vixt VOOM re-fillable pod Teardown
Duration: 45 minutes
Steps: 8 Steps
When the re-fillable pods starts to near end of life they mainly are just clogged in the coil core, this teardown will expose the coil to help the reader clean it and to prolong the life of their pods.
Step 1


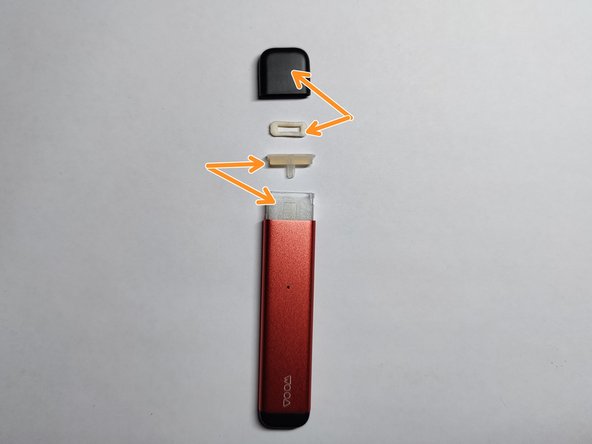
Inside the cap, there’s a little filter/padding up top. It’s super delicate once the pod has been used, so be careful—if you try to take it out, it might just fall apart on you!
– Pop off the cap. A little twist and pull should do the trick!
Step 2


Heads up! When it releases, the bottom part might just take off on its own. Stay sharp!
– Gently pry the four tabs on the back of the pod – it’s time to set it free
– As one corner starts to lift, move on to the next – you’re making great progress
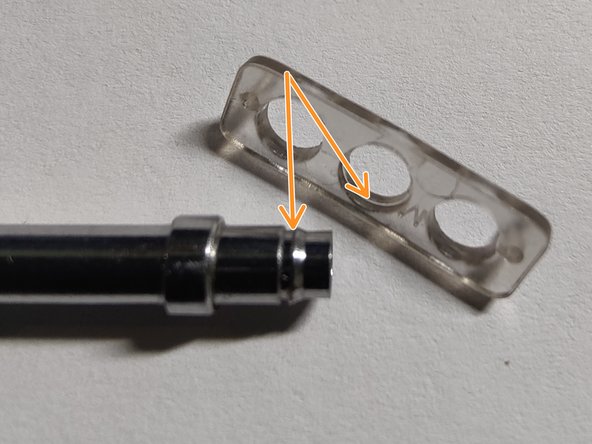
Step 3


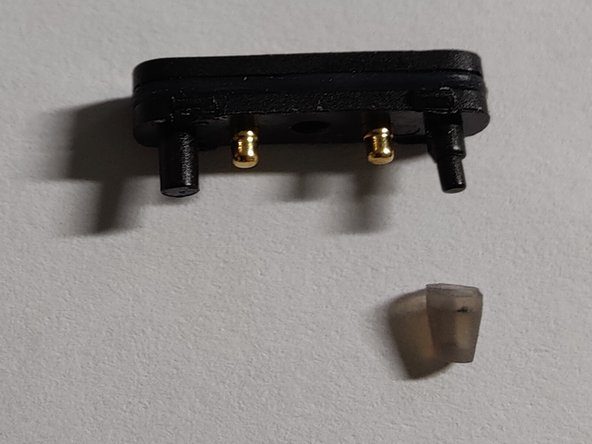
– Check out the thru-hole on the side of the tank—it’s plugged up with one of the bottom plate’s legs and a snug little rubber cone.
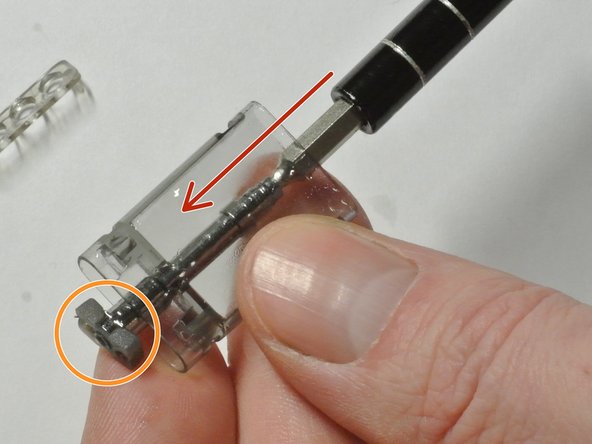
Step 4
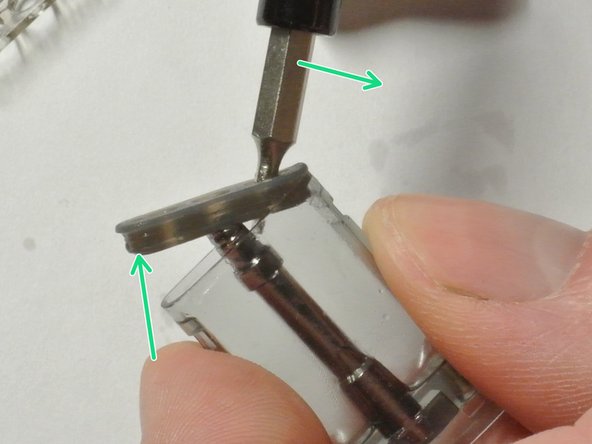
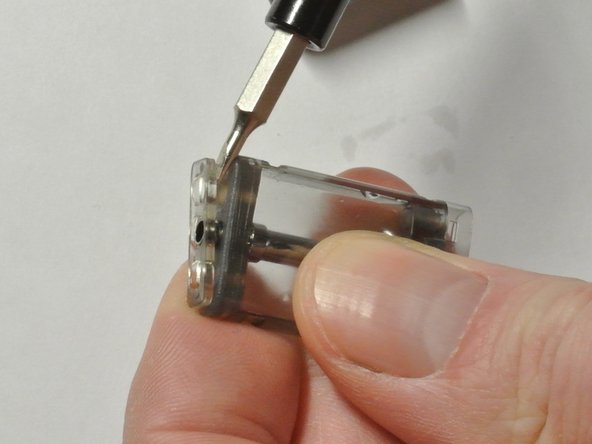

– Gently work your way between the clear plastic and the silicone or rubber with a flathead screwdriver, prying upward. The clip in the middle should come loose easily—no need to force it. Think of it as a gentle nudge rather than a tug-of-war.
– Next, slide the flathead into one of the rubber’s holes and carefully bend it away from the pod. The rubber seal should pop off smoothly, with no resistance. Just a gentle leverage and it’ll come free without a fuss.
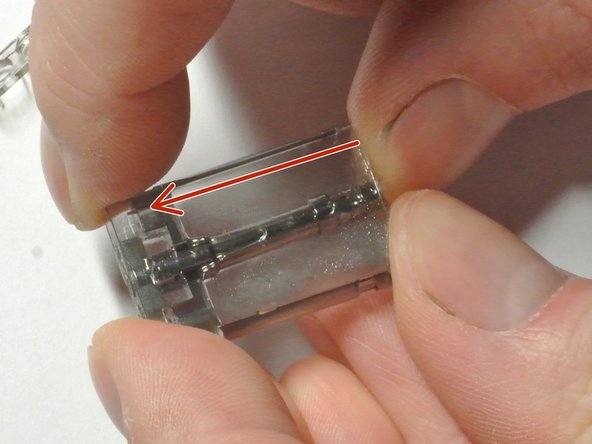
Step 5

– The clear plastic piece snaps right over the stem—other parts are out of the way here so you can see what’s happening.
Step 6

Hey there! Just a friendly reminder: avoid tugging on that rubber piece sticking out from the bottom (the orange one). It’s got some delicate hairline wires connecting it to the coil, and we definitely don’t want to mess those up.
– Gently press down on the stem from the top of the pod to the bottom. Once it pops free, grab something to help nudge the stem a bit more from the top. You’ve got this!
Step 7
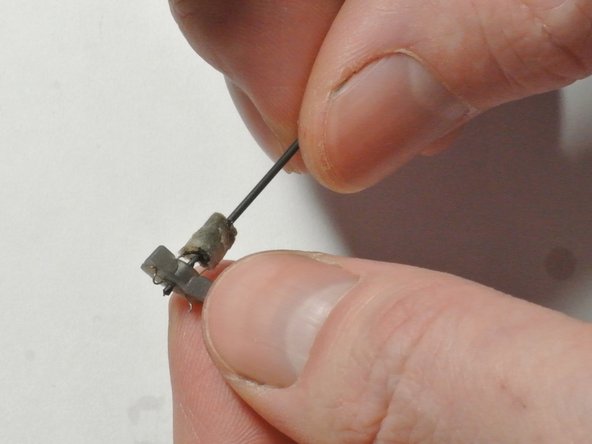

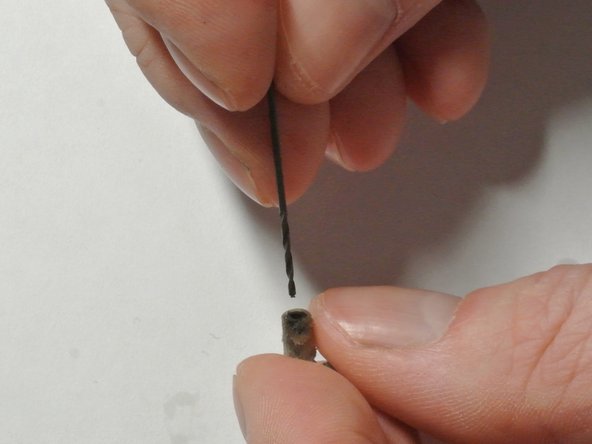
Handle delicate parts with care—these are the sensitive bits! Take your time and stay cautious to keep everything in tip-top shape.
– Grab a small, sturdy tool like the back of a drillbit (around 1-2mm diameter) and gently coax the coil out from the top of the stem.
– Carefully scrape around the edge of the stem to push the coil upward, making your way to the top edge. Avoid pressing directly in the center to prevent damaging the coil.
– Use a 1mm drillbit to carefully clear out any blockage in the center bore of the coil—patience and a gentle touch are key here.
Step 8

– Check out the parts we’ve uncovered here!
Success!