Xbox 360 HDD Replacement Guide: DIY Step-by-Step
Duration: 45 minutes
Steps: 7 Steps
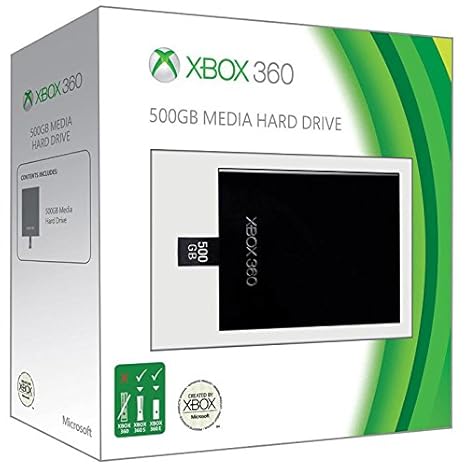
Get ready to breathe new life into your console with a simple storage upgrade. Keep in mind that modifying your Xbox in this way may go against the Xbox Live terms of service, and could potentially result in your ban from Xbox Live. In this step-by-step guide, we’ll walk you through the process of replacing the hard drive in the 360’s HDD enclosure. Microsoft may make it tough to upgrade, but we’ve got you covered. We’ll show you how to take the drive apart and swap it out with a shiny new Western Digital HDD – specifically, one from the WD Scorpio Series BEVS/BEAS, WD Scorpio Blue Series BEVS/BEVT, WD Scorpio Black Series BEKT/BJKT, or WD VelociRaptor Series. We found a great option, the Scorpio Black 250GB drive, which spins at 7200RPM with 16MB cache and 3.0Gb/s, all for around $65. It’s a great bang for your buck, and about half what you’d pay from Microsoft for the same 250GB drive. If you need help along the way, don’t worry – you can always schedule a repair.
Step 1


Got some Torx bits or drivers lying around? Give them a whirl! They’ll make your life a whole lot easier than those flatheads.
– Here it is—the standard 20GB HDD for the Xbox 360! Pretty neat, right?
– Check out the proprietary adapter! Inside, it’s just a standard 2.5″ SATA drive, nothing too fancy.
– I snapped these pics while putting everything back together, so the Microsoft warranty sticker might look a tad off.
– Oh, and you might see the screw in the bottom left is a bit loose. That’s because I was swapping out the previous screw when my bit decided to call it quits. I was using a 1/16″ flathead bit (don’t have a T6 Torx) and maybe got a little too enthusiastic with the torque and, well, it snapped! I did find another 1/16″ bit to finish the job, but I didn’t manage to get a photo of that.
Step 2

Peel off that Microsoft warranty sticker like a boss! A little tip: I used my trusty fingernail. Just keep in mind that doing this will cancel the warranty on the drive if it’s still in effect. No pressure, though!
– Removing the drive won’t affect your console’s warranty – they’re separate, so you’re good to go!
– Now, let’s get started by removing the four T6 Torx screws.
Step 3


Whoa, easy there, tiger! Don’t let it fly away when you’re separating things. Once the top is off, that latch mechanism is just hanging out, hoping you won’t lose its spring. No worries if it does come out, though – popping it back in is a piece of cake. Just keep track of that spring!
– Holding the drive with the top facing up, carefully lift the top half away from the bottom half. As you do this, the back will swing up – don’t worry, it’s still connected by two handy plastic clips.
– To release these clips, try rotating the top enclosure about 30º, then gently but firmly lift it up. If you need a little extra help, you can always schedule a repair
Step 4

– Let’s kick things off by unscrewing those four T10 Torx screws! They’re just hanging out, waiting for you to give them a little twist.
– Now, slide that cover towards the back of the enclosure and gently lift it off. Just a heads up, there’s a tiny dab of lock-tite on each screw, so they might be a bit sticky!
Step 5


– Now that we’ve got everything opened up, take a look at the internals – it’s pretty cool to see how it all fits together!
– The four screws that held the cover in place also kept the drive secure, so just disconnect the SATA connector and the drive is almost ready to come out.
Step 6

– To remove the drive, gently bend the plastic part of the bottom enclosure downwards. Be careful not to bend it too much, but don’t worry, a little flexibility won’t hurt anything. If you’re feeling stuck, remember that you’re making progress and it’s all part of the repair process!
Step 7


– To wrap up your device repair, grab that shiny new hard drive and retrace your steps in reverse – you got this!
– If you need help or have questions, you can always schedule a repair with Salvation Repair.
– You’re all done! Take a moment to admire your handiwork.
Success!