Xbox 360 Power Supply Teardown
Duration: 45 minutes
Steps: 13 Steps
Before diving into any power supply work, make sure it’s unplugged! Trust us, it’s a must. And don’t forget to discharge those hefty capacitors—it’s super important! They pack quite a punch and we want you to stay safe and sound!
Got a couple of these power supplies sitting around, and I figured, why not take a peek and see how tricky the teardown is? This 175w PSU is easy to spot by the label and plug. Honestly, taking it apart was way simpler than I thought – no glue, no hidden screws, just straightforward. As always, make sure it’s unplugged before you do anything. And don’t forget, discharging those big capacitors is a must before diving in. It packs a punch strong enough to give you a nasty shock, so be cautious!
Step 1


– Take a peek at this handy image that showcases the various plugs for different power supplies!
– We’re diving into the teardown of Model # HP-AW175EF3. It takes an input of 100V-127V, and outputs 12V at 14.2A, plus 5V at 1A. Pretty neat, huh?
– Time to get those rubber feet off the bottom of the PSU! Just give them a gentle push with a small screwdriver or something similar. You’ve got this!
Step 2


– Once you take off those rubber feet, you’ll spot a little plastic cap underneath.
– Grab a small screwdriver or something similar.
– Then, just pop it out with a flick!
Step 3


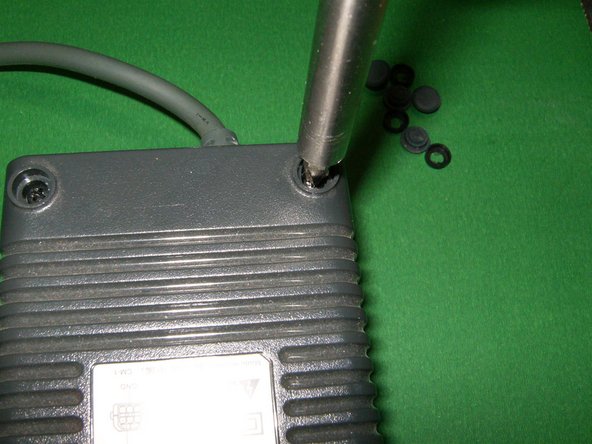
– Once the rubber feet and the plastic cap are out of the way, you’ll spot those Phillips screws staring right back at you.
– Go ahead and unscrew all four of them.
– Each Phillips screw is 3/4 inch long. Here’s a look at the feet, caps, and screws you just removed—nice work!
Step 4
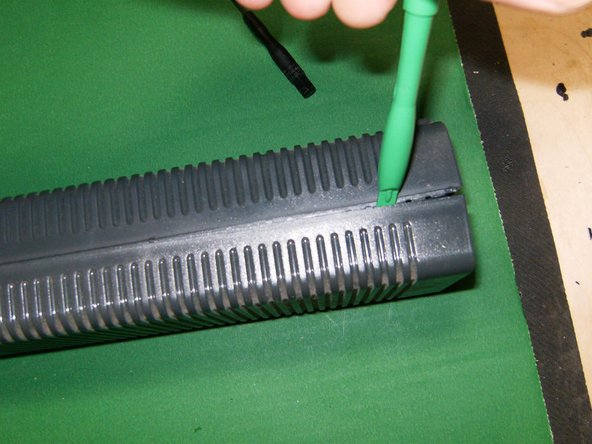

– Grab a plastic opening tool or something similar, and gently work it into the seam between the top and bottom halves of the PSU.
– Glide that tool along the edge to pop the tabs loose and let those two halves part ways.
– Flip to the other side and repeat—almost there!
Step 5


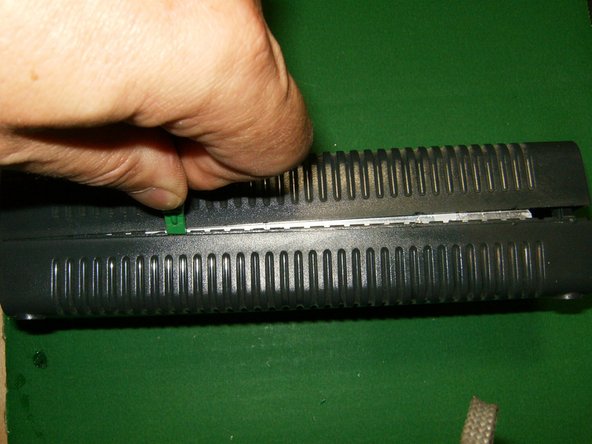
Don’t go ahead and fully detach the two pieces just yet! There’s a fan wire hanging on that still needs to be unplugged first. Take it easy and make sure everything’s disconnected properly!
– Once the snaps have been released with your opening tool, gently start to separate the two parts. Begin by angling them apart, then slowly pull them straight apart. No glue or extra materials are keeping the PSU together—just a little patience and a steady hand!
Step 6


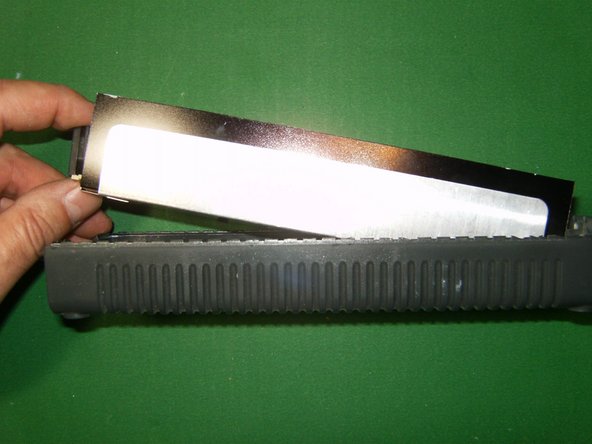
– Take a look at these two parts now apart, and hey, the fan wire is right there for you to see!
– Time to take off the connector by
– Now that the fan is out of the way, both pieces can be easily separated.
– gently pulling the tab away from the connector and then lifting it upwards.
– First thing’s first, check out that generous amount of thermal paste! It’s slathered across every heatsink and large capacitor like it’s got a job to do.
Step 7


On this board, you’ll spot a PDIP IC, which happens to be a Power Integrations TNY276P AC-DC converter. Pretty neat, right?
– Here’s the circuit board still nestled in the bottom case. No screws or clips holding it down—just gently lift it out of the case. Once free, the circuit board and case are separated and ready for the next step.
Step 8
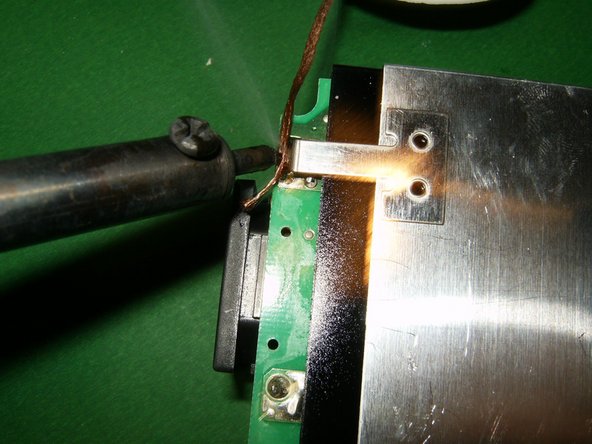


– First things first, there’s a hefty EMI metal shield that’s been soldered to the PCB, and it’s time to free it!
– Grab your trusty soldering iron, some flux, and a desoldering wick—these are your new best friends. Carefully work on the left and right solder connections to get that shield off.
Step 9


– Let’s kick things off by removing the shield!
– Here’s a peek at the PSU circuit board all bare and ready for action.
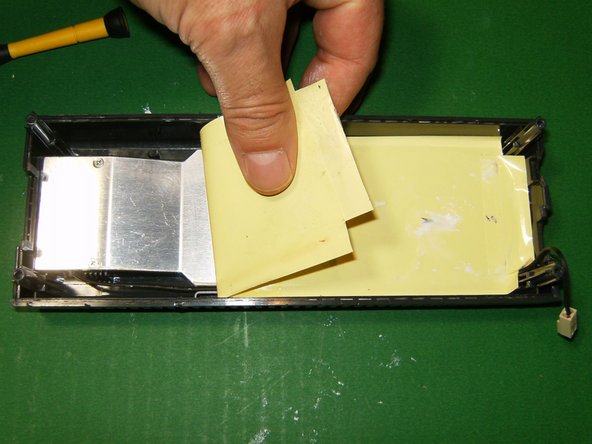
– Now, take a look inside the top part of the case. You’ll spot a plastic tape (could be Kapton, but who’s counting?) that needs to be peeled away. Just give it a gentle tug, and voilà, it comes right off!
Step 10
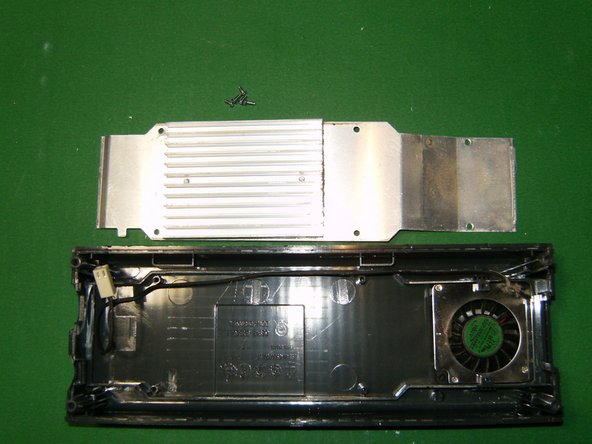

– Here’s why there’s so much thermal paste earlier—it’s because the top ends of the heatsinks and the capacitors all touch this larger heatsink. The plastic sheet you removed earlier acts as an electrical insulator, keeping things safe. To continue, gently remove the heatsink from the case—remember, the six screws holding it in are all the same length—and note that underneath, you’ll find the fan. Unscrew the six Phillips screws to detach it. If you need a hand during this process, you can always schedule a repair.
Step 11


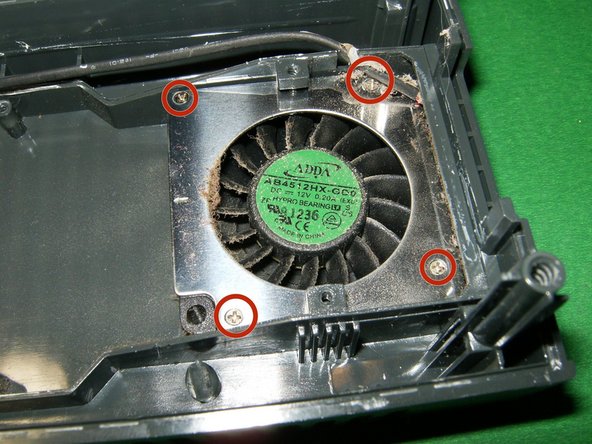
– First off, let’s get those four tiny Philips screws out of the way. They’re about 1/4 inch long and look just like their siblings, so no worries there!
– Now, give the metal top a gentle pull to set it free.
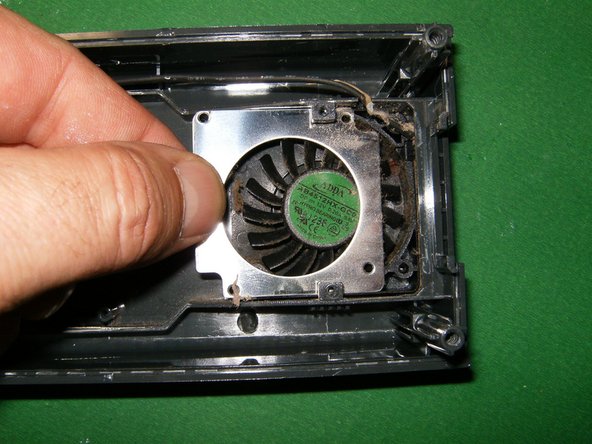
– Next, it’s time to remove the fan. You might notice some dust bunnies and debris hanging out in there from all your device’s hard work.
Step 12


Disassembly went smoothly—quick and straightforward. Fun fact: some PSUs hide a T10 security screw, so keep an eye out. The next couple of images show a 150W PSU. Make sure you’ve got the right tools on hand before diving in. If you need help, you can always schedule a repair.
– Here’s a look at the top of the PSU with the heatsink and fan out of the way.
Step 13

– If your PSU isn’t working quite right, it’s time to take a look at a few key parts. First, check the fuse—it’s a quick fix if that’s the culprit. Then, don’t forget about the thermistor, as it can sometimes be the sneaky problem maker. Both are essential in getting your device back up and running smoothly.
Success!