Xbox Intec 7.2 Screen Replacement Guide
Duration: 45 minutes
Steps: 9 Steps
Let’s take apart this Intec 7.2″ Color Game Screen attachment! We’ll be using some of the same tricks as the Intec 5.4″ Color Game Screen attachment, but we’ll keep you posted on any differences as we go. Ready to get this party started?
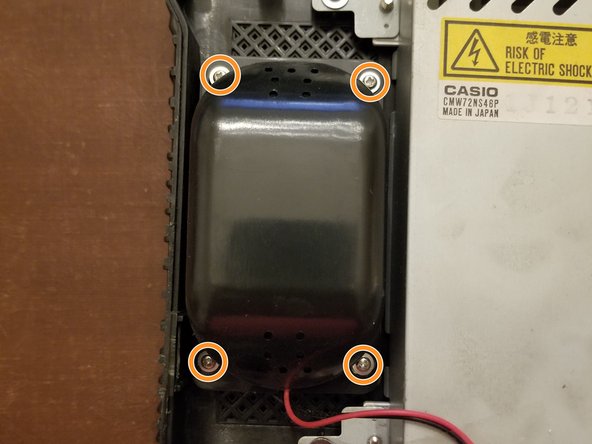
Step 1


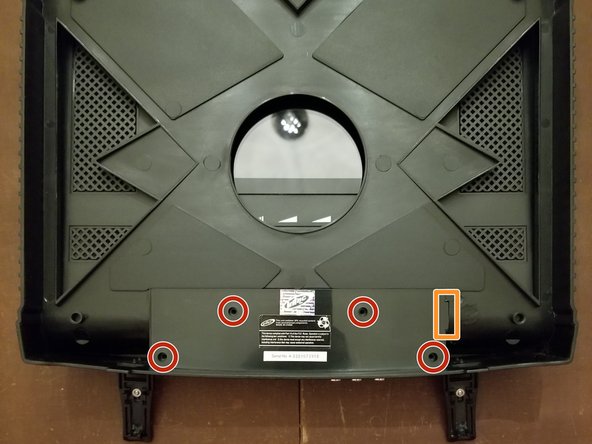
Alright, let’s get this party started! The top shell is held down by 4 screws and 6 little tabs. You’ve got this!
– Time to get a little sneaky! Start by popping off those 2 rubber pads to reveal the cleverly hidden screws beneath. Once you’ve unleashed those, go ahead and take out those 4 #1 screws. You’re doing great!
Step 2


Get ready, because this step is going to take a little while! Grab a snack, stay chill, and take your time.
When you pop those tabs off, you’ll hear a satisfying little ‘pop’ sound. It’s like a victory cheer for your device!
– Use a spudger to unclip the 6 retaining tabs – you got this!
– Let’s go ahead and remove the top housing next.
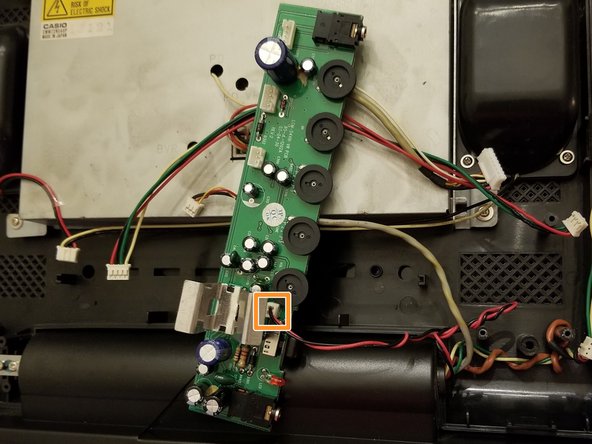
Step 3
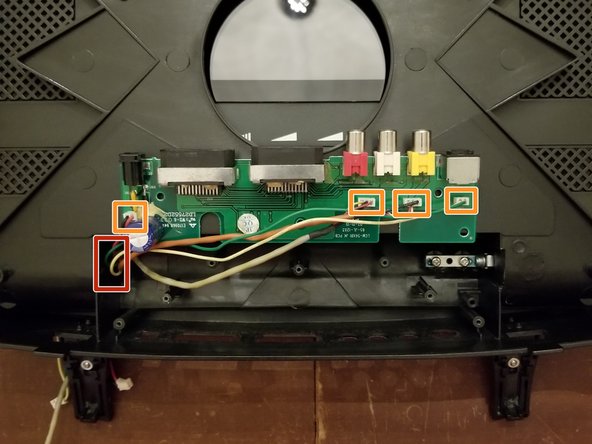
– First up, let’s tackle those 2 #1 screws and give them the ol’ twist and shout. They’re ready to come out!
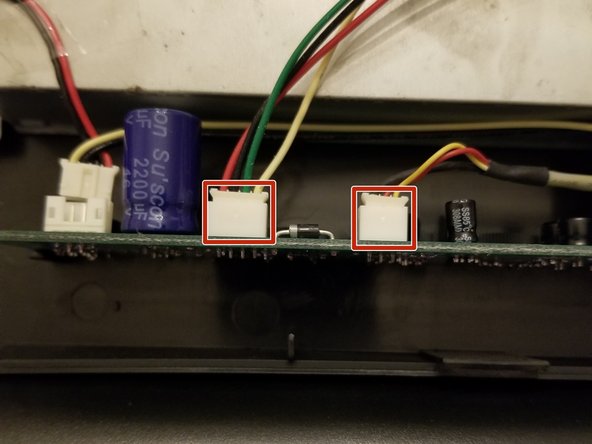
– Now, gently disconnect those 4 wire harnesses. Treat them like delicate little noodles as you unhook them!
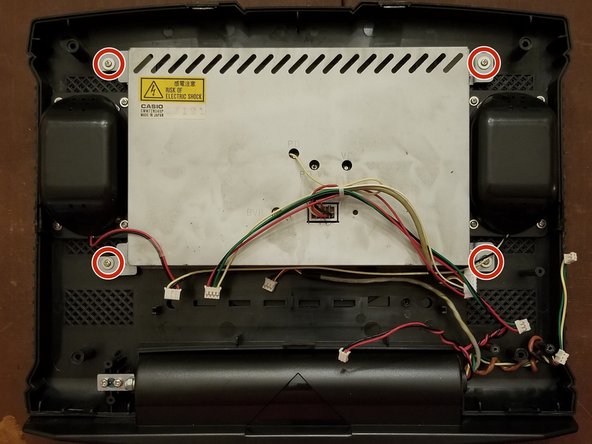
Step 4
No need to stress about removing the speakers from the housing—just leave them be unless you’ve got a specific reason to take them out.
– Time to get started! Disconnect that speaker header
– If you’re planning to remove the speakers, now’s the time to disconnect the header – otherwise, we’ll take care of it in the next step
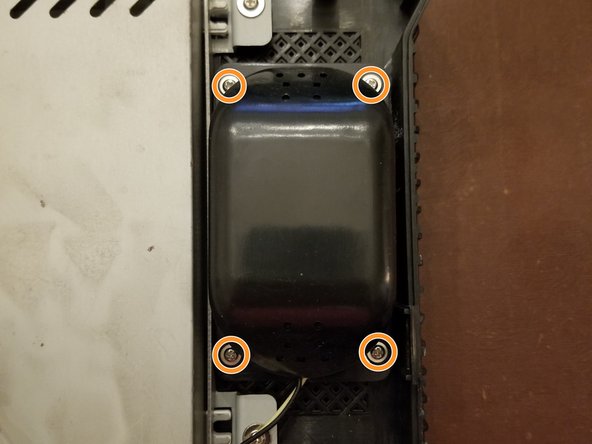
– Now, let’s get our screw game on – remove those 8 #1 screws
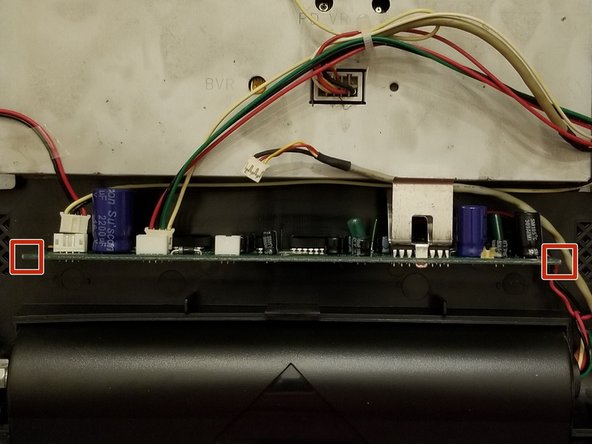
Step 5
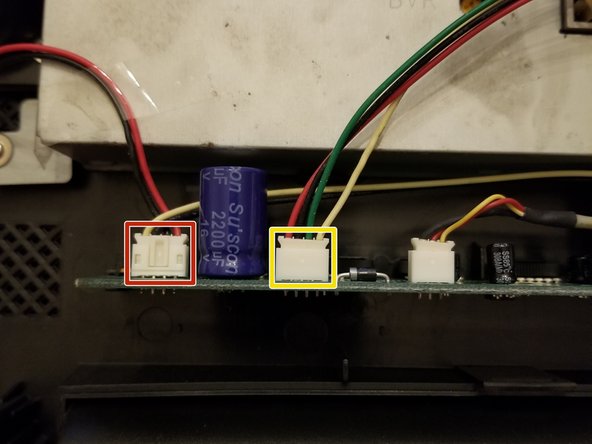
– Let’s get those headers disconnected, two down, one to go!
– Now, gently lift those wires over the retaining posts. It’s like a little dance, and we’re all about making this repair a party!
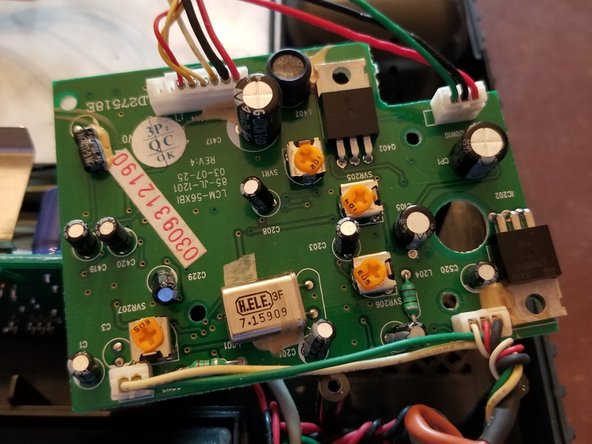
Step 6
Don’t try to completely remove the board from the unit just yet, let’s take it one step at a time
– Gently grasp the sides of the board and lift it upwards with care.
– Unplug the last header to complete the disconnection.
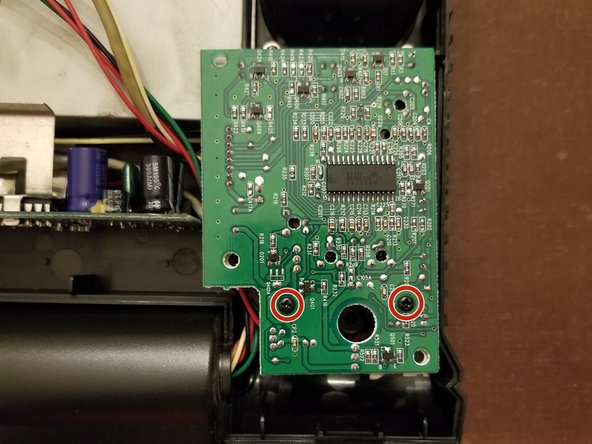
Step 8
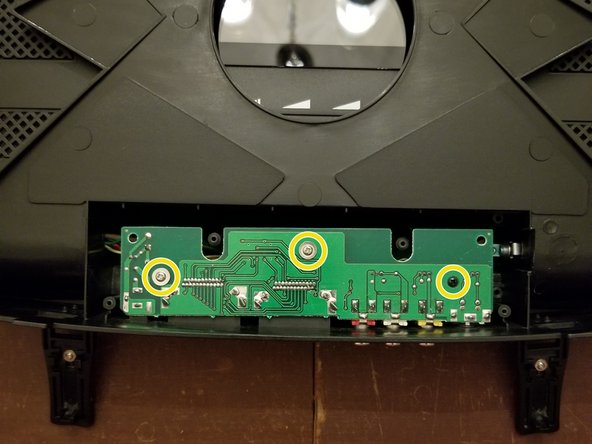
Don’t try to completely remove the board from the unit just yet, let’s take it one step at a time
– First, carefully remove the 4 #1 screws to get started
– Next, gently lift up on the tab to release it
– Now, take out the 3 #1 screws to move forward
– Finally, grab the edges and lift the board up with confidence
Step 9
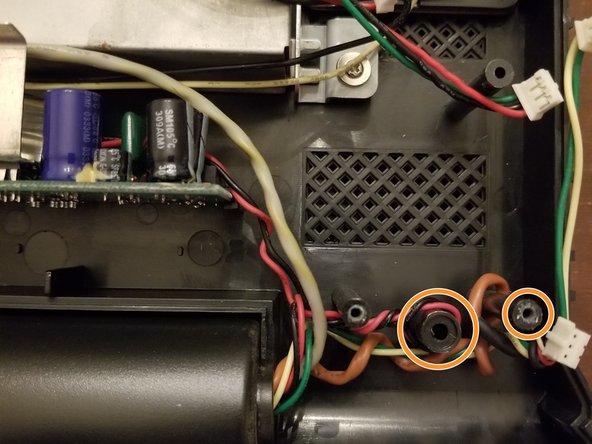
If you’re diving into the deep end and need to completely take out this board, make sure to guide those wires all the way through the hinge. You’ve got this!
– Now that you’re a pro at this, it’s time to bring your device back together! Just retrace your steps in reverse and you’ll be good to go.
– Oops, if this guide didn’t work out for you, it’s totally okay to hit cancel. No stress!
–
Success!