Xbox One Elite Repair: DIY Controller Teardown Guide (Model 1698)
Duration: 45 minutes
Steps: 9 Steps
Get ready to breathe new life into your Xbox series 1 Elite controller. This step-by-step guide is perfect for hobbyists who love tinkering with electronics. We’ll walk you through the process of tearing down and cleaning your controller, and the colored bullet points in each step match up with the corresponding colored circles in our visuals. If you’re feeling stuck or need a little extra help, don’t worry – you can always schedule a repair with the experts at Salvation Repair.
Step 1


Let’s be safe! This is to make sure we don’t get any zaps while we’re taking things apart, because that’s no fun for anyone.
– Give that battery a proper send-off by holding down the home button for a few seconds after you remove it. Let’s get rid of any lingering energy!
– Taking out the thumbsticks and D-pad makes the rest of the teardown a breeze. You’re on a roll!
Step 2


This part’s held on with some super sticky tape and snaps. It’s a bit of a wrestling match to get it off, so be careful not to break those plastic snaps on the grips. Take it slow and steady, champ!
Feel free to give those rear grips a quick clean now, or you can always do it after we’re done taking everything apart!
– Grab a soft pry tool and kick things off at the top near the triggers. Gently work your way down, prying and loosening up those grips until they finally make their grand exit. You’ve got this!
Step 3


To keep that sticker looking smooth, gently pry up a corner with your tool until you can grab it with your fingers. Once you’ve got a hold of it, carefully work your way across the top and peel it downwards—like a banana—until the screw comes out to say hello!
Take your time, and you’ll see that the sticker will remain in great shape! When you’re putting everything back together, just slide your finger from the bottom of the sticker still attached to the rear housing and move it upwards. Easy peasy!
– Time to tackle those pesky T8 screws hidden under the rear grips! Let’s get them out of there.
– Now, don’t forget the T8 screw that’s playing hide and seek behind the sticker in the battery compartment. It’s your turn to find it!
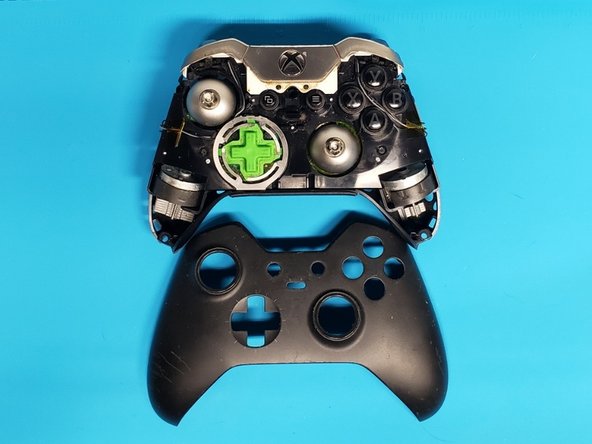
– Give the edges of the front housing shell a little wiggle and coax it free. With a gentle touch, it should pop right off!
Step 4


– Let’s get started by removing the joysticks and selector switch. This is a great opportunity to get familiar with the inner workings of your device.
Step 5


– Time to get that audio input jack out. Gently pry the rear housing shell around the jack, and at the same time, carefully pull up on the midframe. This should help you remove it with ease.
Step 6
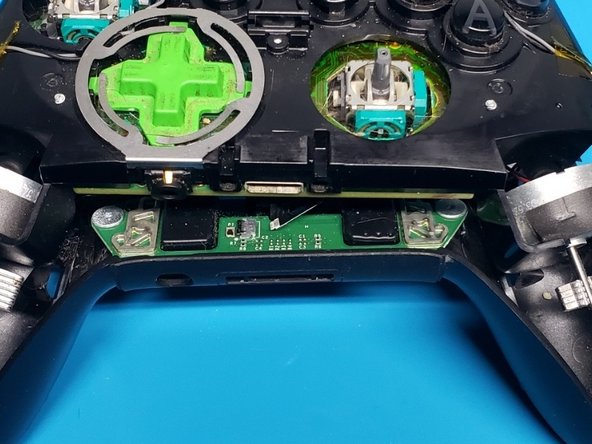

– Gently wiggle and ease the ribbon out from the connector. Just take it slow and steady—you’re doing great!
Step 7


Before you go full steam ahead and remove that retaining ring, just double-check that the top is free and clear. We want to keep everything nice and tidy—no warps or bends, please!
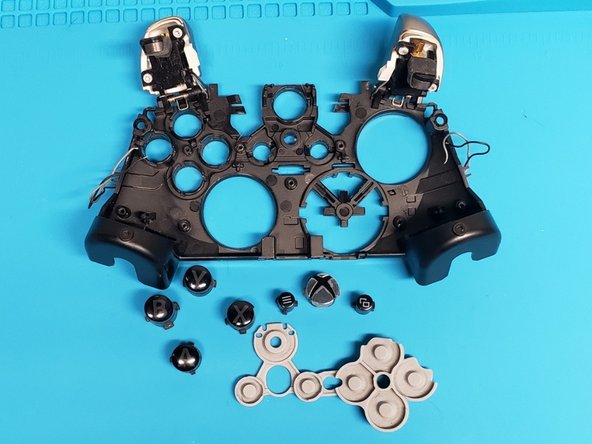
– Start by popping off the retaining ring and the D-pad. Easy does it!
– Next up, let’s tackle those bumpers! Just push down on the ends and gently pull them outward to unclip. Once that’s done, give them a little wiggle while pressing the home button— they’ll be out in no time.
– The retaining ring is snug, but no worries! Just give it a gentle tug back and lift up to set it free.
Step 8

Before you start resoldering, take a quick snapshot of the wire orientation so you can easily keep track of which wires are positive and negative. This will save you some hassle later on!
– First, let’s gently desolder both sets of those rumble motor wires and trigger wires from the back of the daughter board. Take your time, you got this!
– Next up, grab your trusty T6 screwdriver and remove those two screws from the back of the daughterboard. Easy peasy!
– Now, it’s time to carefully work that pry tool around the daughterboard. Slide it gently between the midframe while giving it a light tug until it pops off. You’re doing great!
– Finally, set the audio input jack aside. You’re one step closer to getting your device back in action!
Step 9


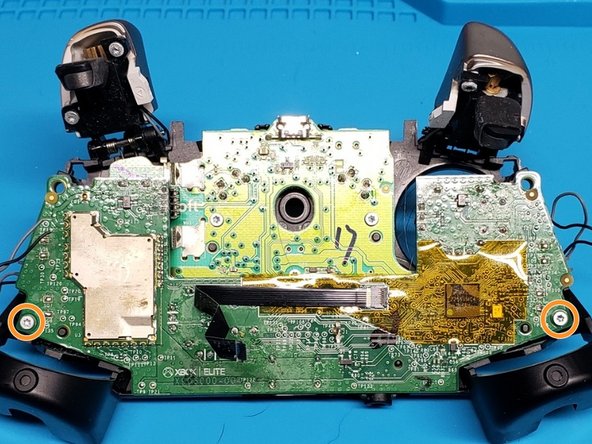
– Start by loosening up those 6 T6 screws on the main board – you’ve got this!
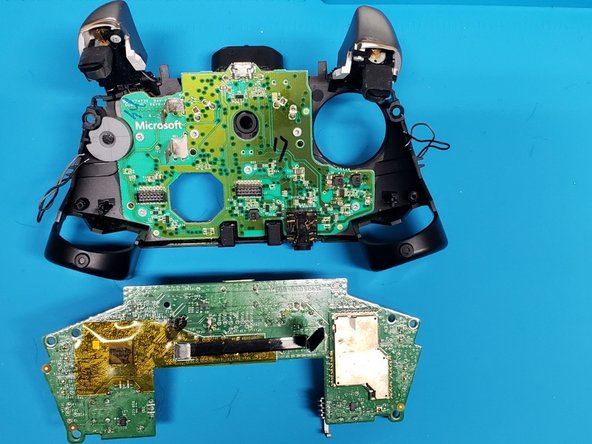
– After the screws are out, gently pull the board straight out and give it a cozy spot on the side.
– Next, it’s time to peel away that grey rubber button backing, then carefully pop those buttons out and set them aside.
Success!


