Xbox One Heat Sink Replacement Guide
Duration: 45 minutes
Steps: 21 Steps
Make sure you have some fresh thermal paste ready to go before you put everything back together!
Ready to give your Xbox One a little TLC? This guide will walk you through the process of swapping out the heat sink and fan. These little heroes keep your Xbox’s processor cool and collected. Without them, your gaming buddy might just throw a tantrum! Remember, you’ll need to detach the heat sink and fan from the motherboard, and every time you do, it’s a good idea to refresh that thermal paste between them. So, make sure you’ve got some handy before you put everything back together. If you need help, you can always schedule a repair.
Step 1


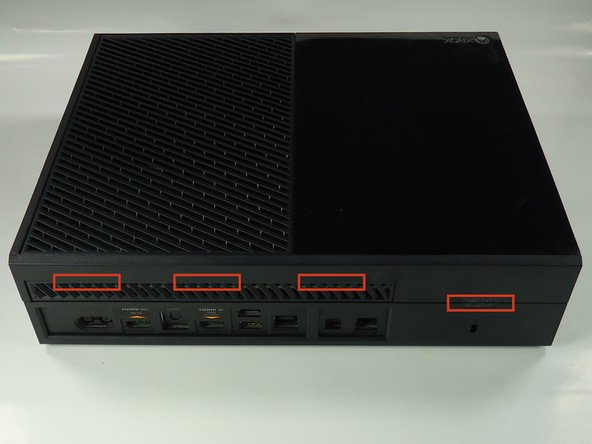
Begin at the back edge and gradually make your way toward the front of the console.
– Using a plastic opening tool, gently work your way around the side vent of the console to pop it off. You’re doing great!
Step 2


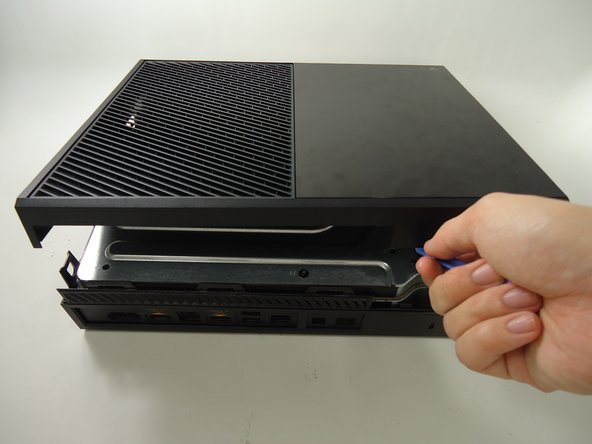
– Gently slide that sleek black tab tucked behind the shiny silver button towards the back of the console and set it aside like a pro.
Step 3

Flip your Xbox over and peel off the warranty sticker from the back. Keep in mind, removing this sticker and opening up your Xbox will void the warranty with Microsoft. So, if you’re okay with that, proceed with caution!
This step might take a bit longer than the rest, so keep at it with that trusty plastic opening tool! Once you pop one clip, slide something underneath to keep it from snapping back. You’ve got this!
– Time to get this repair started! Use a plastic opening tool to carefully pry the top of the case away from the bottom. Gently rock the tool back and forth in an up and out motion to release the clips. Don’t worry, it’s easier than it sounds – just take your time and work your way around the back and sides, where you’ll find multiple clips waiting to be set free. If you need help, you can always schedule a repair
Step 4

– Gently lift the top of the case, but don’t forget there’s a wire linking the front panel to the motherboard. Be careful, we don’t want to snap that by accident!
– Grab a spudger and carefully detach the ribbon wire from the front panel.
– With the top case now free, set it aside, you’ve made great progress!
Tools Used

Step 5
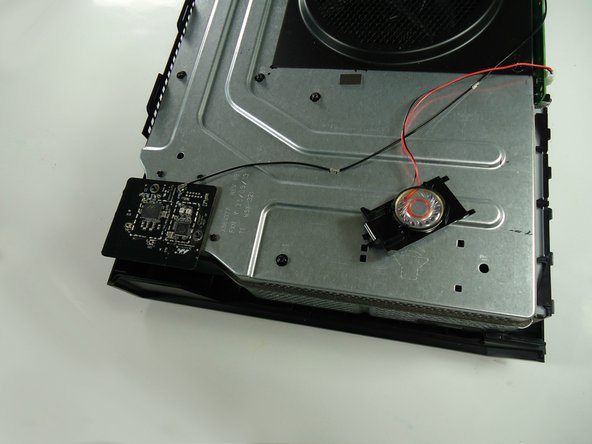

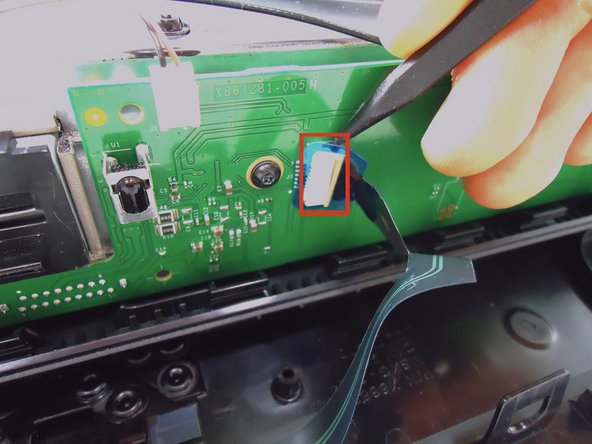
– Pop out the speaker by pinching the tab on the black plastic mount and lifting it up.
– Gently unplug the connector from the green front panel board.
– The speaker is free, set it aside.

Step 7

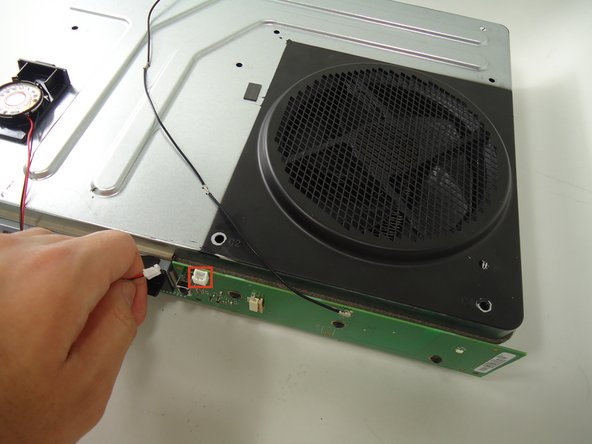
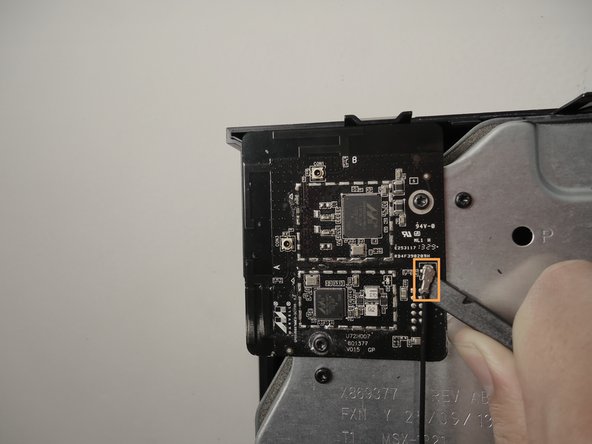
– Grab your trusty spudger and, with a move just like the last step, gently pop that antenna connector off the green board on the front. Nice and easy!
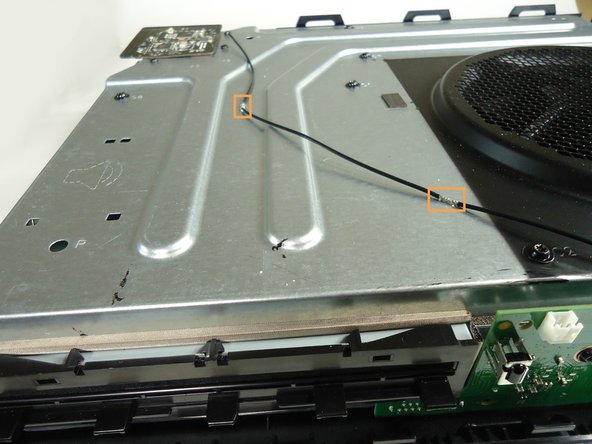
– Next up, carefully unclip the antenna wire from the chassis. Just a gentle tug to free it from those clips, and voila, the wire is released!
Tools Used
Step 8

– Gently lift the Wi-Fi board straight up to set it free from the chassis. And just like that, the Wi-Fi board is all yours!
Step 9

– Unscrew the eight 64.0 mm T-9 screws, labeled C1 through C8, that are holding the top of the chassis to the motherboard. Once they’re out, you’ll be one step closer to getting the job done!
Step 10


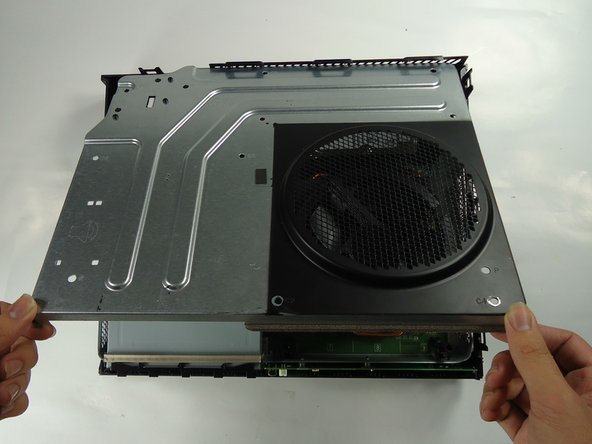
– Gently lift the top of the chassis, making sure to keep that delicate wire connecting it to the motherboard safe and sound.
– Carefully unplug the connector marked 3 on the motherboard by giving it a gentle tug upwards.
– With the chassis top now free, place it aside and take a moment to admire your handiwork!
Step 11
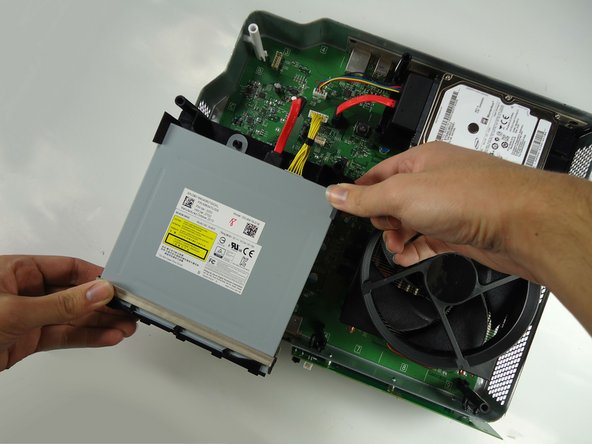

– Gently lift the bottom half of the chassis (motherboard and all) from the bottom part of the black case.
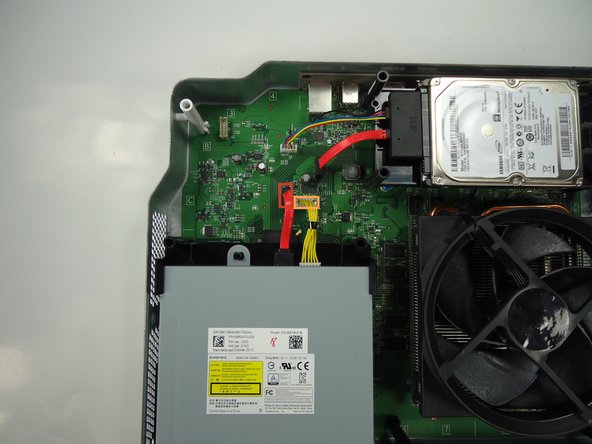
– Unplug the red wire connecting the optical drive to the motherboard from its connector on the motherboard. You got this!
– Unplug the yellow wire connecting the optical drive to the motherboard from its connector on the motherboard. Nice work!
– The optical drive is now free, lift it from the chassis and set it aside. Well done!
Step 12

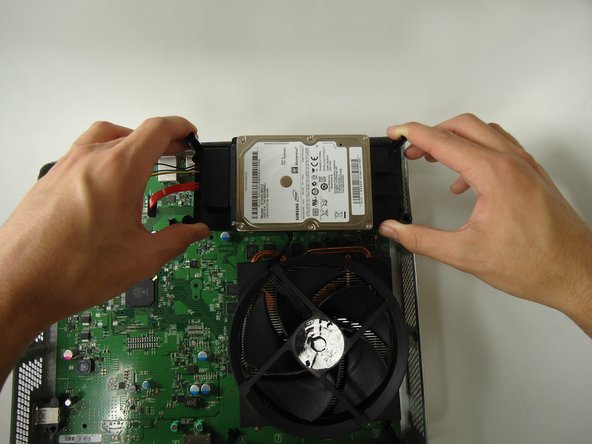
– Pop off the red wire connecting the hard drive to the motherboard from its connector on the motherboard.
– Unplug the colorful wire connecting the hard drive to the motherboard from its connector on the motherboard.
– Lift the hard drive out of the chassis and set it aside. You’re free!
Step 13

– Flip that chassis over so it’s lounging upside down.
– Unscrew the four black 9.5mm T-9 screws marked A1, A2, A3, and A4—it’s like unlocking a little treasure chest!
– Now tackle the four grey 11.0mm T-9 screws labeled B1, B2, B3, and B4—pop them out one by one with care.
Step 14

– Start by removing the three 9.5mm T-9 screws that are securing the front board to the metal chassis. You’ll need a T-9 screwdriver for this job!
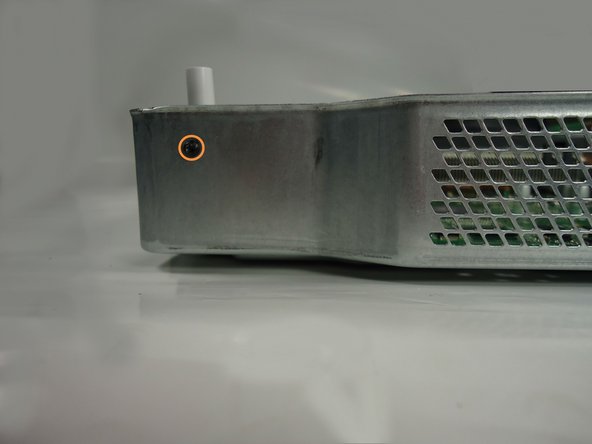
– Next, take out the single 8.2mm T-9 screw that’s holding the white standoff to the metal chassis. A quick twist, and you’re all set.
Step 15


– Give those two black standoffs a little squeeze to release the clips holding them to the metal chassis, then lift them up like a pro.
– Next up, say goodbye to the white standoff and remove it with ease.
– Now, unplug the front panel board from the chassis. It’s free now, so go ahead and set it aside for a moment.
Step 16

– Gently unplug the fan cable from the motherboard by lifting it up with a little care. It’s like a handshake—smooth and easy.
Step 17

– Gently flip the chassis back over. Grab hold of the motherboard or fan and lift the whole assembly out, keeping the fan and heat sink together. Now, set the bottom of the chassis aside and get ready for the next step!
Step 18

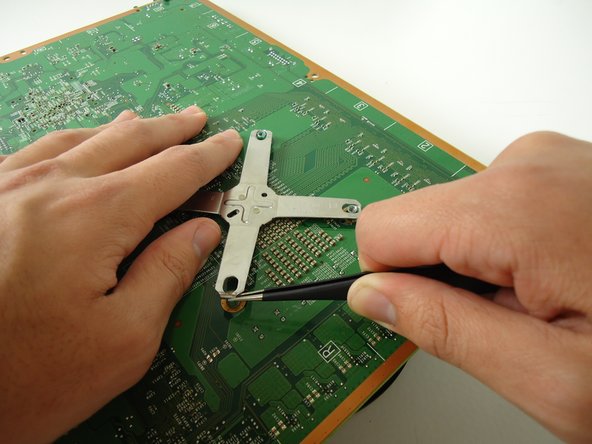
The X-shaped spring might be a bit stubborn and need some oomph to pop loose. Take your time and feel around—some arms might cooperate more than others.
– Gently flip the motherboard and fan so the fan is facing down.
– Use tweezers or a small flathead screwdriver to carefully lift the edge of the X-shaped spring and release it.
– Remove the spring from the pegs and set it aside.
Step 19

– Gently lift the motherboard off the fan and heat sink, and place it safely to the side.
– Wipe off the old white heat paste and swap it out for fresh paste—check out this guide to nail it.
– When putting the heat sink and fan back, make sure they sit snugly flush with the right side of the motherboard. Keep it cool and aligned!


Success!


