Xbox One Kinect Repair Guide
Duration: 45 minutes
Steps: 11 Steps
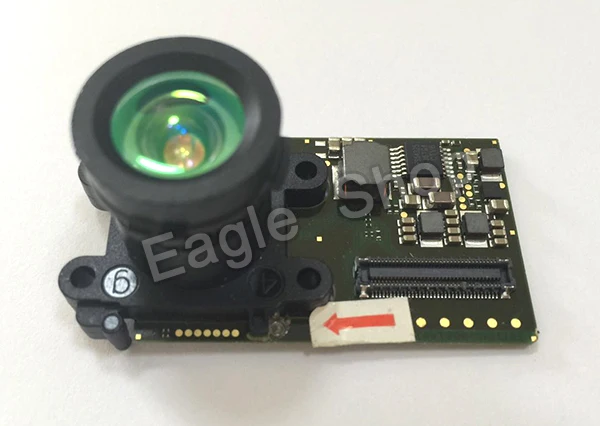
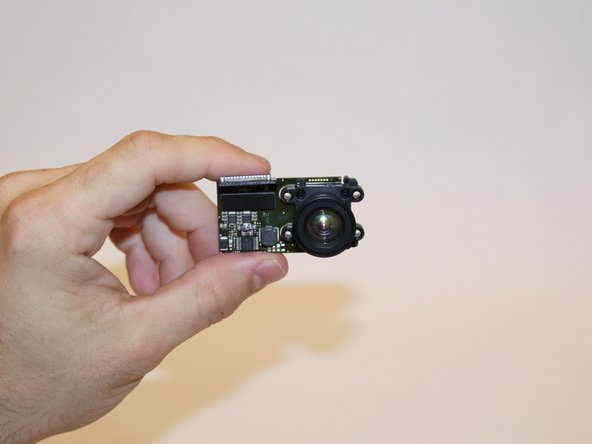
Get ready to uncover the magic behind your device’s infrared camera! It captures IR signals sent out by the blasters, allowing the Kinect to calculate the distance to objects nearby. You’ll find the IR camera snugly mounted on the heat sink inside your device.
Step 1

– Let’s kick things off by peeling off that sticker on the bottom of your device. It’s like unwrapping a present!
– Next up, grab your trusty T10 screwdriver and remove those four 3.1×23.5 mm screws hiding beneath the sticker. They’re just waiting to be freed!
– While you’re in the zone, don’t forget to take out the four 3.1×7.5 mm T10 screws lurking under there too. Keep track of their sizes and spots, so you can put everything back just right!
Step 2


– Let’s get started by taking off the back panel. It’s like opening a present, but way cooler!
– Next up, gently remove the black panels flanking the Kinect. Underneath, you’ll find those sneaky 3.1×7.5mm T10 screws waiting for you. Time to unscrew them and keep moving forward!
Step 3


– Get a grip on that outer case – literally! Use your thumbs to press firmly on either side of the stand. This will help disengage the internal assembly, and you’ll be one step closer to fixing your device.
– Now it’s time to lift the internal assembly with your trusty spudger. Remember to be gentle but firm, and you’ll have it out in no time.
– The final step is to remove the assembly from the case. And just like that, you’ll have access to the inner shell, heat sink, microphone, and LED sensor. If you need help, you can always schedule a repair
Tools Used

Step 4

– Time to get those tiny screws out! Carefully remove the eight 2.9×7.6 mm T9 screws holding the back of the internal case in place.
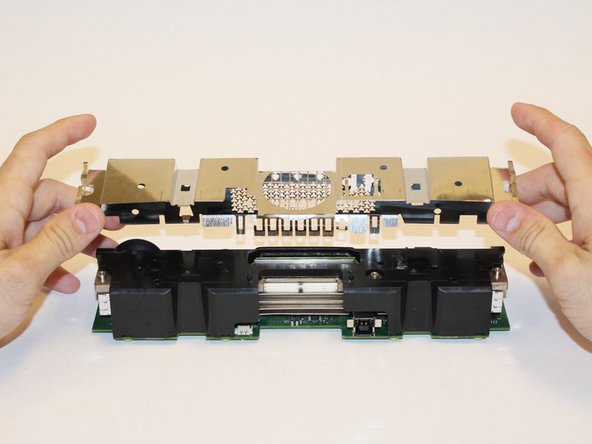
– With the screws removed, gently lift the metal internal case off the plastic shell that houses the heat sink assembly. Take your time, we don’t want any accidental drops!
Step 5


– Let’s break that connection! Gently disconnect the ribbon cable that links the sensor driver board and the motherboard.
– Time to unscrew! Remove the 3.0×7.5 mm T9 screw holding the sensor driver board to the heat sink.
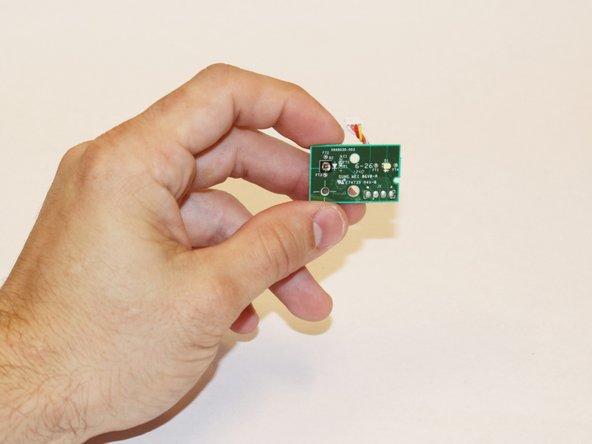
– Almost there! Now, carefully remove the infrared sensor board for the Kinect.
Step 6


– Gently wiggle out the ribbon cable that connects to the microphone using your trusty tweezers.
– Unscrew those four 3.1×7.7 mm T9 screws that are holding the microphone snugly against the heat sink assembly.
– Time to say goodbye to the stand—just remove it!
Step 7
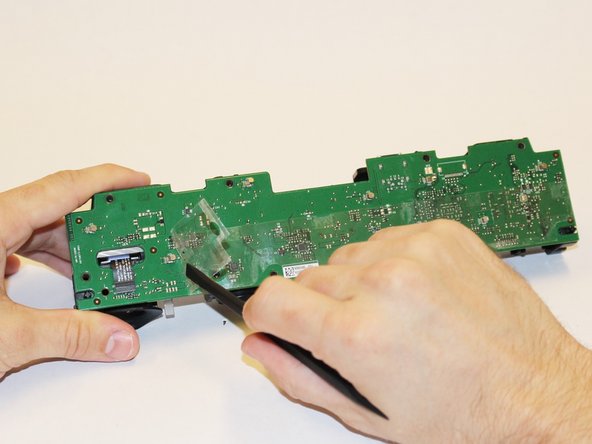
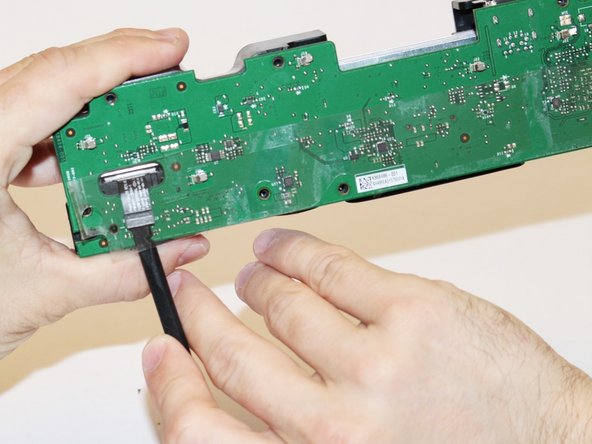

– Let’s start by removing those eight little T9 screws holding the motherboard in place. They’re 3.0×7.6 mm, so you’ll want to use a precision screwdriver.
– Now, gently peel away the plastic film from the motherboard. A spudger is your best friend for this part.
– Time to disconnect the ribbon cable that connects to the color camera. Use your spudger to gently detach it. You’re doing great!
Tools Used
Step 8


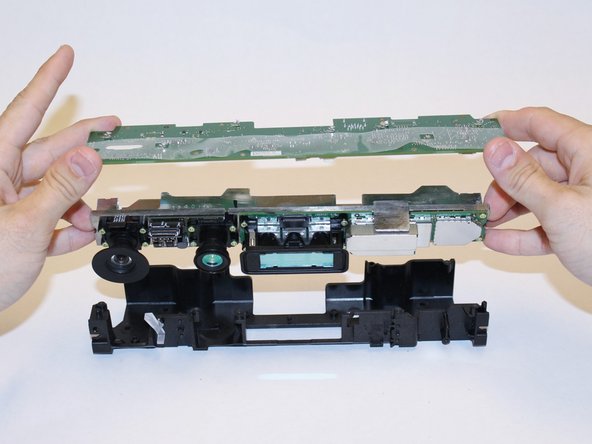
– Time to get up close and personal with the motherboard and heat sink assembly! Carefully lift them out of the plastic shell, and you’ll find that the components attached to the heat sink are now easily accessible.
Step 9


– Alright, champ, first things first, let’s get that camera compartment separated from the outer casing. We’re in this together!
Step 10

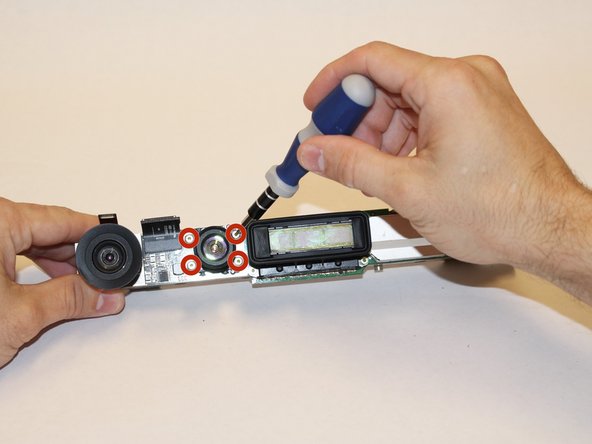
– After you’ve peeled back the cover to reveal the camera area, grab your trusty T5 Torx Screwdriver and unscrew those four 1.9×10.2 mm screws like a pro!
Tools Used

Step 11

– Ready to put it all back together? Just follow these steps in reverse!
– Cancel: Couldn’t complete the guide? No problem!
– Need a hand? You can always schedule a repair
Tools Used
Success!