Xbox One Repair Guide: Replace Optical Disc Drive
Duration: 45 minutes
Steps: 11 Steps
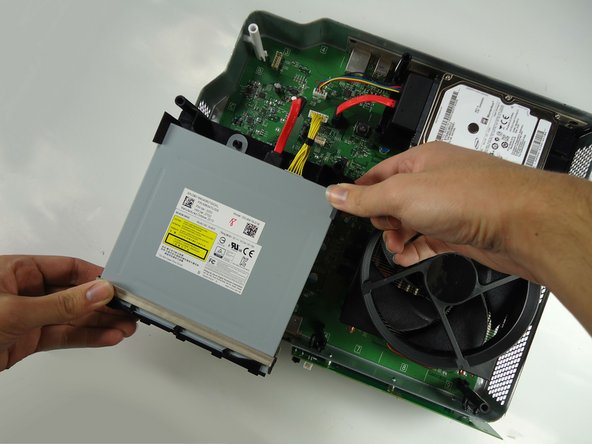
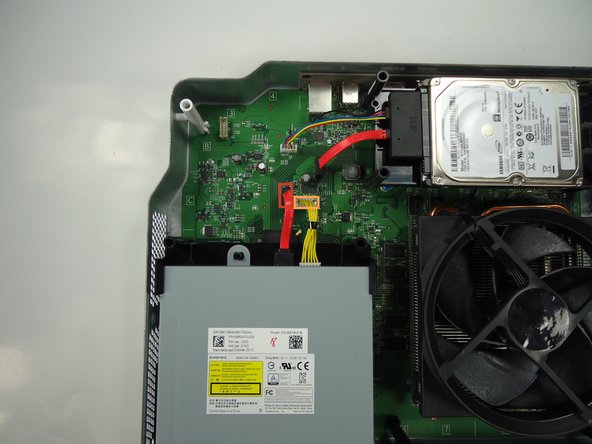
The optical drive is your trusty sidekick for reading all those game, DVD, BluRay, and music discs. It’s connected to the motherboard with two colorful cables: one for powering it up and the other for sending data. Keep it happy, and it’ll keep you entertained!
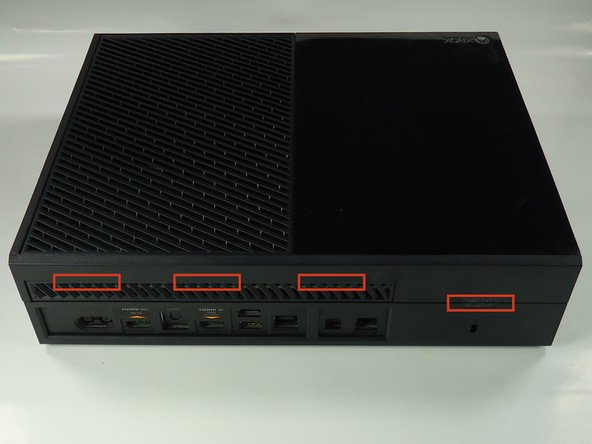
Step 1


Start from the back edge and make your way toward the front of the console—steady hands win the day!
– Using a plastic opening tool, gently pop the side vent away from the console. You’ve got this!
Step 2


– Slide the black slanted tab behind the silver button towards the back of the console, then set it aside.
Step 3

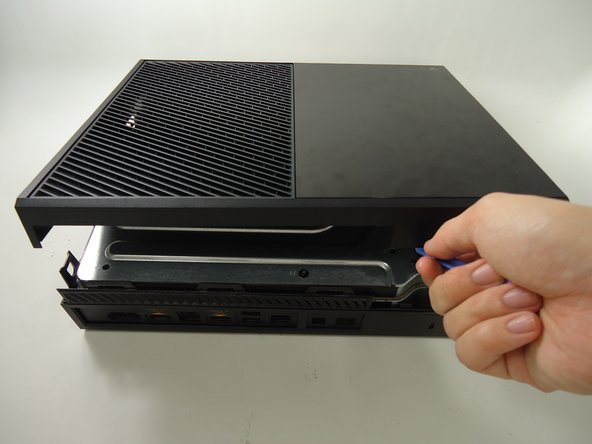
Take a moment to flip over your Xbox and peel off that warranty sticker from the back. Just a heads-up—removing this seal and cracking open the case means your warranty with Microsoft is no longer in play. If you’re not feeling confident about this step, you can always schedule a repair.
Alright, this part might take a bit longer than the others. Keep working that plastic opening tool like a pro! Once you pop one clip loose, slide something under it to keep it from snapping back shut. Patience is key here—you’re doing great!
– Grab a trusty plastic opening tool and work your magic on the back of the case. Start by prying the top section away from the bottom using an up-and-out motion to pop those clips loose. Keep at it—there are several clips along the back and a couple sneaky ones on the sides. Patience and a steady hand will get the job done!
Step 4

– Gently lift up the top of the case—heads up, there’s a sneaky wire connecting the front panel to the motherboard. Be chill and careful not to mess it up!
– Grab a spudger and pop the ribbon wire loose from the front panel. It’s easier than it sounds, promise!
– Boom! The top case is now free. Place it somewhere safe and move on to the next step.
Tools Used

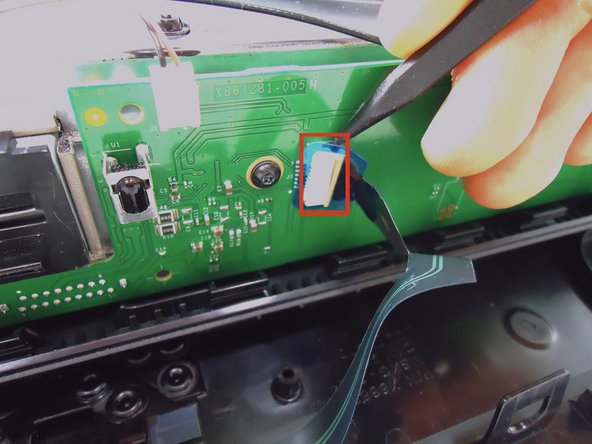
Step 5

– Pop out the speaker by squeezing the tab on the black plastic mount and lifting it up.
– Gently disconnect the connector from the green front panel board.
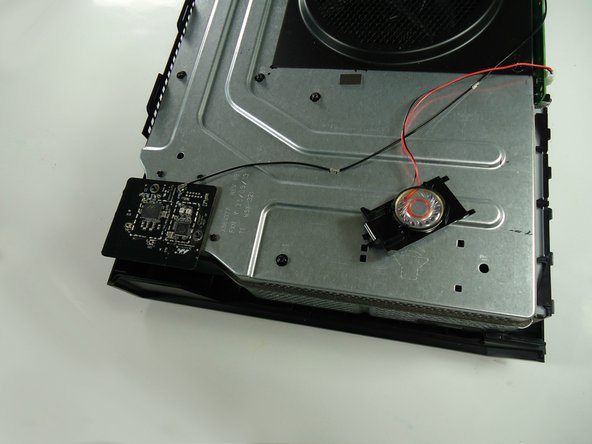
– Congrats, the speaker’s now free! Set it aside.

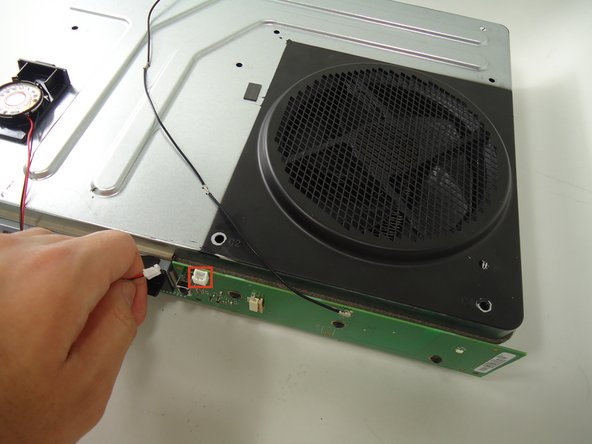
Step 7

– Grab your spudger and gently work it under the antenna connector, lifting it away from the green board on the front. It’s a smooth move—just like the last one!
– Now, carefully release the clips holding the antenna wire to the chassis. Give the wire a gentle pull and set it free!
Tools Used
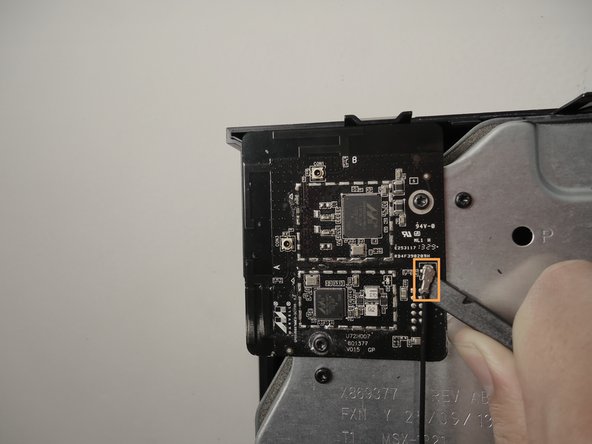
Step 8

– Gently lift the Wi-Fi board straight up to release it from the chassis. Congratulations, the Wi-Fi board is now free and ready for its next adventure!
Step 9

– Pop off those eight T-9 screws (64.0 mm) labeled C1 through C8 holding the chassis top to the motherboard. Ready? Let’s go!
Step 10


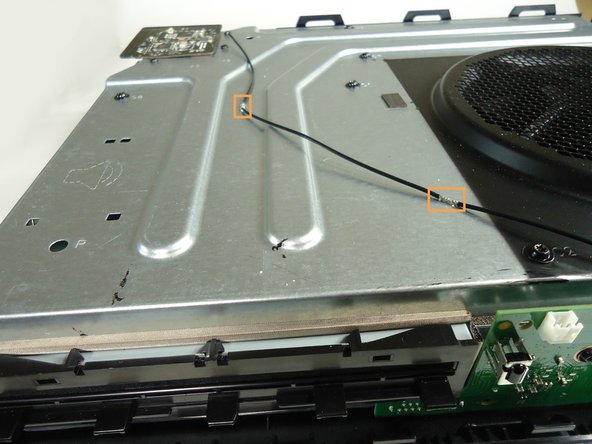
– Gently lift the top of the chassis, but watch out for that sneaky wire connecting it to the motherboard—let’s keep it intact!
– Carefully unplug the connector marked 3 on the motherboard by giving it a gentle tug upwards.
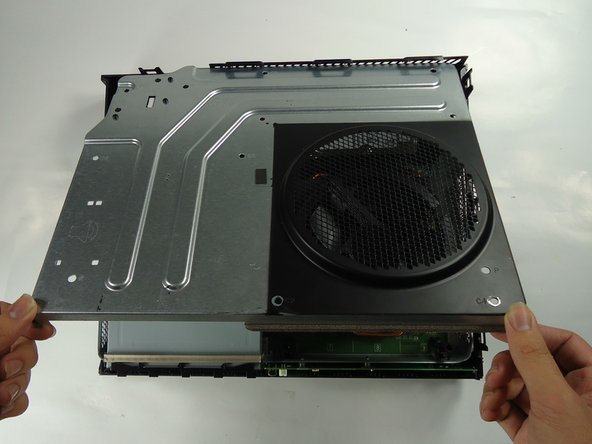
– With the chassis top now free, you can set it aside and move on to the next step!
Step 11

– Put your device back together by following these steps in reverse—easy peasy!
– Cancel: Didn’t quite get through the guide? No worries, you’ve got this!
– Feeling accomplished? You should! If you hit a snag, you can always schedule a repair.
Success!


