Xbox One S Firmware Install Guide
Duration: 45 minutes
Steps: 14 Steps
Heads up, champ! This guide’s for learning, not for blaming Salvation Repair if things go awry. Stuffing around with the hard drive can be a bit dicey, so make sure you’re up for the challenge. You got this!
Heads up, folks! This guide is purely for educational fun; I can’t take the heat if something goes awry and your console takes a hit. Tinkering with firmware and the HDD can be a bit of a wild ride, and by diving into these steps, you’re embracing that adventure. If you need help, you can always schedule a repair.
Step 1

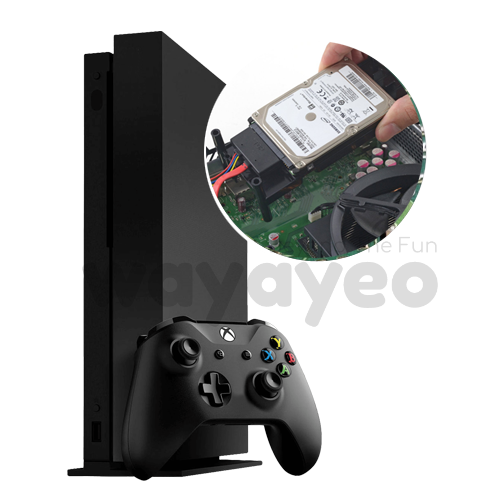
Before diving into updates or making any software changes with the Hard Drive hooked up to the motherboard, double-check that all connections to the board are nice and snug, like a comfy pair of shoes! If the disc drive isn’t secured, you might just end up bricking the Motherboard and saying goodbye to your precious device—yikes! So, let’s keep it safe and sound, folks.
Step 2

– Before you dive in, take a minute to review the steps for the hardware portion – it’s super helpful to know what you’re getting into
– You’ll also need a Windows PC and a hard drive reader with SATA Data and SATA Power to USB capabilities – don’t worry, it’s easier than it sounds
– Just a heads up: Seagate drives can sometimes cause issues with XBox One software, so keep that in mind as you work through this guide
Step 3

– Okay, hook up that new hard drive to your PC. Make sure it’s nice and secure, you don’t want it accidentally getting unplugged!
Step 4

– This next step involves running a handy-dandy script to create partitions on your HDD/SSD. It’s all about organizing your storage space like a pro!
– We’ve got you covered with links for both the download and the original post where this awesome script was created. Thanks to tai1976 from gbatemp.net for sharing their creation!
– Now, let’s unzip the file and get ready for the next step!
– Link 1
– Link 2
Step 5

– Tap that Windows key or hit the Start menu, then type “CMD” like a boss. Right-click it and go for the ‘Run as Administrator’ option.
– Now, get ready to navigate by typing in “cd C:\Users\(Your Name)\Downloads\xboxonehdd-master-6.1\xboxonehdd-master\win”.
– Just swap out (Your Name) for your actual user profile name, and you’ll be golden!
Step 6

– Type in the command “create_xbox_drive” and hit enter! Now, let’s get creative and whip up a drive with 500GB, 1TB, or even 2TB of storage—your choice! If you find yourself scratching your head at any point, don’t forget there’s a handy readme file in that folder you just extracted. It’s like having a helpful buddy right there with you!
Step 7


– Let’s get started with this repair guide. We’ll be using the first option: replacing or upgrading without a working original drive. This is a great way to breathe new life into your device, and we’re here to walk you through it step by step.
Step 8


– Alright, cool cat, time to choose the right drive to format. Disk 0 is usually where your operating system lives, so don’t pick that one. You’ll know it’s the right one, trust me.
– It’ll ask you to double-check your choice – just say ‘yes’ to that, you’re the boss.
– Now you gotta tell it how big you want your new drive to be. You got this!
Step 9

– When the command line shows six lines of lengthy numbers topped with ‘GUID’, you’re in the clear! You’ve finished that part like a champ.
– If that doesn’t do the trick, give your disk a little TLC using diskpart, and then give it another shot. Link below for more details!
– Link 3
Step 10


– First things first, head on over to the official Xbox website and grab a little file known as OSU 1.
– Next up, choose the option that says ‘I need to update my console offline’.
– Make sure you select ‘Xbox One S or Xbox One X’ for the right update.
– Finally, click that shiny green link labeled ‘OSU1’ to kick off the download!
Step 11


Hey there, don’t forget to snag that bootanim.dat file and pop it into folders ‘A’ and ‘B’. There are two versions floating around – one for OG / S and another for the X. If you skip this step, your Xbox will be stuck staring at a black screen instead of rocking that sweet boot logo. No worries, we’ve got you covered!
– First things first, hop on over to the System Update (X) drive and whip up two shiny new folders. Let’s call one ‘A’ and the other ‘B’—simple and effective!
– Next up, grab all the files from OSU1 and make a copy of everything in $SystemUpdate, but hold on tight to ‘updater.xvd’—we’ll save that for later.
– Now, it’s time to place those files into the folders ‘A’ and ‘B’ you just created. Go on, give them a cozy home!
– Finally, snag ‘updater.xvd’ from $SystemUpdate and drop it right in the root of System Update (X). You’ve got this!
Step 12

If your Xbox is giving you trouble, try a Factory Reset. It might just be what the doctor ordered!
– First things first, safely eject that media and pop it back into your Xbox like a pro!
– Next up, reassemble your Xbox and get ready to power it up with a smile.
– Follow along with our guide for replacing the hard drive of your Xbox One S like a champ.
– And if you’re feeling a bit lost, don’t fret! We’ve got factory reset instructions to help you reset the groove.
Step 13

– Hey, sometimes after a super speedy SSD upgrade, your console might have a little trouble logging in. No worries! Just give it a quick reset and your console will be back in action like a champ, ready to play your games. Keep all your games and apps, no sweat!
– If you’ve got your Xbox set to ‘energy saving’ mode, you might see a black screen for a few seconds when you power it up. It’s just taking a quick nap! Switching to ‘instant on’ will wake it up right away.
– Now you’re ready to enjoy lightning-fast speeds and crazy-fast loading times. You’ll be saying goodbye to those long wait times in no time!
Step 14

– Alright, it’s time to put your device back together! Slide that hard drive back into your Xbox One S and reassemble everything like a pro.
– If you decide to take a break from this guide, that’s totally cool!
– Remember, if you need help, you can always schedule a repair.
Success!