
Xbox One Speaker Replacement Guide
Duration: 45 minutes
Steps: 16 Steps
If you’re finding yourself chatting away to your Xbox One and it’s responding with nothing but silence, it might be time to swap out that speaker. Follow this guide to easily remove and replace the speaker in your Xbox One, and get back to enjoying those delightful sound effects!
Step 1

– To get started with your Xbox repair, you’ll need to carefully remove the tamper-evident tape. Don’t worry, taking it off won’t void your warranty as long as you’re gentle and don’t cause any damage. You’re on your way to fixing your device!
Step 2


– Grab a plastic opening tool and gently nudge up to lift away the plastic vent that hugs the side USB port. You’ve got this!
– This vent is quite the flexible friend, held down by some rather weak plastic clips. Start from the back and peel it away like a pro!
Step 3


Let’s take a look at the front corner of your Xbox – you’ll notice a small plastic tab that helps keep everything in place.
– Gently slide that tab straight back and voila, it’s out!
Step 4


You’ll need to use some muscle here! There’s a strong plastic clip holding the two case halves together (and it’s just the first of many!), so get ready to put in some effort.
Keep that spudger in place until you’ve fully opened the case. These clips are like little springs, and they could cause the case to snap shut while you’re working.
– Gently slide the flat end of a spudger between the upper and lower case where they cozy up at the back near the side vent.
Tools Used

Step 5


Alright, so the top and bottom parts of your Xbox are held together by a bunch of clips on the back and sides. It’s like a mini-fortress! Just be careful, those clips are holding things in place, so be gentle as you go.
– Slide a plastic opening tool between the upper and lower case to pop the clip over the rear vent. It’s like giving your phone a little high-five!
Step 6


– Keep scooting along the rear of the Xbox, popping those clips.
Tools Used
Step 7


As you make your way to the far edge of the rear case, the top case should be ready to come off. If it’s being stubborn, just run your plastic opening tool around the corner and gently pop the clips along the side without the USB port. You’re getting close!
– Keep popping those clips! If you’re feeling stuck, try sliding the plastic opening tool along the edge of the clips. It’s like a little dance for your phone!
Step 8


Hold your horses! The upper case isn’t ready to come off just yet—it’s still attached by the front panel button cable. Patience is key!
Grab your trusty plastic opening tool and gently nudge any stubborn clips that might still be hanging on for dear life.
– Let’s start with that trusty spudger you wedged into the crack. Give the upper case a gentle nudge to pop free those last few clips!
– Now, lift the upper case just a tad and slide it over a bit to unveil the front panel board. You’re doing great!
Tools Used
Step 9


Heads up! The front button cable uses a special ZIF connector. Let’s carefully disconnect it in the next few steps.
– Grab those tweezers and gently lift the blue plastic loop over the white connector on the board. You’ve got this!
– Now, take the tip of your spudger and give that connector’s locking tab a little nudge toward the cable to release it. Easy peasy!
Tools Used
Step 10


– Gently grab the cable with tweezers and pull it straight out of the connector on the board – easy does it!
– Next, carefully remove the upper case to get to the good stuff.
Step 11


– Alright, now we’re gonna put this thing back together! You can skip these next 4 steps if you wanna keep taking it apart, but if you’re ready to rock, let’s do it!
– Grab your trusty spudger, the flat end, and gently pry up those clips holding the front panel to the top part of the case.
– Now, carefully remove the front panel. See? You’re doing great!
Tools Used
Step 12


– Swap out the top piece of the upper case like a pro!
– Align those clips just right and give them a firm press to snug them back into place around the edges.


Step 14


The lower edge of the front panel is equipped with handy plastic hooks that cleverly interlock with matching hooks on the front edge of the lower case, making it easy to get started with your repair.
– Tilt the front panel to a 45-degree angle and connect its plastic hooks to those on the lower case – it’s like a perfect match!
– Now, gently push the top of the front panel into the Xbox, similar to closing a mailbox. Apply firm pressure so the clips snap securely into place, locking the front panel to the upper case.
Step 15


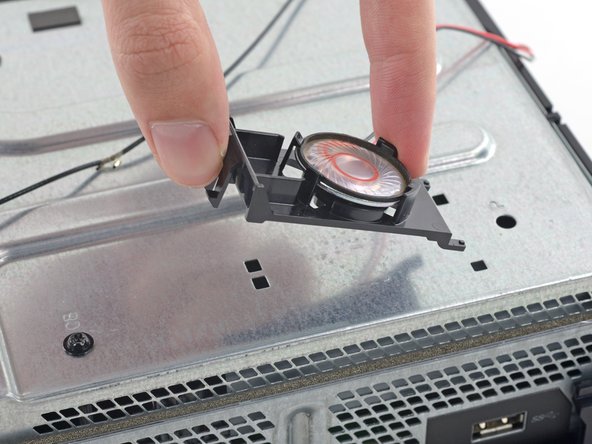
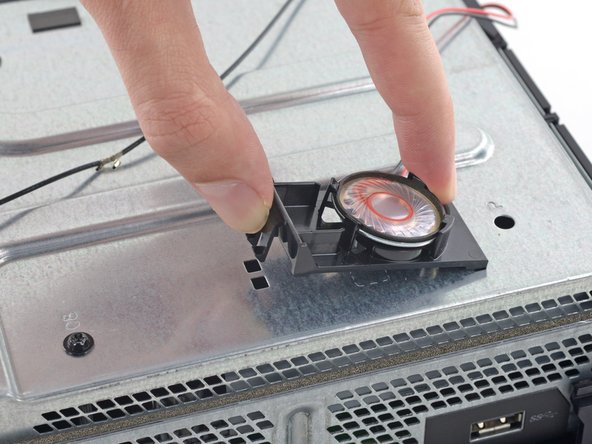
Hey there! When you’re lifting up on the cable’s connector, make sure you’re not tugging on the board’s connector. It’s a bit delicate, and you wouldn’t want to accidentally pop it off! You’ve got this!
– Time to give that speaker cable connector a little love tap! Gently pull it up to disconnect it from the front panel board. You got this!
Step 16

– To put your device back together, just retrace your steps like a pro!
– If you decide to take a break from this guide, no worries at all!
– And remember, if you find yourself in a bind, you can always schedule a repair.
Success!

