Samsung Galaxy S10e Back Cover Replacement
Duration: 45 minutes
Steps: 14 Steps
Follow this guide to expertly detach or swap out the glass back cover on your Samsung Galaxy S10e. You got this!
Step 1

- First things first, let's power down your phone completely before diving into this repair adventure!
- Grab your trusty iOpener and warm up the back of your phone along the right edge for about two minutes. This little trick will help loosen up the adhesive holding that back cover in place.
Got a hair dryer, heat gun, or hot plate? Those can do the trick for loosening things up—just keep it cool, literally. Too much heat can bother the OLED screen or the battery, so don’t get carried away!
Opening up your phone will break its waterproof seal, so have some replacement adhesive on hand before you start. If you're reassembling without new adhesive, just be extra careful to keep liquids out. You might need to warm up the iOpener a few times to get the right heat—just follow the instructions to avoid overheating and keep things safe.
Tools Used

Step 2


The adhesive pattern is laid out just like in the first image, which shows the inside of the cover after removal. Keep an eye on this so you know exactly how it's placed before you proceed.
- Ready to get sticky with it? In these next steps, you’ll be working your way through the glue that’s keeping the back cover locked down.
- From the outside, you’ll be slicing along the highlighted zones—think of them as your adhesive obstacle course.
- Pro tip: The adhesive is thinnest on the right side, just below the Bixby button, so that’s your easiest entry point.
Step 3


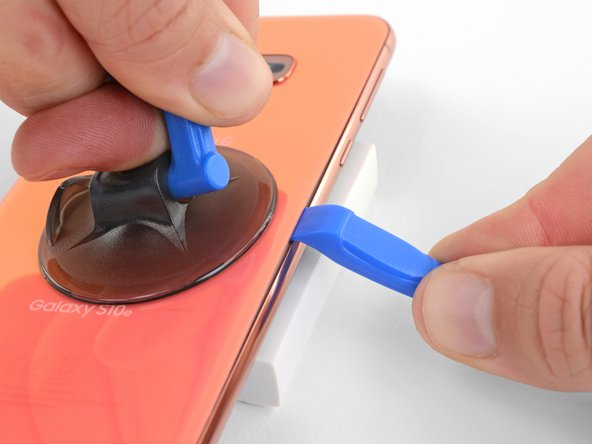
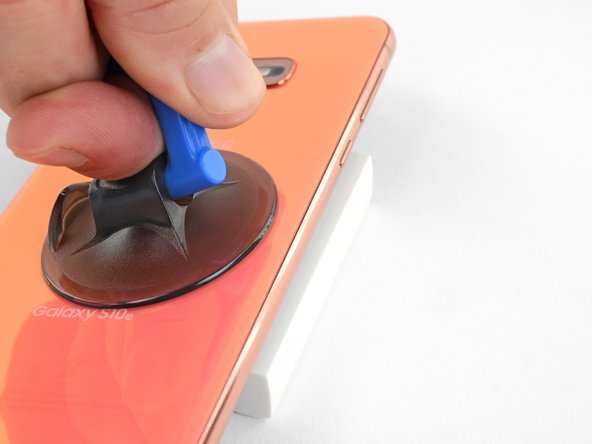
- Stick a suction cup onto the back cover, getting as close to the heated edge as you can—aim for the spot just under the Bixby button, since that's where the adhesive is on the shy side.
The suction cup might struggle to stick on the curved edges of the glass, so steer clear of pressing it right at the very edge. If the back cover is cracked, the suction cup may not hold well—try using some strong tape to lift it, or glue the suction cup in place and let it cure fully before moving on. If you need a hand with this step, you can always schedule a repair.
Step 4

The rear glass is delicate—go gentle and steer clear of metal tools, or you might end up with a crack instead of a fix.
When using an iOpener, stick to the heating instructions to keep things cool—otherwise, your gel pack might just burst with excitement (and hot gel).
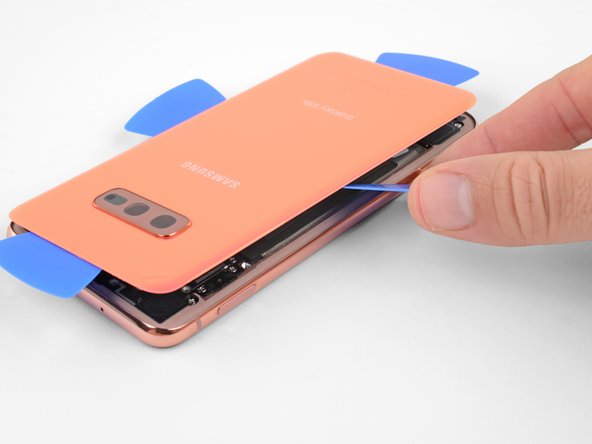
- Set the heated side of your phone on something about half an inch (13mm) tall. This gives you a nice angle to slide in your opening tool—like setting up your own little repair ramp!
- Grab that suction cup and lift the right edge of the back cover until you see a tiny gap peeking through.
- Slide the edge of your opening tool into the gap. Be brave—sometimes it takes a bit of muscle!
- If the adhesive is putting up a fight, hit it with some more heat to soften it up. It cools down fast, so you might have to warm things up a couple times. Patience pays off!
Tools Used
Step 5


- Gently slide your opening tool along the right edge of the phone to cut through the adhesive holding the back cover in place. Keep a steady hand and take your time—you're peeling back the layers for a smooth reveal. If you need help along the way, you can always schedule a repair.
Step 6


- Slide an opening pick into the edge right next to your opening tool. Let it chill there—it's your secret weapon to keep that pesky glue from sticking back together.
Step 7

- Gently lay a heated iOpener on the top edge of the phone and let it sit for about two minutes. This helps loosen things up so you can get inside more easily.
Tools Used
Step 8


Since the glued part here is a bit bigger, you’ll want to slide your pick a little deeper into the phone to get that separation going smoothly.
- Grab an opening pick and work it into the top right corner of your phone, then glide it smoothly around the corner and all the way across the top edge.
- Keep the pick in place so that the sticky adhesive doesn't sneakily stick itself back together.
Step 9

- Gently press a heated iOpener along the left edge of the phone for two minutes to loosen things up.
Tools Used
Step 10


- Start by inserting a new opening pick near the top left corner of the device. Gently slide it along the left edge to loosen the adhesive. Keep the pick in place on the left side to prevent the adhesive from resealing, making your next steps easier. If you need assistance at any point, you can always schedule a repair.
Step 11

- Place a heated iOpener along the bottom edge of your phone and let it chill there for two minutes.
Tools Used
Step 12


The area that's glued up is a bit bigger here, so make sure to slide your pick in a little deeper to completely break it free. You've got this!
- Take an opening pick and slide it into a bottom corner of your phone. Glide it smoothly along the bottom edge to loosen up the sticky adhesive holding things together.
Step 13


- Grab those opening picks and gently work your way around the back cover—slow and steady wins the race.
- Lift off the back cover with care.
- If you hit a stubborn spot, pause for a sec and use an opening pick to slice through any leftover adhesive.
Step 14

Feel free to pop the back cover back on without swapping out the adhesive! Just make sure to clear away any big bits of sticky stuff that could keep the cover from fitting snugly. After you've got it in place, give it a little heat and press down to make sure it stays put. It may not be fully waterproof, but that leftover adhesive is usually plenty strong to keep everything secure.
Don't forget to power up your phone and check your handiwork before slapping on any new adhesive and sealing things up tight!
- Put your device back together by working through the steps in reverse—like rewinding a movie, but with more tiny screws.
- When it’s time to say goodbye to old parts, drop them off at an R2 or e-Stewards certified recycler and let them live their best second life.
- Done with the repair? Jump over to the testing guide to make sure everything’s working like a charm.
- If things aren’t cooperating, swing by our Answers community for some troubleshooting wisdom. And if you need backup, you can always schedule a repair.