Samsung Galaxy S10e Wireless Charging Coil Replacement
Duration: 45 minutes
Steps: 22 Steps
In this guide, we'll walk you through the fun adventure of removing and swapping out the wireless charging coil for your Samsung Galaxy S10e. With just a little bit of care and attention, you'll have your device charged up and ready to go in no time!
Step 1

A hair dryer, heat gun, or hot plate can do the trick, but keep it cool—literally. The OLED display and internal battery are sensitive to heat, so avoid overheating the device while applying heat.
Cracking open your phone will break its waterproof mojo, so make sure you’ve got fresh adhesive on standby. If you skip the adhesive, just keep your phone away from anything wetter than a spilled soda.
To get your phone nice and toasty, you might need to heat up and slap on the iOpener a few times. Stick to the iOpener instructions so you don’t accidentally turn your phone into a hot potato.
- Power down your phone before you get started—let's not have any unexpected surprises.
- Grab your iOpener and heat up the right edge of the back cover for a couple of minutes to loosen up that stubborn adhesive.
Tools Used

Step 2


The adhesive pattern is shown in the first image, which displays the inside of the cover after removal. This visual guide helps you understand how the adhesive is laid out before you proceed.
- Get ready to dive in! In the upcoming steps, we're going to slice through the adhesive that’s holding the back cover in place.
- From the outside of your phone, you'll be making your way through the adhesive in the areas we've highlighted for you.
- The adhesive is a bit more chill on the right side of the phone, just under the Bixby button, so that’s where you want to start!
Step 3


The suction cup might struggle to stick on the curved edges of the glass, so steer clear of placing it right at the border.
If the back cover of your phone is cracked, the suction cup might not adhere properly. In that case, try using some strong tape to lift it, or you can superglue the suction cup in place and let it set before moving on.
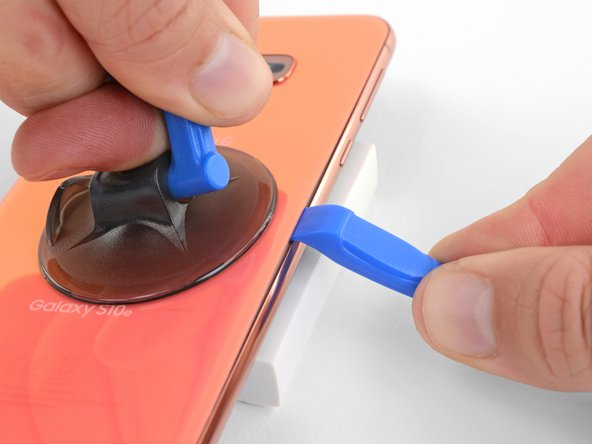
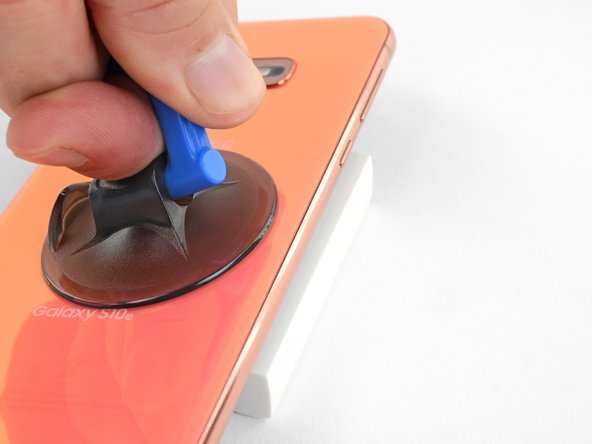
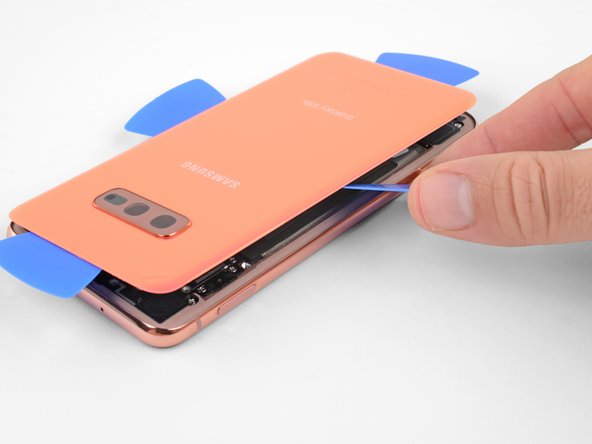
- Attach a suction cup to the back cover, aiming for the heated edge near the Bixby button where the adhesive is at its weakest. Let's get that cover off with a little finesse!
Step 4

Be careful! The rear glass is a bit delicate and can shatter if you apply too much pressure or try to pry it open with metal tools. Keep it cool and gentle, and you'll be just fine!
When heating your iOpener, stick to the instructions so you don’t end up with a gel explosion—trust me, nobody wants that mess!
- Prop up the warm edge of your phone on something that's about 0.5 inches (13 mm) thick. This nifty angle will make it a breeze to slide in that opening tool.
- Use your suction cup to gently lift the right edge of the back cover, creating a little gap between the back cover and the frame.
- Now, slide the edge of your opening tool into that gap.
- It might take a bit of muscle! If you're struggling, don't hesitate to apply a little more heat to soften that adhesive, and give it another go. Just a heads up, the adhesive cools off quickly, so you might need to warm it up a few times.
Tools Used
Step 5


- Gently slide the opening tool along the right edge of your phone to carefully cut through the adhesive holding the back cover in place. Take it slow—you’ve got this!
Step 6


- Slide an opening pick along the edge, right next to the opening tool. Let it hang out there to stop the glue from sticking back together while you keep working.
Step 7

- Warm up your trusty iOpener and give the top edge of your phone a cozy two-minute hug.
Tools Used
Step 8


This section has a bit more glue, so get ready to slide your pick in deeper this time to loosen things up.
- Grab your trusty opening pick and gently insert it at the top right corner of your device. Slide it around the corner and across the top edge like you're tracing a smile!
- Keep that opening pick in place to keep the adhesive from staging a comeback. You've got this!
Step 9

- Warm up the left edge of your phone with a heated iOpener for about two minutes.
Tools Used
Step 10


- Slide a new opening pick into the top left corner and gently glide it down the left edge of your phone. You're doing great!
- Keep that opening pick snugly in place along the left edge to stop the adhesive from getting all clingy again. Nice work!
Step 11

- Heat things up by placing a warmed iOpener along the bottom edge of your phone for about two minutes.
Tools Used
Step 12


Since the glued area here is a bit more generous, you'll want to slide your pick a little farther into the phone to get everything separated smoothly.
- Grab an opening pick, sneak it into a bottom corner of your phone, and glide it smoothly along the bottom edge to loosen up that sticky adhesive.
Step 13


- Grab those opening picks and gently wiggle them to lift the back cover. Take your time, we want to keep things smooth!
- Once you've got it, go ahead and remove the back cover like a pro.
- If you feel any stubbornness, just pause for a moment. Use an opening pick to slice through any leftover adhesive. You've got this!
Step 14

- Follow this step-by-step to pop off the back cover and swap out the adhesive. Keep it steady and gentle—you're almost there! If you hit a snag, remember you can always schedule a repair for extra help.
Want to skip replacing the adhesive? No worries—just peel off any big chunks of leftover glue that might keep the back cover from sitting flat. Once it's in place, gently warm up the back and press down firmly to secure it. Keep in mind, it won’t be waterproof anymore, but the remaining adhesive is usually more than enough to hold things together. Before sealing everything up, be sure to turn on your device and test your repair. If all looks good, you’re good to go! If you need a hand, you can always schedule a repair.
Step 15

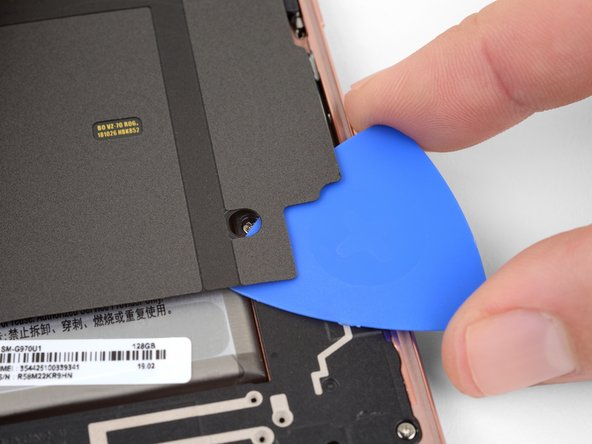
- Time to grab your Phillips screwdriver and take out those eight 3.9 mm screws holding the upper midframe in place. Let’s make it rain screws—just keep them somewhere safe!
Step 16

- Gently slide an opening pick into the bottom right corner of the upper midframe to break free the adhesive that's binding it to the lower midframe. Take your time and be careful—you're doing great!
Step 17


- Let's kick things off! Slide the point of your spudger into that nifty little cutout on the right edge of the plastic upper midframe, just a stone's throw from the Bixby button.
- Now, using that same trusty spudger, give the midframe a gentle pry to lift it away from the phone's chassis. You've got this!
Tools Used

Step 18

- Gently lift the midframe using the plastic section and slide it out of the phone. To put it back, start by hooking the top edge of the assembly into the phone’s frame, then carefully press down on the rest of the assembly until it clicks into place. If you need a hand, you can always schedule a repair.
Step 19

- Place a heated iOpener on the top half of the midframe and hold it there for about a minute. This gentle warmth helps loosen things up, making the rest of the disassembly smoother. If you need a hand with the process, you can always schedule a repair.
Tools Used
Step 20

The pad is really stuck on the midframe. If it’s being stubborn, a little high-strength (>90%) isopropyl alcohol can help coax it loose.
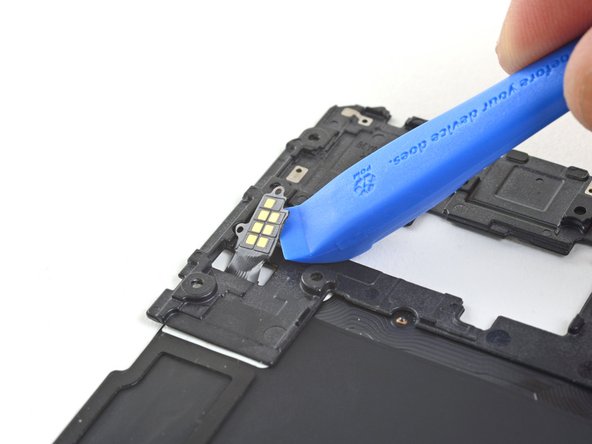
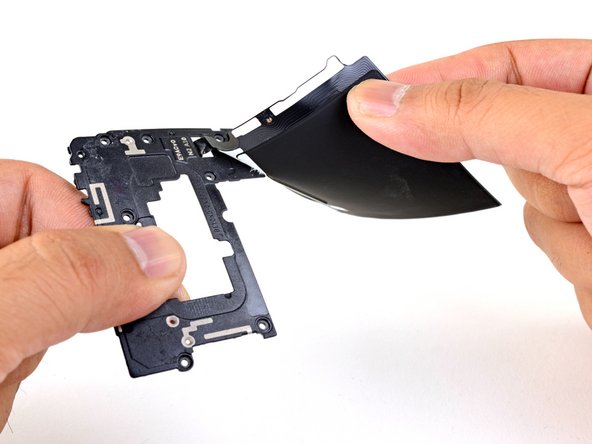
- Take your opening tool and gently lift the wireless charging coil's contact pad away from the midframe—no need to rush, just a smooth move!
Tools Used

Step 21
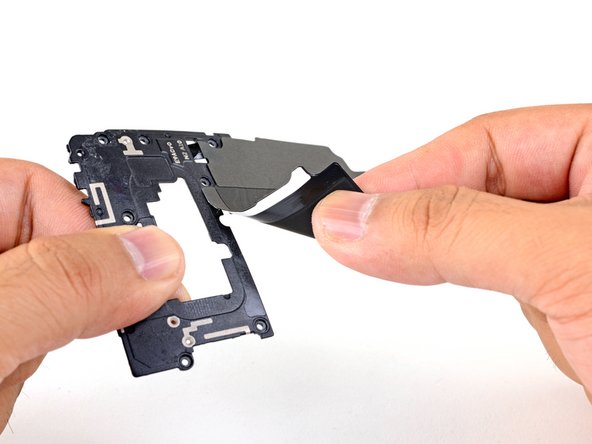

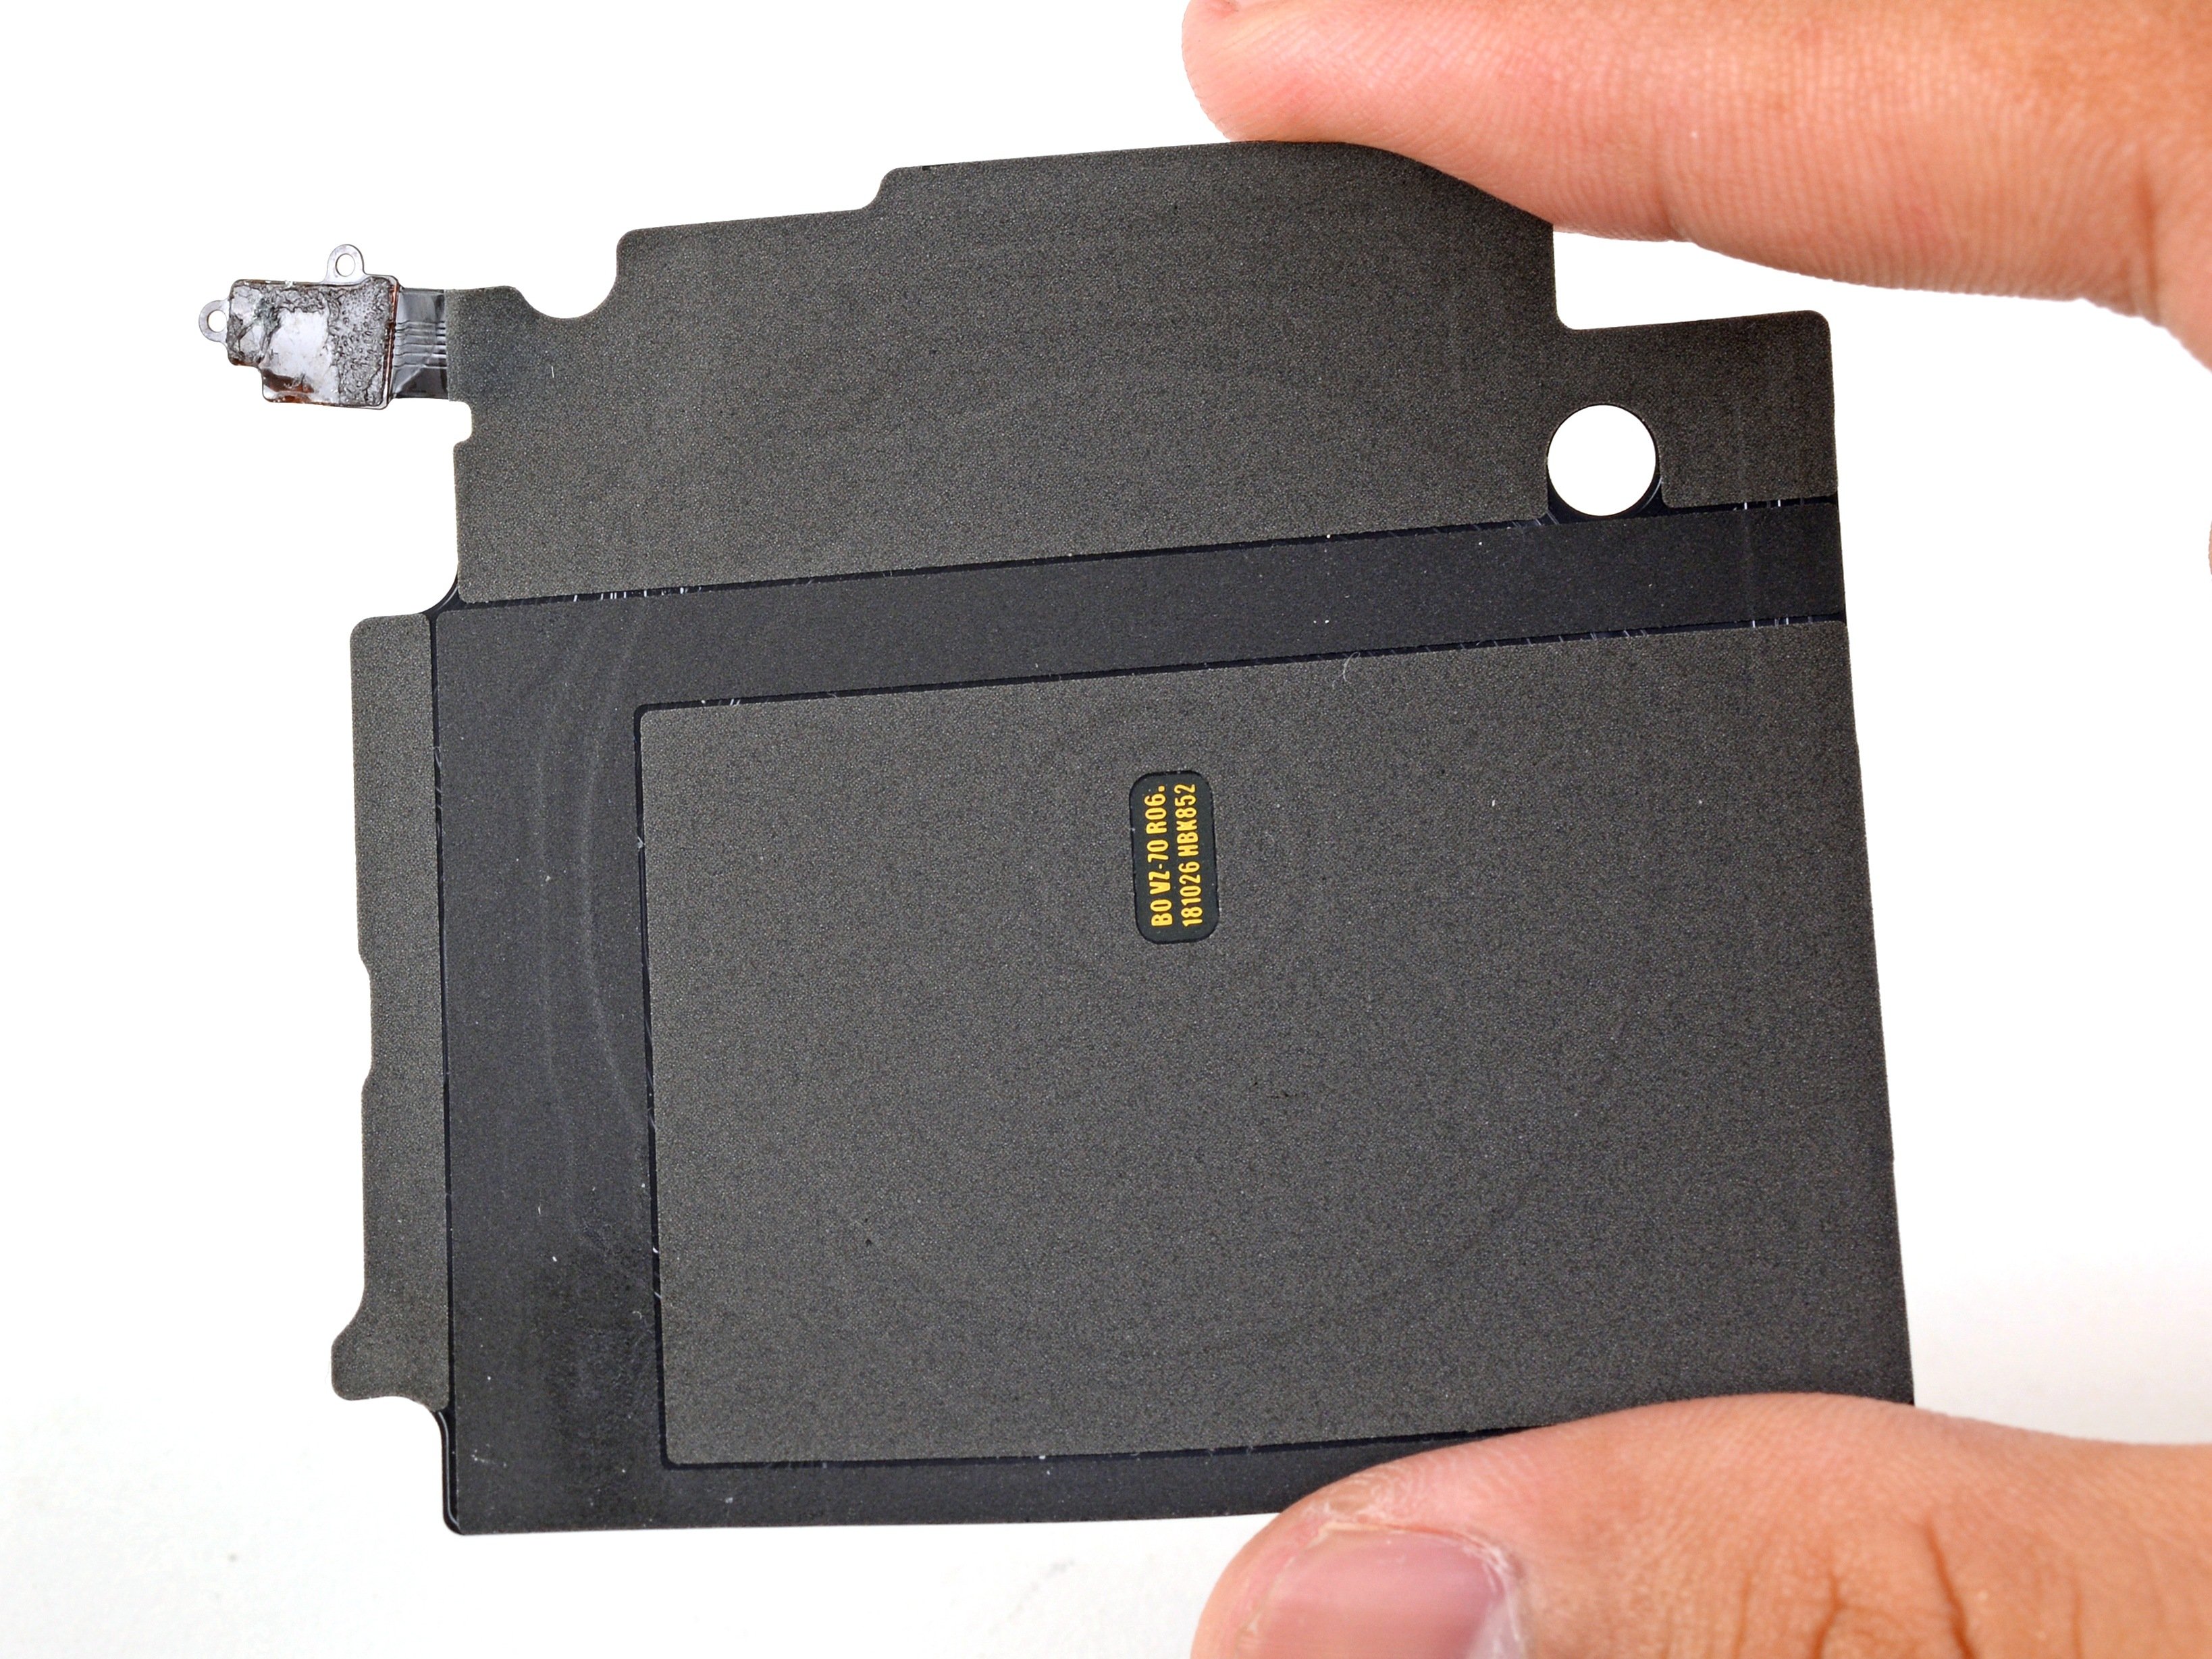
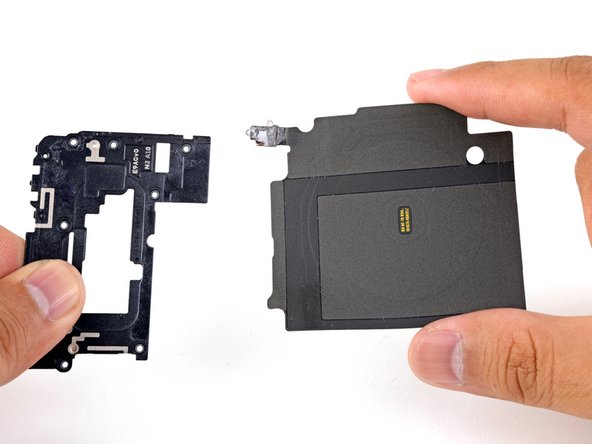
- Gently lift the wireless charging coil off the midframe—no need to rush, just take it slow and steady.
Step 22
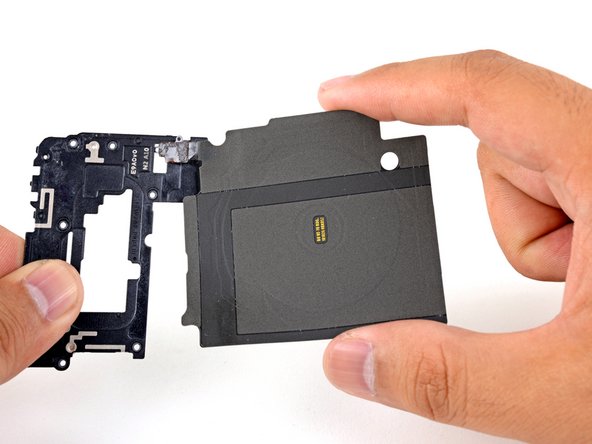

- Gently pull the wireless charging coil's contact pad out of its midframe slot to loosen it up.
- Take out the wireless charging coil carefully.
- When you're putting things back together, use some double-sided Tesa tape to stick the contact pad onto the midframe—it helps keep everything in place.
- Compare your new replacement part with the original—sometimes you need to transfer bits or peel off adhesive backing on the new part before it’s ready to go.