Samsung Galaxy S9 Rear Glass Removal
Duration: 45 minutes
Steps: 7 Steps
Damaging the waterproof seal or causing it to loosen its water protection can lead to leaks or water damage, so handle it carefully to keep things watertight.
Follow this guide to safely remove the rear glass of your Samsung Galaxy S9. Keep in mind, cracking open your device will break its waterproof seal. If you skip replacing the adhesive seals, your phone will work just fine, but it won't be able to handle water like before. You'll need fresh adhesive to put everything back in place during reassembly. If you need help, you can always schedule a repair.
Step 1

The glue holding your Samsung Galaxy S9 together is no joke—it's seriously sticky. If the iOpener isn't cutting it, feel free to grab a hair dryer, heat gun, or hot plate for some extra warming power. Just keep it chill with the heat, because the AMOLED screen and battery don't vibe well with too much warmth.
You may find yourself reheating and reapplying the iOpener a few times during the removal process to ensure the adhesive gets nice and toasty for a clean cut. Just follow the iOpener instructions to keep things from getting too hot to handle!
- Alright, first things first—power down your phone. Safety first, right?
- Now, grab your heated iOpener and gently apply it to one of the long edges of your phone to help loosen up the sticky adhesive under that rear glass. Give it at least two minutes with the heat—patience is key here!
Tools Used

Step 2

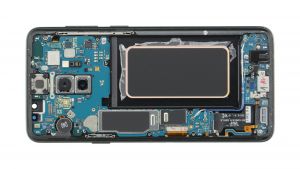
Check out the pattern of adhesive inside the back cover—yep, just like in the photo.
- Next up, you’ll be working your way through the adhesive holding the back cover tight.
- Here’s where you’ll want to slice through the sticky stuff:
- Thicker stripes of adhesive
- Thinner stripes of adhesive
- Steer clear of this spot—it’s where the fingerprint sensor flex cable hangs out, so no poking or prying here!
Step 3


- Start by pressing a suction cup onto the back cover. You've got this!
- Gently lift the bottom edge of the back cover with your suction cup to create a tiny opening between the back cover and the frame. Just a little wiggle here!
- Now, slide an opening pick into that gap you just made and glide it over to the bottom right corner. Nice and smooth!
- Time for a second opening pick! Slide it over to the bottom left corner to keep things moving.
- Don't forget to add a third opening pick to hold off that pesky adhesive from sealing back up while you finish the removal process. You're doing great!
If the back glass on your phone is cracked, the suction cup might not stick as well. No worries—try grabbing some strong tape to lift it, or even superglue the suction cup in place and let it cure. That way, you’ll be ready to go. When opening, a little force is okay—you only need to create a tiny gap with the suction cup to slip in your tool. If it’s stubborn, warm it up a bit to soften the adhesive, then try again. Keep in mind, the glue cools down quickly, so a few reheats might be necessary. Need a hand? You can always schedule a repair with Salvation Repair.
Step 4


- Just sneak the tip of the opening pick in at the bottom left corner, and slide it smoothly up the side to the top—think of it as tracing the edge.
- Swing the pick around the top corner and let it chill there to keep the adhesive from sticking back together.
Step 5


Hold off on swinging the phone open just yet—the delicate fingerprint sensor cable is still hanging out between the back cover and the motherboard.
If the adhesive starts acting stubborn, hit it with some extra heat. The back cover stays under tension the whole time, so don’t rush it or you’ll risk cracking it.
- Gently slide your opening pick from the bottom right corner along the side, working your way up to the top.
- Then, maneuver the pick around the corner and carefully cut through the remaining adhesive at the top of the phone.
Step 6


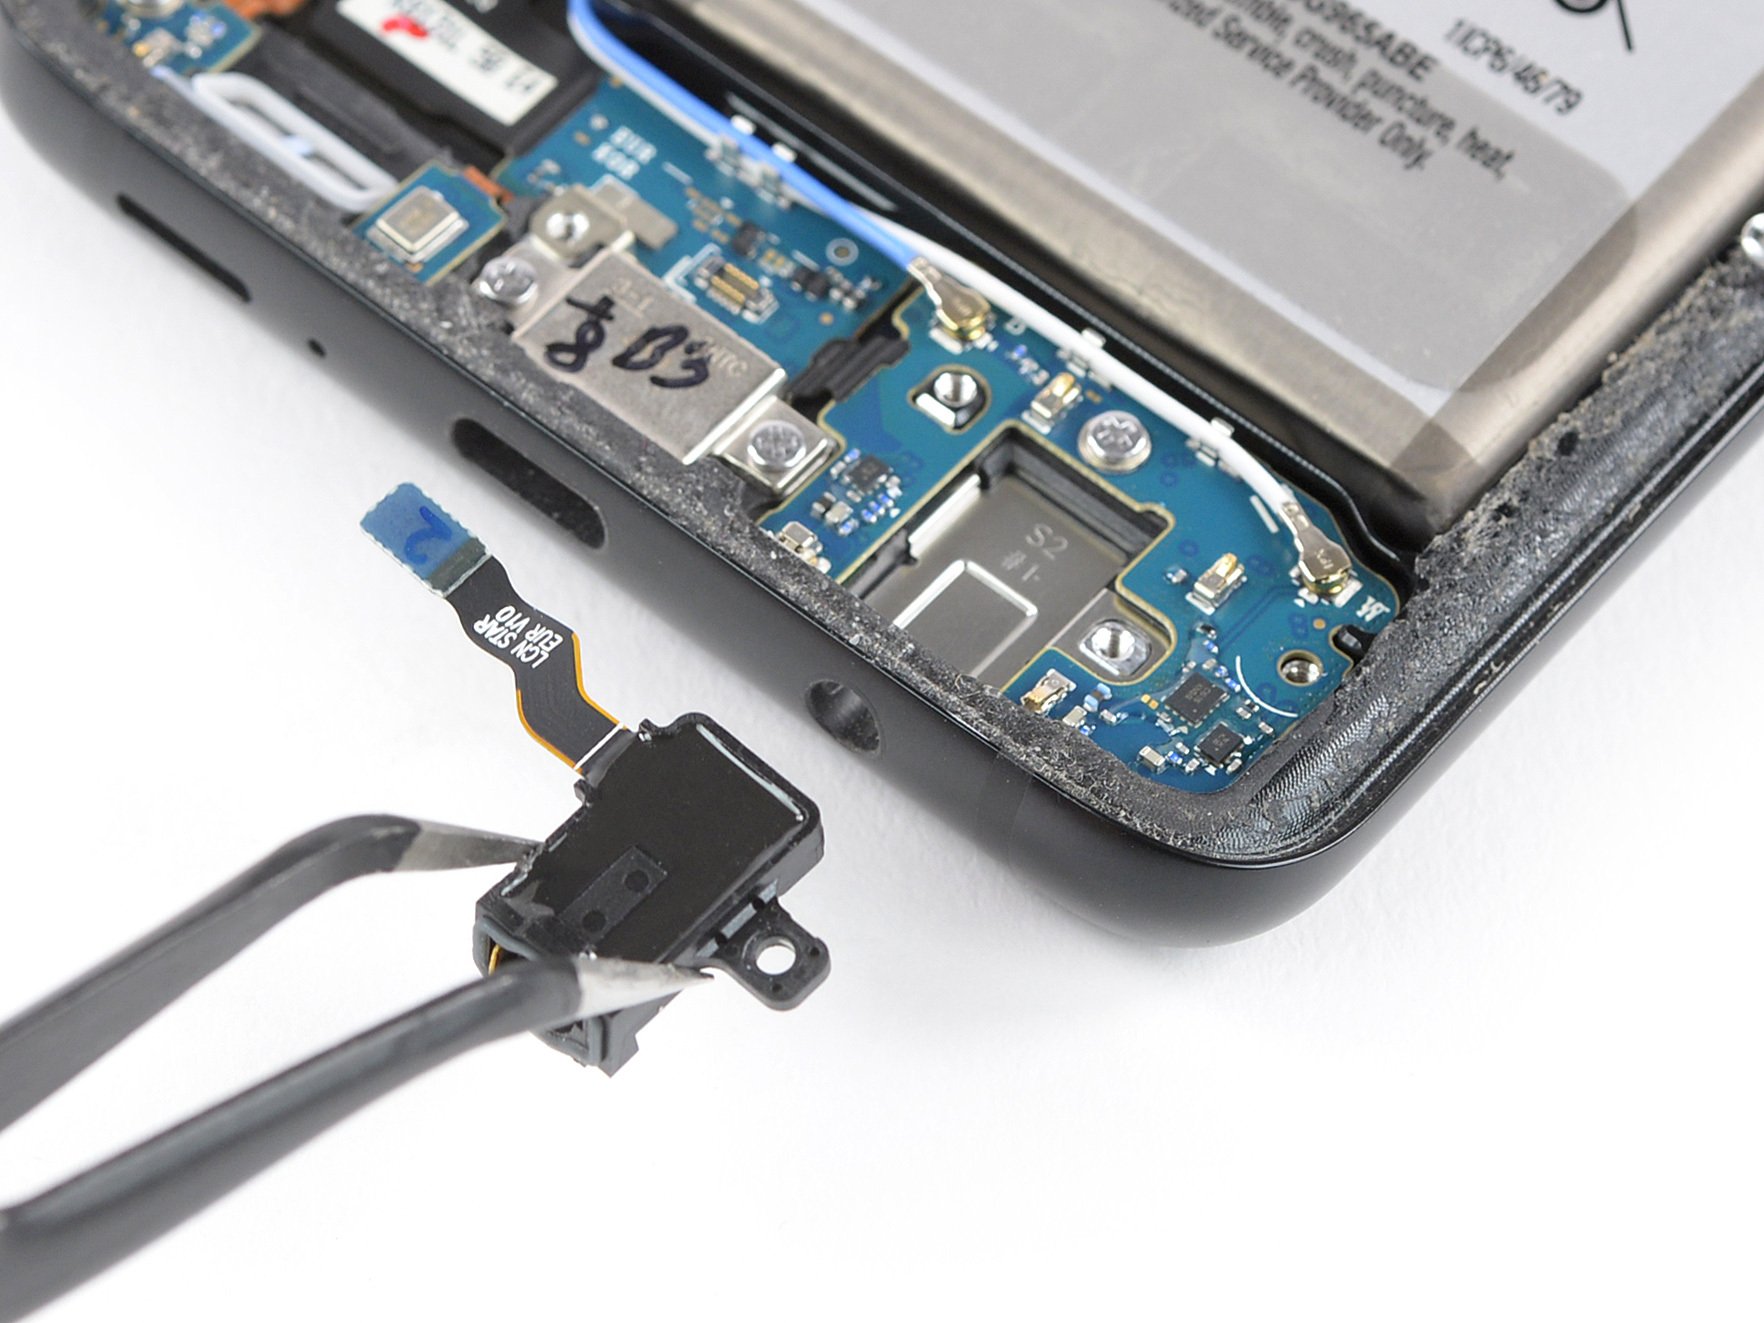
- Gently lift the rear glass from the side where the volume button hangs out—easy does it!
- Grab a spudger and use its edge to pop up and disconnect the fingerprint sensor flex cable. Precision is key, but you've got this!
Tools Used

Step 7

- Start by carefully removing the rear glass—patience is key here. Once it's off, follow this guide to reapply the adhesive and put the rear glass back in place. If you're looking to swap out the rear glass entirely, this guide will also walk you through transferring the rear camera bezel along with the fingerprint sensor. Need a hand? You can always schedule a repair for expert help.