Samsung Galaxy S9 Rear-Facing Camera Replacement
Duration: 45 minutes
Steps: 18 Steps
Get ready to give your Samsung Galaxy S9 a brand new rear-facing camera. If the lens is cracked or scratched, it's time for a replacement. When installing the new camera, make sure it's level and straight to ensure everything lines up perfectly. Keep in mind that swapping out the rear camera will affect your phone's waterproofing, unless you also replace the adhesive seal on the back cover. Don't worry, with these steps, you'll be taking great photos in no time.
Step 1
- Kick things off by turning off your device so you're ready to go. Then, grab a heated iOpener and gently press it along a long edge of the phone to loosen up the adhesive under the back glass. Keep the heat on for at least two minutes—patience pays off!
The adhesive holding the Samsung Galaxy S9 together is pretty tenacious. If a standard iOpener doesn’t do the trick, you might want to try a hair dryer, heat gun, or hot plate to soften things up. Just be careful not to get the device too hot—those AMOLED screens and internal batteries don’t like heat waves. Take your time, and if you need a hand, you can always schedule a repair.
Get ready to work that iOpener! You’ll probably need to warm it up and use it a few times to get the adhesive nice and gooey. Make sure you follow the iOpener directions so you don’t accidentally turn your iOpener into a hot potato.
Tools Used
Step 2
The adhesive inside the back cover is arranged as shown in the image, making it easier to handle during reassembly. Keep an eye on the pattern so you can apply or remove it smoothly.
- In these steps, you'll be gently slicing through the adhesive that holds the back cover in place—think of it like peeling a sticker, but with more finesse.
- Follow the lines shown here to cut through the adhesive smoothly:
- Thick patches of sticky stuff that need a little more love to loosen up.
- Lighter, thinner adhesive areas that come away more easily with a careful slice.
- Keep clear of this zone—it's where the fingerprint sensor flex cable lives, and we want to keep it happy and unscathed.
Step 3
If your phone's rear glass looks like it went twelve rounds with a hammer, the suction cup might bail on you. No worries—grab some tough tape for backup, or go MacGyver with a dab of superglue on the suction cup and let it set so you can get back in action.
It might feel like you’re arm-wrestling your phone, but you only need to crack open a tiny gap to fit your tool in. If it’s putting up a fight, hit it with more heat to show that adhesive who’s boss. The sticky stuff cools off fast, so reheat as needed and keep at it!
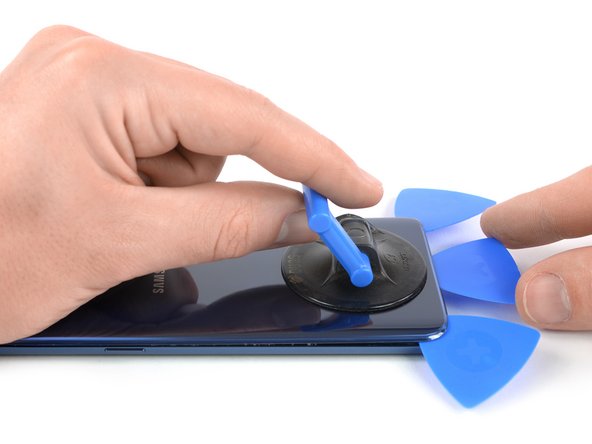
- Stick a suction cup onto the back cover like you mean business.
- Gently pull up on the suction cup to create a little gap between the cover and the frame—just enough to sneak in a tool.
- Slide an opening pick into that gap and cruise over to the bottom right corner.
- Grab another pick and send it over to the bottom left corner for backup.
- Pop in a third opening pick to keep that adhesive from pulling a sneak attack and sealing itself up again while you work.
Step 4
- Gently insert just the tip of your opening pick at the bottom left corner, then glide it smoothly along the side toward the top.
- Keep the pick moving around the top corner and hold it there to stop the adhesive from sealing back up.
Step 5
Hold off on fully opening the phone just yet. The fingerprint sensor cable is delicate and still keeping the back cover attached to the motherboard, so let's take it easy here.
If the adhesive is being stubborn and hard to cut, go ahead and apply a bit more heat. Remember, the back cover is under tension throughout, and if the adhesive isn't soft enough, there's a good chance the cover might crack.
- Take your opening pick and cruise it from the bottom right corner straight up the side to the top.
- Keep the pick moving around the corner and slice through any leftover adhesive at the top edge of your phone.
Step 6
- Gently lift up the rear glass on the side where the volume button hangs out—no sudden moves!
- Grab a spudger and use the edge to pop up and disconnect that fingerprint sensor flex cable like a pro.
Tools Used
Step 7
- Start by carefully removing the rear glass panel. Take your time and keep everything safe. When you're ready to put it back together, follow this guide to reapply the adhesive and snap the rear glass back into place smoothly. If you're planning to swap out the rear glass entirely, be sure to transfer the rear camera bezel, including the fingerprint sensor, following these steps. Need a hand? You can always schedule a repair for expert help.
Step 8
- Grab your trusty #000 Phillips screwdriver and unscrew the fifteen 4mm screws. A little twist here and there, and you're on your way!
Step 9
- Take out the NFC coil assembly—just a gentle lift and you're good to go!
Step 10
- Take off the motherboard bracket—one more step closer to victory!
Step 11
- Time to pop off that speaker cover/antenna assembly. Get a good grip and gently detach it. You’ve got this!
Step 12
- Gently pry up the battery connector with a spudger to disconnect it, making sure you're not forcing anything. If you need a hand, you can always schedule a repair.
Tools Used
Step 13
- Unscrew one 3mm screw using a #000 Phillips screwdriver. You've got this!
Step 14
- Gently pry apart those six cables with a spudger—think of it as giving each connection a little friendly nudge to free them up. If you hit a stubborn one, take your time and stay patient. Need a hand? You can always schedule a repair to get professional help.
Tools Used
Step 15
- Grab your SIM card remover tool (or just an unbent paperclip) and give that release lever a gentle press. Your SIM card will pop right out, ready for the next step!
Step 16
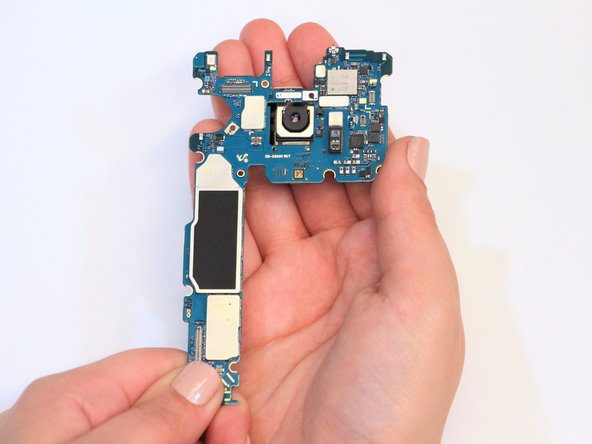
- Gently coax the motherboard out using a spudger—it's like giving it a little nudge to say, 'Time to come out and play!'
Tools Used
Step 17
- Gently pop one connector loose using your trusty spudger—think of it as giving your device a little wake-up call.
Tools Used
Step 18
- Now it's time to put your device back together! Just retrace your steps in reverse, and you'll be back in action in no time. If you hit a snag, remember, we're here to help! Feel free to schedule a repair if you need a hand.


