Asus Zenbook UX21e Cooling System Replacement
Duration: 45 minutes
Steps: 7 Steps
The Asus Zenbook UX21e has a straightforward cooling system that’s a breeze to remove, clean, or swap out. To get started, follow the battery replacement guide first. Then, peel away a protective plastic cover to access and disconnect the fan. Next up, unscrew and unplug the fan to take it out. Once the cooling system is out, make sure to clean off any old thermal paste and apply fresh thermal paste when reassembling the cooling system. You’ve got this!
Step 1


– Grab your trusty T4 Torx screwdriver and get ready! Unscrew the ten screws holding the bottom cover in place. After that, confidently slide the bottom cover straight back parallel to the computer—smooth like butter.
– Heads-up! There are two screw lengths here: eight of them are 3mm, while the two 5mm screws always belong in the two center holes along the back edge. Keep track of ’em to avoid any mix-ups!
Tools Used

Step 2


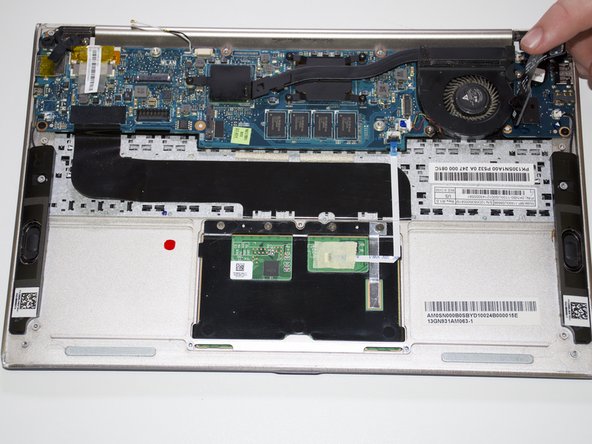
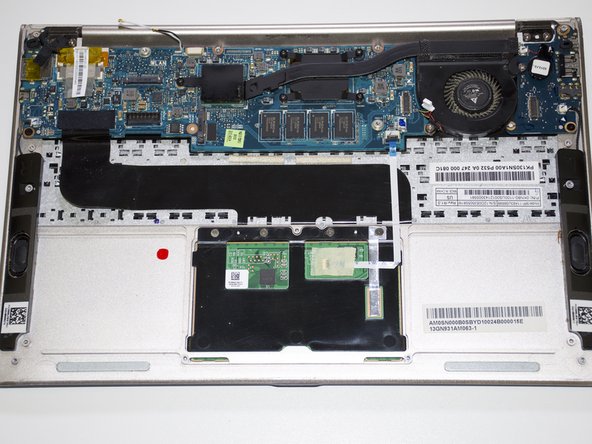
– Let’s get started! Using an opening tool and a little bit of finesse, gently lift the connector up from the tape wrapped around the connector wires and carefully pry it away from the motherboard. Take your time and be gentle, we’ve got this!
Tools Used

Step 3

There’s one hanging out at each corner and another chilling right in the center.
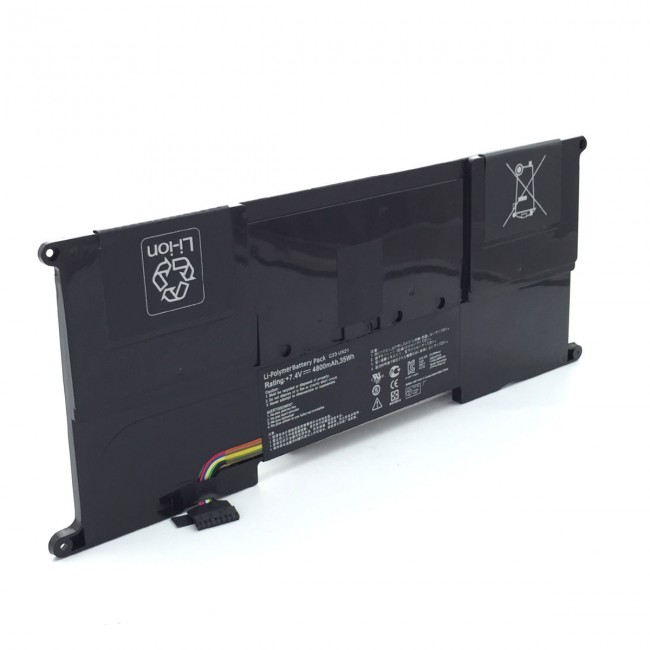
– Let’s get started! Remove the battery by taking out the five 3mm screws using a trusty Phillips #1 screwdriver.
Tools Used

Step 4


– Gently pull the battery straight up and lift it out of the device—no twists or turns needed!
Step 5


– Carefully lift and peel off the plastic piece labeled M3 10 sitting on top of the fan. Start from one edge and work your way across—it’s like opening a stubborn snack wrapper, but way cooler!
Step 6

– Gently pull the small white-and-blue connector out from its snug little socket to disconnect the fan from the motherboard.
Step 7


Four screws are chillin’ along the heat sink right above the CPU, one is hanging out on the smaller heat sink to the left of the CPU. Two are kicking back along the edge of the fan. Keep it steady and you’ll be golden!
– Grab your trusty Phillips #1 screwdriver and undo the seven 3mm screws holding the cooling system in place—you’re practically a pro already!
– Lift the cooling system out of the device with care; it’s like removing the crown jewel from a treasure chest.