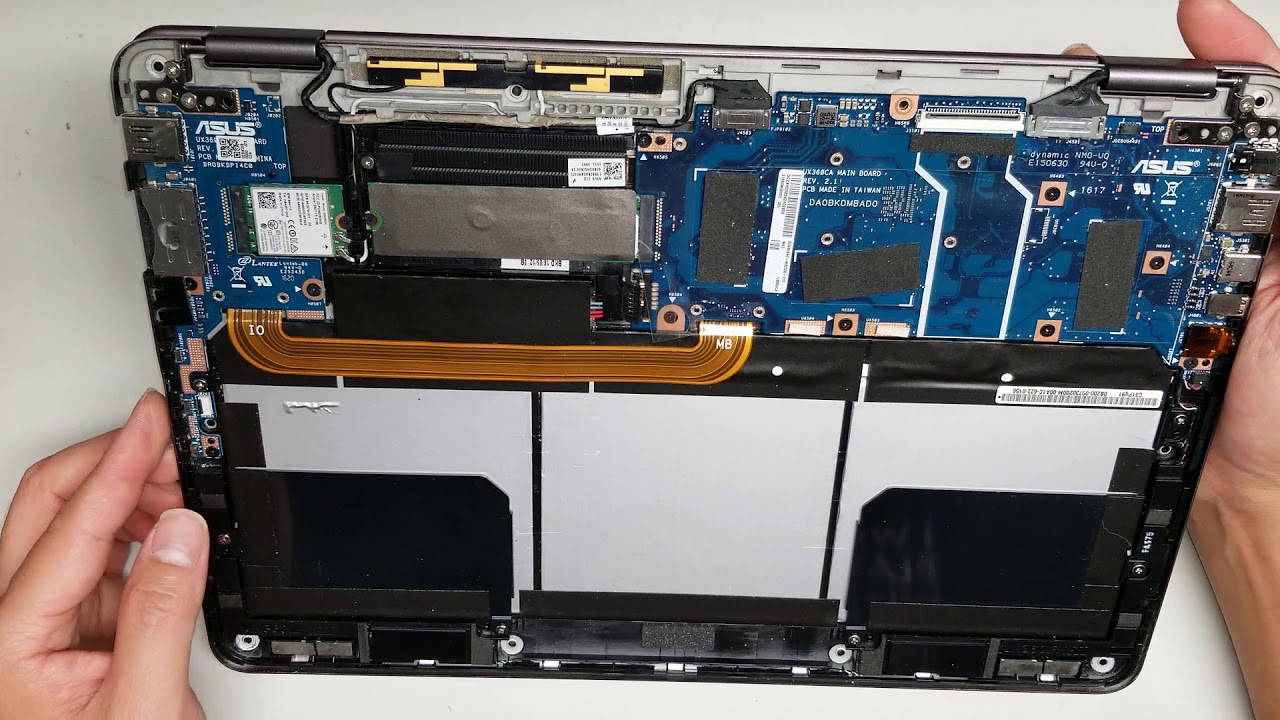
Asus ZenBook Flip UX360C Screen Replacement
Duration: 45 minutes
Steps: 5 Steps
Is your Asus ZenBook Flip (model UX360C) screen looking all blurry, cracked, or showing absolutely nothing? Don’t worry, you’ve come to the right place! Follow this guide to swap out that faulty screen and get back to enjoying your laptop. Your laptop sends signals to the LCD screen via an auxiliary cord, and when the screen gets damaged or cracked, it can result in fuzzy visuals or no image at all. Let’s fix that!
Step 1


– Take your trusty spudger and pop out the two rubber grommets from the front of the screen—no stress, just a gentle wiggle.
– Now, unscrew the two Phillips Head #1 screws (they’re 4mm long) that were hiding behind those grommets. Easy does it!
Tools Used

Step 2

– Grab a big plastic opening tool and carefully work your way around the edges of the screen to gently pop those two halves apart. You’re doing great!
Step 3

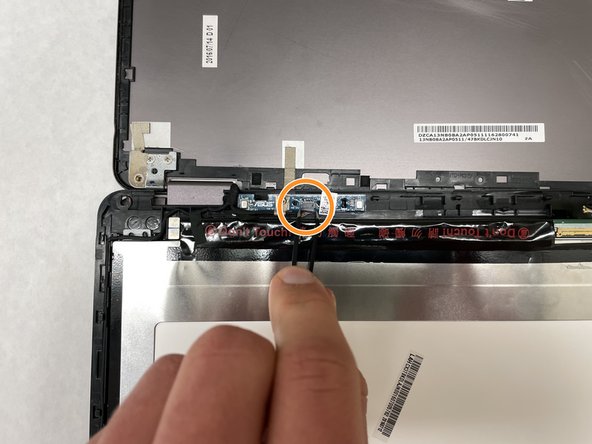
– Grab your trusty Phillips #00 screwdriver and carefully take out those two 2 mm camera screws. Easy, right?
– Next up, let’s unscrew that 2 mm Phillips #0 screw on the upper circuit board. Just one more to go!
– Now, go ahead and remove the 2 mm Phillips #0 screw on the lower circuit board. You’re almost there!
Step 4

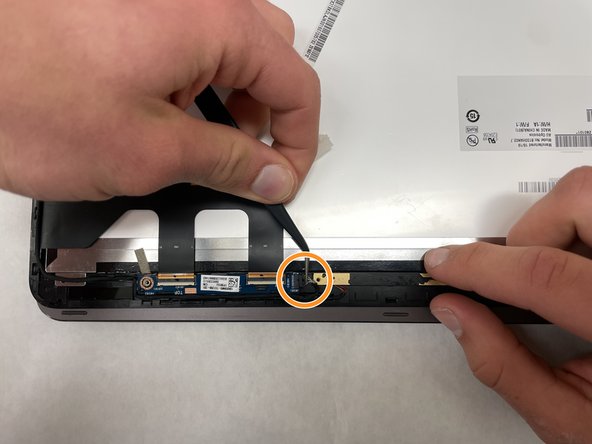
– Grab those tweezers and gently unplug the two ribbon cables from the upper part of the screen. You’re doing great!
– Now, let’s move on and detach the upper circuit board cable using the same technique. You’ve got this!
Tools Used

Step 5


– Ready to put everything back together? Just work your way through these steps in reverse. If anything feels off or you need a hand, you can always schedule a repair with Salvation Repair.
–