Asus ZenBook Flip UX360C Keyboard Assembly Replacement
Duration: 45 minutes
Steps: 4 Steps
Ready to give your Asus Zenbook Flip UX360C a fresh typing experience? Follow along as we guide you step-by-step through replacing the keyboard—no sweat, just some handy work and good vibes.
Step 1


– Flip that laptop over like a pro!
– Grab your trusty metal spudger and gently pop off those rubber feet from each corner of the laptop.
Tools Used

Step 2

– Turn your device upside down, then unscrew the eleven 5 mm Phillips #1 screws holding the case together.
Step 3

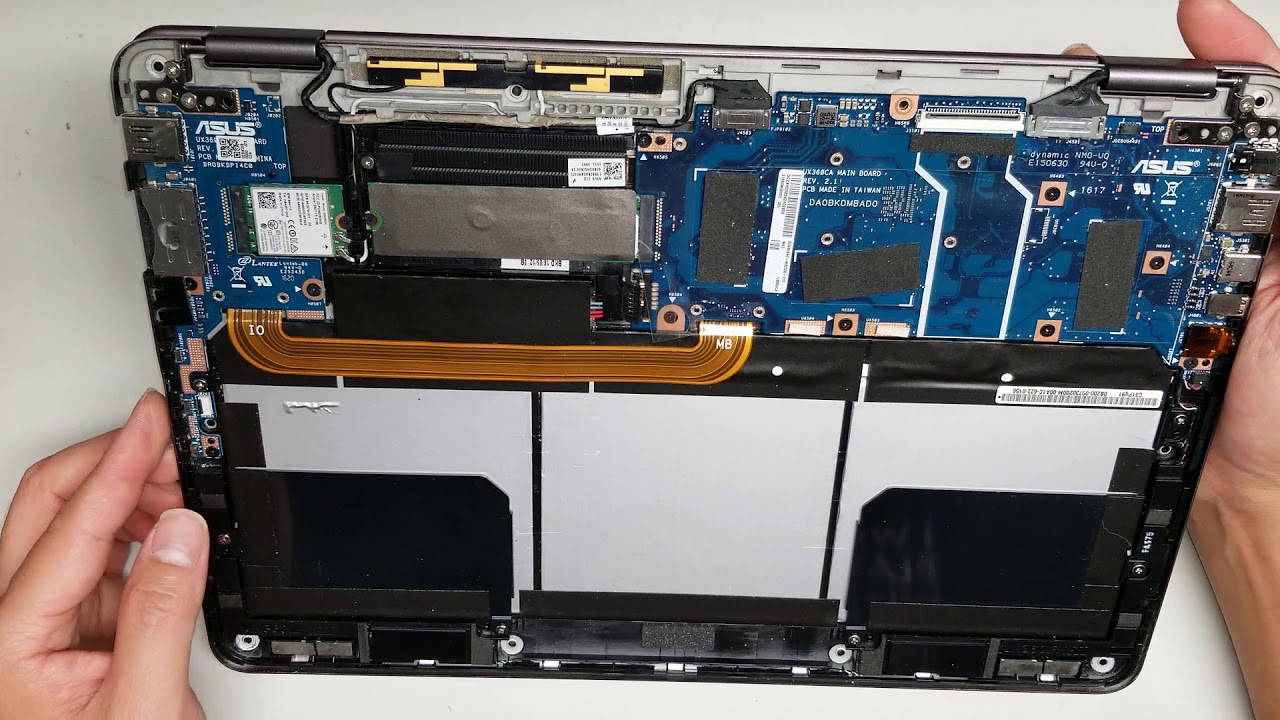
– Flip your device over so it’s facing up again.
– Take your opening tool and gently wedge it between the keyboard area and the bottom case. Slide it around the edges to carefully pop the keyboard assembly loose.
Step 4

– Gently disconnect the keyboard ribbon cable from the motherboard, making sure not to bend or damage the connector. If you need a hand with the process, you can always schedule a repair.