How to Replace iPhone 11 Battery Guide Step-by-Step DIY Tutorial
Duration: 45 minutes
Steps: 43 Steps
Hey there! Just a friendly reminder: if you run into any hiccups along the way, don’t hesitate to reach out for help. You can always schedule a repair!
Your iPhone’s battery is built to last for up to 500 charge cycles while keeping 80% of its capacity, which typically spans around 18-24 months. Beyond that, you’ll likely find yourself reaching for the charger more often, and iOS might let you know that your phone’s performance is taking a hit (in other words, it might be slower). Follow this guide to swap out your battery and get your iPhone running like new. If your battery’s swollen, handle with care. Note: After the swap, your iPhone might display a warning about the battery’s ‘genuineness’, even with original Apple parts. If everything’s working fine, feel free to ignore it. For the best performance, once you’re done, calibrate your new battery: Charge it to 100% and keep it plugged in for at least two more hours. Then, use your iPhone until it powers down from a low battery. Finally, charge it uninterrupted back to 100%. If you need help, you can always schedule a repair.
Step 1


Hey there! Before you dive in, make sure to drain that iPhone battery to below 25%. A fully charged lithium-ion battery can be a bit of a drama queen and might catch fire or even explode if it gets a little too much love. Stay safe and let’s get to fixing!
Hey there! Just a heads up – when you crack open your iPhone’s display, those waterproof seals are going to say bye-bye. Make sure you’ve got some replacement seals on deck before you dive into this step. Oh, and if you decide to put the pieces back together without swapping out the seals, just be extra cautious around liquids. Better safe than soggy!
– Turn off your iPhone before getting started with disassembly.
– Unscrew the two 6.7 mm pentalobe screws at the iPhone’s bottom edge.
Step 2


Hey there! If your opening pick goes in too deep, it might cause trouble for your device. Follow this cool step to mark your pick and keep your device safe.
– Measure 3 mm from the tip and mark the spot with a permanent marker.
Step 3


Put on those safety glasses to keep your peepers safe from any sneaky glass bits that might pop out during the repair.
Got a cracked iPhone screen? Pop some tape over that bad boy to keep the glass in place and protect those precious fingers while you work on the repair. Need a hand? You can always schedule a repair.
– Grab some clear packing tape and lay down overlapping strips over the iPhone’s screen until it’s completely covered. It’s like giving your phone a cozy blanket!
– If the suction cup isn’t playing nice in the next few steps, no worries! Just fold a sturdy piece of tape (like duct tape) into a handle and use that to lift the screen instead. You’ve got this!
Step 4


In the next three steps, we’re going to introduce you to the Anti-Clamp, a nifty little gadget we’ve created to make opening your device a breeze. If you don’t have the Anti-Clamp handy, no worries! Just skip ahead three steps for a different approach.
– Pull the blue handle backwards to unlock the Anti-Clamp’s arms.
– Slide the arms over either the left or right edge of your iPhone.
– Position the suction cups near the bottom edge of the iPhone—one on the front, and one on the back.
– Squeeze the cups together to apply suction to the desired area.
Step 5


– Go ahead and pull the snazzy blue handle forward to lock those arms in place.
– Now, give that handle a cool 360-degree turn clockwise or until you see those cups starting to stretch.
– Just keep an eye on those suction cups, making sure they stay in perfect alignment. If they start to slip out of place, just loosen them up a bit and realign those stylish arms.
Step 6


– Get that iOpener nice and toasty, then slide it through the Anti-Clamp’s arms.
– Fold up that iOpener and gently place it along the bottom edge of your iPhone.
– Chill for a minute to let the adhesive do its thing and create a gap for you.
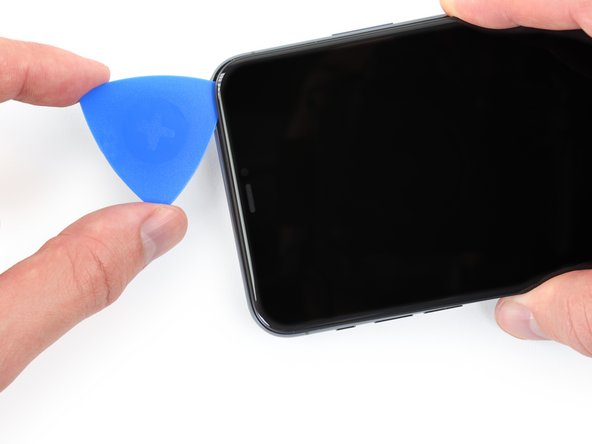
– Gently slide an opening pick into the gap beneath the screen and plastic bezel, avoiding the screen itself.
– Skip the next three steps like a boss.
Tools Used

Step 7

A bit of gentle heat along the bottom edge of your iPhone softens up that adhesive, making it a breeze to pop open.
– Grab your trusty hairdryer, heat gun, or whip up an iOpener, and gently warm the lower edge of your iPhone for about a minute. This will help loosen up that sticky adhesive hiding underneath, making your repair journey a breeze!
Tools Used
Step 8


– If you’re rocking a single suction handle, stick it to the bottom edge of the phone, just steer clear of that curvy glass part. You’ve got this!
Tools Used

Step 9


The adhesive keeping the display snugly in place is super strong, so getting that first gap open requires a bit of muscle. If you’re struggling to create a gap, try applying a little more heat and gently rocking the screen up and down to loosen the adhesive. Once you’ve got a nice gap, you can slide in your tool and keep going!
– Give that suction cup a good ol’ tug with steady, even pressure to create a teensy gap between the front panel and rear case.
– Now, let’s slide an opening pick right into that gap.
Step 10


– Swing that opening pick around the bottom left corner and glide it up along the left side of your iPhone. Slice through the adhesive that’s hugging the display tight.
Step 11

Hey there! Just a heads up, steer clear of the delicate cable running along the right edge of your iPhone. Be gentle in that area to avoid causing any harm to the cable.
Step 12


– Slide your pick back into the bottom edge of the iPhone and gently glide it up the right side to keep peeling away that pesky adhesive!


Step 15

– Give that little nub on the suction cup a gentle tug to pop it off the front panel. If you need help, you can always schedule a repair.
Step 16


Remember, don’t rush the process! Those delicate ribbon cables are still holding things together.
– Gently lift the iPhone’s display from the left side, just like flipping open a book to delve into a great story.
– Prop the display up against something sturdy to keep it steady while you work your magic on the phone.
– When putting it all back together, carefully position the display, align the clips at the top, and press that edge down with confidence. Once it’s snug, snap the rest of the display into place. If it feels a bit stubborn, give those clips a quick inspection to ensure they’re in tip-top shape and not bent out of line.
Step 17


– Unscrew those two 1.3 mm Y000 screws holding the battery cover bracket in place and let’s get this show on the road!
– Now, while you’re putting things back together, why not power up your iPhone and give everything a quick test before sealing the display? Just remember to completely power it off again before diving back into the repairs.
Step 18

– Time to say goodbye to that pesky bracket! Just give it a gentle nudge, and it should come right off.
Step 19


– Grab a spudger or a clean fingernail and carefully pop the battery connector out of its socket on the logic board.
– Gently bend the connector away from the logic board to avoid any accidental contact that might power up the phone during your repair.
Tools Used

Step 20


– Grab your trusty Y000 driver and get ready to tackle those six 1.3 mm screws holding the logic board cover bracket in place. You’ve got this!
Step 21

– Time to say goodbye to that bracket! Just give it a gentle nudge and remove it with care.


Step 25


– Hey there! Grab your trusty Y000 driver and let’s tackle those four pesky 1.2 mm screws to free up the lower battery connector cover. You’ve got this!
Step 26

– Time to get down to business! Start by popping off the cover that protects the lower battery connector. You’ve got this!
Step 27


– Grab a spudger and with a positive attitude, gently disconnect the lower battery flex cable by lifting it straight up from its socket.
Tools Used
Step 28


– Grab that trusty spudger and disconnect the Taptic Engine flex cable. Gently pry it straight up from its socket. If you need help, you can always schedule a repair.
Tools Used


Step 31


– Grab your trusty Y000 driver and get ready to tackle those three 1.3 mm screws holding down the Lightning flex cable bracket. You’ve got this!

Step 33


– Gently prod and pop both of the Lightning flex cable connectors from the Logic board. If you need help, you can always schedule a repair
Step 34


– Carefully lift the Lightning flex cable and give it a slight bend towards the bottom edge of the iPhone. This will make it easier to access the battery hiding below!
Step 35


If the strips happen to break, no need to stress! They don’t always play nice. Just keep on reading for some handy tips on how to tackle those pesky broken strips.