Asus VivoBook E203MA-TBCL432B Headphone Jack and USB Port Replacement
Duration: 45 minutes
Steps: 7 Steps
If your headphone jack or USB port isn’t playing nice anymore, don’t stress! You can swap them out with just a Phillips #0 screwdriver and a plastic opening tool. The screwdriver handles the screws on the bottom panel and those on the headphone jack/USB port circuit board. It’s a straightforward fix that doesn’t require any fancy skills—just a bit of elbow grease. Need help? You can always schedule a repair if you’re stuck!
Step 1

Closing your laptop first makes swapping the battery way less tricky.
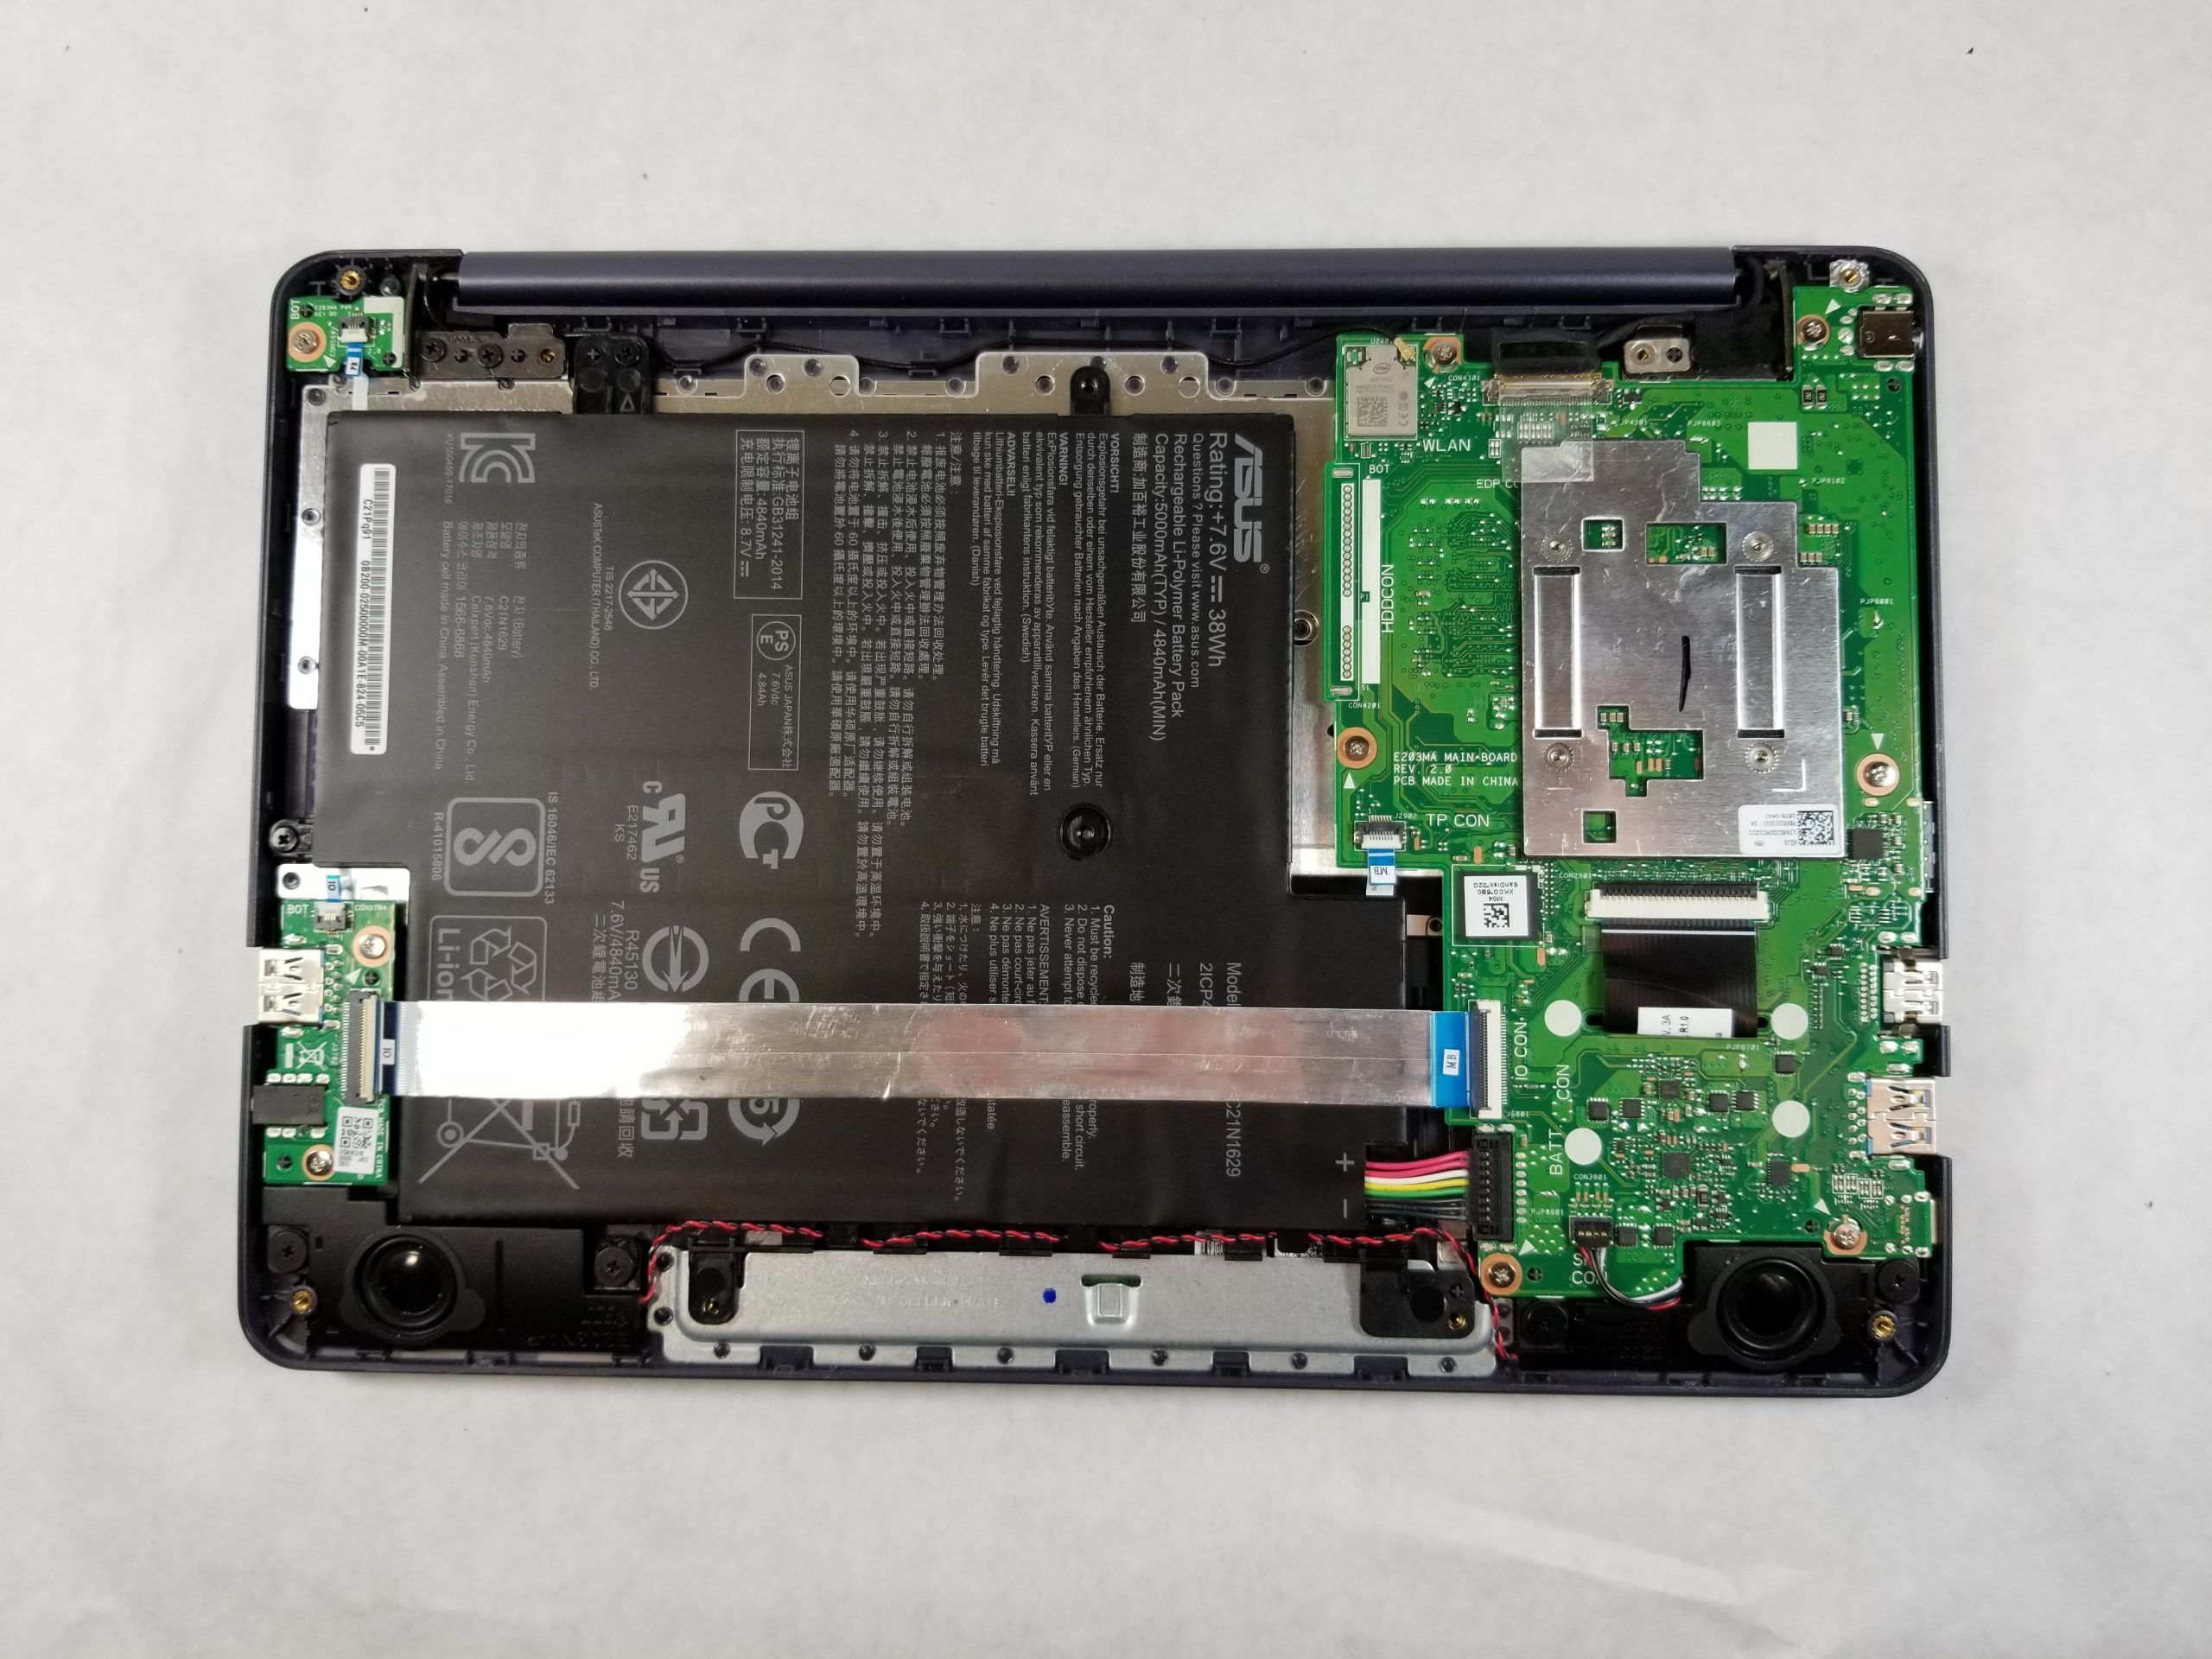
– Flip your laptop so the bottom panel is facing up, with the hinge farthest from you and the ASUS logo chilling against the table.
Step 2


The 8 screws in red are all the same size—5 mm, so no need to worry about mixing them up. Just make sure they don’t get swapped with the 2 longer 7 mm screws marked in orange. Keep them in their places, and you’re good to go!
– Grab your Phillips #0 screwdriver and pop out those eight 5 mm screws hanging out on the back panel.
– Next up, get those two 7 mm Phillips #0 screws out of there too.
Tools Used

Step 3


Grab a plastic tool for this part—metal ones are a little too rough and could scratch up your panel.
– Slide your opening tool between the back panel and the rest of the laptop—think of it as gently persuading the panel to let go.
– Work your way around the edges, lifting the panel bit by bit with your tool. It’s a little like popping the lid off a stubborn snack container—steady wins the race.
– Once there’s a nice gap all the way around, carefully pull the back panel off with your hands. Set it aside and admire your handiwork!
Tools Used

Step 4


– Gently disconnect the ribbon cable positioned above the battery. No rush, take your time!
– Flip the locking tab on the ZIF connector up, then carefully slide the cable out. It’s like a little puzzle, but you’ve got this!
Step 5
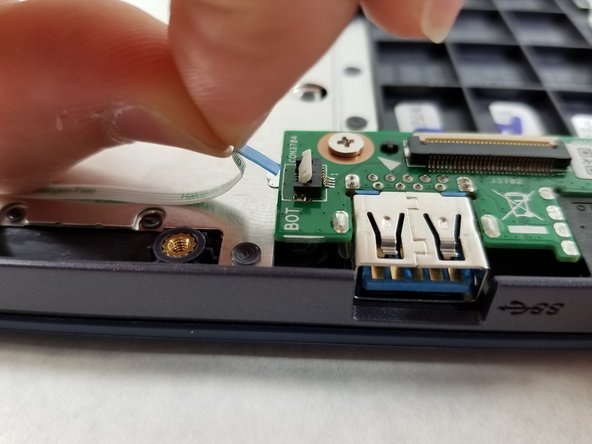

– Gently disconnect the small white ribbon cable that connects to the part holding the USB and headphone jack.
– Start by lifting the white locking tab that secures onto the blue tab, then carefully pull the cable out by gripping the blue tab. If you need help, you can always schedule a repair.
Step 6
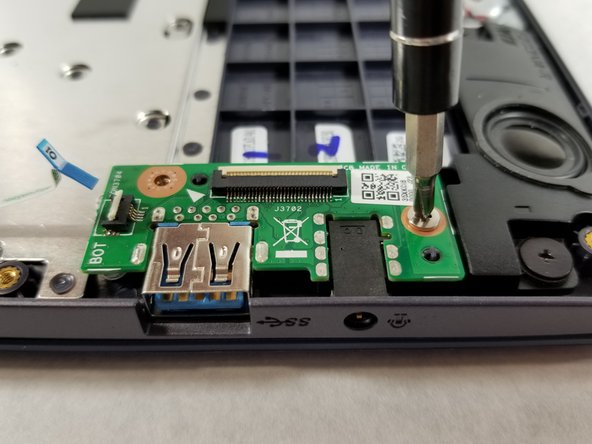

– Grab your Phillips #0 screwdriver and carefully unscrew the two 2 mm screws located at the top left and bottom left corners of the component housing the headphone jack and USB port. Keep those screws safe—you’ll need them later! If you need help, you can always schedule a repair.
Tools Used
Step 7
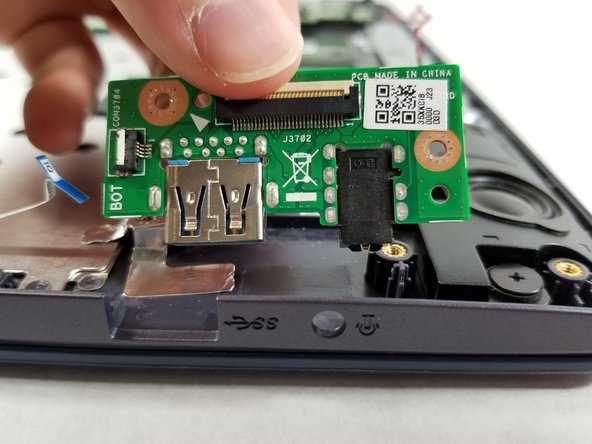

– Gently lift the headphone jack and USB circuit board straight up and out of the laptop—no wrestling moves needed!
Success!