DIY Guide to Replace Apple iPhone SE Battery Step-by-Step
Duration: 45 min.
Steps: 20 Steps
Welcome to your DIY adventure! In this guide, we’ll walk you through the steps to swap out your iPhone SE’s tired battery all by yourself. This handy fix is just what you need if your iPhone decides to take a nap during those intense gaming sessions, refuses to charge, or just won’t turn on anymore. Let’s get that battery back to life and keep your iPhone SE buzzing! Ready? Let’s dive in!
Step 1
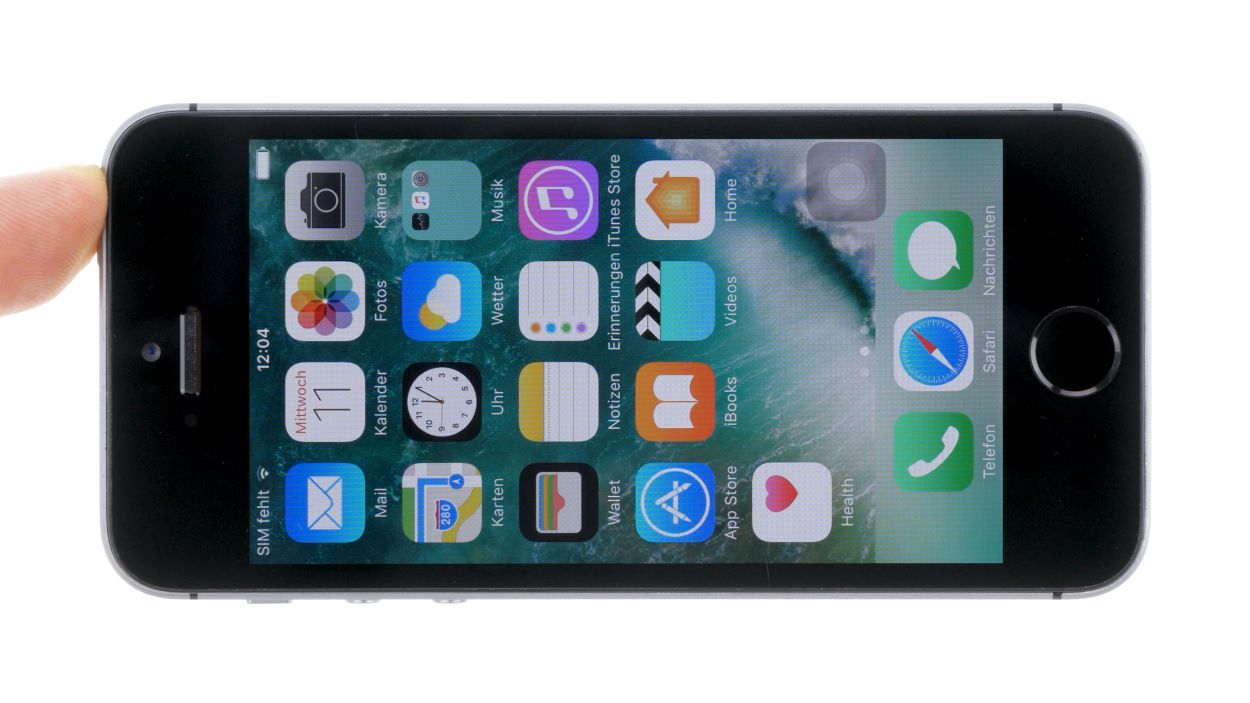
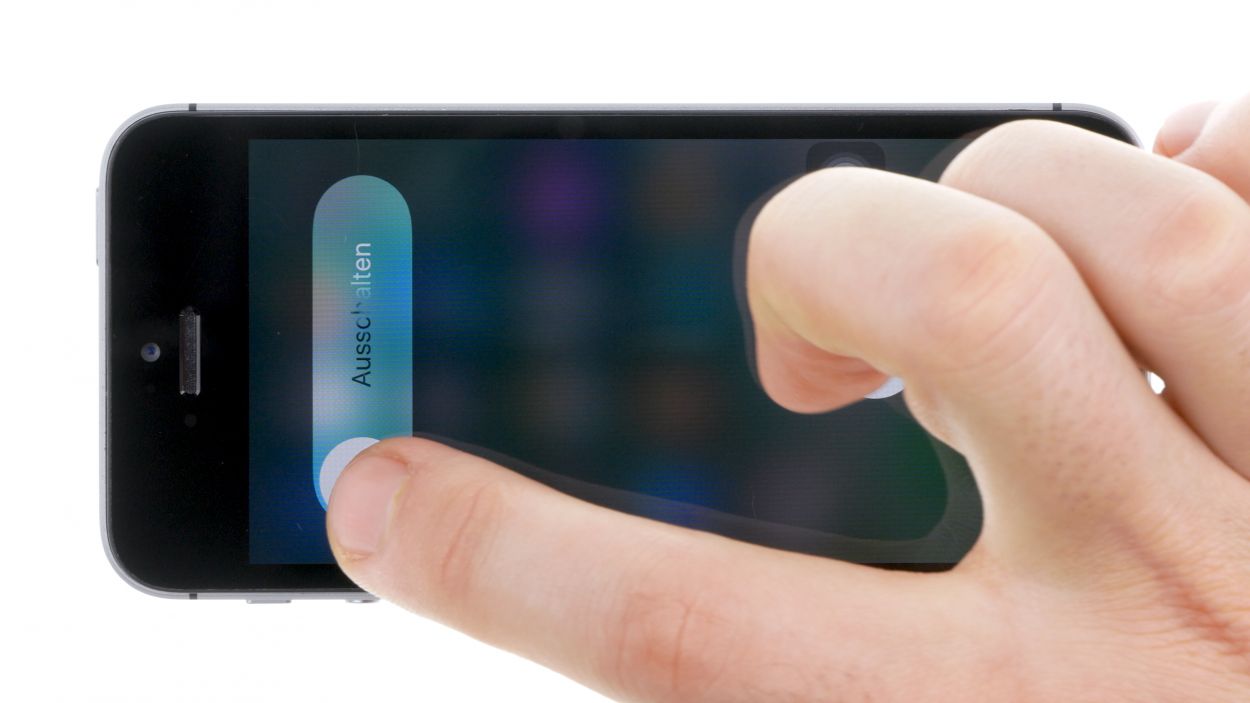
– First things first, let’s give your iPhone a little break! Power it down completely to keep it safe during the repair.
– Give that standby button a friendly press for about three seconds until the magical slider pops up.
– Slide it from left to right like you’re closing a curtain on a show. Your iPhone will take about ten seconds to completely shut down, so hang tight!
Step 2
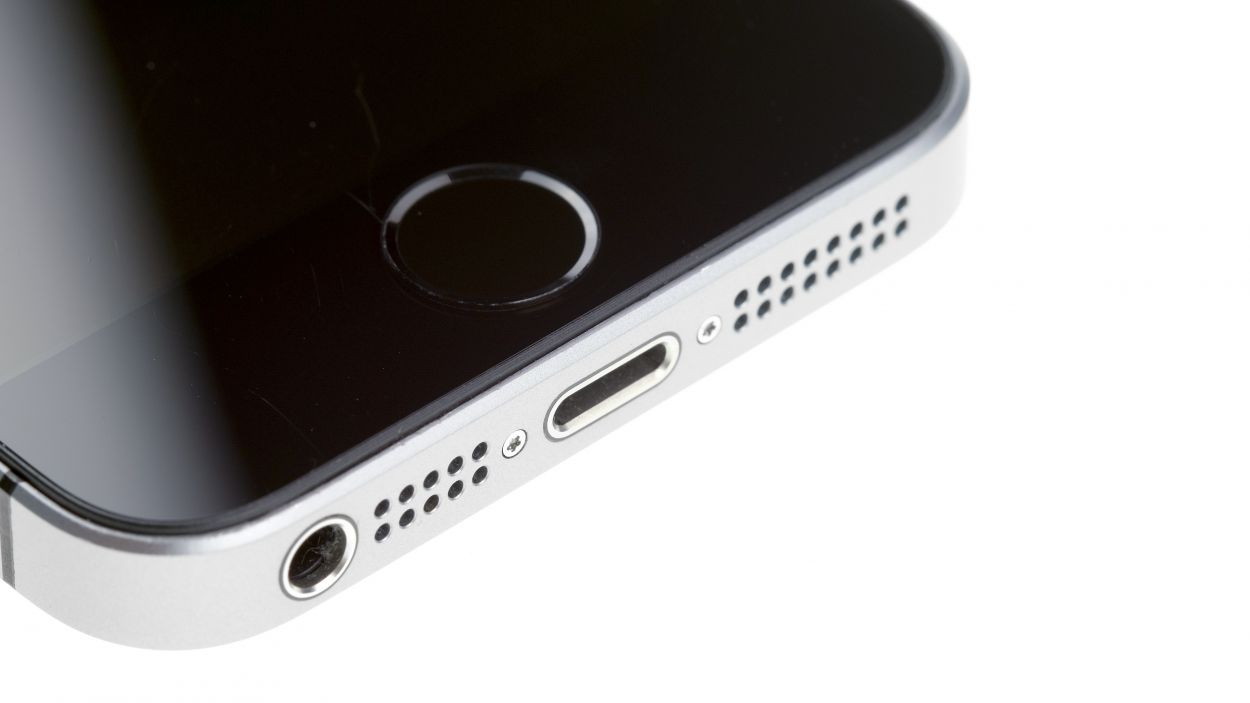

2 × Pentalobe
– Grab your trusty pentalobe screwdriver to pop open that iPhone SE like a pro!
– Carefully unscrew the two pentalobe screws at the bottom of the enclosure, right next to the Lightning connector. Don’t forget to tuck those screws away in the same box so they don’t wander off!
Step 3
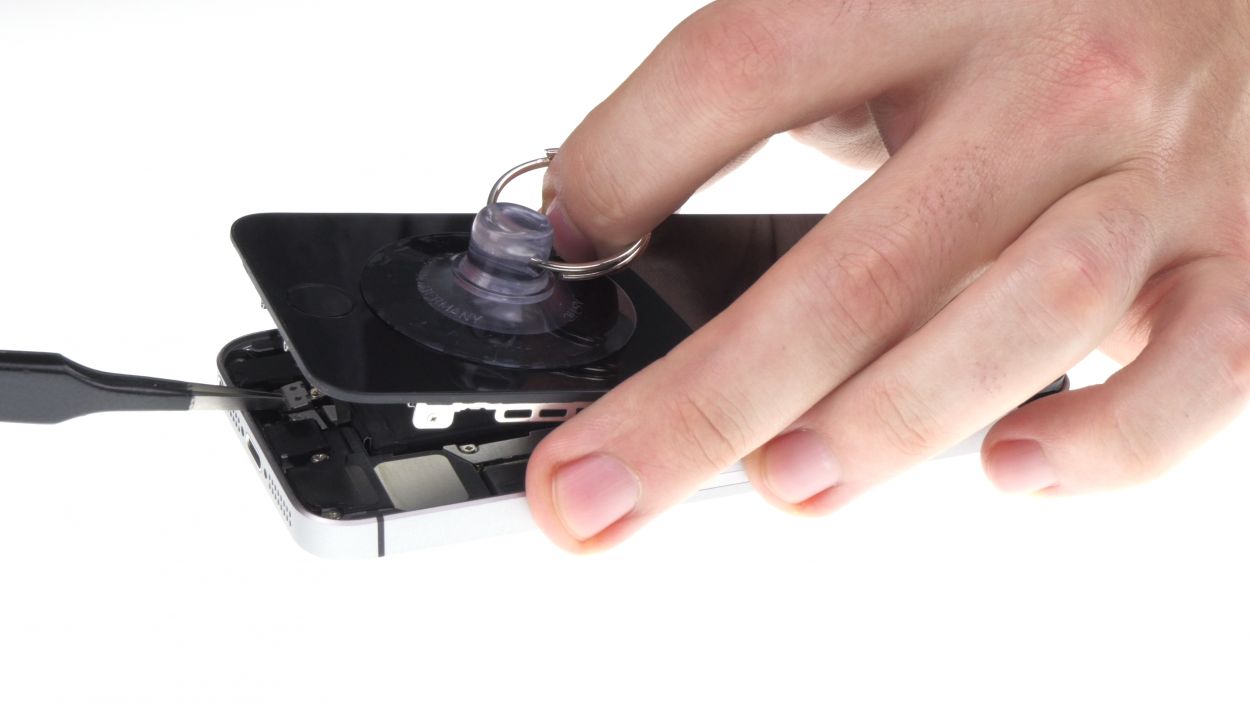
Watch out for pesky shards of glass! Keep your fingers safe while working on your device.
– Place your iPhone SE on a soft, clean surface to keep that back nice and scratch-free.
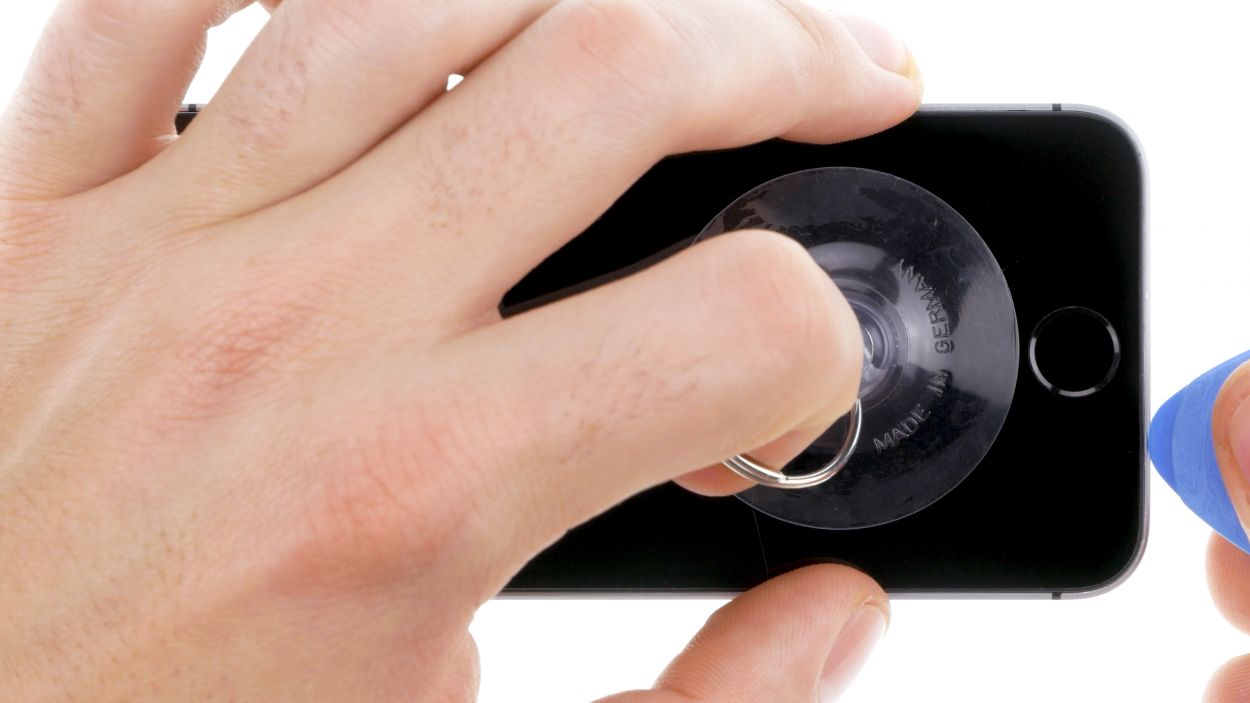
– Ready to lift the display? Grab a suction cup and a hard plastic pick. If your screen is looking a bit shattered, cover it with tape to avoid any glassy surprises. Safety first!
– Stick the suction cup over the Home button if you can (if not, just put it nearby). While you gently pull up the display with the suction cup, use that hard plastic pick to nudge down on the aluminum frame. At the same time, slide the pick between the aluminum frame and the display. This might take a few tries, but you’ve got this!
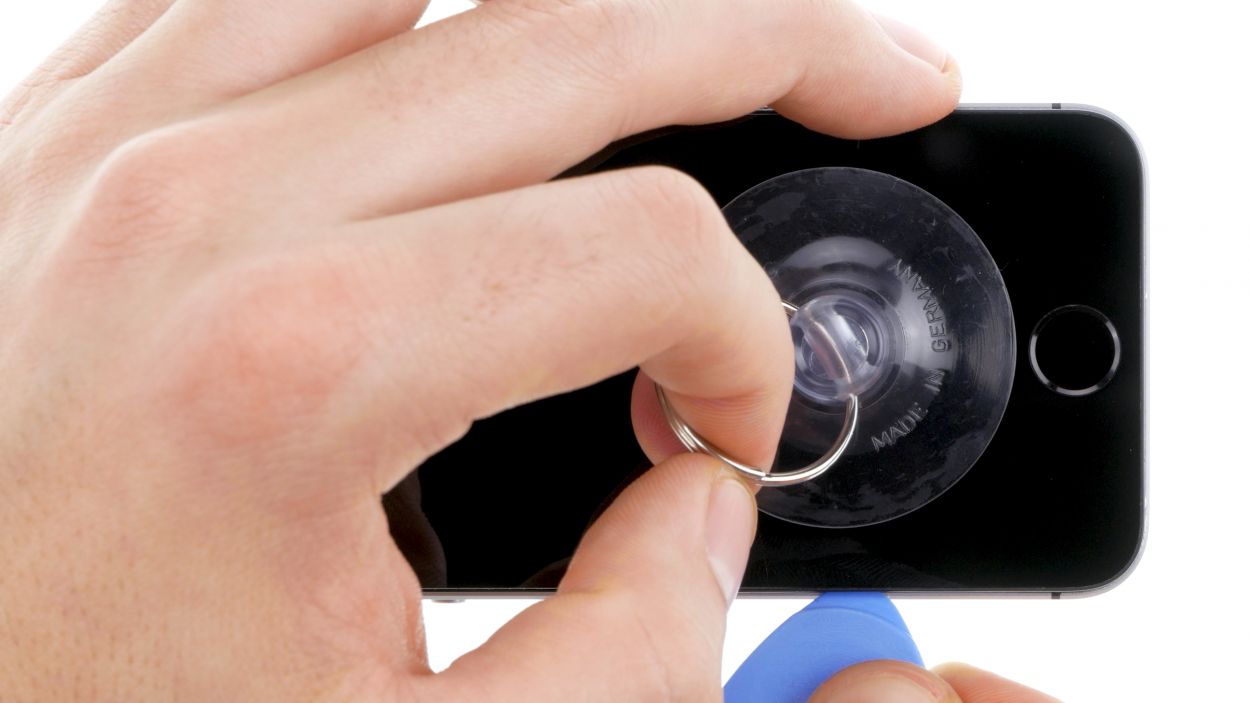
– Once you create a tiny gap, you can gently twist the pick to open it up a bit more.
– When you can lift the display a few millimeters, carefully work your way around the edges until it’s loosened on both sides. But hold on! Don’t fully detach the display just yet; you need to disconnect the Home button first.
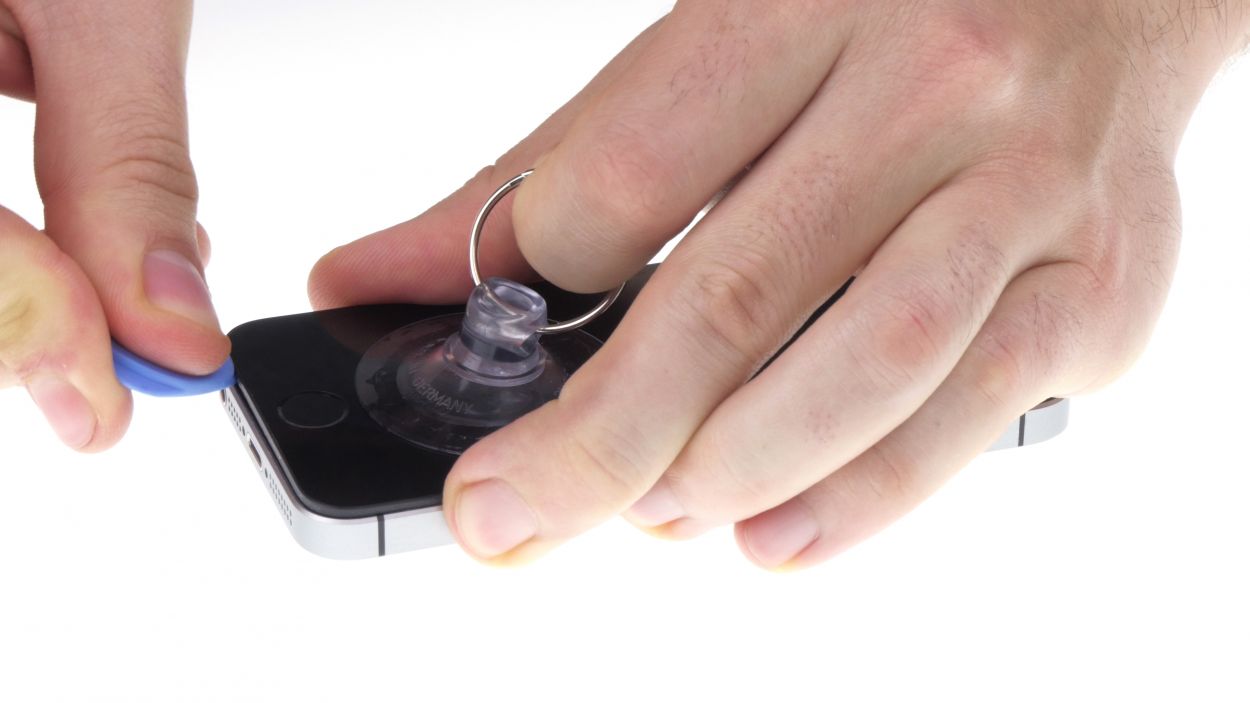
– There’s a metal cover hiding the Home button. Use a pair of tweezers to gently pry that cover off.
– Once the cover is off, you can disconnect the Home button from the flexible flat Lightning cable.
Step 4

2 × 1.5 mm Phillips
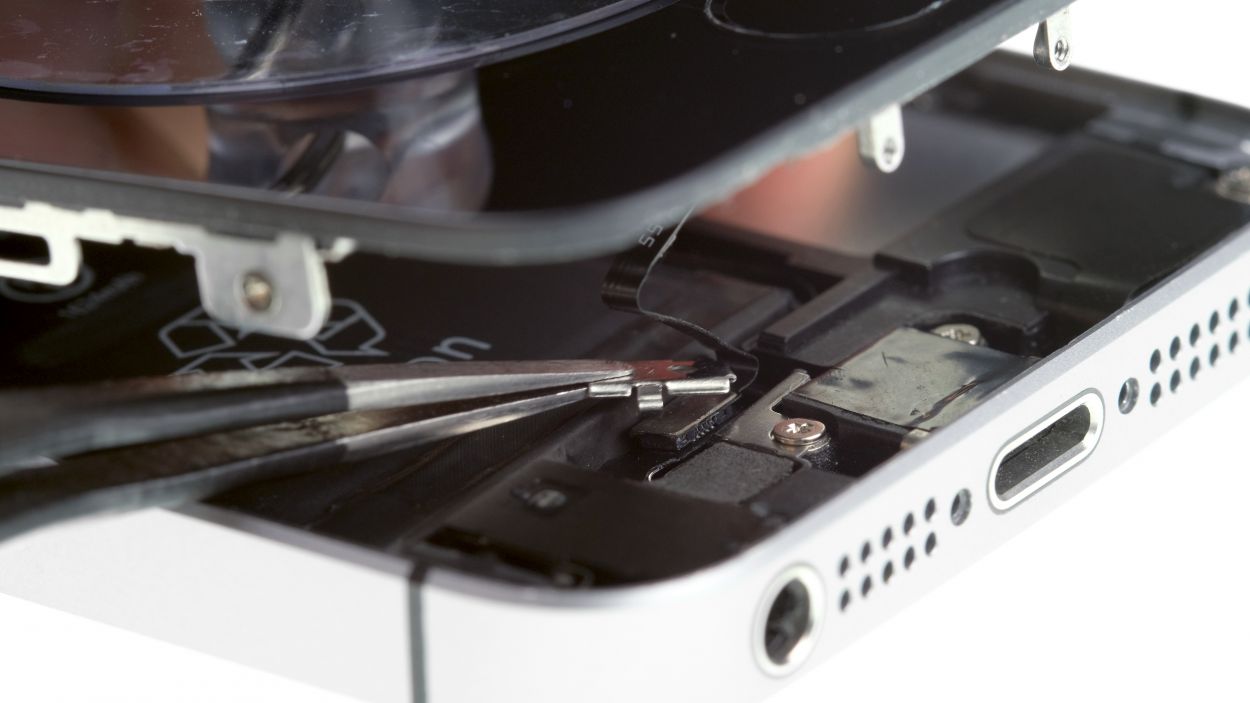
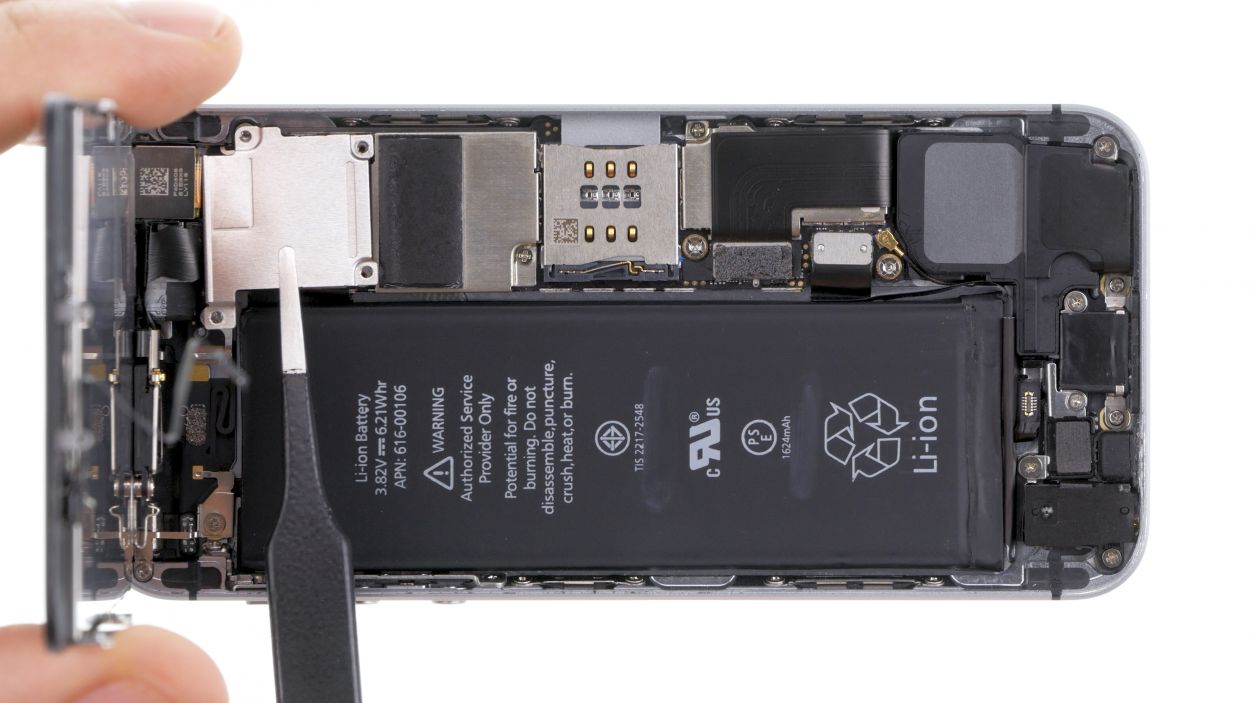
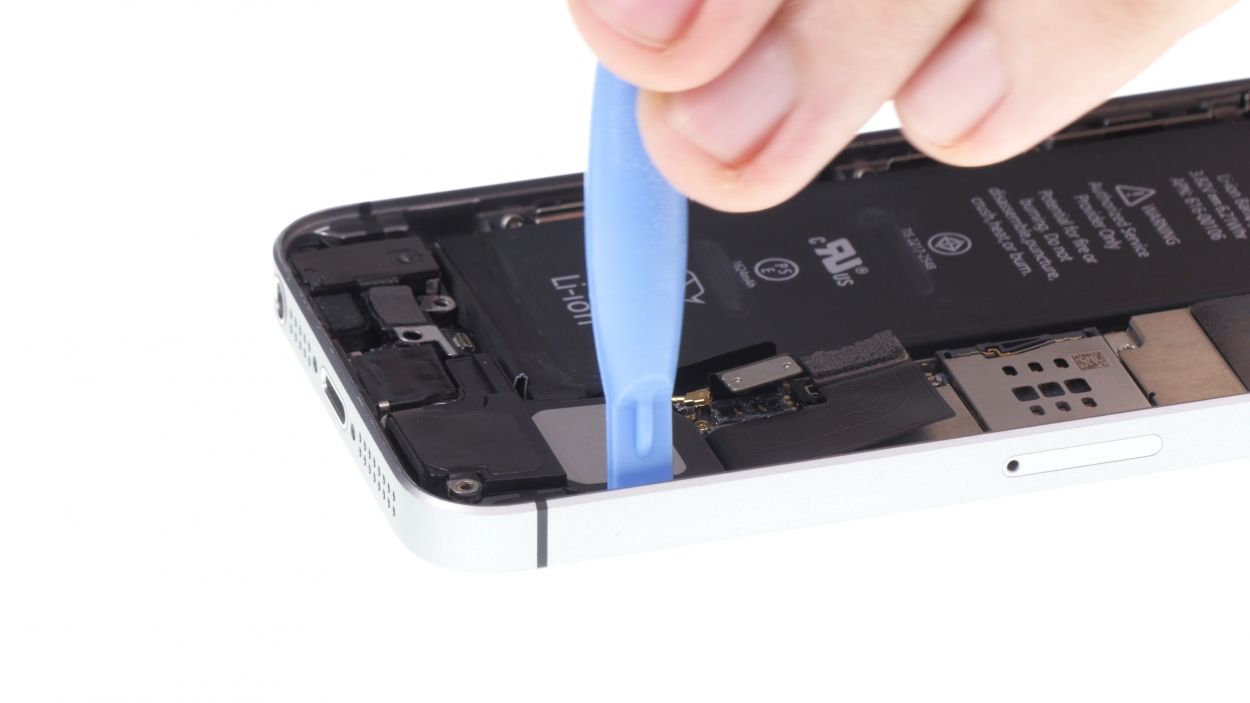
– Underneath a cover, you’ll find the battery contact and the flexible flat Lightning cable contact, all snug and secure. This cover is held in place by two Phillips screws. Grab your Phillips screwdriver and unscrew those screws, then carefully lift the cover using your tweezers. Don’t forget to keep all the little parts in the same compartment of your organizer tray so they don’t play hide and seek!
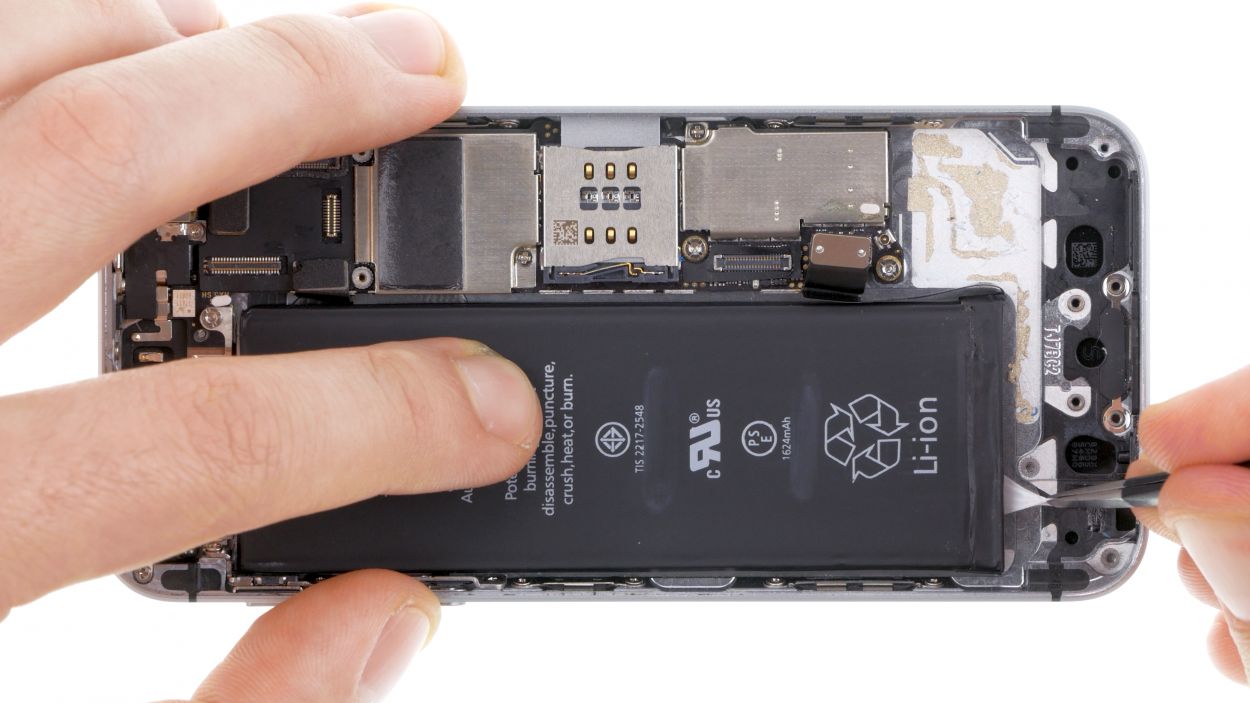
– Now, let’s gently free the battery contact using your spudger. Just slide the pointed tip of the spudger ever so slightly beneath the connector. And hey, if you don’t have a spudger handy, your fingernail can be a great alternative!
Step 5
1 × 1.4 mm Phillips
1 × 1.5 mm Phillips
2 × 1.1 mm Phillips
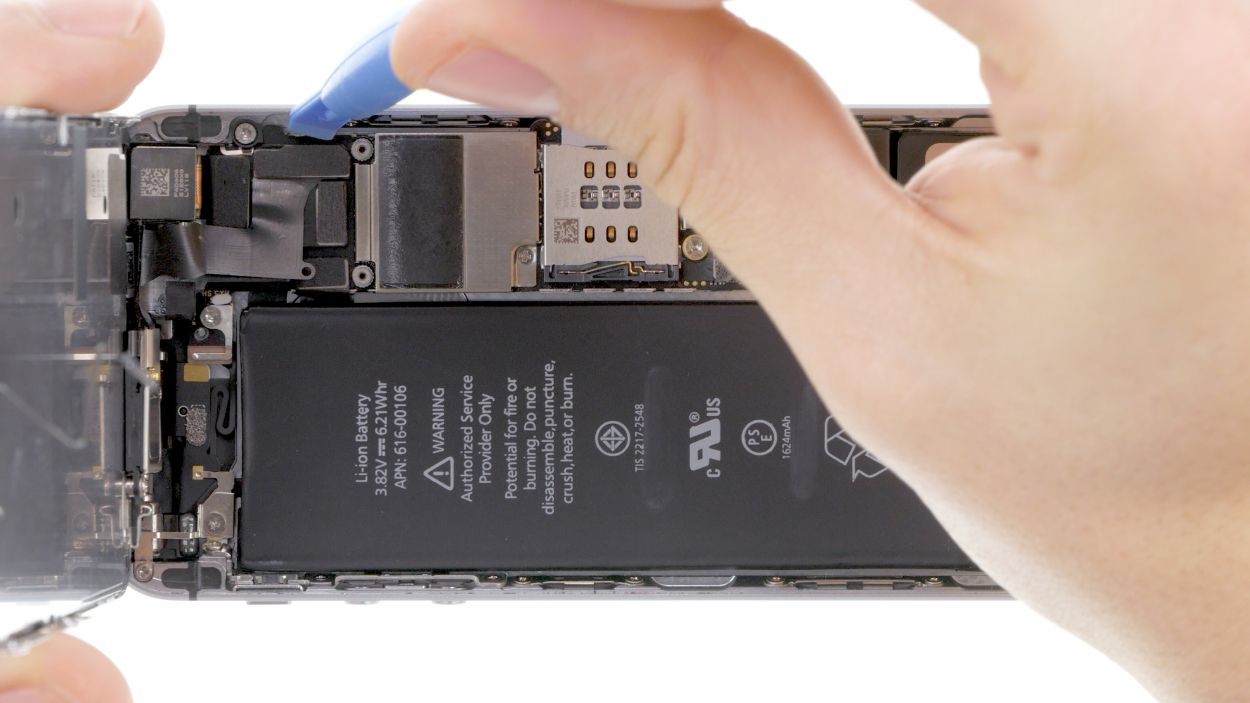
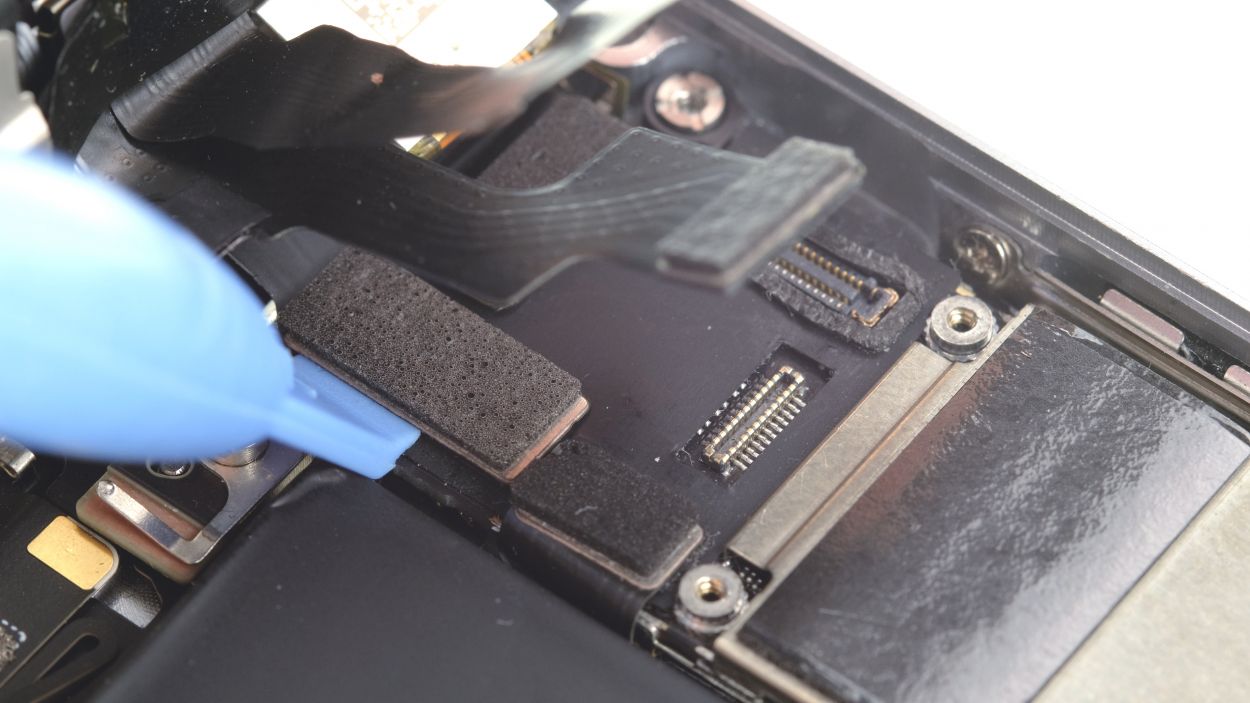
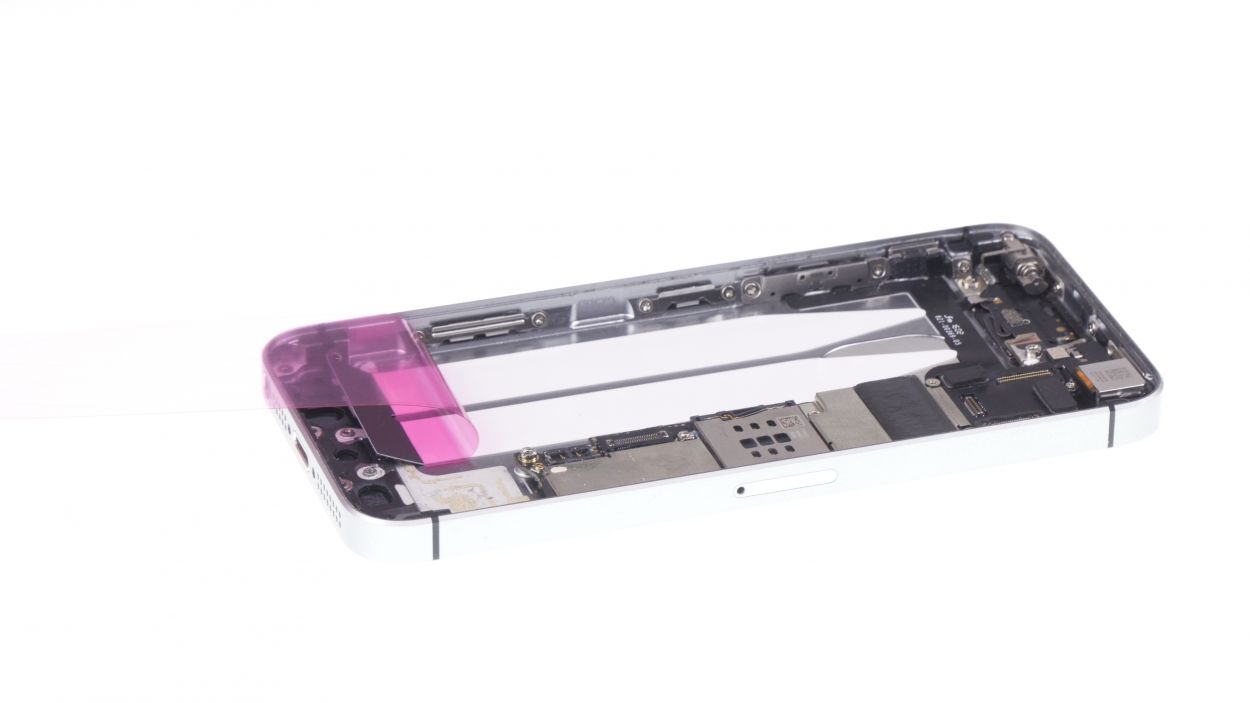
– To kick things off, grab your Phillips screwdriver and tackle those four screws holding the silver cover in place. Make sure to keep them all in one spot so they don’t go on a little adventure! Once you’ve got them out, gently lift that cover off like you’re unveiling a masterpiece.
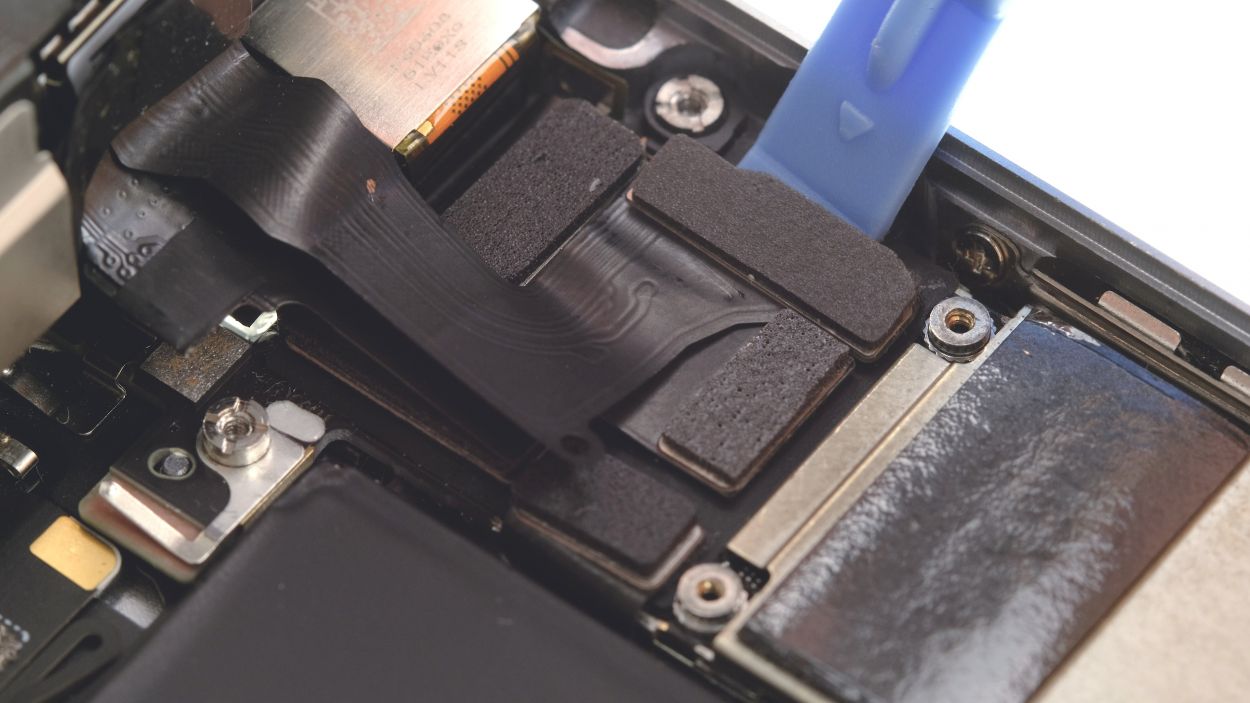
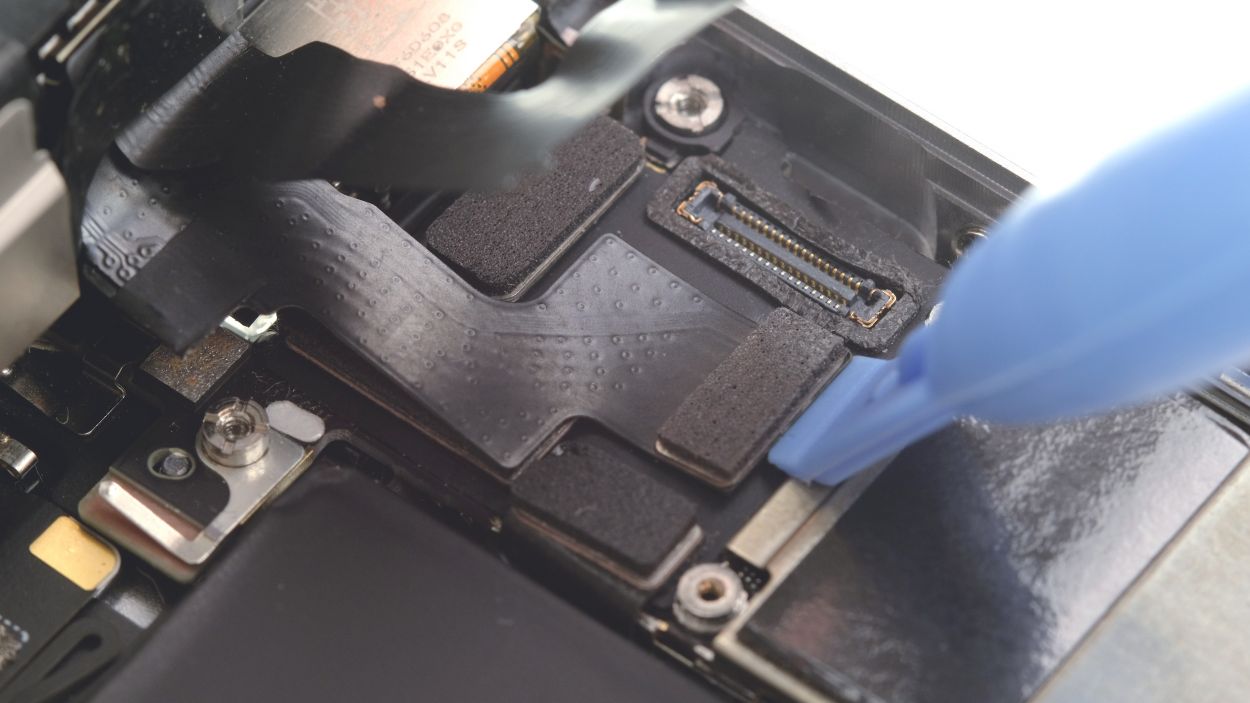
– Next up, it’s time to disconnect three connectors that are playing a game of overlap. Follow the order shown in the image for a smooth operation. Take your spudger and place its pointed tip just below each connector. With a gentle lift, you’ll have them out in no time! Remember, slow and steady wins the race!
Step 6

Lightning connector
Antenna
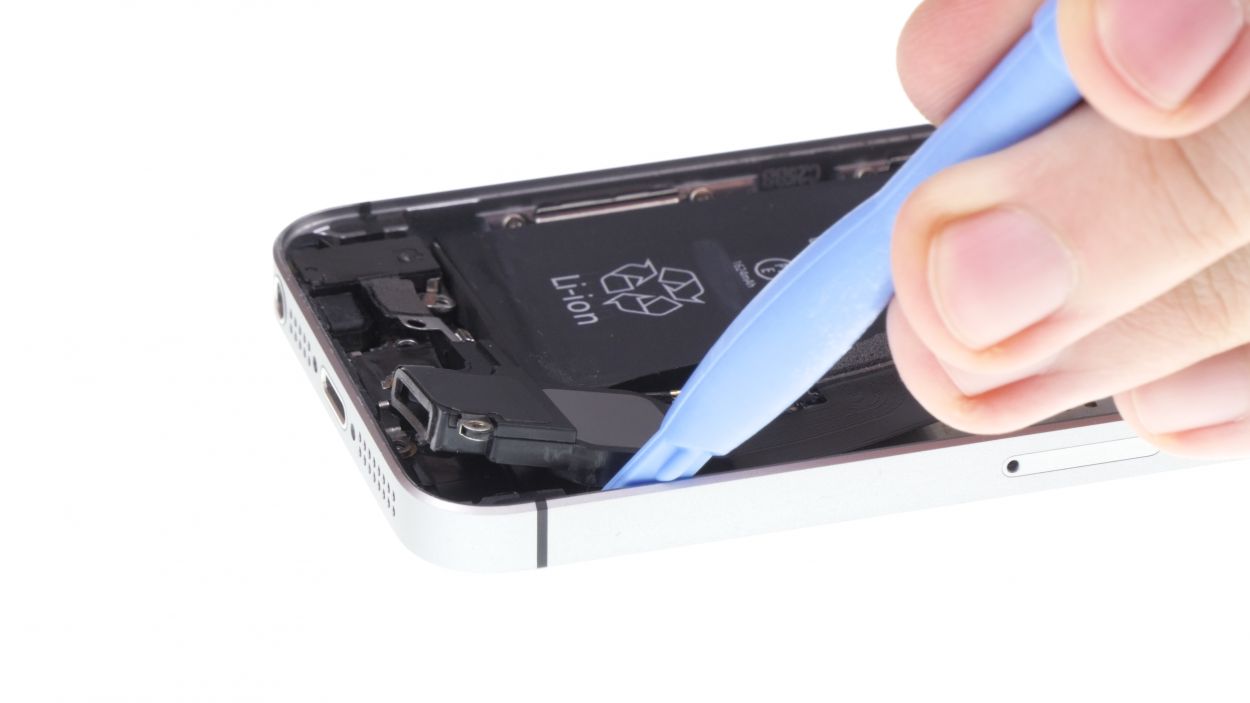
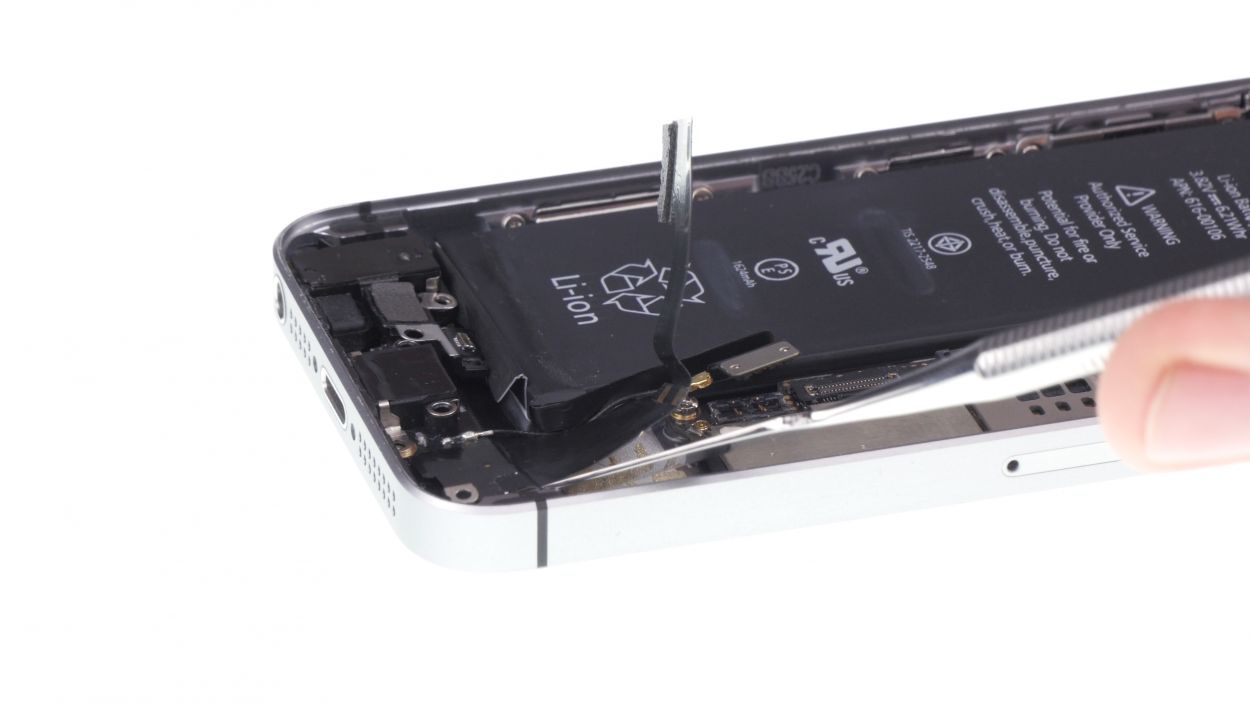
– Time to get a little hands-on! Start by disconnecting the plug connection on the Lightning connector’s flex cable. Take your spudger and gently slide the pointed tip just below the connector and give it a little lift. The flex cable might be a bit shy since it’s lightly glued to the back cover, so carefully detach it and fold it over like a pro!
– Next up, use that trusty spudger to free the antenna cable from the logic board. You’re doing great!
Step 7
1 × 3.0 mm Phillips
2 × 3.3 mm Phillips
2 × 1.3 mm Phillips
2 × 2.7 mm Phillips
– Time to unleash your inner handyman! Grab that trusty Phillips screwdriver and remove the seven screws like a pro. Make sure to stash those screws in different containers so they don’t play hide and seek later on.
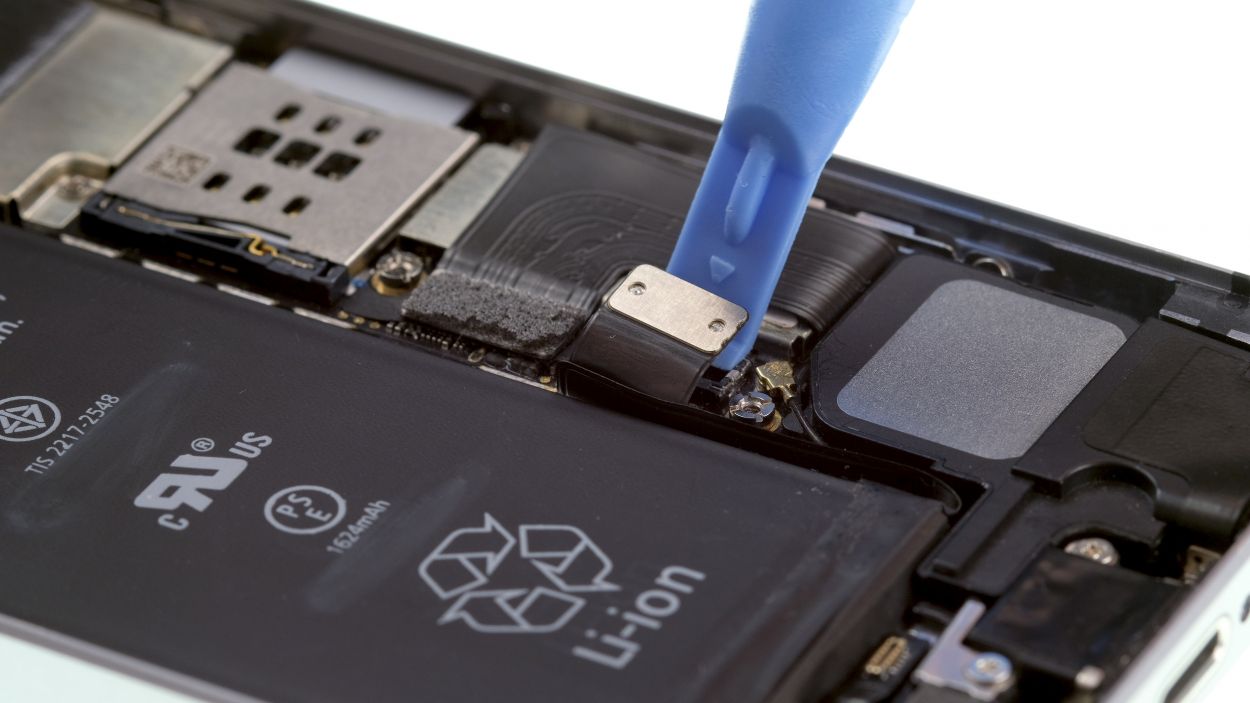
Step 8

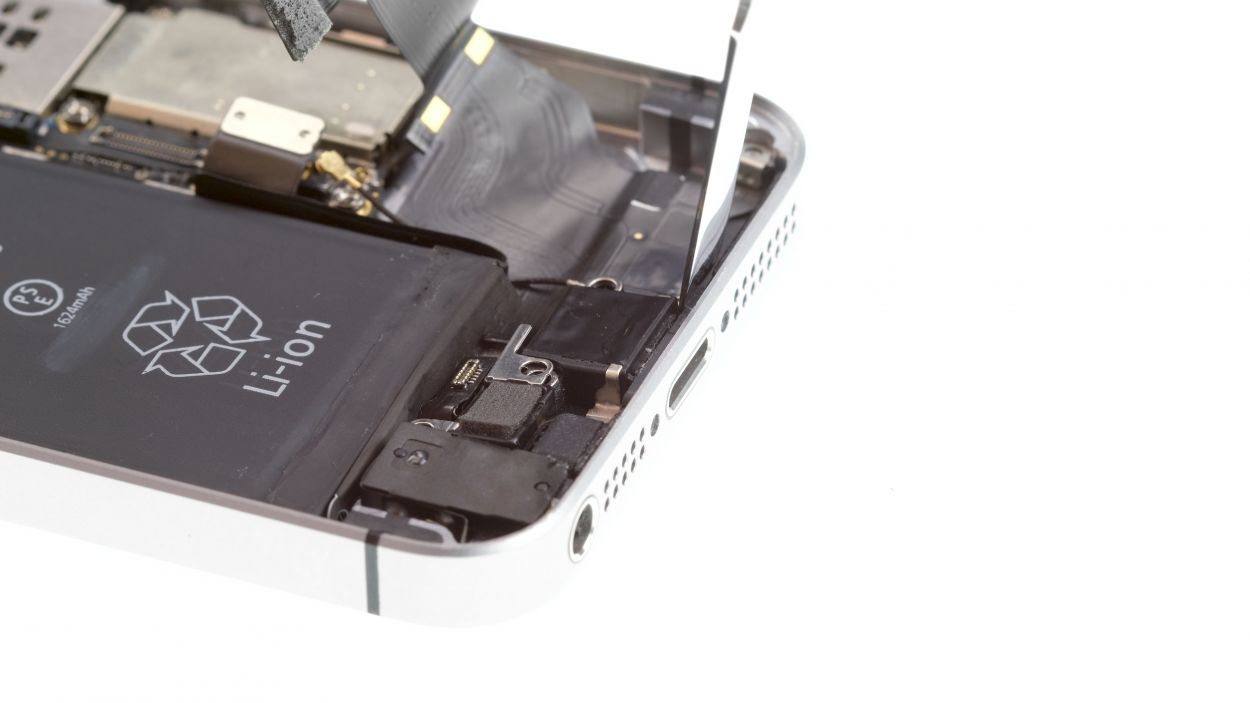
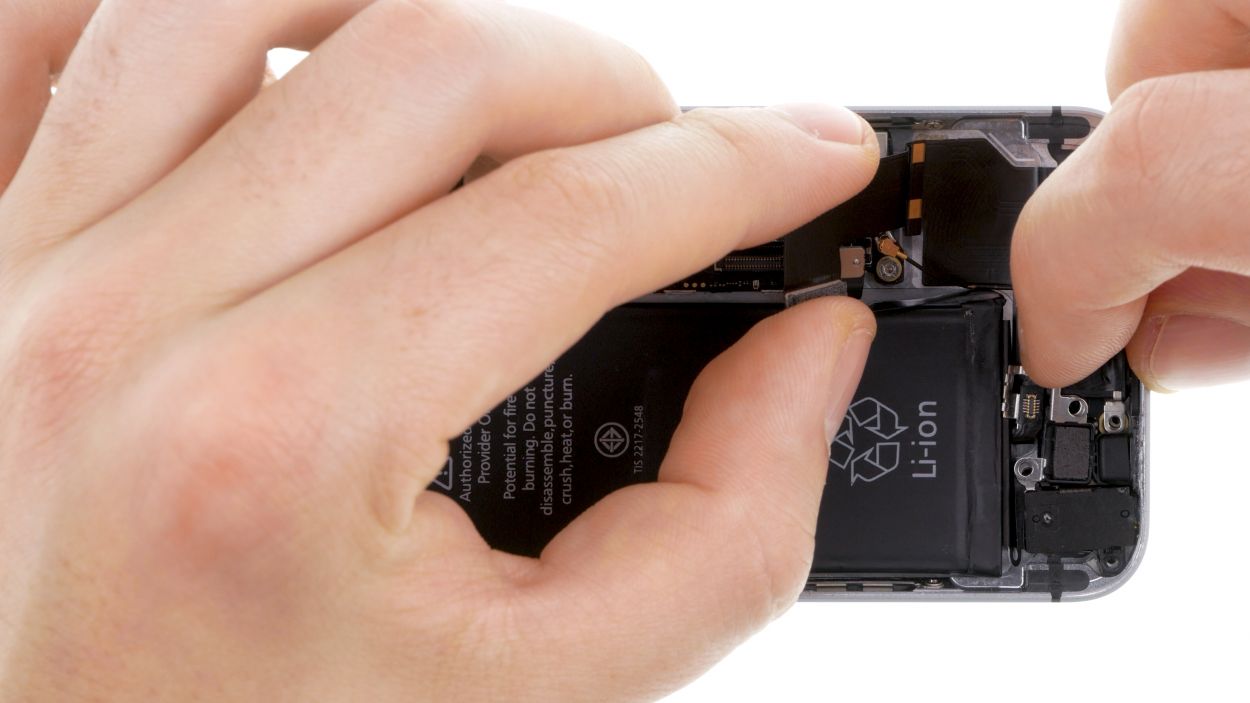
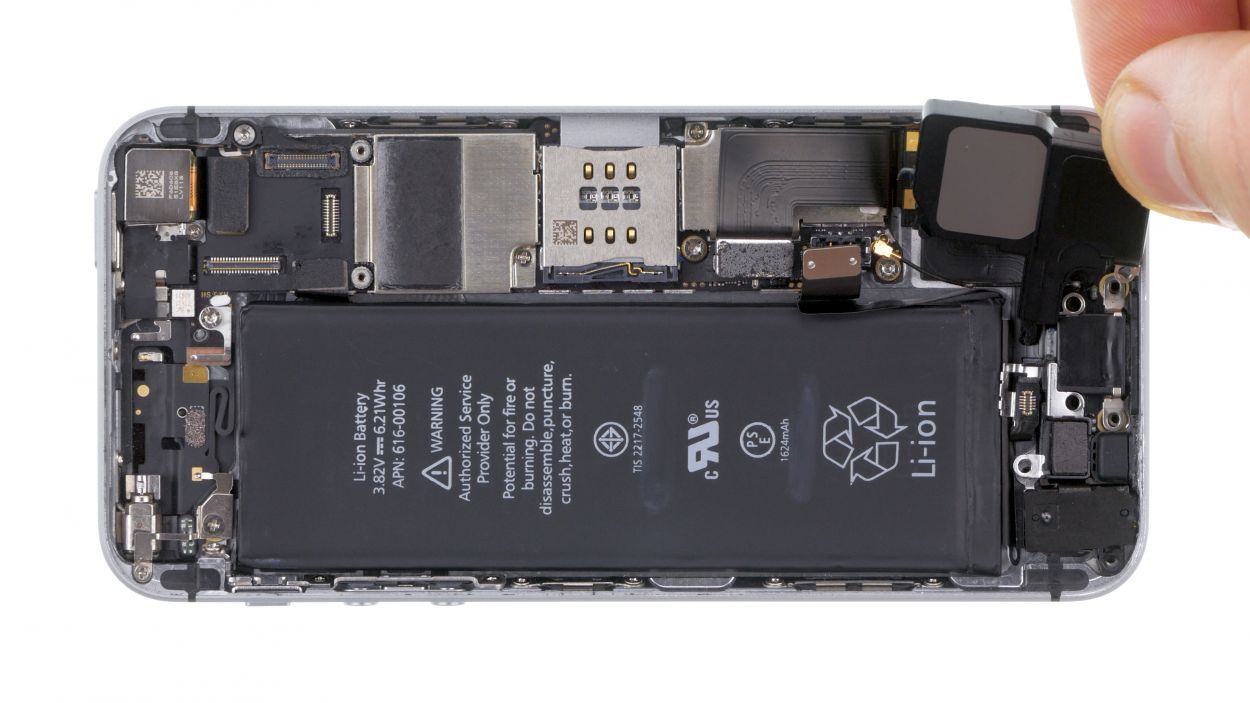
– Grab the flat end of your trusty spudger and gently lift that speaker right out of its cozy little home! Just a heads-up: there are two sneaky tabs keeping it in place. One of them is hiding under the logic board, right below the antenna connection, and the other is chilling below the Home button’s Lightning connector.
– Now, take your tweezers and give that speaker a little twist and turn to pop it out. You’ve got this!
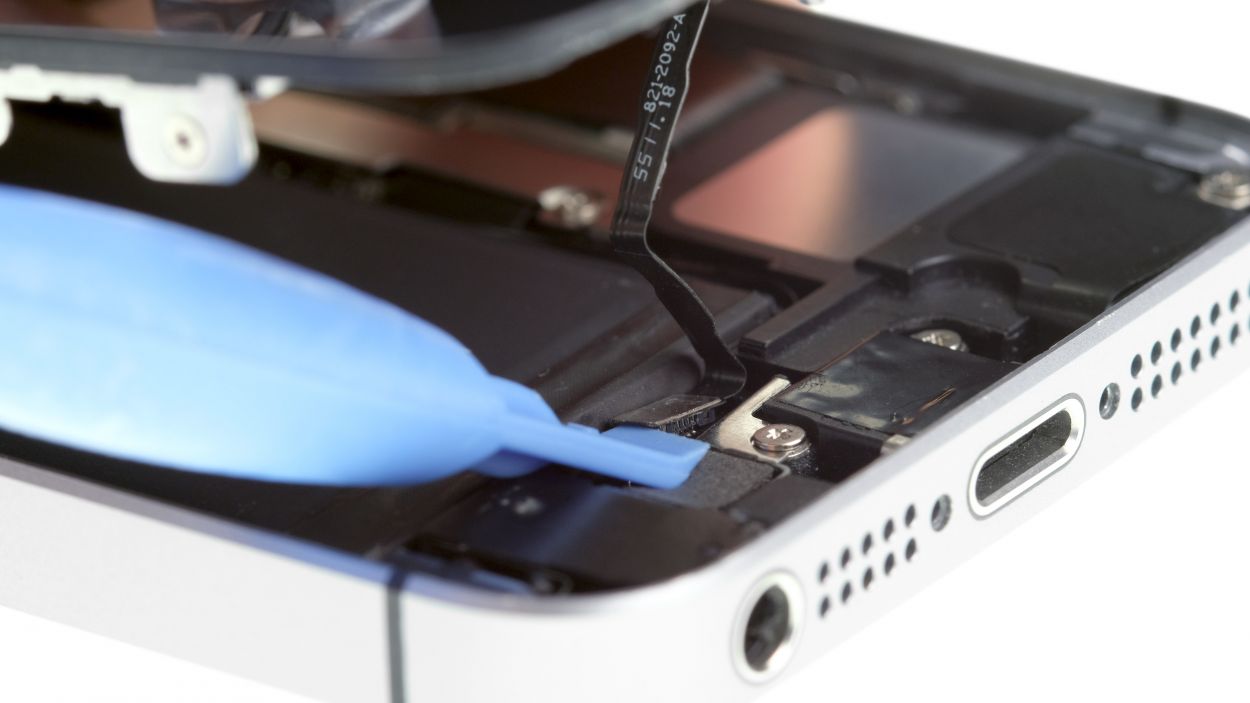
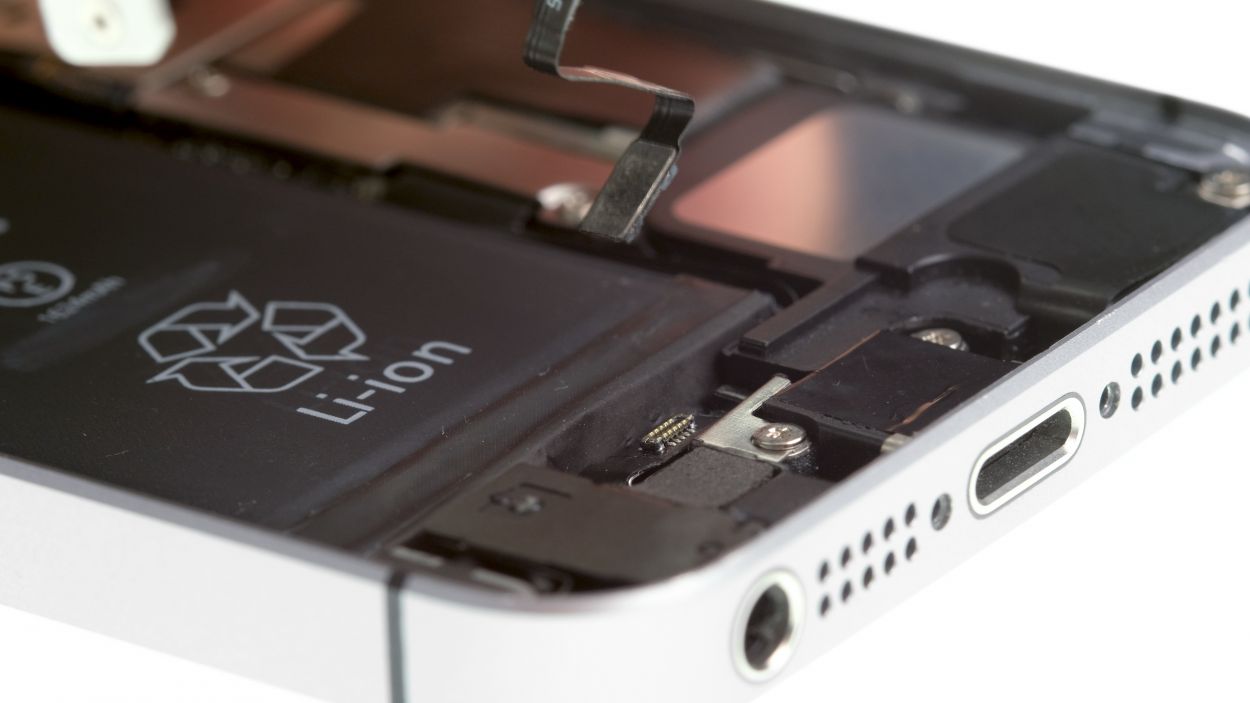
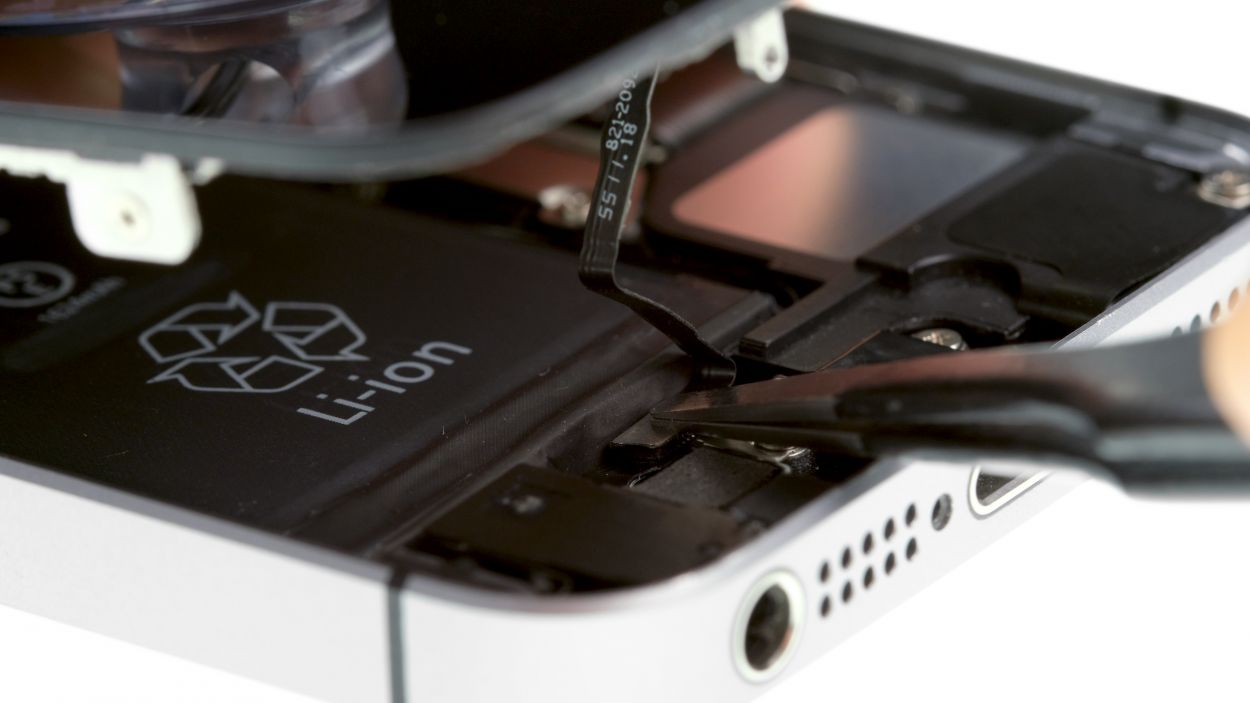
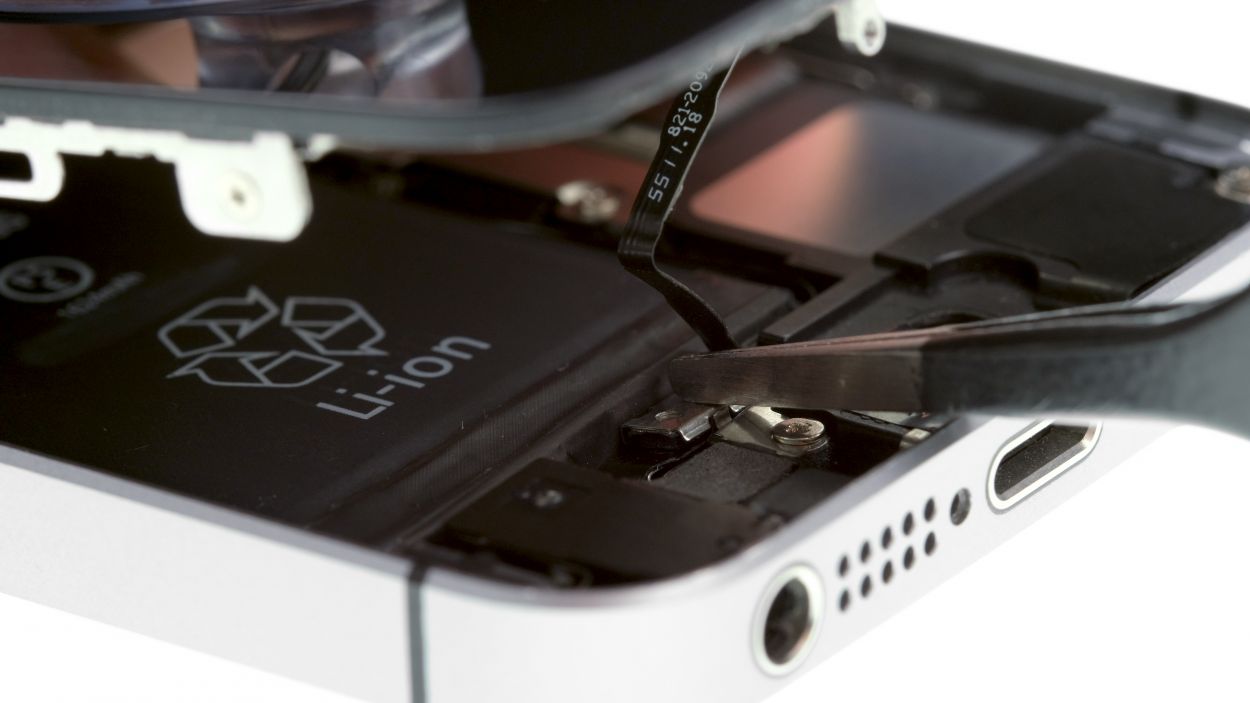
Step 9
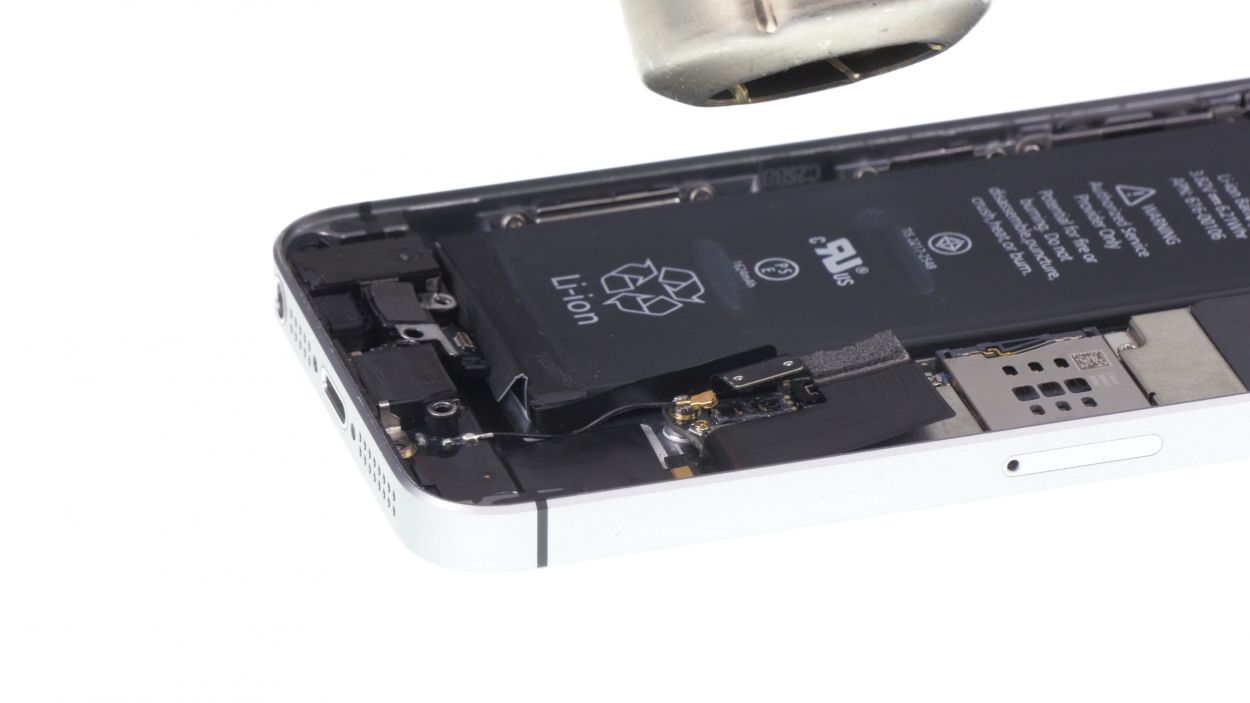
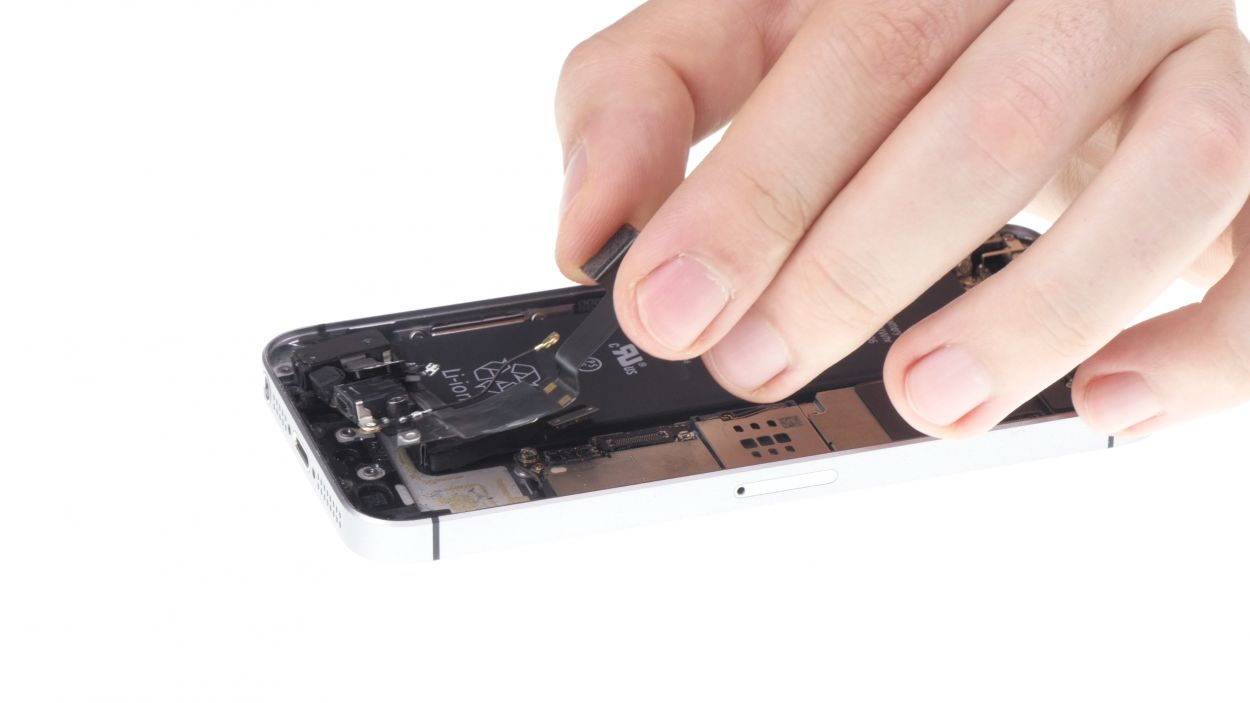
– The Lightning connector is stuck to the back cover like a stubborn sticker! To break that bond, warm things up a bit with a heat gun on the back cover and connector.
– Now, it’s time to be gentle with that steel laboratory spatula. Slip it under the flexible flat cable at various points to carefully disconnect the Lightning connector.
– With a steady hand, use your fingers or tweezers to delicately lift away the ribbon cable. You’ve got this!
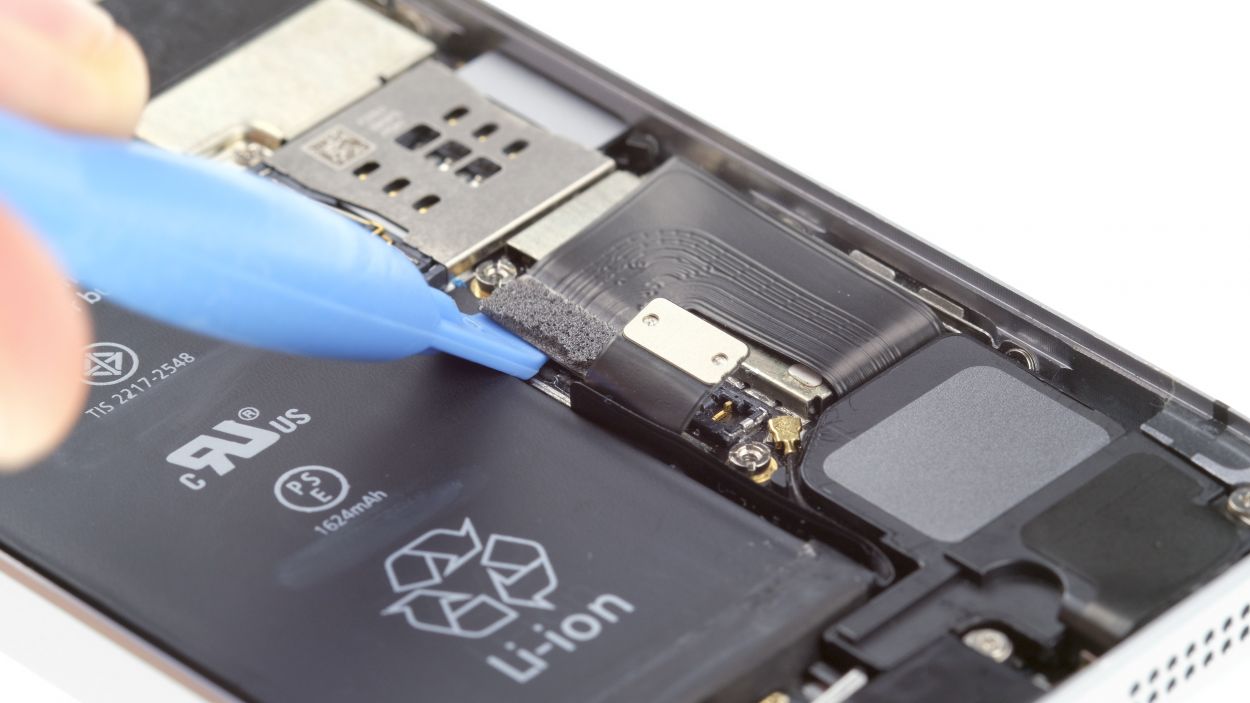
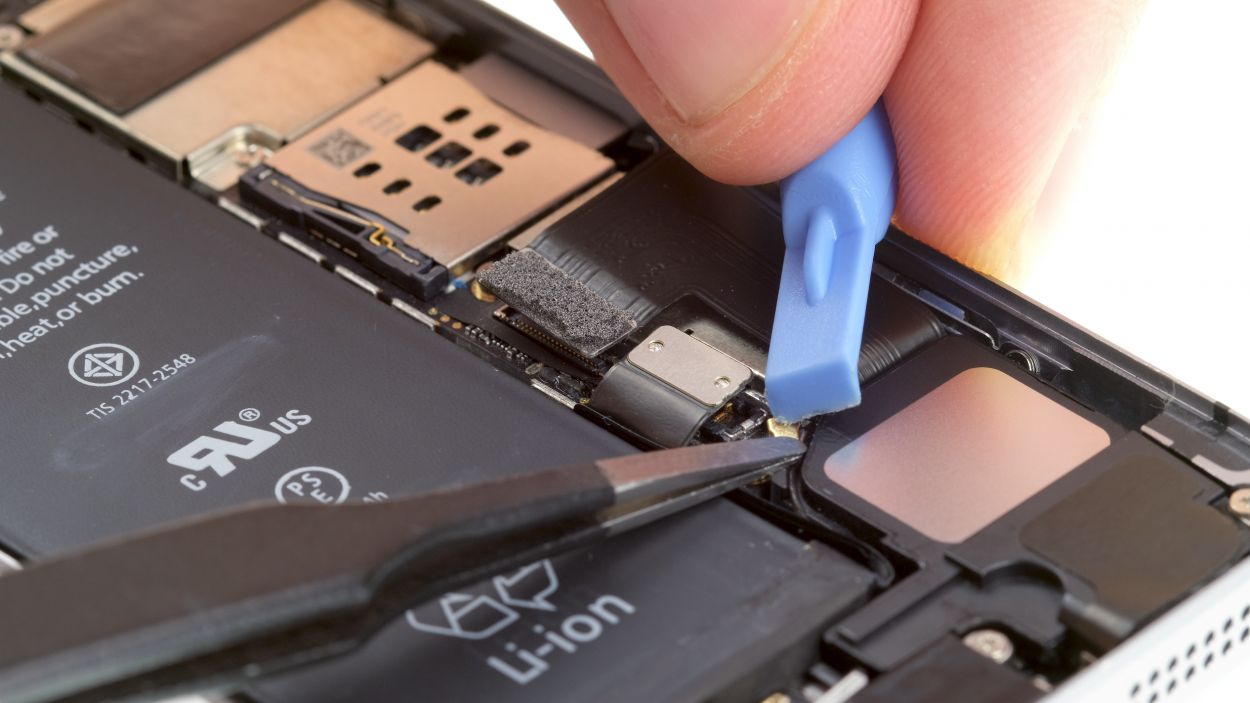
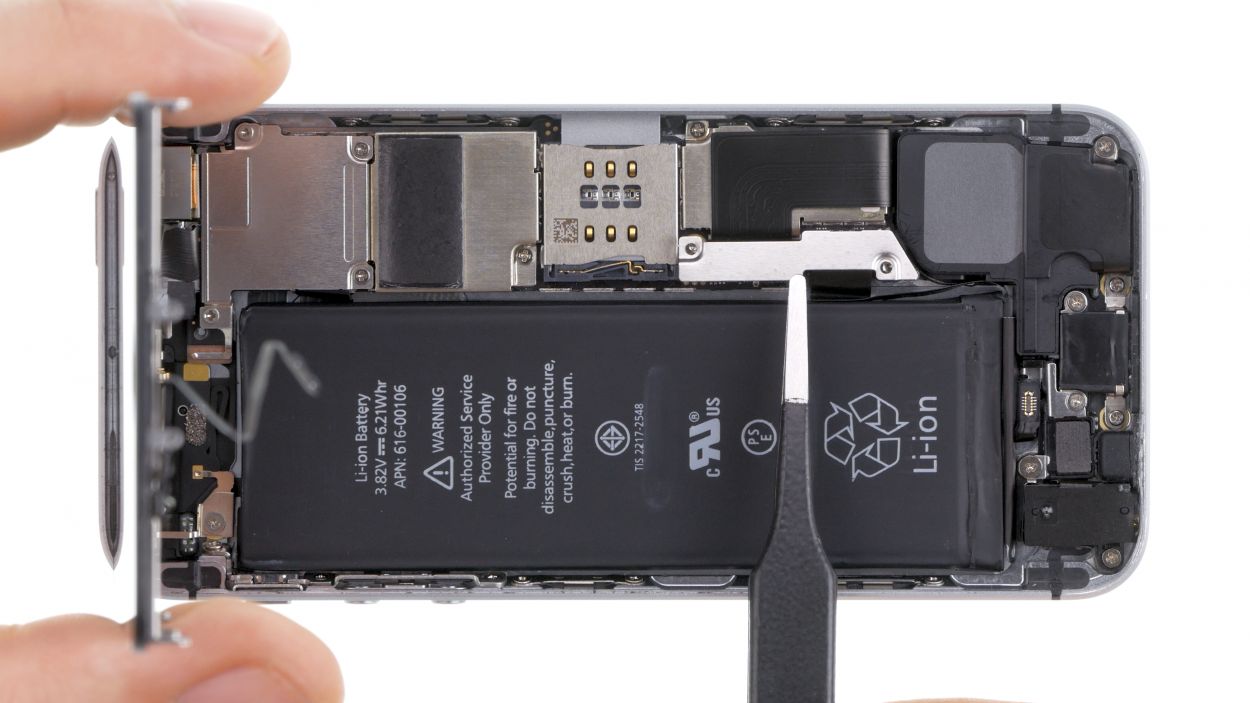
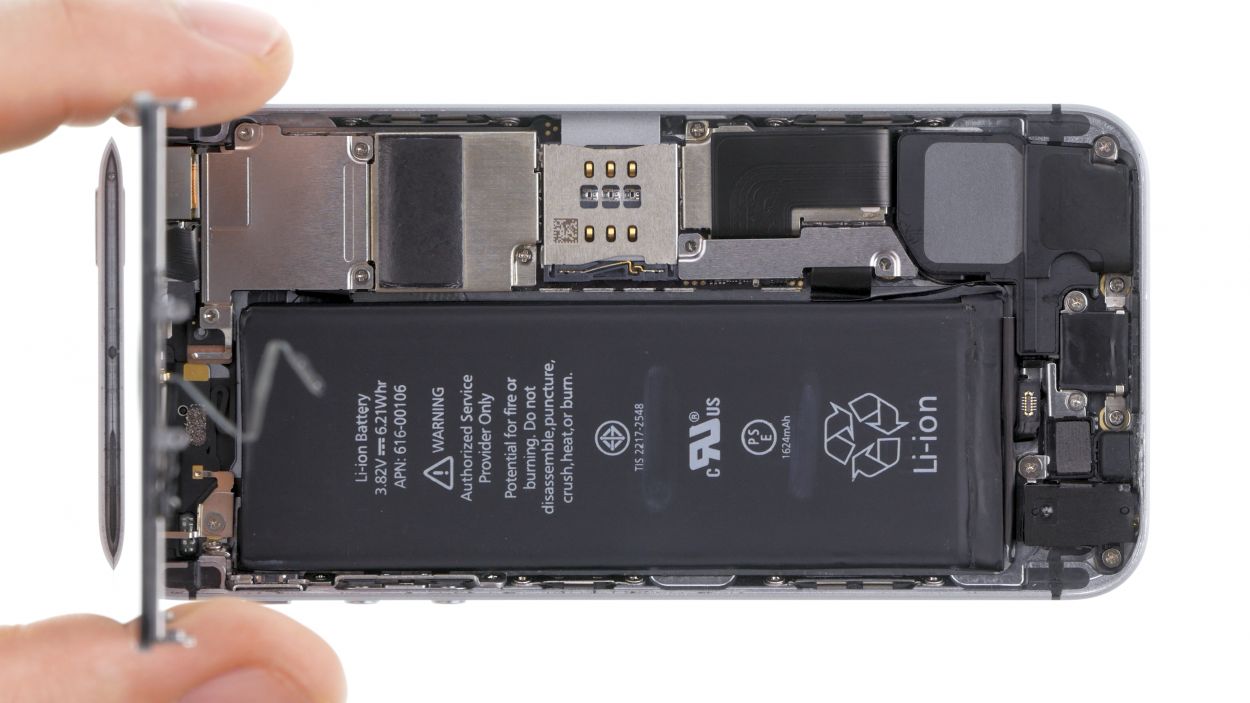
Step 10
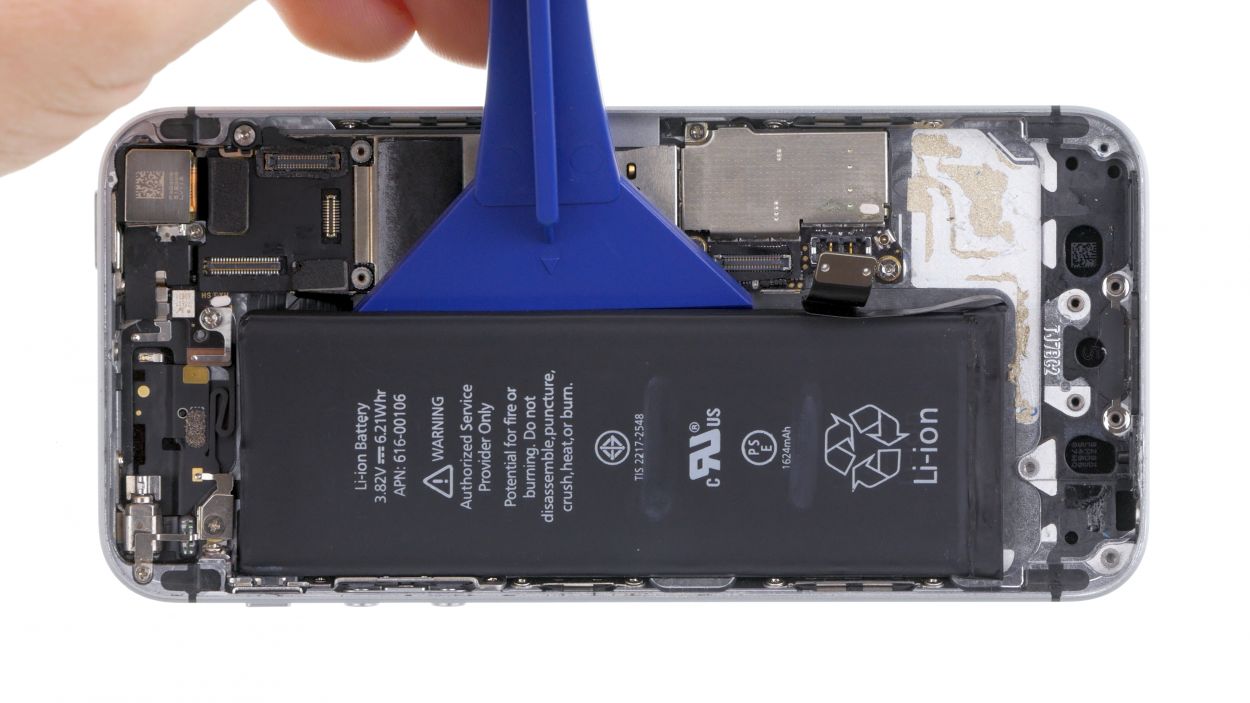
Uh-oh! Those adhesive strips can be a bit temperamental and might tear. If they do, just warm up your device with a little hot air and gently use the spudger to coax that battery out.
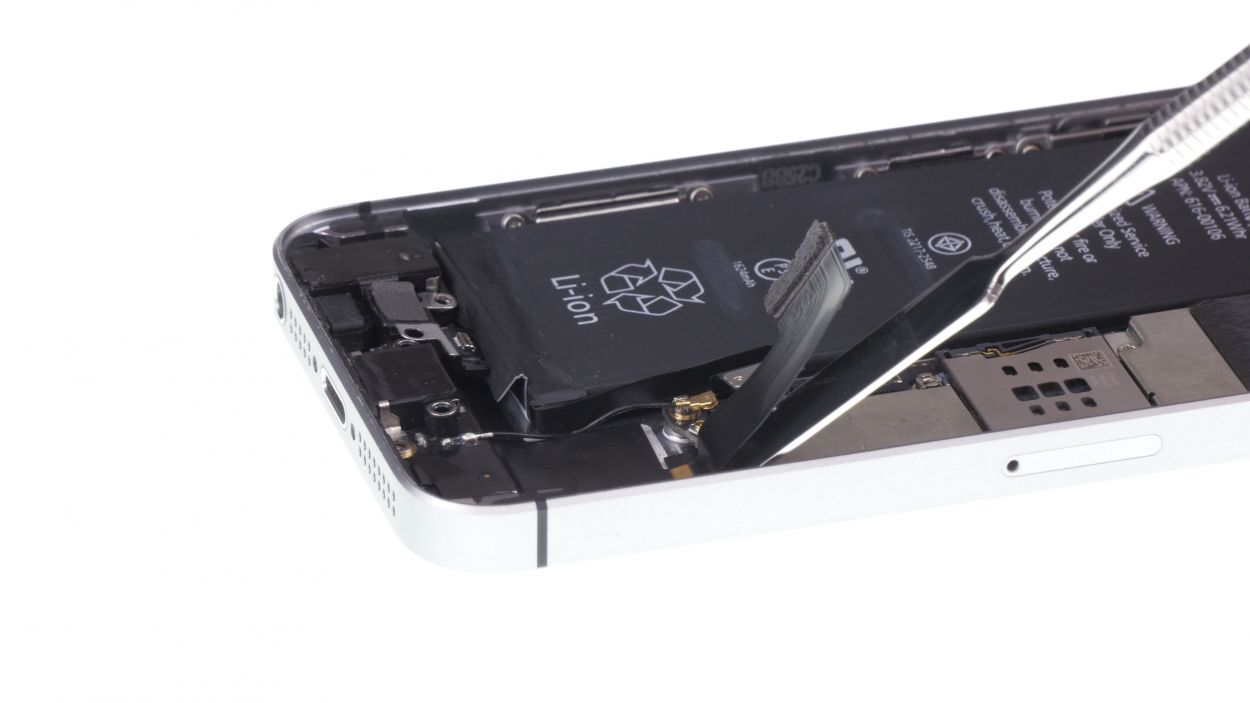
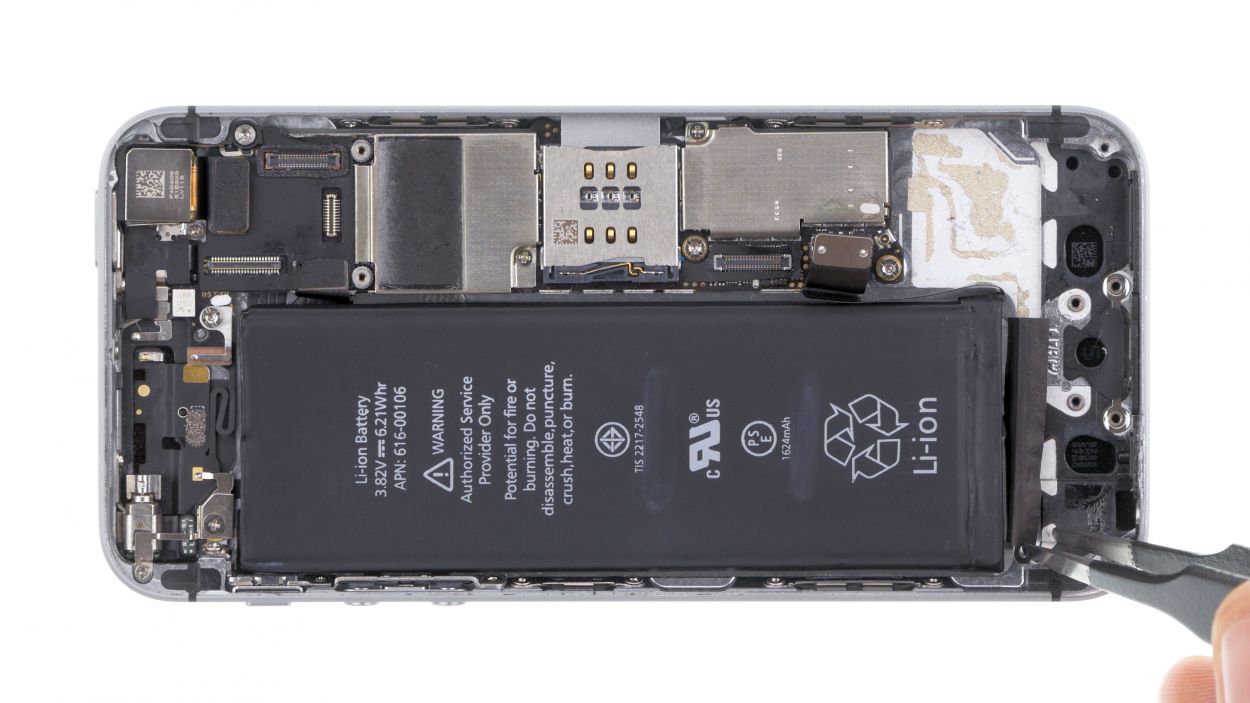
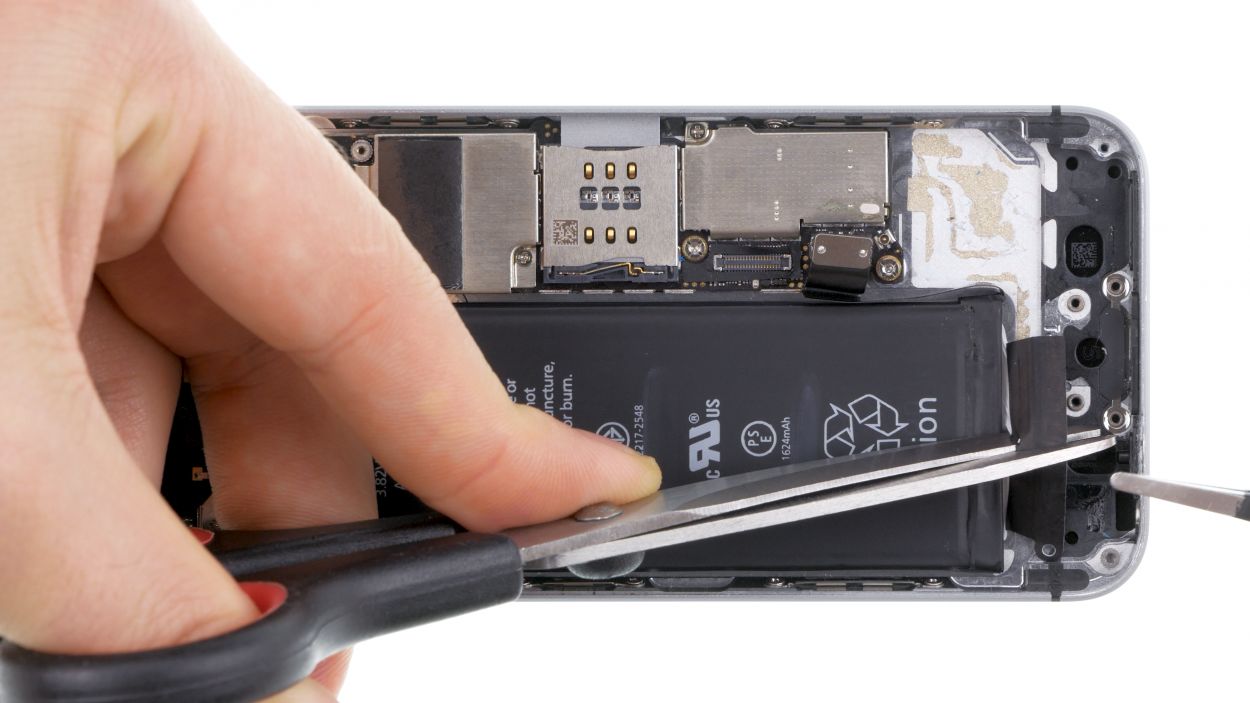
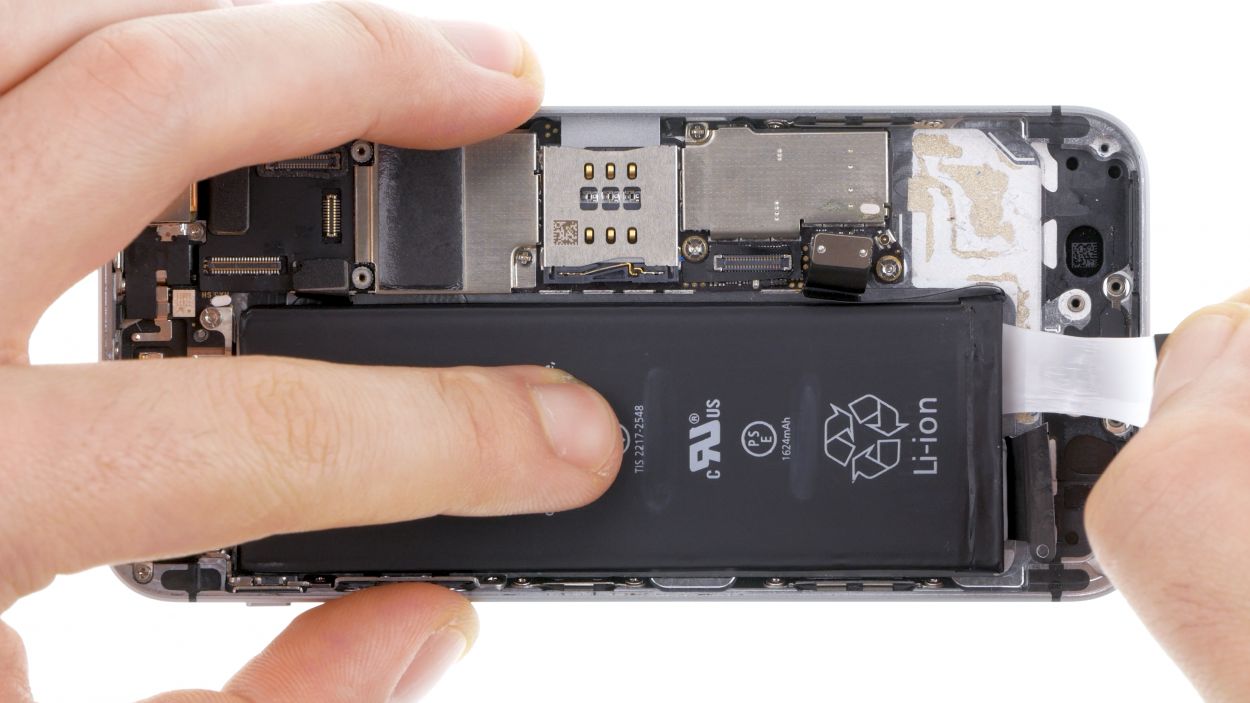
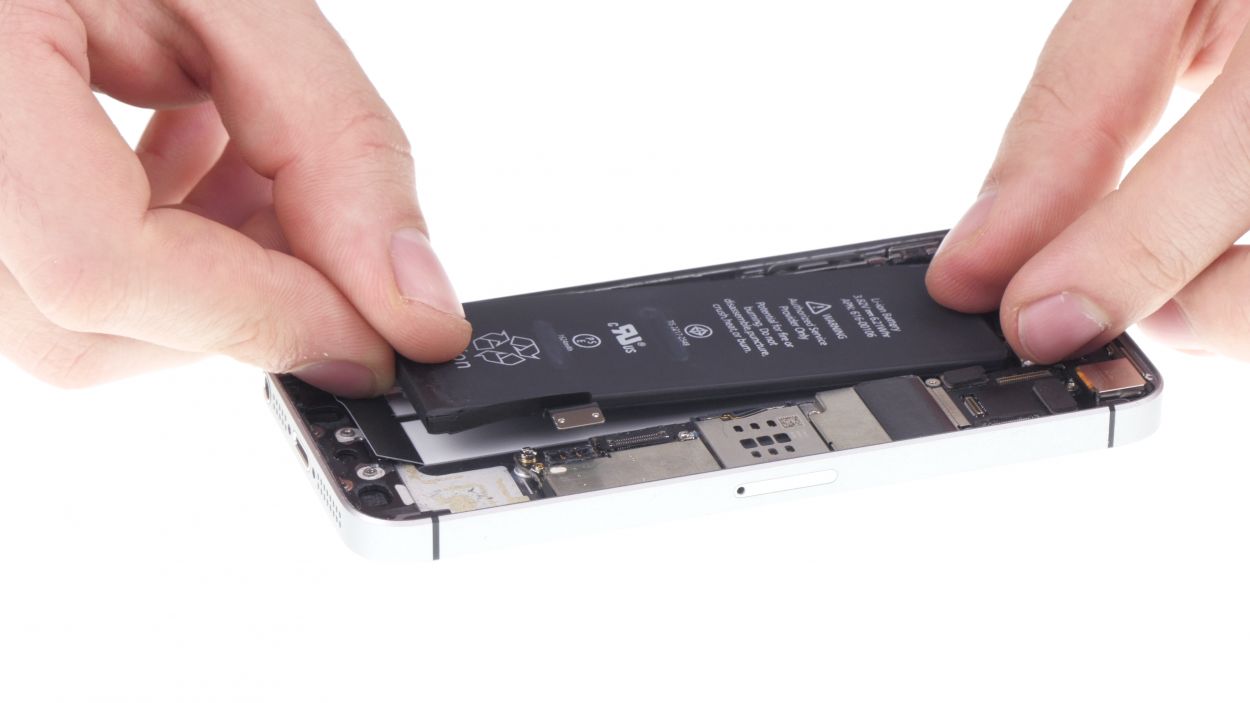
– The battery is glued to the back cover with two adhesive strips. One end of these strips peeks out from below the battery and is folded up. Unfold that little tab to make things easier for the next step.
– Gently pull the black end of the adhesive strips at a flat angle to detach the battery. You can also peel the strips separately, taking one off at a time. Keep a steady grip on both the battery and your device throughout the process. Those adhesive strips can be a bit tricky and might tear. If they do, just warm up your device with a little hot air and use your spudger to carefully coax the battery out.
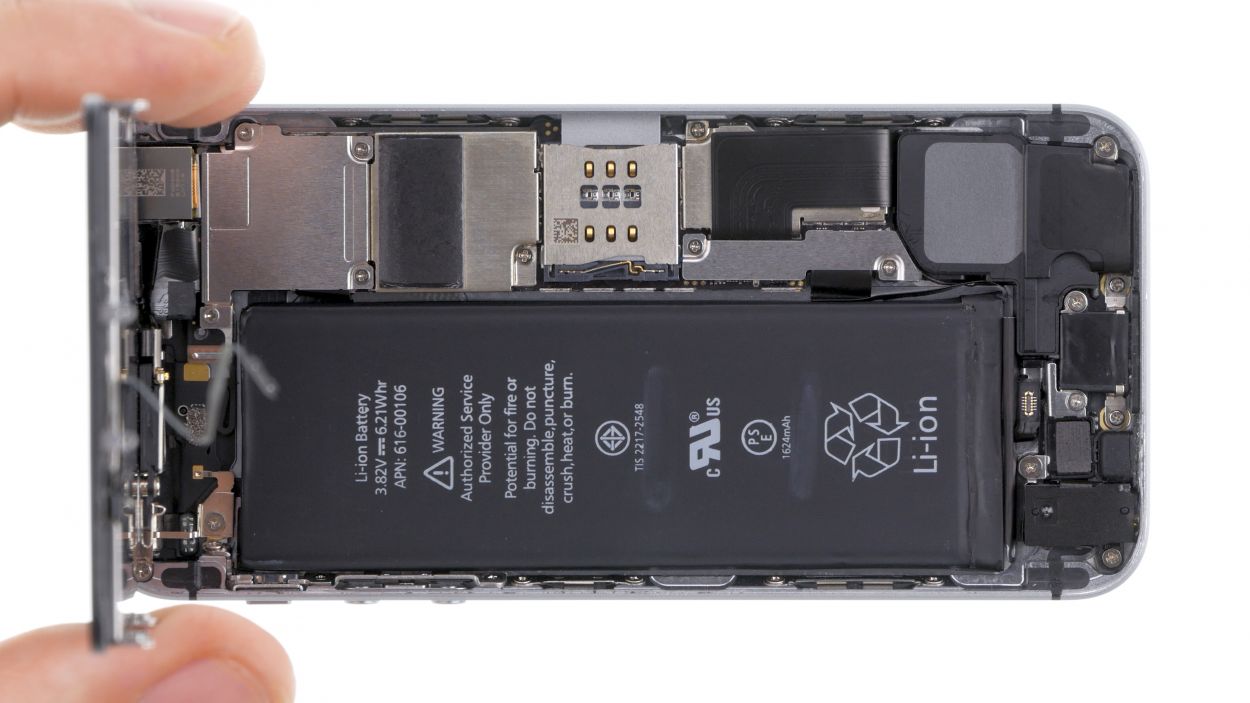
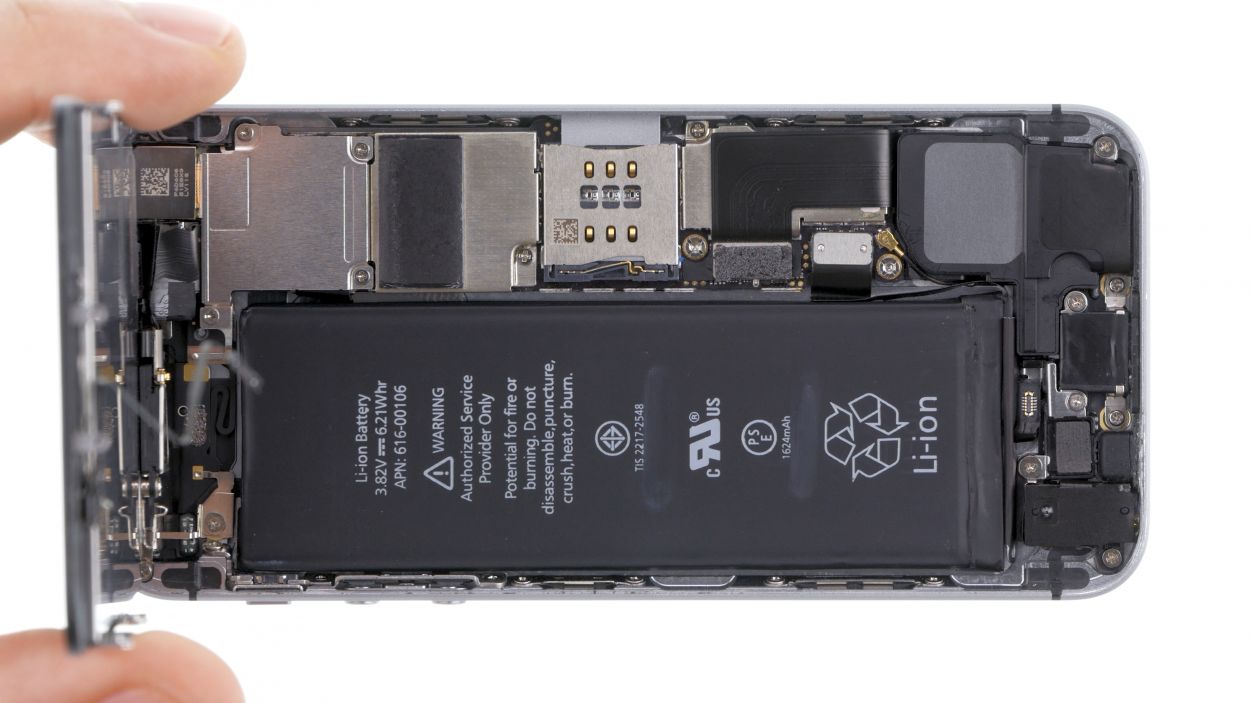
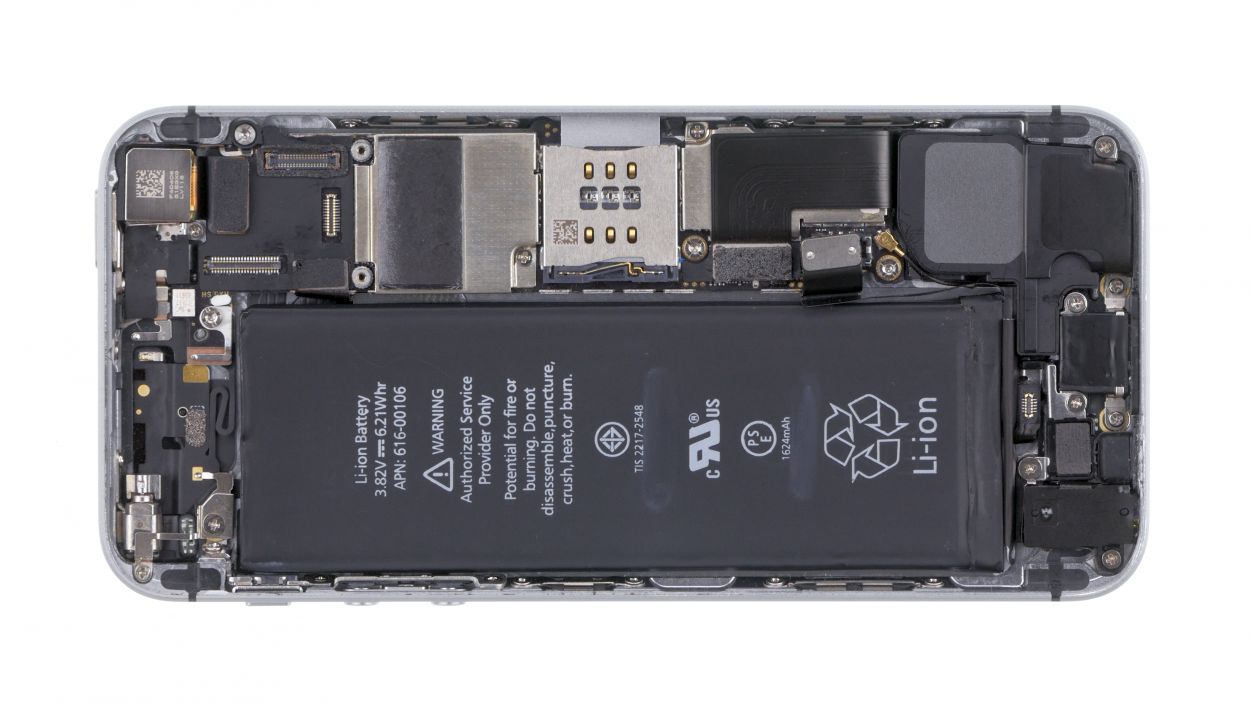
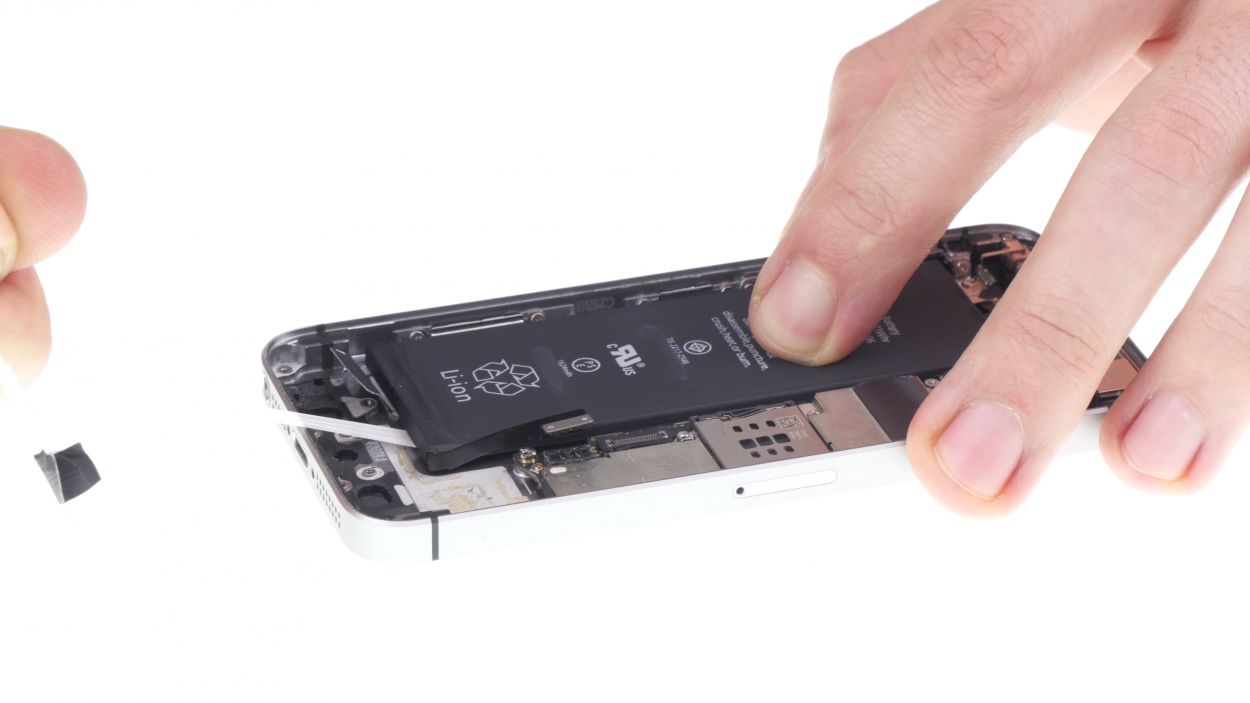
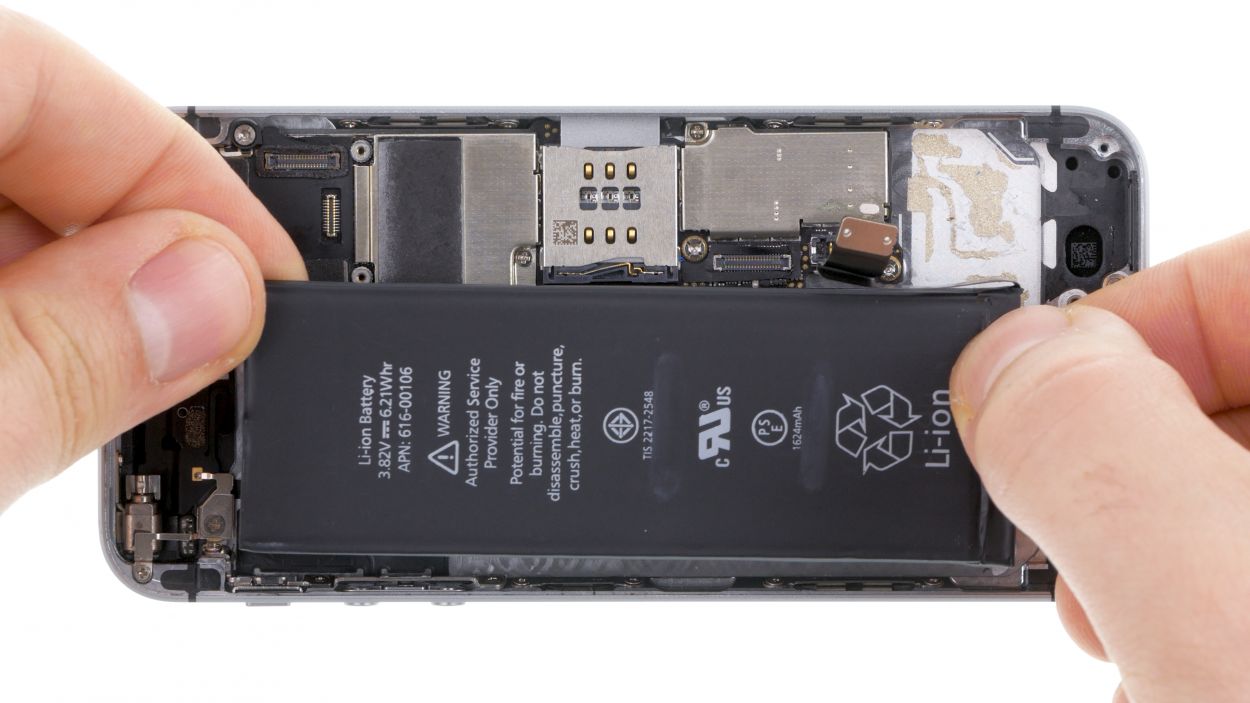
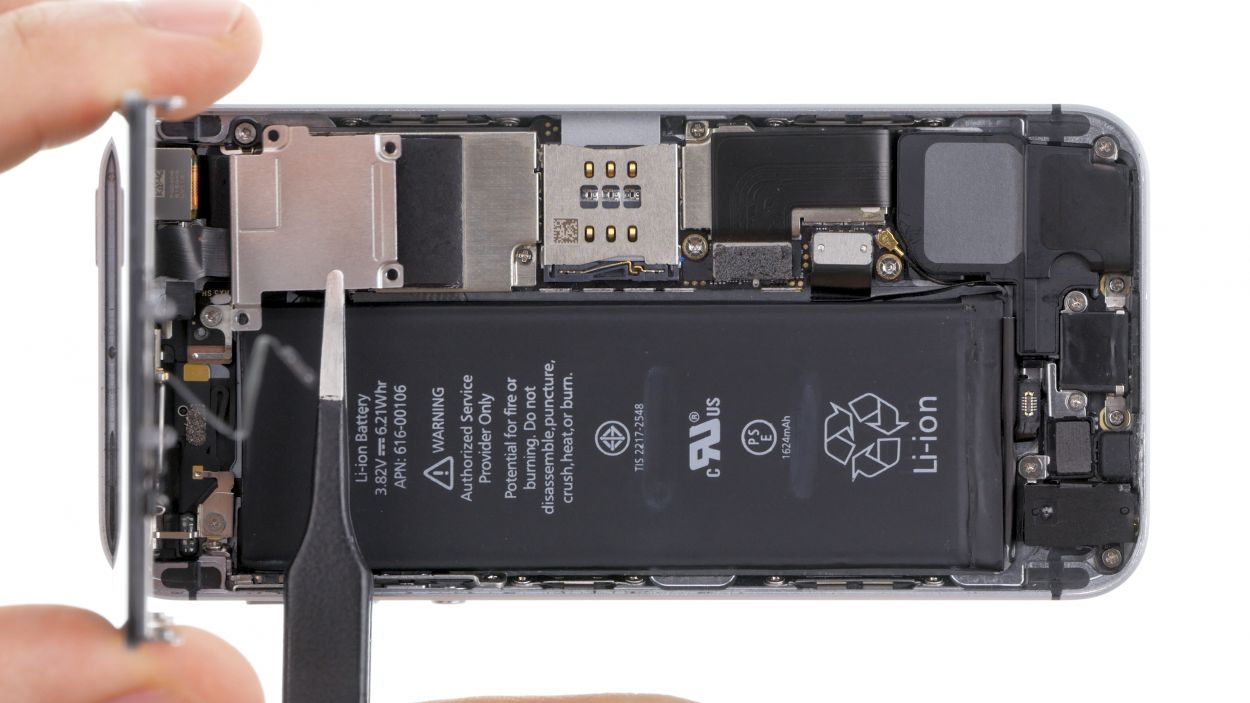
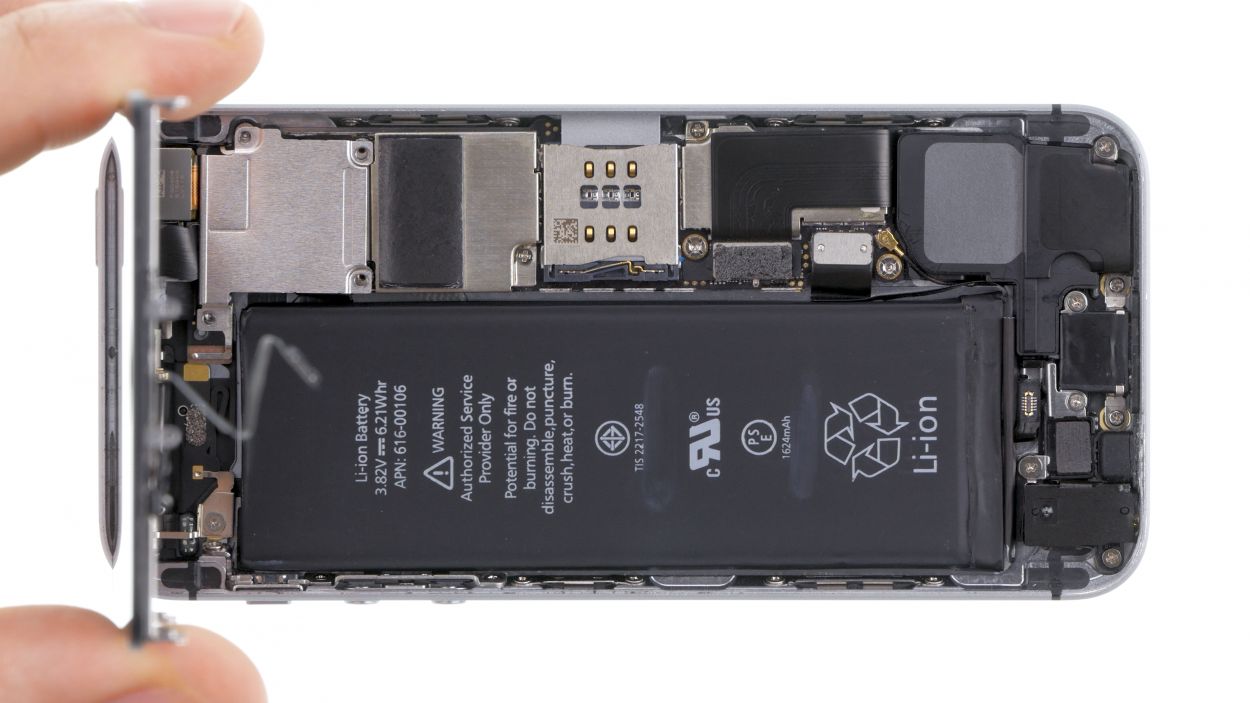
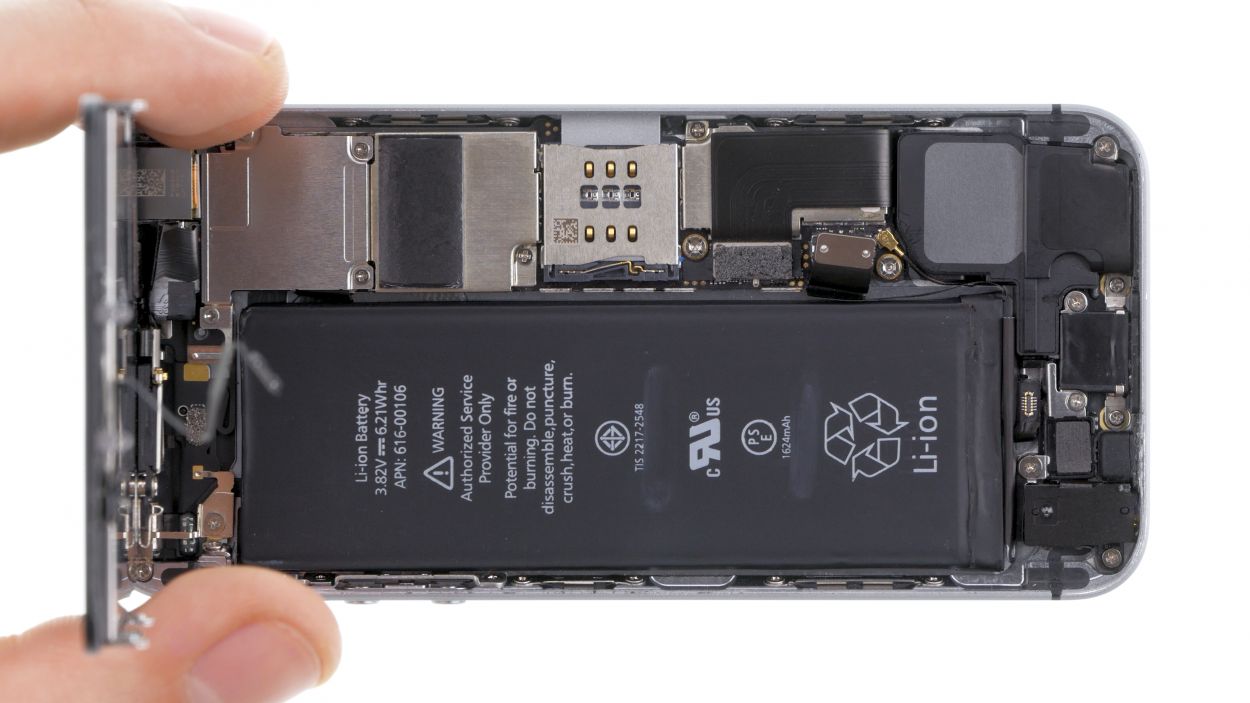
– Once you’ve successfully removed the adhesive strips, feel free to take out the battery!
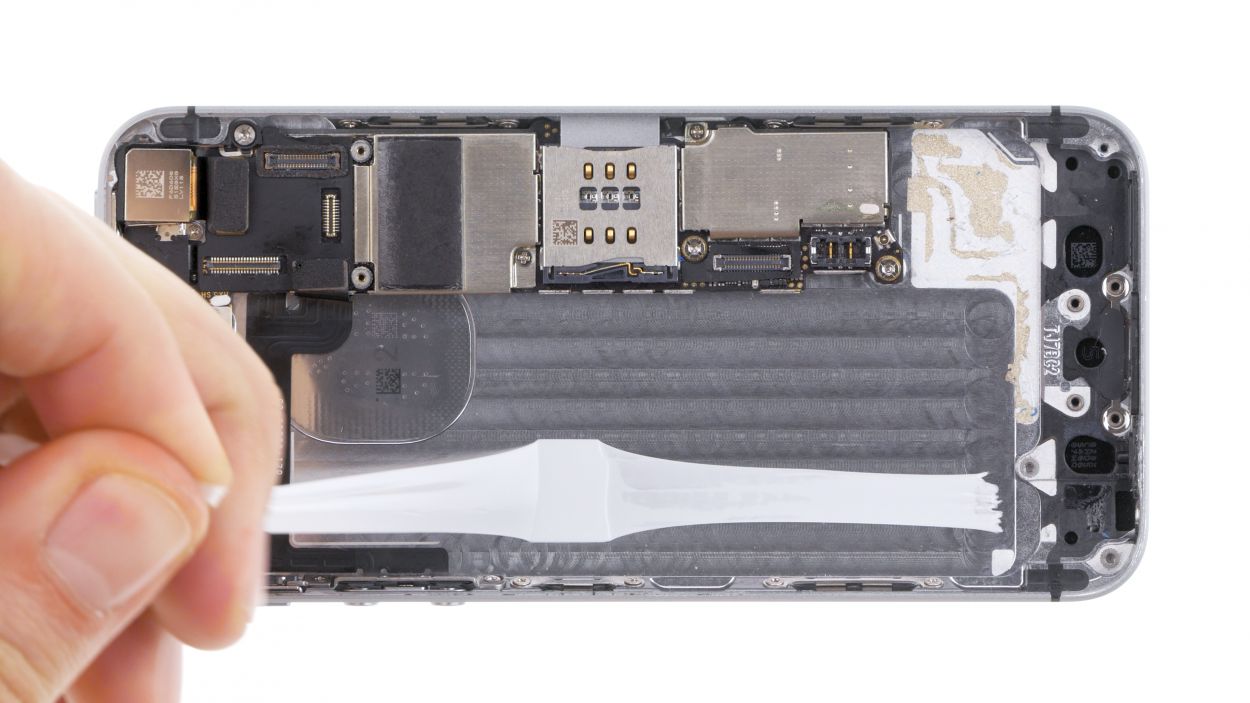
Step 11


– First up, let’s get those new adhesive strips ready to hold your battery tight against the back cover. Make sure to place them so the tips stop just before the flexible flat volume cable, and find that sweet spot right between the logic board and the outer wall.
– Now, give those adhesive strips a good press with your fingers to make sure they stick to the back cover and don’t get caught up with the red film when it’s time to peel it off.
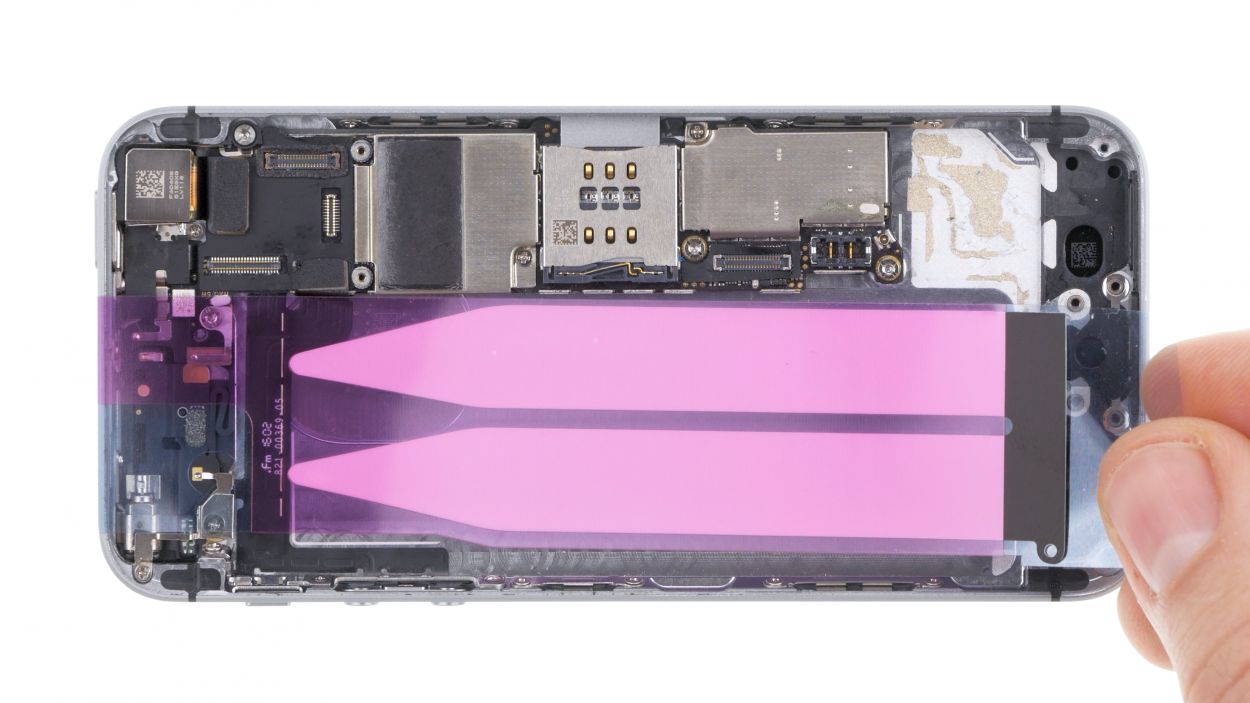
– Time to say goodbye to the red protective film!
– Next, let’s get that battery positioned perfectly on the adhesive strips. Use the black ends of those strips as your guide. The battery should align just right with the white strips, and don’t forget to leave enough room for the battery connection to the logic board.
– Finally, fold over the black end in the middle like a pro!
Step 12

– Place that Lightning connector back in its cozy spot on the back cover like it never left!
– Give that flexible flat cable a good press to ensure the glue sticks like it’s meant to. We want it to feel at home!
– Double-check that the microphone with its rubber sleeve, the Lightning connector, and the headphone jack are all snugly fit in the frame. They should feel like a happy family!
Step 13
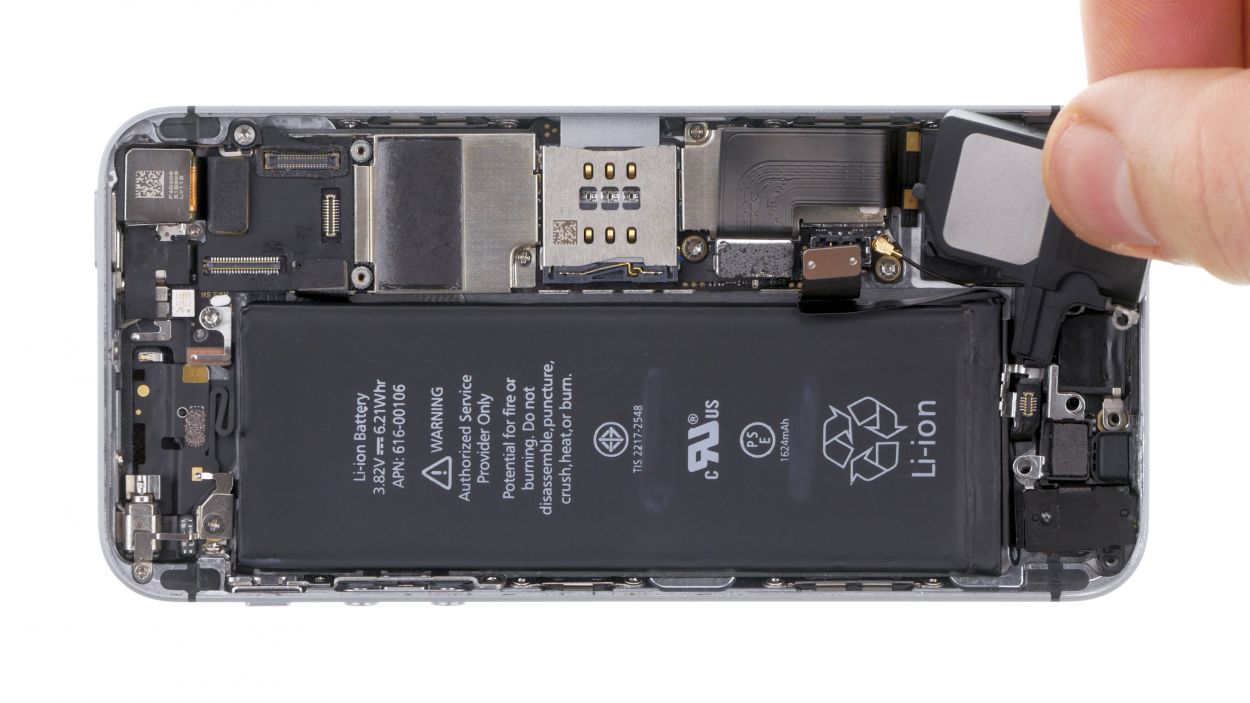

– Time to bring that speaker back home! Remember, it’s got two sneaky tabs keeping it snug. One tab is hiding under the logic board, just below the antenna connection, while the other is chilling beneath the Home button’s Lightning connector. Grab those tweezers and give the speaker a little twist and turn to slide it right back in. You’ve got this!
Step 14
1 × 3.0 mm Phillips
2 × 3.3 mm Phillips
2 × 1.3 mm Phillips
2 × 2.7 mm Phillips
– Tighten up that Lightning connector with the seven Phillips screws like a champ!
Step 15

Antenna
– Let’s get those connections sorted! First up, gently attach the antenna cable to the logic board like it’s a cozy hug.
– Now, give that Lightning connector a warm welcome back to the logic board. It’s been waiting for this moment!
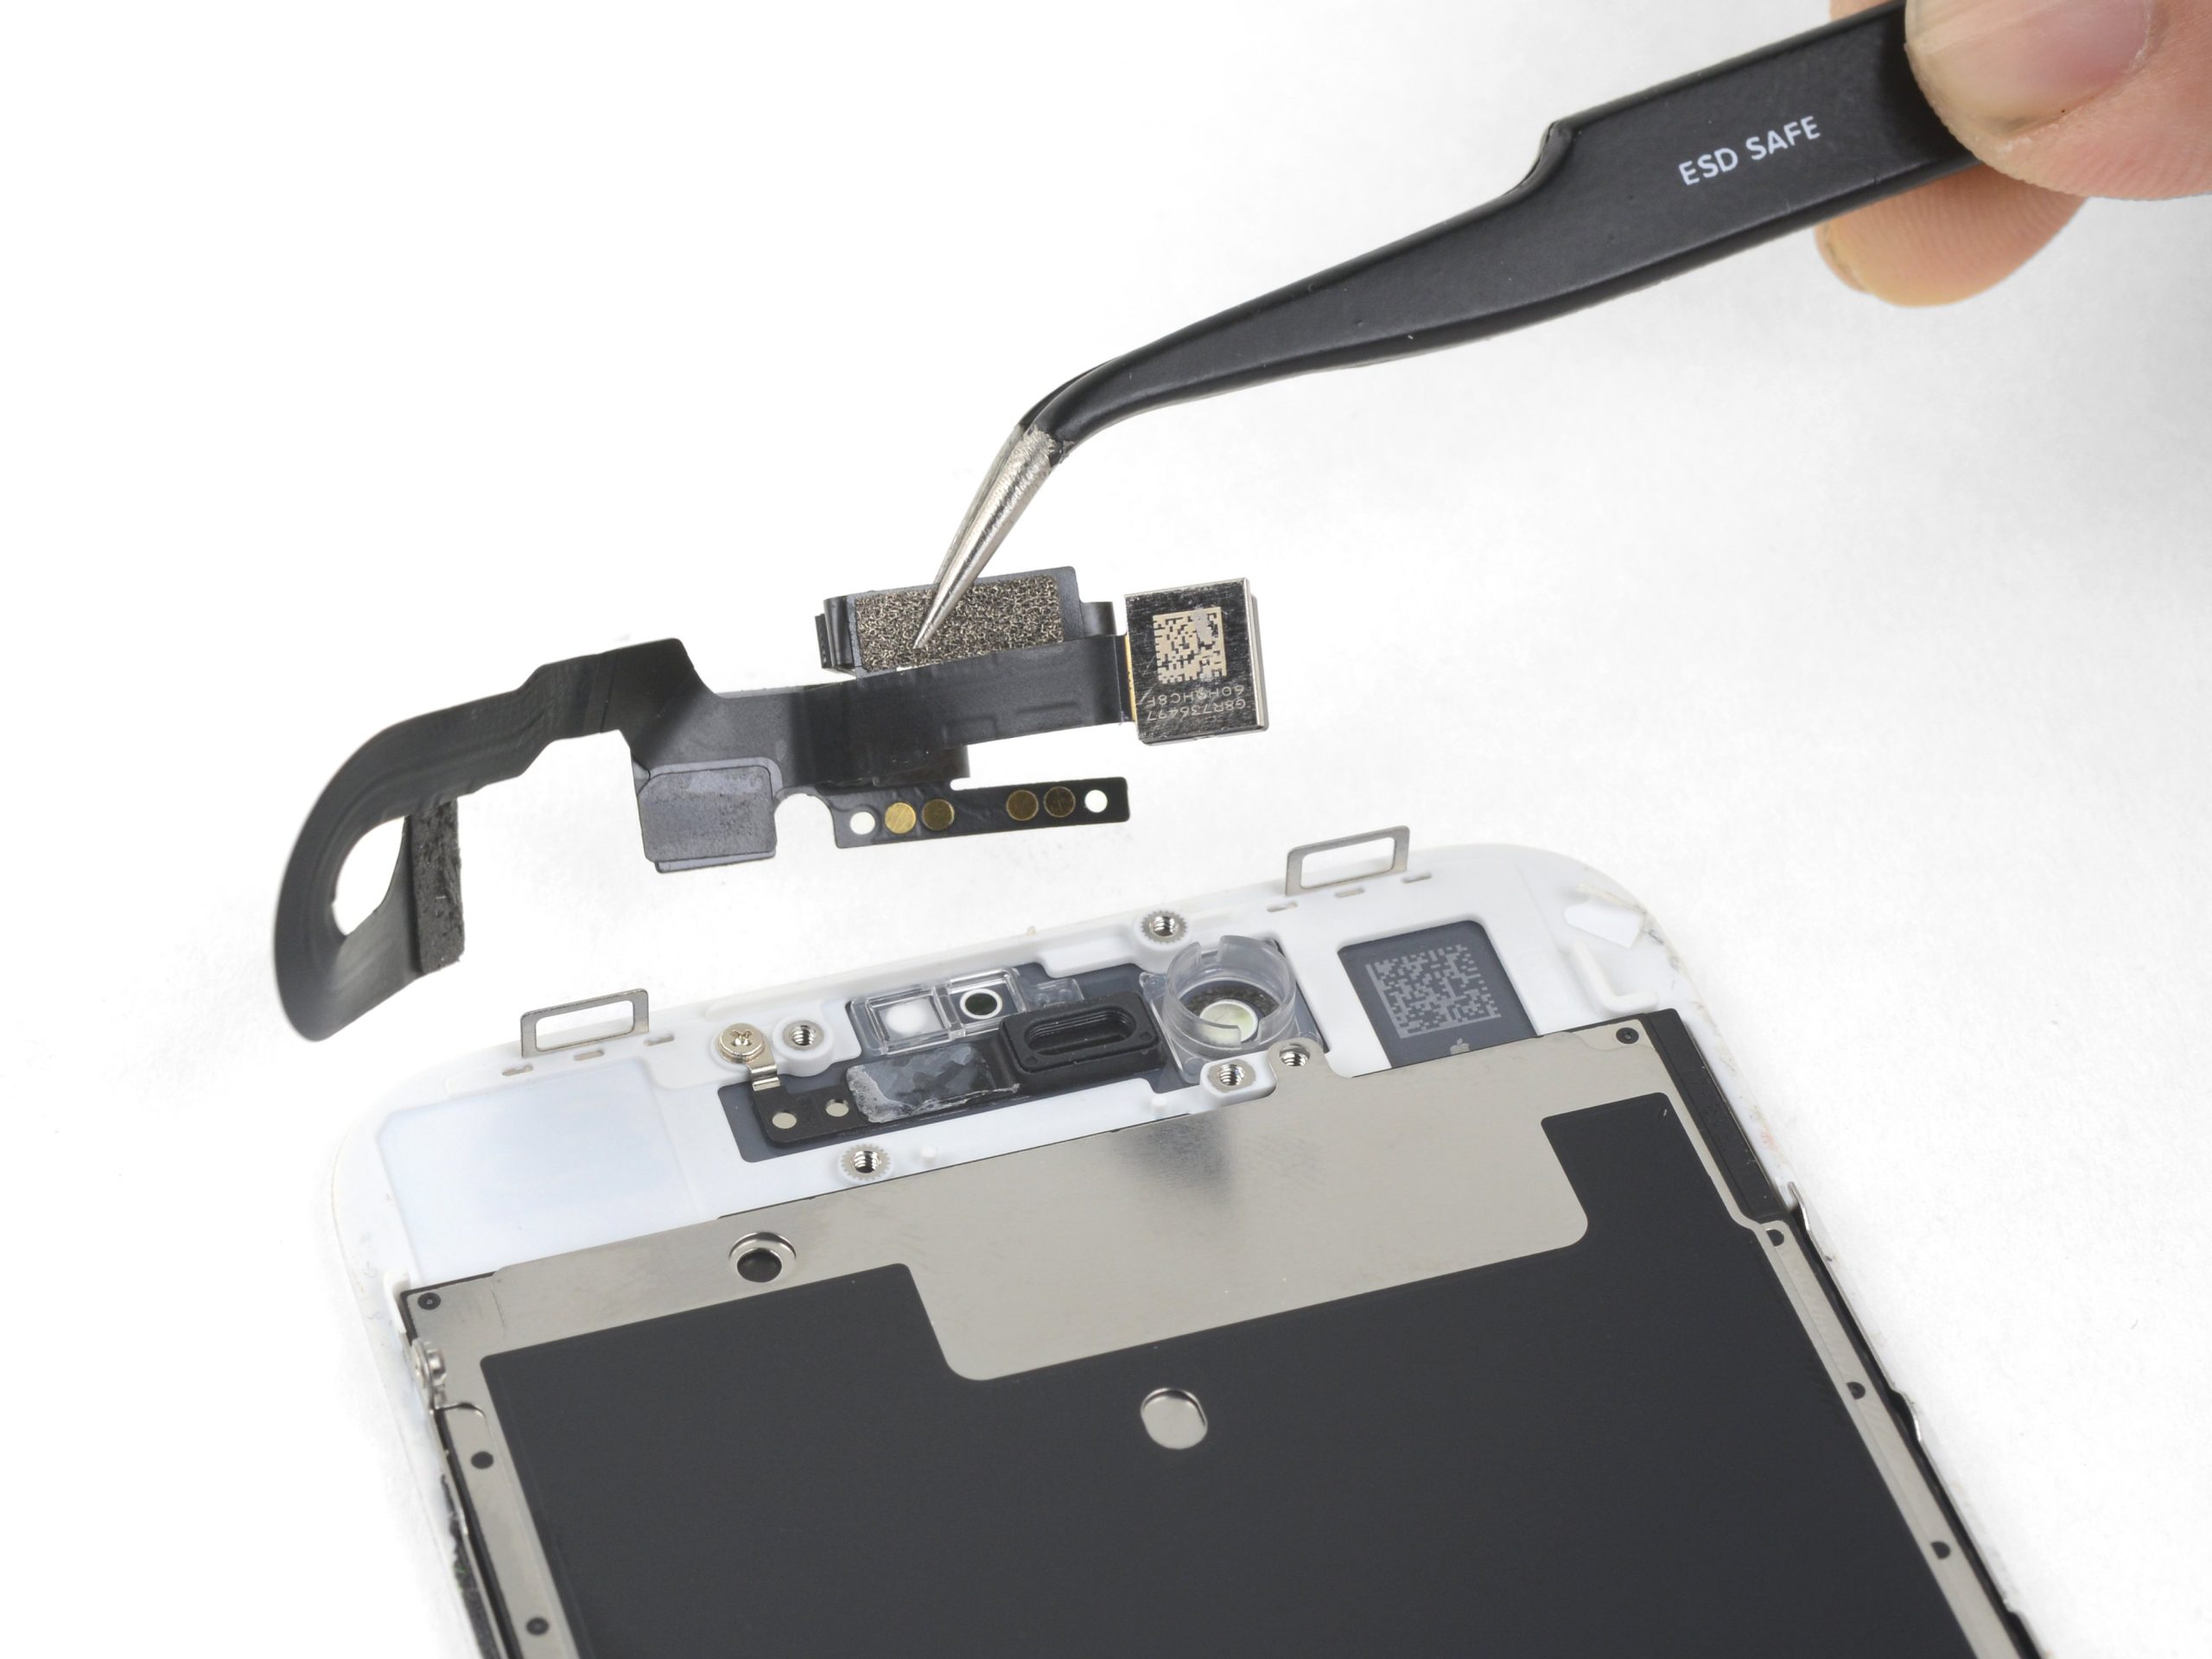
Step 16


Front camera flex
LCD
Digitizer
1 × 1.4 mm Phillips
1 × 1.5 mm Phillips
2 × 1.1 mm Phillips
If those display connectors aren’t snug as a bug, you might see some funky stripes on the screen or parts of the touchscreen might decide to take a day off. Let’s make sure everything’s connected just right!
– Reconnect those connectors! Sometimes getting the display connector snug can take a couple of tries, so be gentle and avoid bending them like a pretzel.
– Once everything is securely in place, power up your iPhone! Check that the LCD, touchscreen, proximity sensor, front camera, and earpiece are all functioning. If the connectors aren’t snug, you might see some funky stripes on the screen or parts of the touchscreen might decide to take a little break.
– Time to put the cover back on and screw it in place like a pro!
Step 17
2 × 1.5 mm Phillips
– First, let’s connect that battery contact to the logic board and get everything powered up again!
– Now, pop the cover back on and secure it with those two Phillips screws. You’re doing great!
Step 18
– Slide that display into the enclosure at the top edge where the connection cables hang out. Make sure it clicks into place like a puzzle piece fitting just right!
– Before you can link your device to the display, connect the Home button to the Lightning connector and secure them with the cover. Teamwork makes the dream work!
– Gently press the display towards the Home button until it’s snugly in the frame. You want it to be flush with the frame, like it’s meant to be!
Step 19
2 × 3.8 mm Pentalobe
– Now, let’s get those two pentalobe screws at the bottom of the enclosure snugged in! Just twist them in like you’re sealing a secret message.
Step 20

Hey there! When you pop that battery out, your iPhone might get a little confused and reset to 1:00 a.m. on 1/1/1970. This could throw a wrench in your cellular connections, so be sure to set the time right!
– First up, let’s sync your iPhone with iTunes or hop onto a WLAN network and chill for a moment while the time gets back on track.
– Next, pop out the SIM tray, give that SIM card a little love, and then slide it back in.
– Now, let’s activate airplane mode for a quick second and then turn it off again. Easy peasy!