DIY Guide to Replace Battery in iPhone Xr
Duration: 60 min.
Steps: 20 Steps
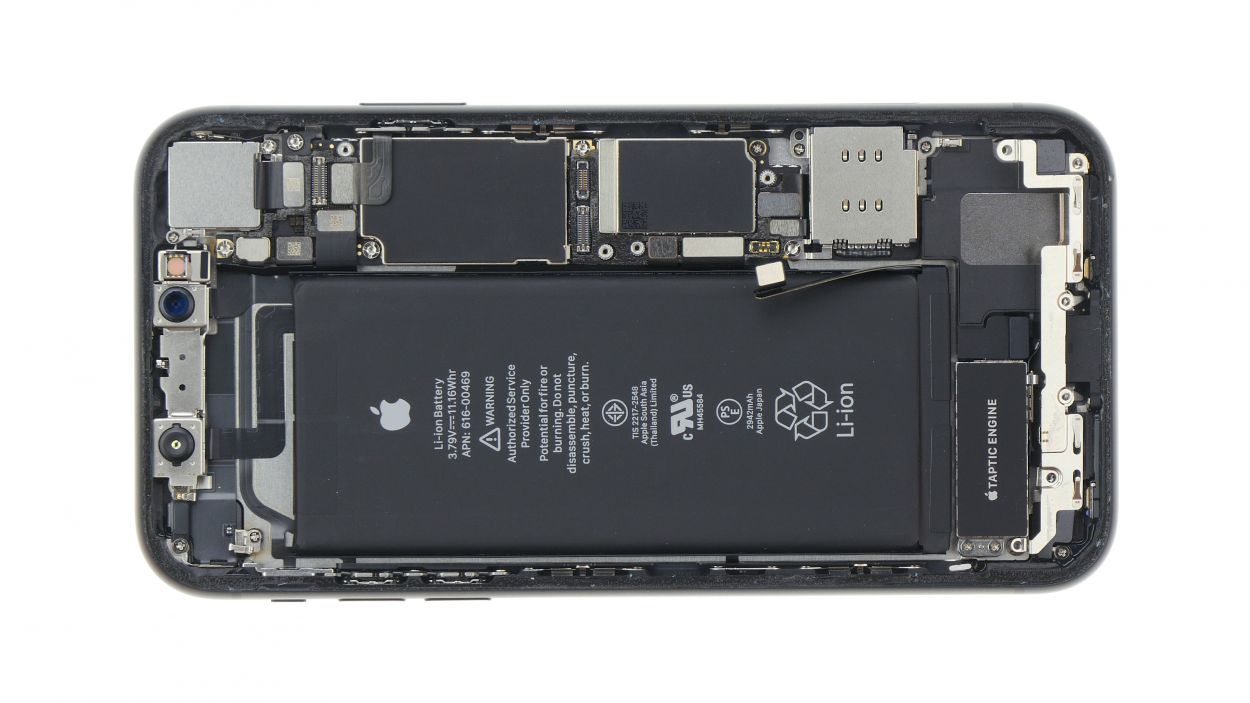
Is your iPhone Xr feeling a bit drained and always begging for a charge? It might be time for a battery swap! In this handy repair guide, we’ll walk you through bringing your iPhone back to life with a shiny new battery. This fix is just what you need if your iPhone Xr is crashing during those intense gaming sessions because the voltage dips, or if it refuses to charge or power on at all. Before you dive in, remember to back up your data, clear off a tidy workspace, and give yourself plenty of time. Got questions? Don’t hesitate to reach out via live chat on our website or drop a comment. Let’s get your iPhone Xr back in action!
Step 1


– First things first, let’s power down your iPhone completely to keep it safe during the repair! Just press and hold the Standby button along with one of the volume keys for about three seconds, and voilà, the “Power off” slider will pop up.
– Now, give that slider a gentle swipe from left to right. Your iPhone will take a little nap and shut down completely, which should take around ten seconds. Easy peasy!
Step 2

2 × 6,8 mm Pentalobe
Once you pop the back cover off your iPhone Xr, it waves goodbye to its dust and water protection (IP 67 rating). Keep that in mind as you proceed!
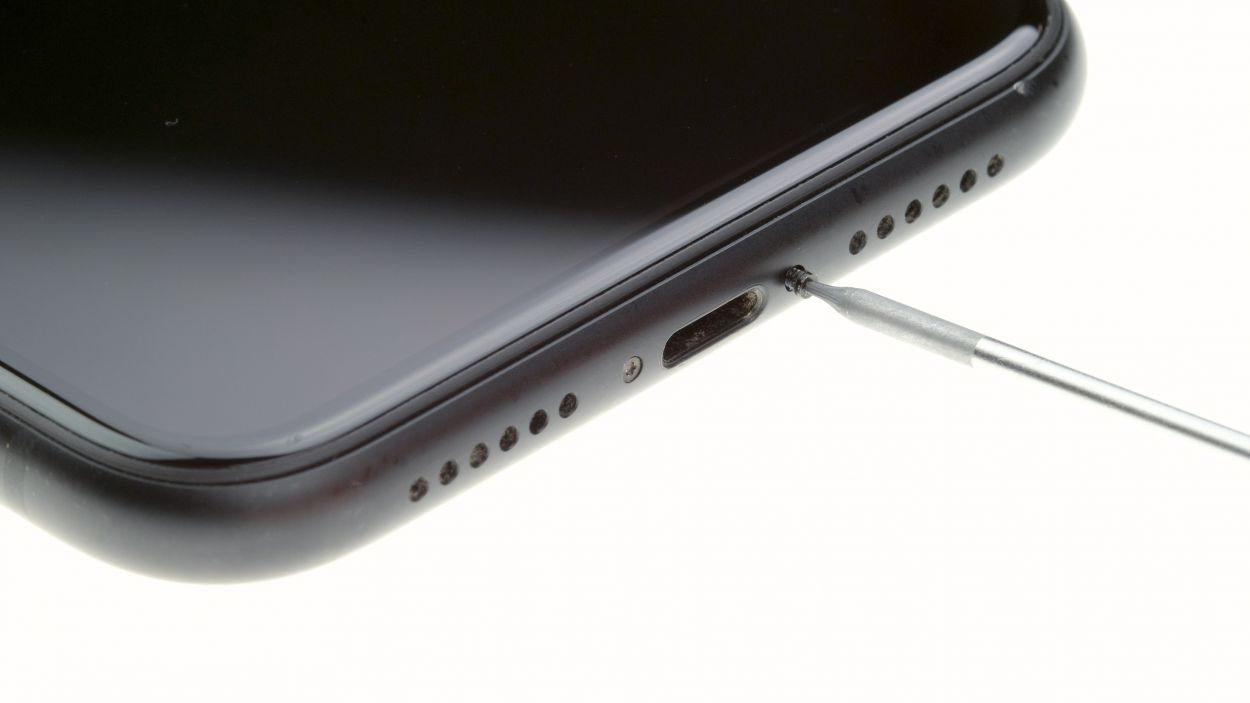
– Let’s tackle those two pentalobe screws at the bottom edge of the back cover! They’re hanging out on either side of the Lightning connector, just waiting for you. Once you’ve got them out, make sure to place those little guys on your magnetic pad so they don’t go wandering off.
Step 3


Keep your tool under 5 mm deep in that gap, so you don’t accidentally tickle any tiny parts inside the iPhone!
If you’re rocking an iFlex, don’t forget to swap over to a plastic pick as soon as you can! It’s the perfect way to keep that frame looking fresh and scratch-free.
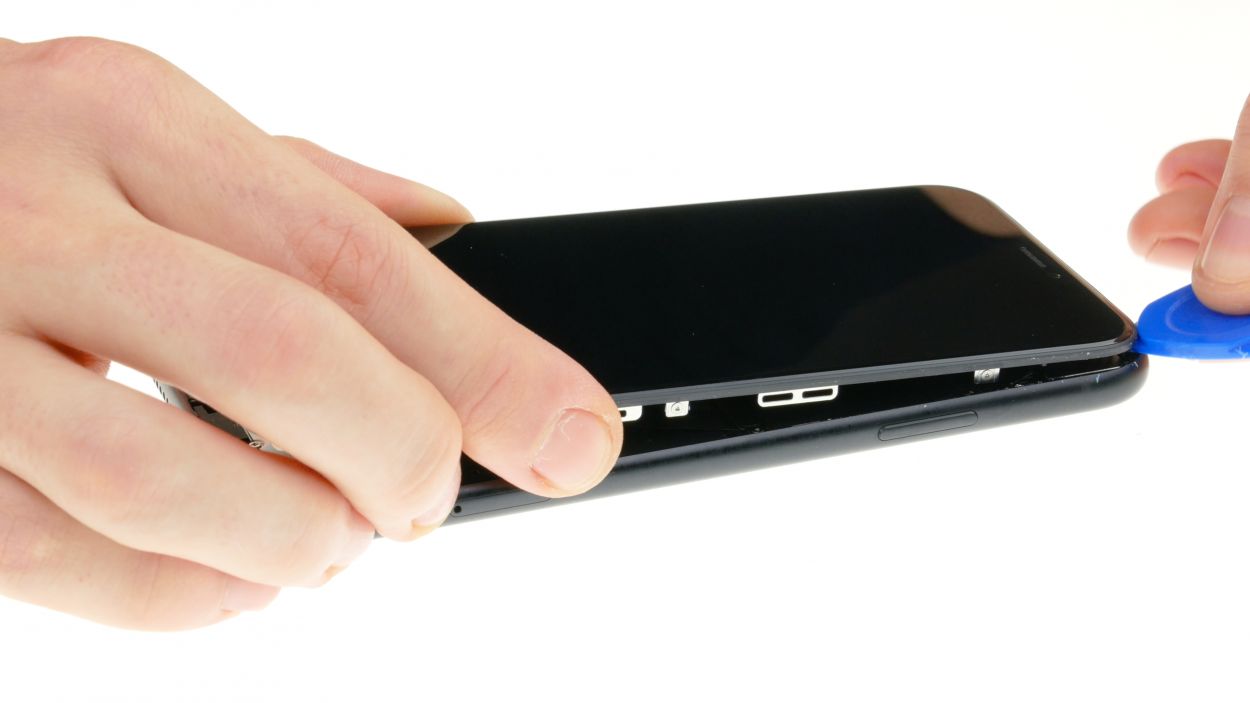
– Set your iPhone Xr down on a soft, clean surface to keep that back looking fresh and scratch-free!
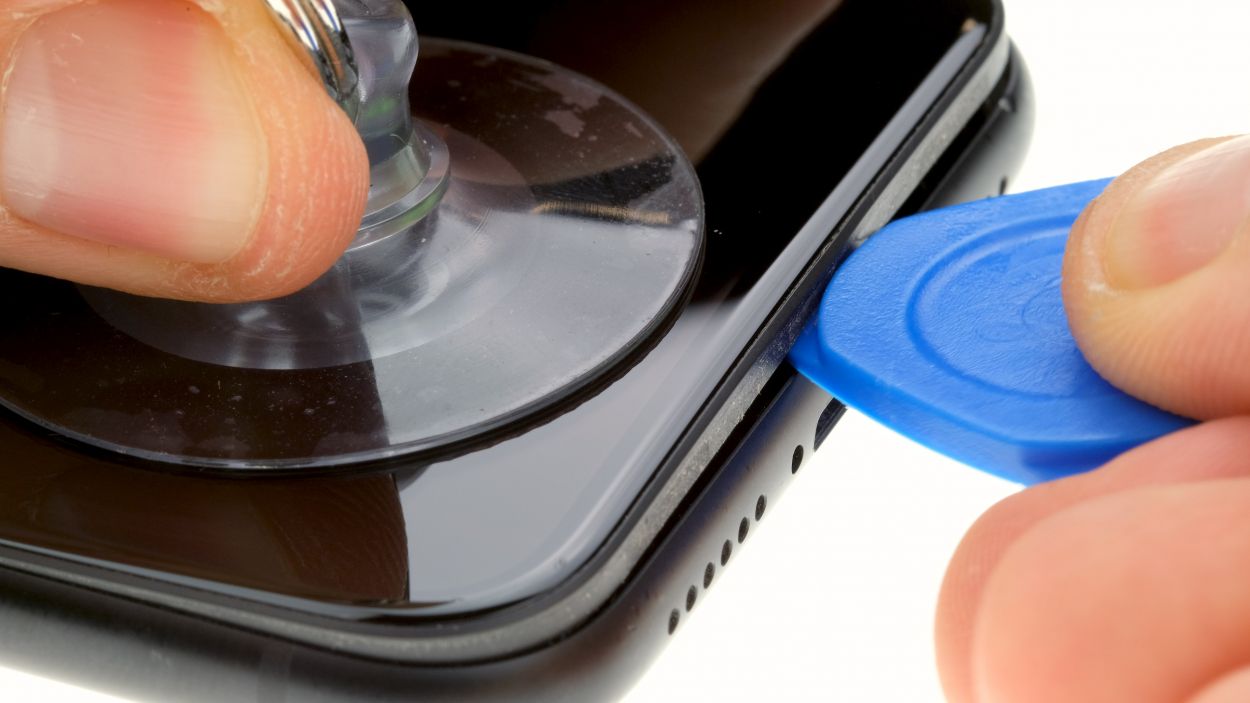
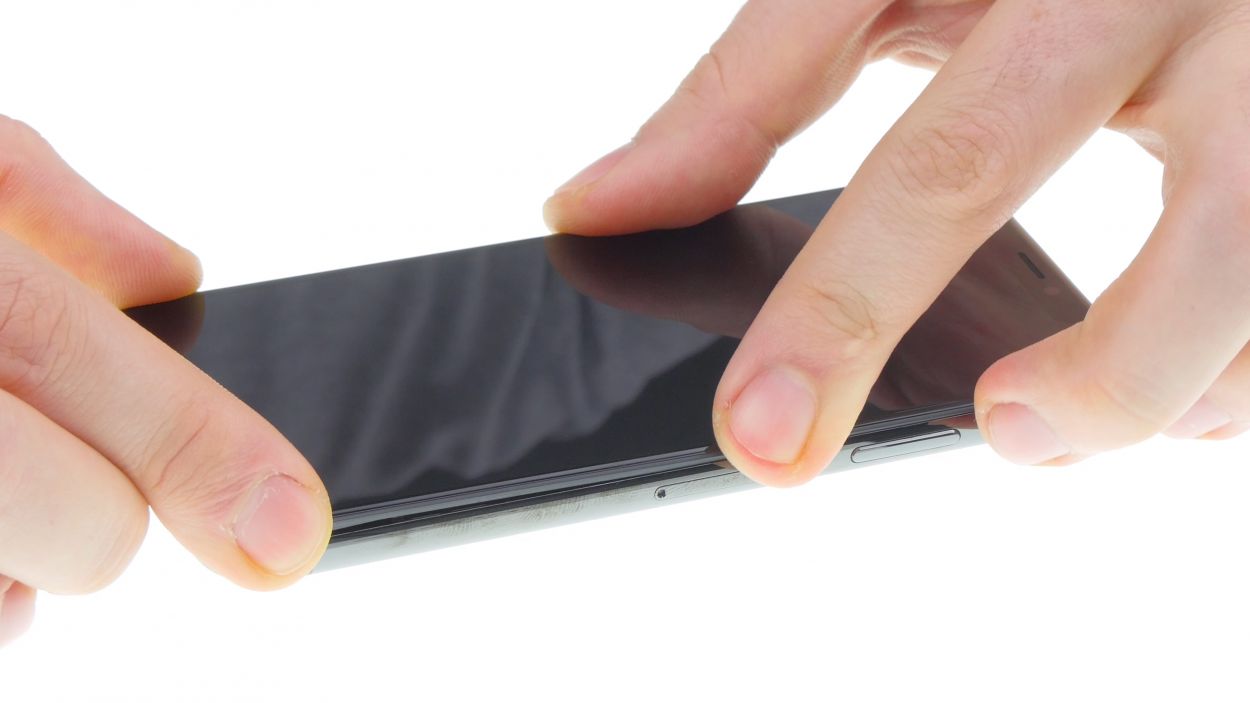
– To get the front panel off, you’ll need a suction cup, a hard plastic pick, and a heat gun. If your screen is cracked like a bad joke, slap some packing tape over it before you dive in.
– The display is glued to the frame, so let’s warm things up! Use a heat gun to gently heat the edges of the display to about 60°C (140°F).
– Stick the suction cup at the bottom of the display. While you’re lifting with the suction cup, slide that hard plastic pick between the frame and the display and gently push down on the frame.
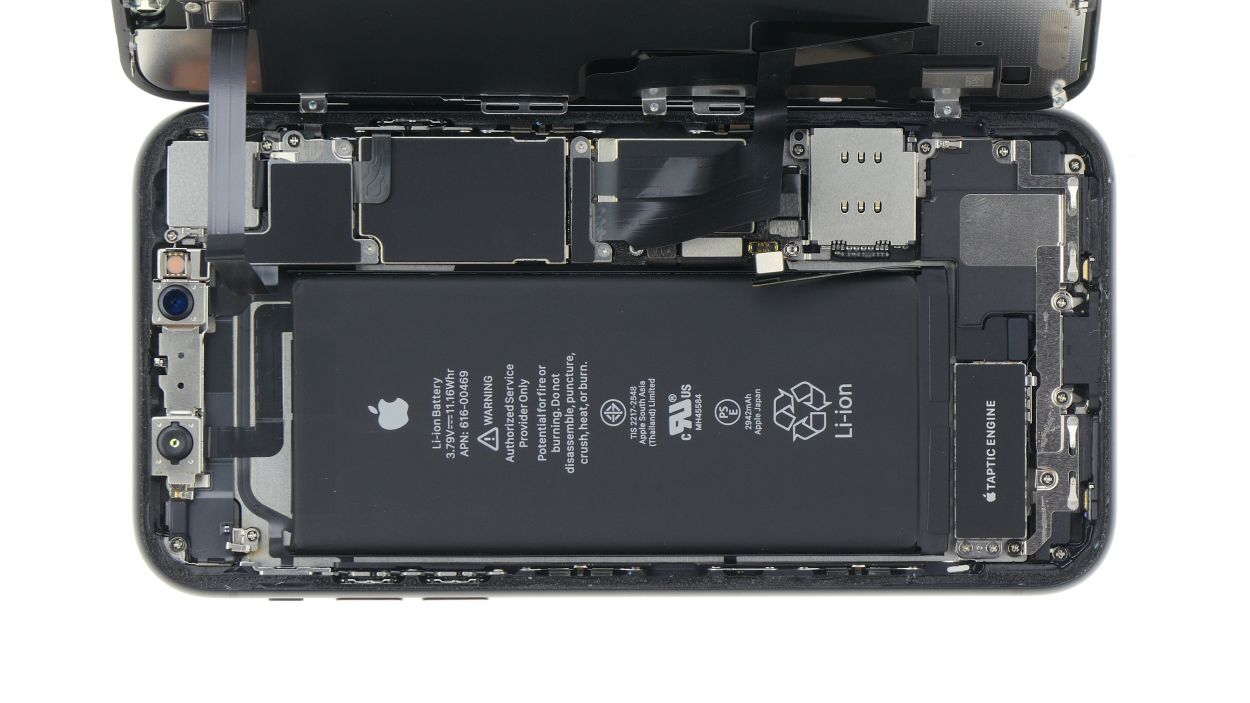
Step 4


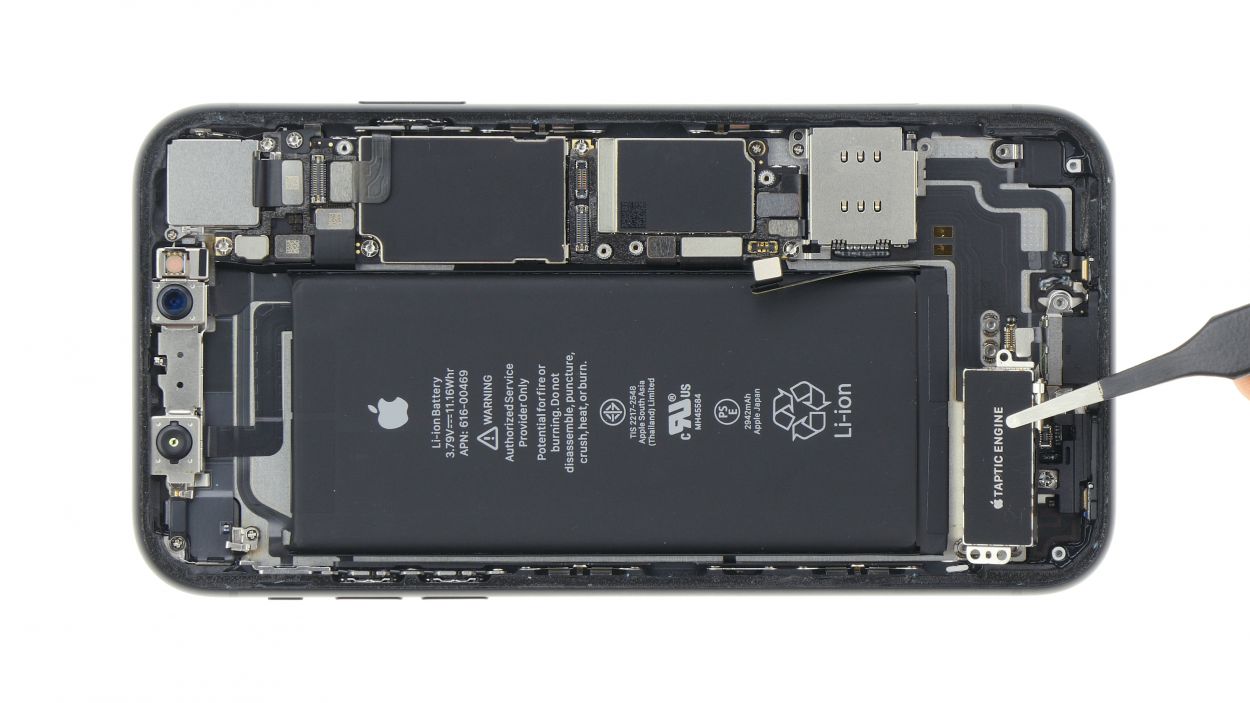
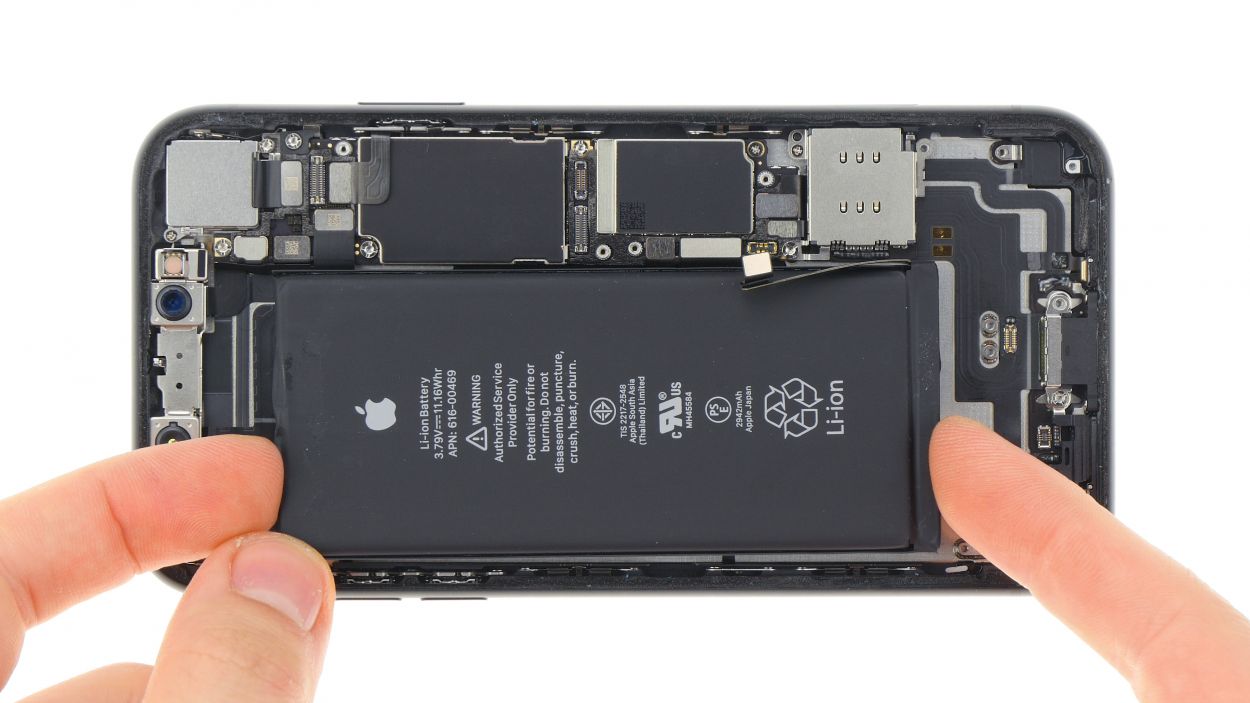
– Grab your Y-Type screwdriver (Y000) and let’s get those Y-Type screws out of the way! Once you’ve done that, gently lift off the bracket plate. Remember to keep all the little parts together on your magnetic pad so they don’t play hide and seek.
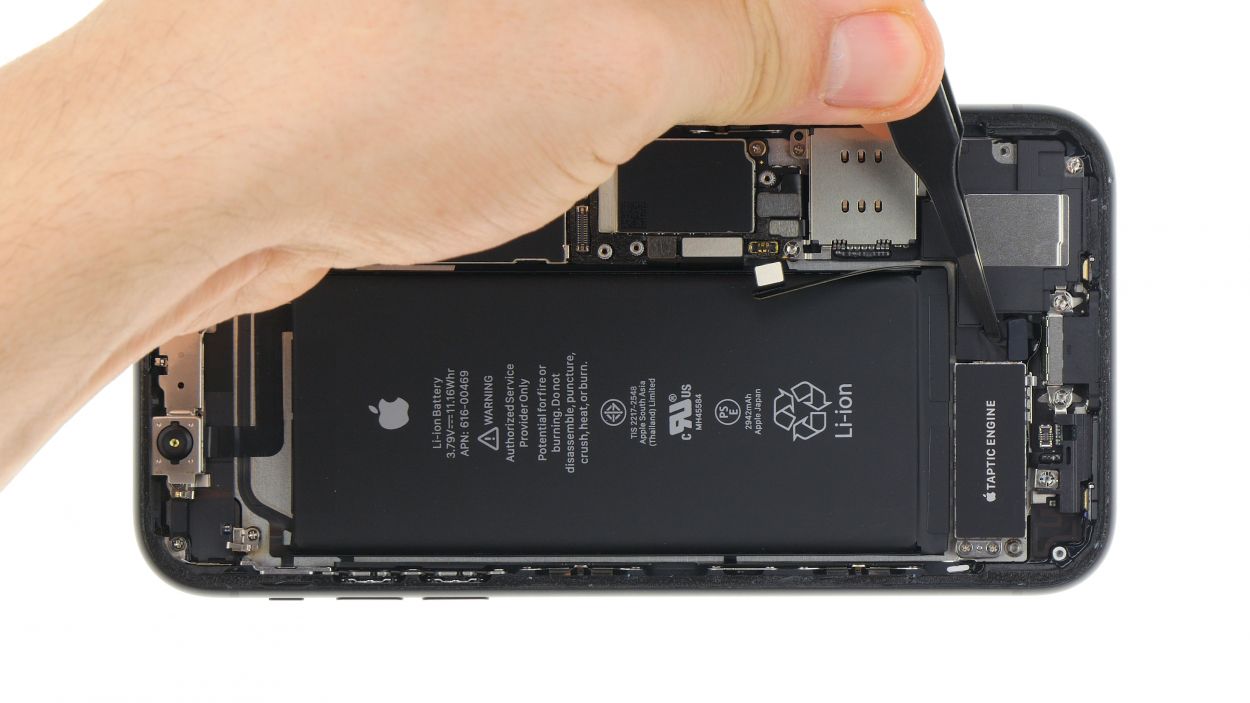
– Next up, take it slow and carefully pry off the battery contact. Just slide a spudger underneath that connector and lift it gently. You’ve got this!
3 × 1,2 mm Y-Type
Battery connector
Before you get your hands dirty, make sure to disconnect the battery contact. This little move will save you from short circuits and prevent your device from accidentally springing to life while you’re working on it!
So, here’s the scoop on those Y-Type screws that Apple rolled out with the iPhone 7. They sometimes get mistaken for Tri-Point or Tri-Wing screws, but let’s set the record straight. Grab a Y-Type screwdriver that fits just right to avoid stripping those screw heads. You’ve got this!
Step 5


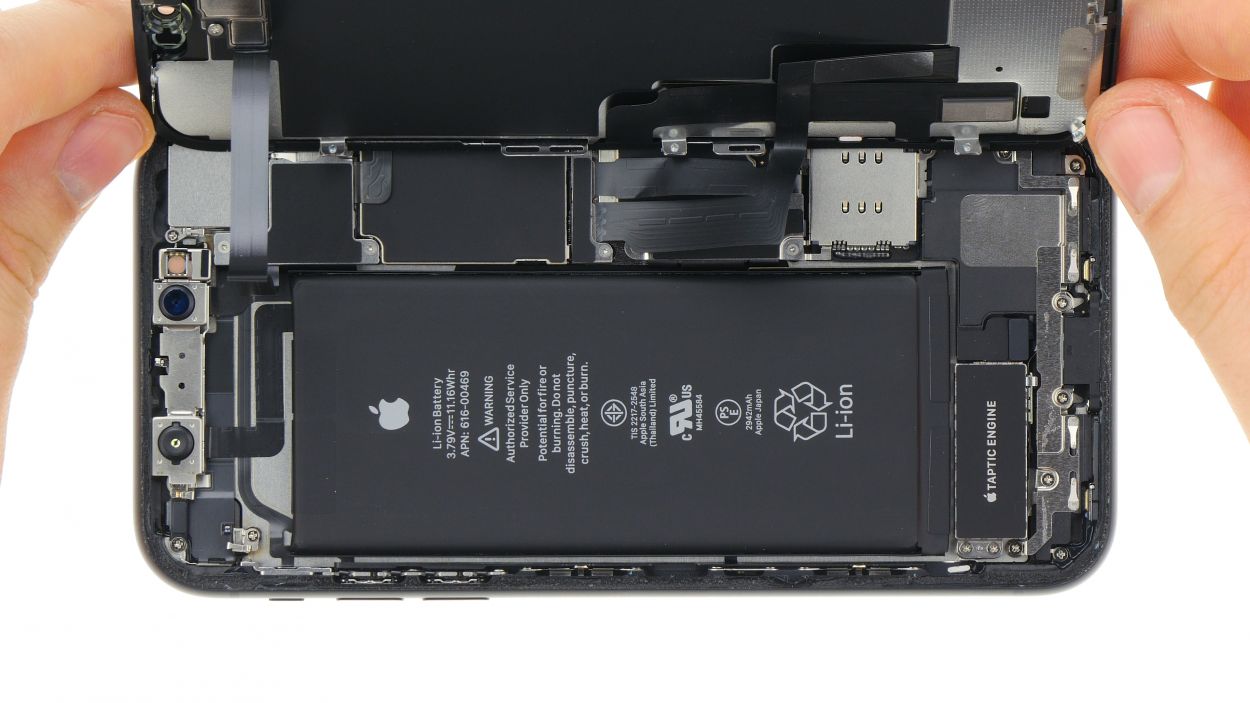
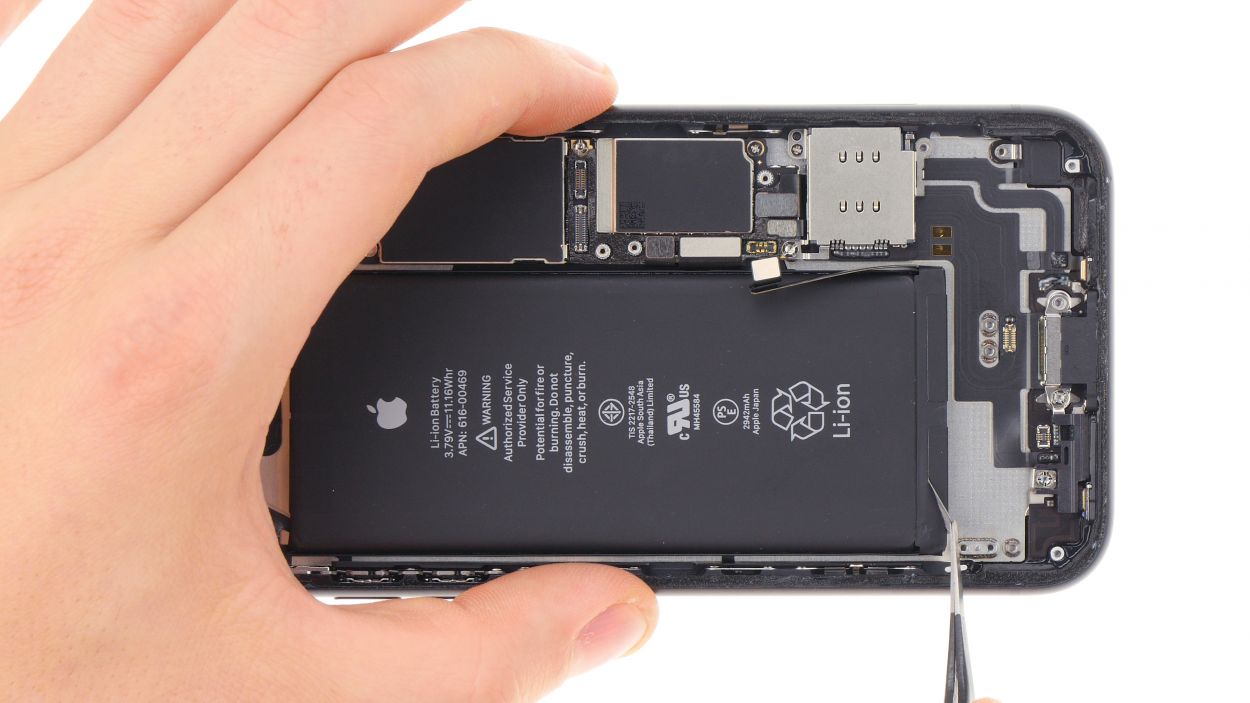
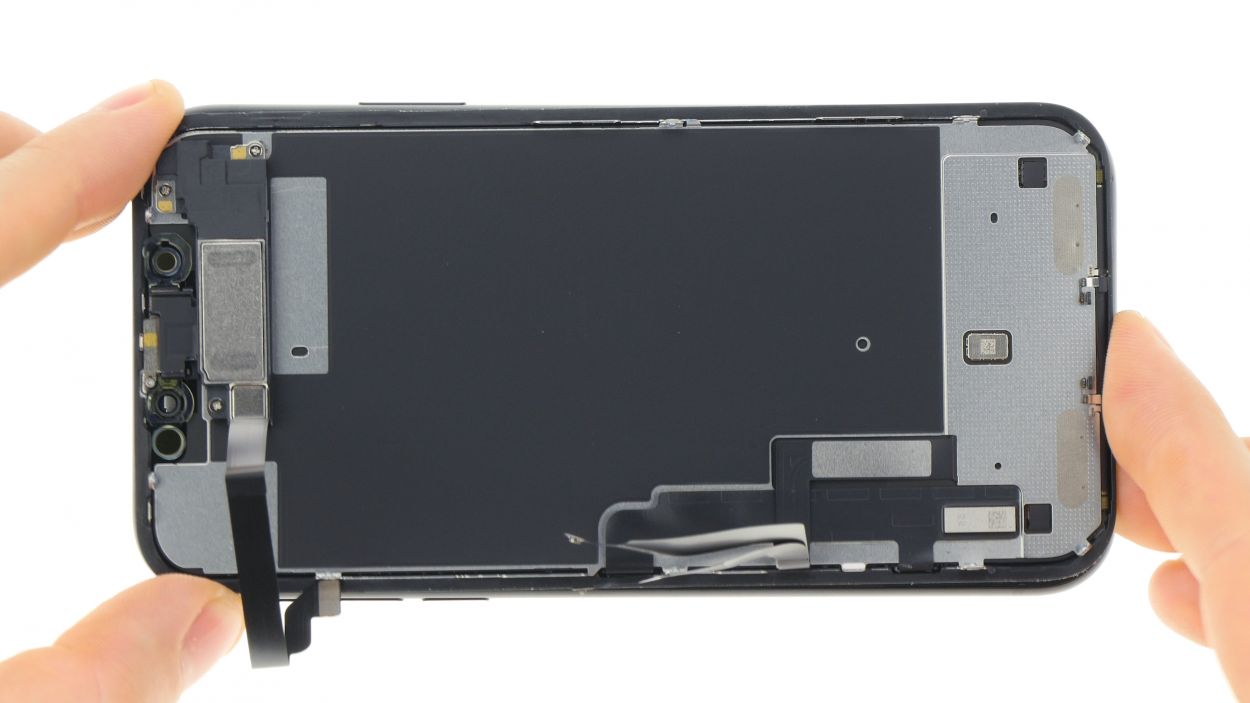
– The display unit is linked to three connectors, snugly tucked beneath two cover plates. Let’s uncover those connections!
– Grab your trusty spudger and gently pry apart the connectors for the display and earpiece, one at a time. You’re doing great!
2 × 1,2 mm Y-Type
Display connector
3 × 1,2 mm Y-Type
1 × 1,5 mm Phillips
1 × 1,3 mm Phillips
Earpiece connector
When you’re prying off those connectors with your trusty spudger, channel your inner zen master! Keep a steady hand to avoid any accidental mishaps, and make sure to hold the display steady so it doesn’t decide to go on its own little adventure while you work.
After you’ve unplugged those two lower connectors, feel free to lay the display flat next to your device. The earpiece cable is long enough to accommodate this little move!
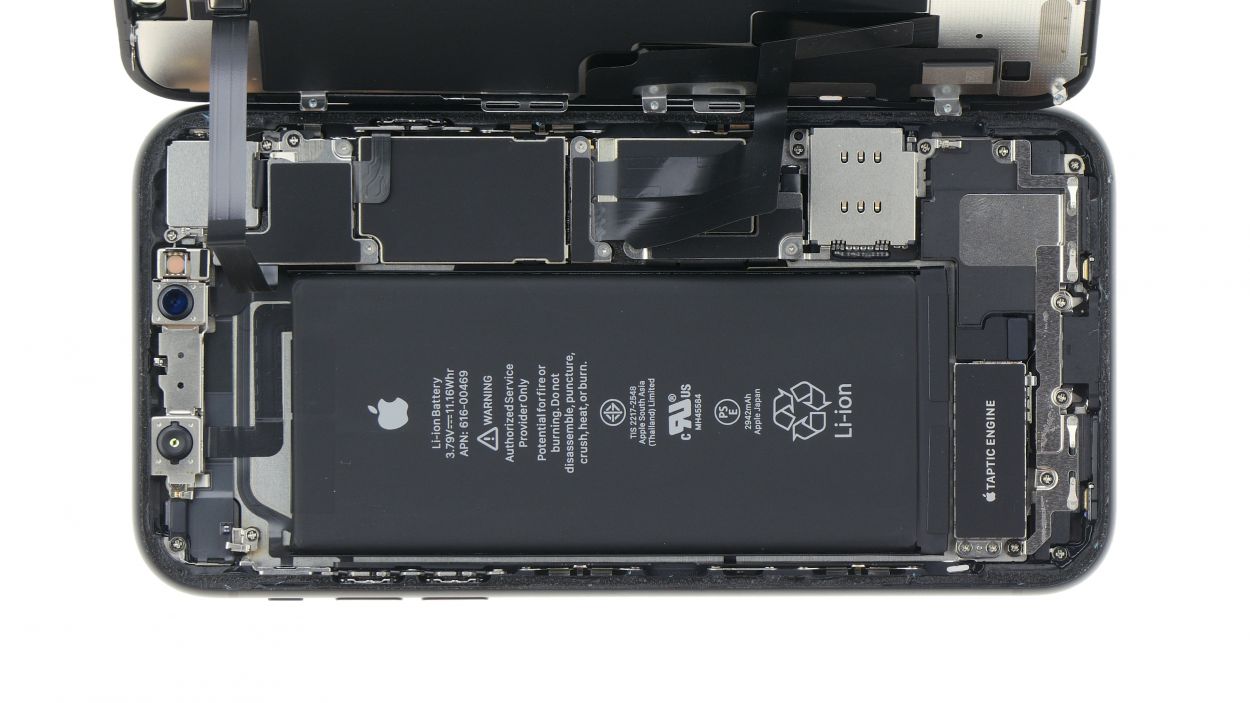
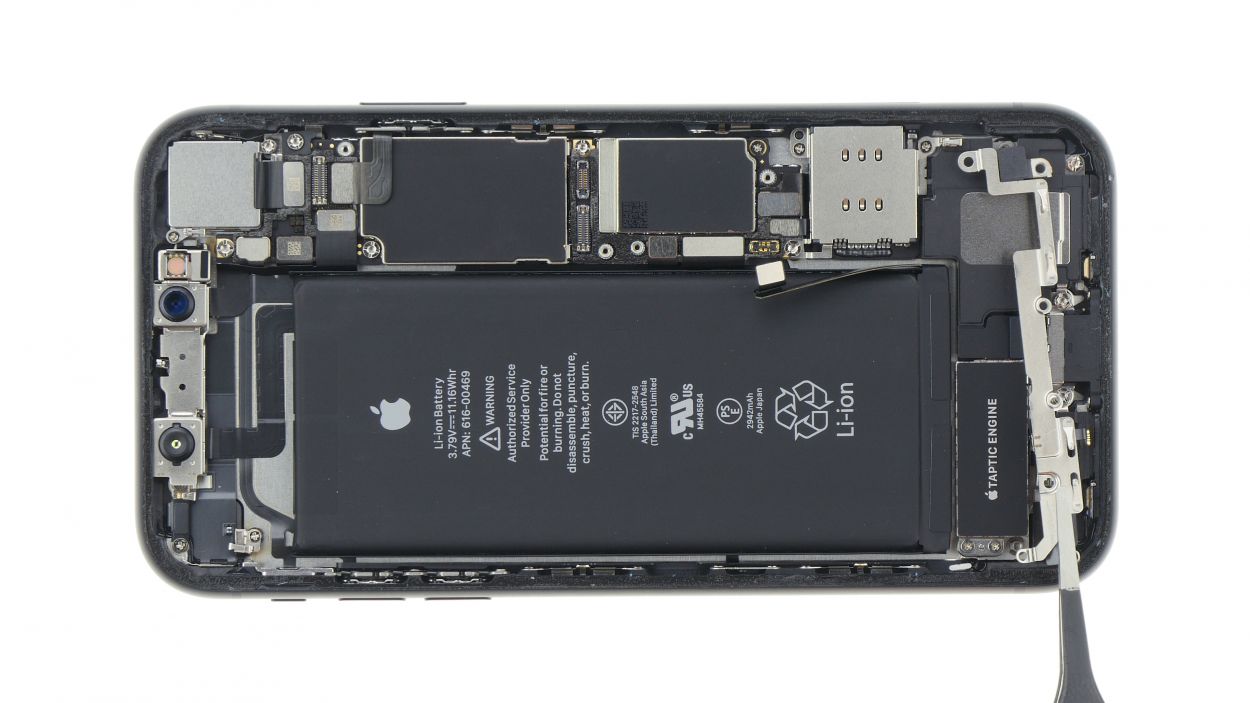
Step 6
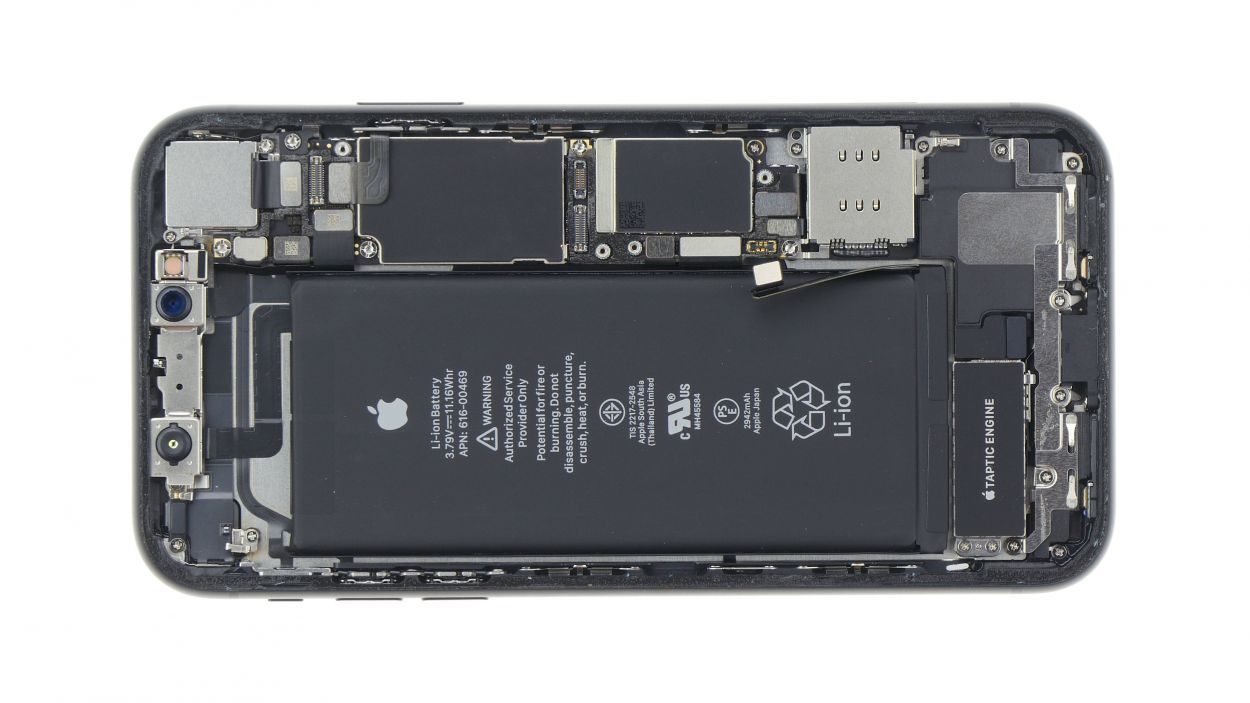
1 × 1,9 mm Phillips
1 × 1,4 mm Phillips
2 × 1,6 mm Phillips
3 × 1,2 mm Phillips
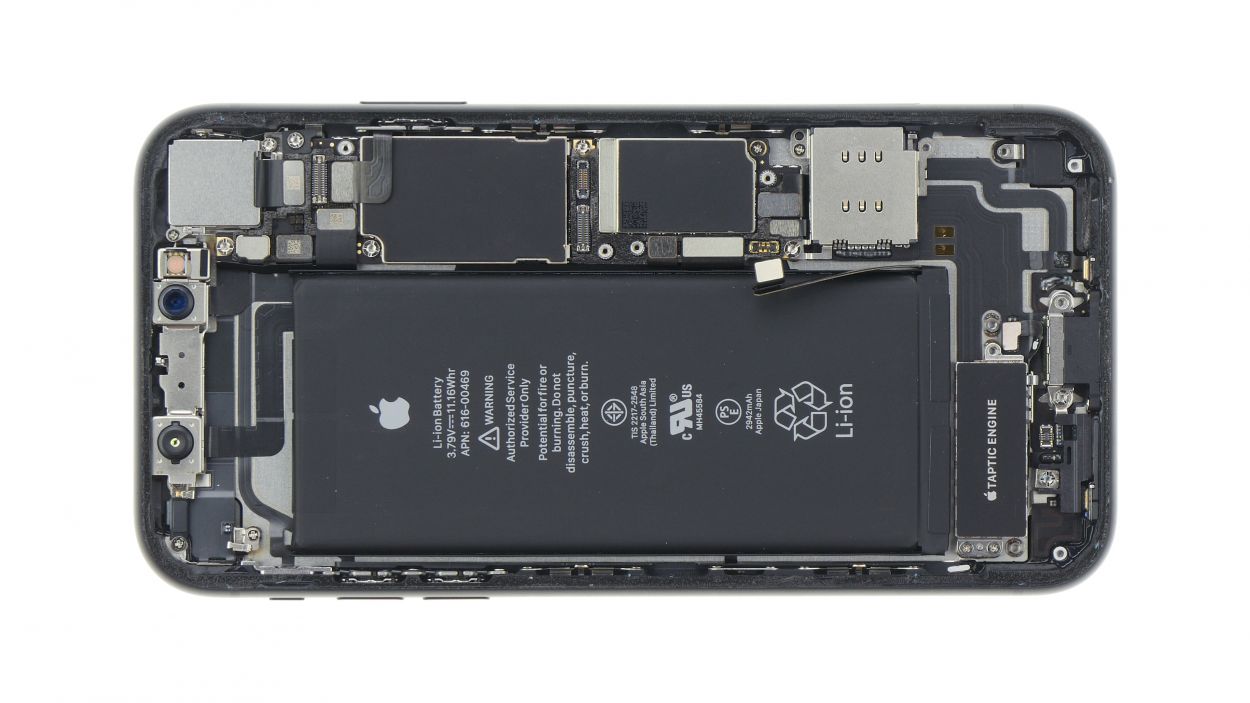
– Time to tackle those Phillips screws of various lengths from the cover plate of the speaker and the Taptic Engine! Pop them out and place them on your trusty magnet mat so they can chill there until you need to put them back. No screw left behind!
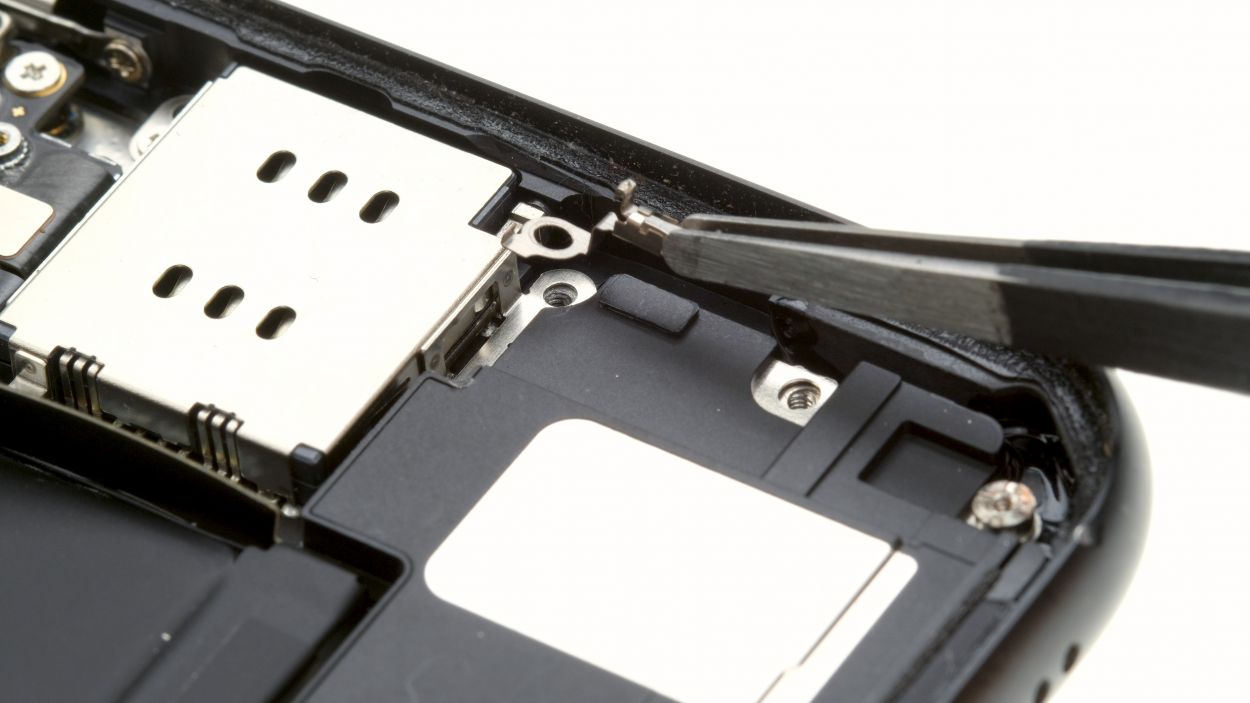
Step 7


1 × 1,2 mm Phillips
1 × 2,1 mm Standoff
1 × 2,4 mm Standoff
1 × 2,1 mm Phillips
1 × 1,8 mm Phillips
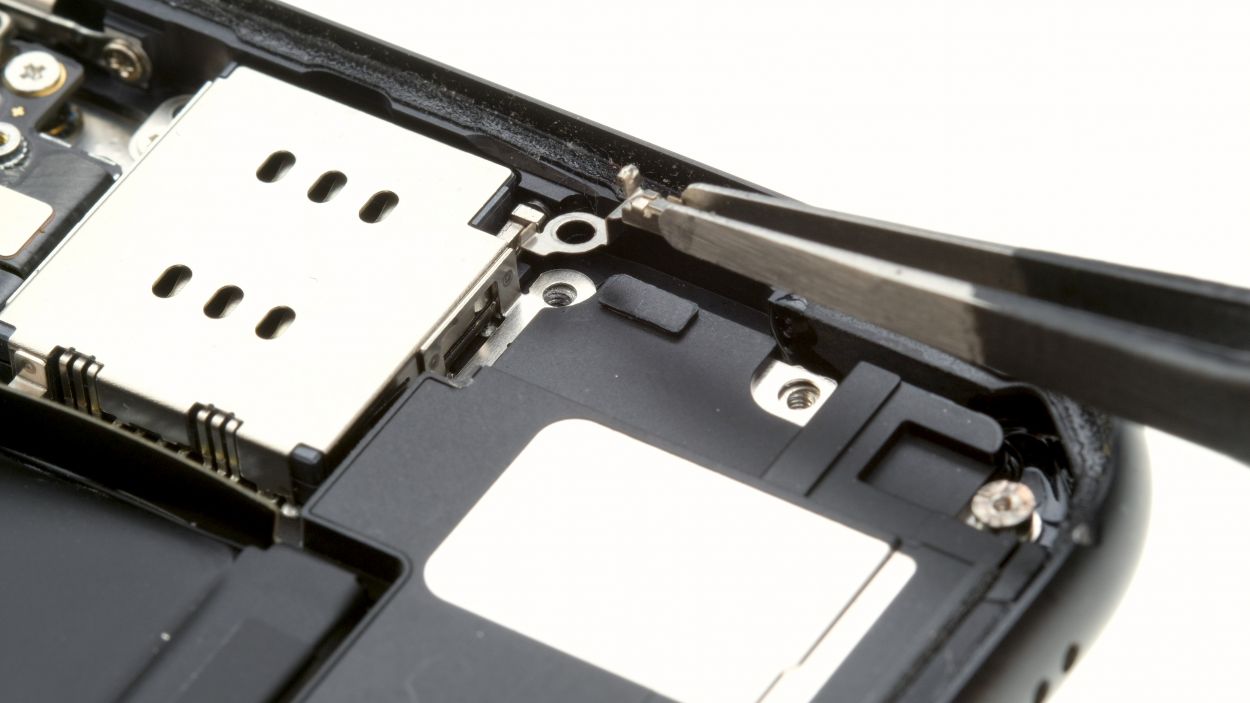
– Let’s kick things off by taking off that black rubber cover. It’s just hanging out, waiting for you!
– Now, loosen up the screw on the metal cover plate and all the other screws that are keeping the speaker in place. They’re ready to be set free!
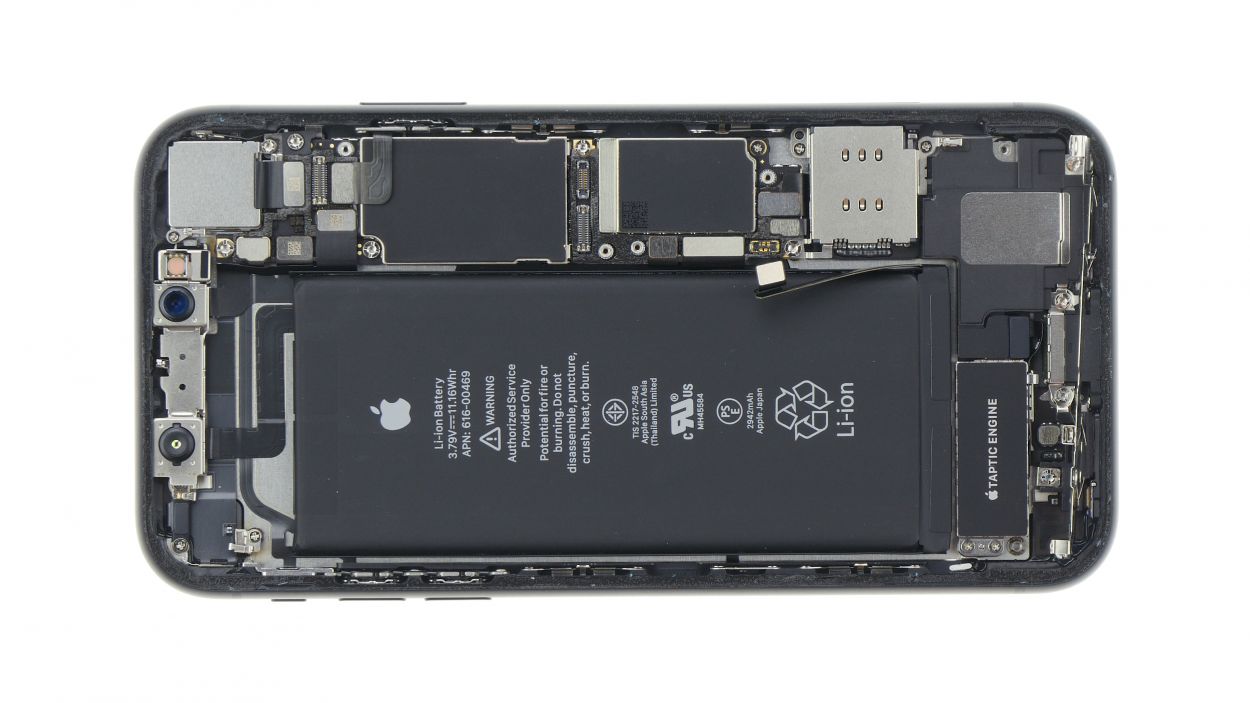
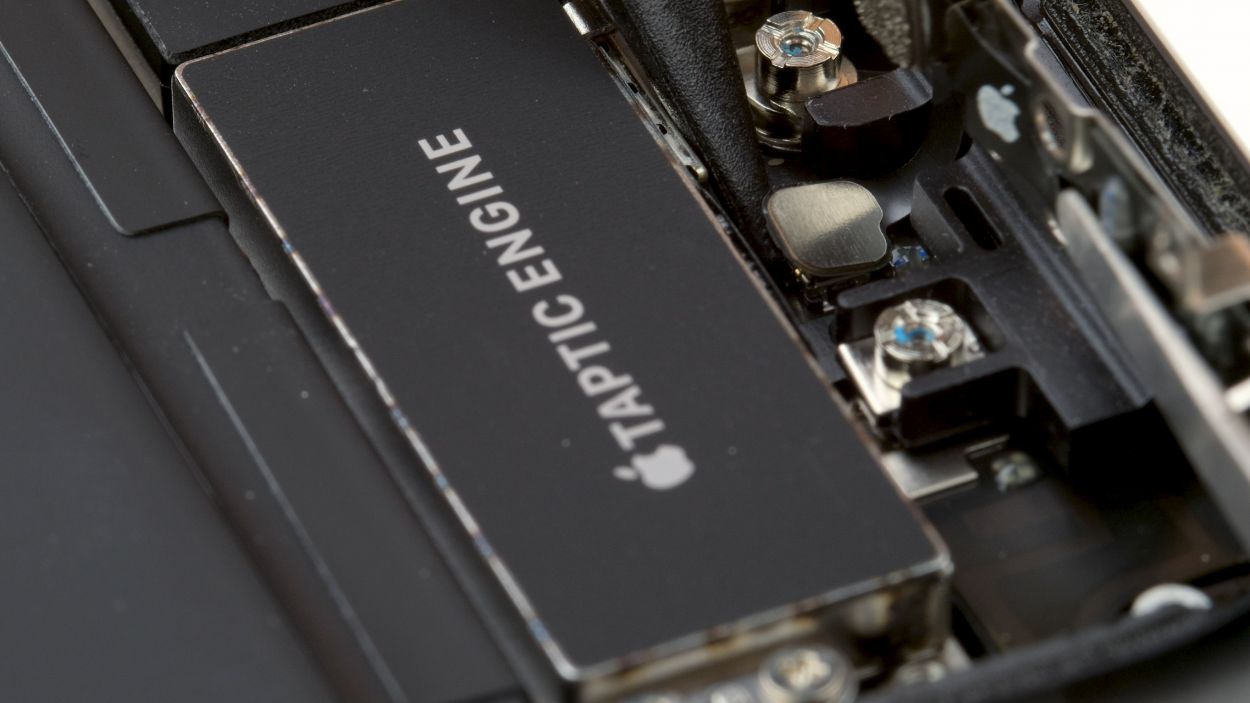
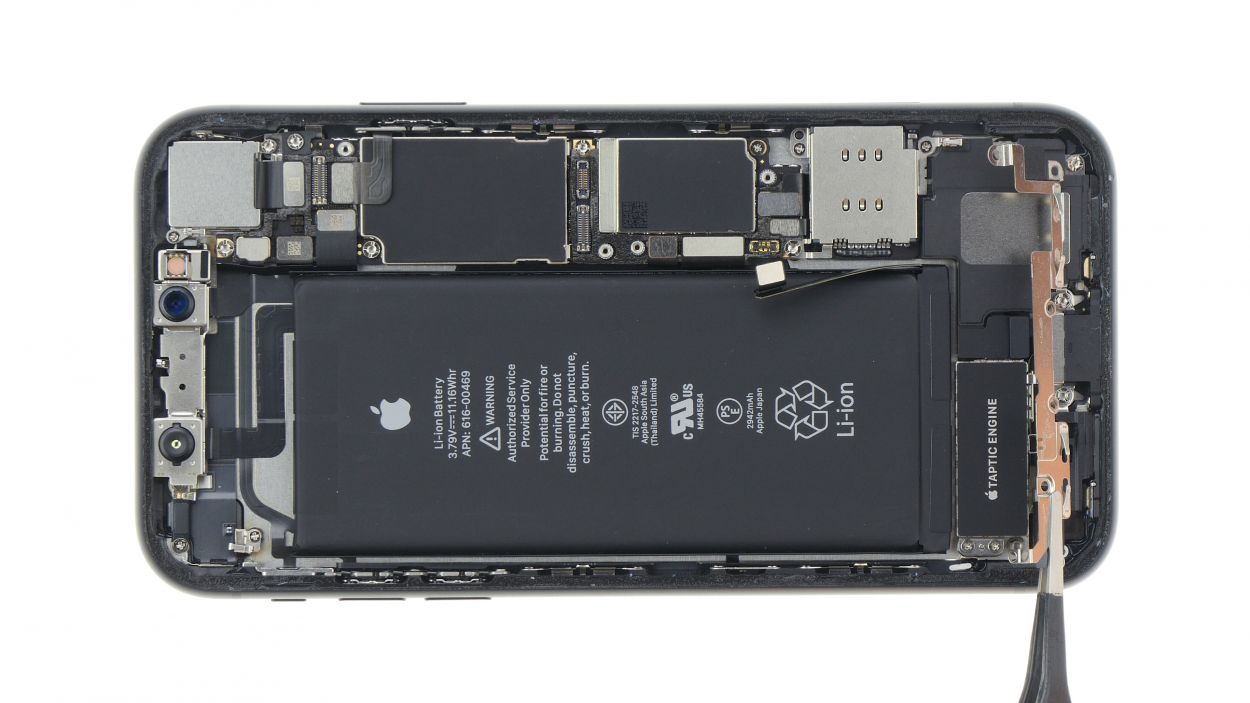
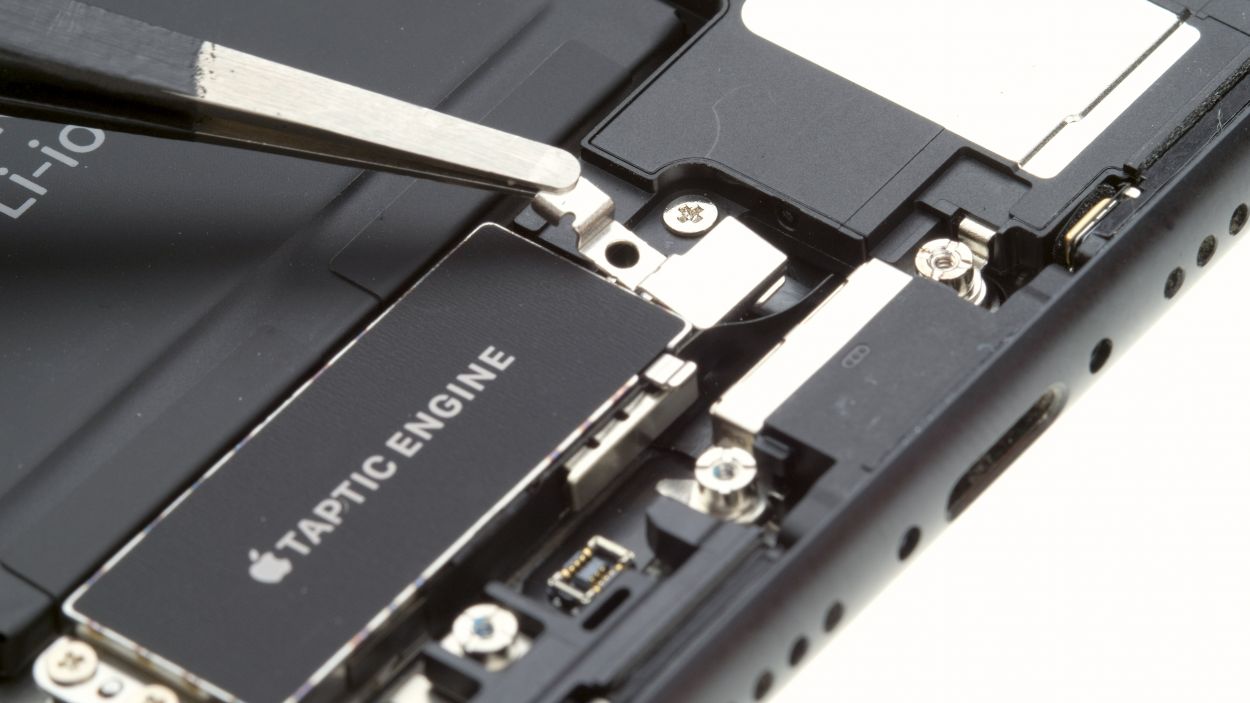
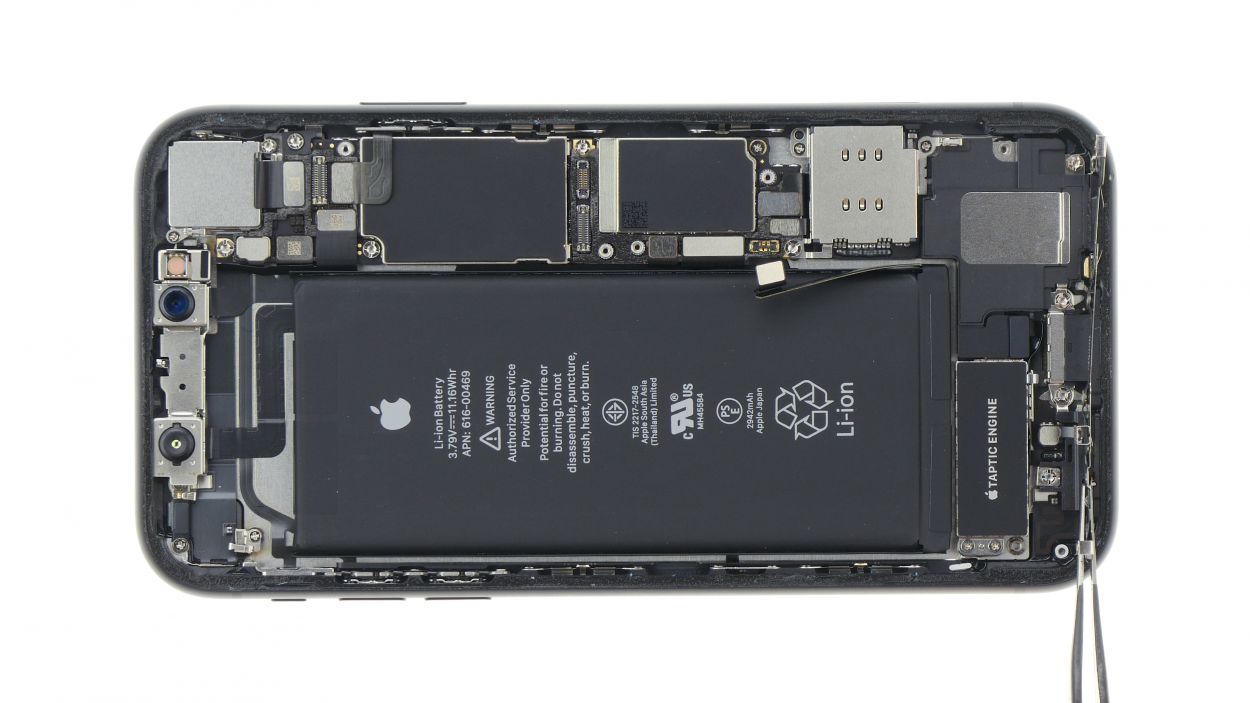
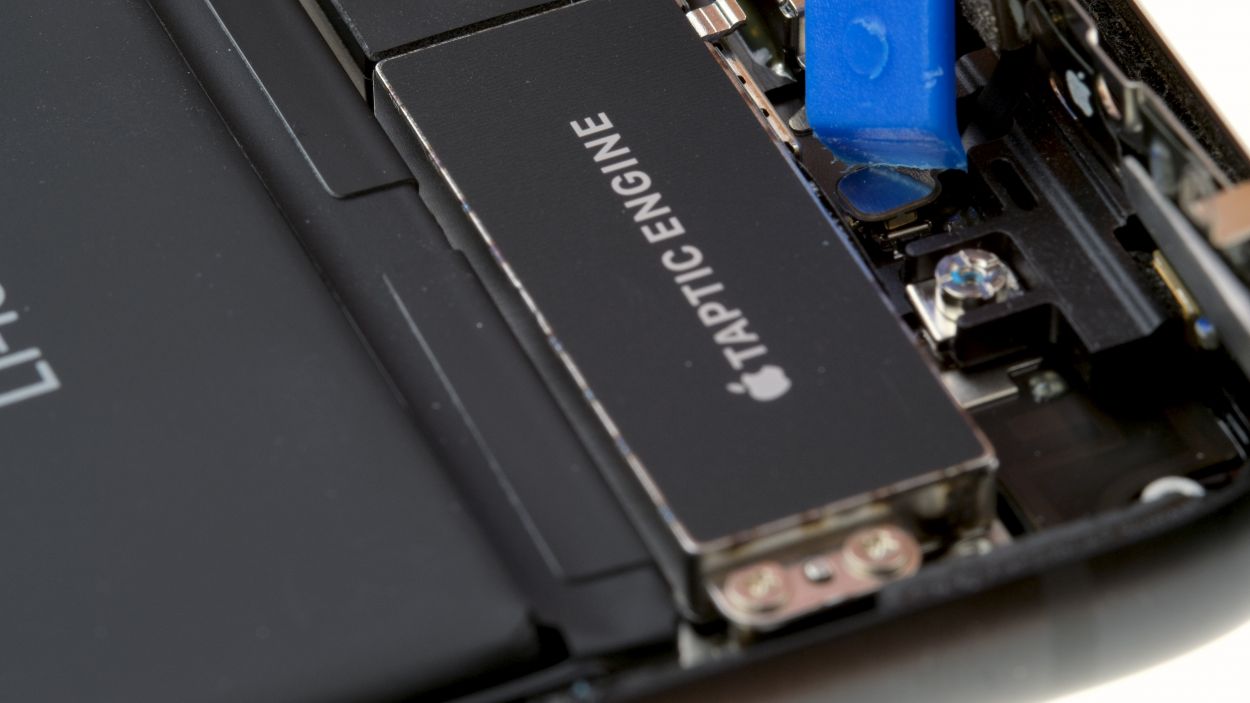
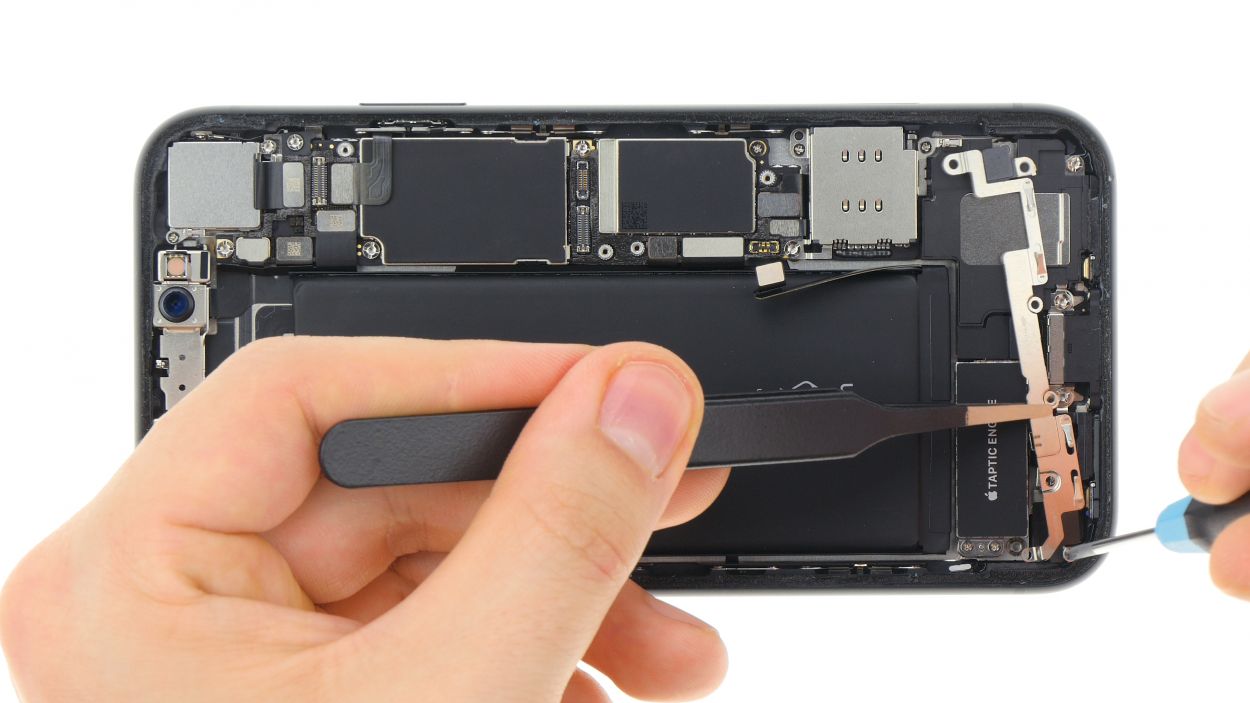
Step 8
2 × 1,4 mm Phillips
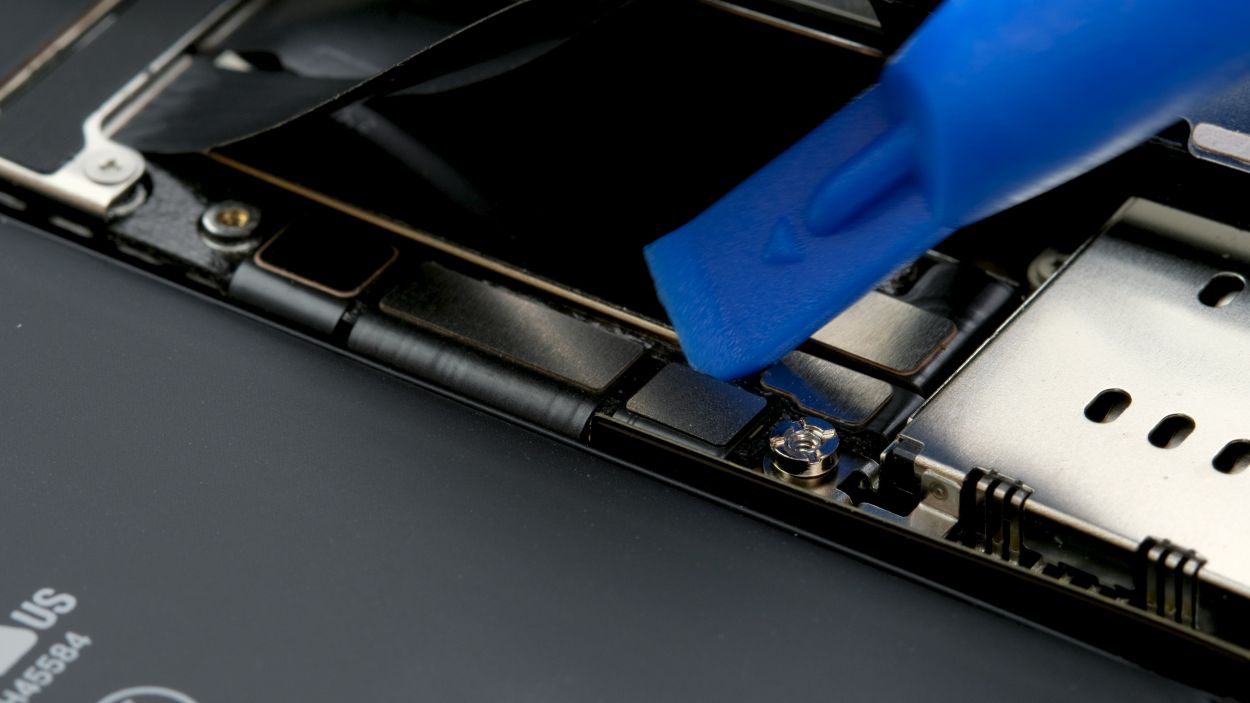
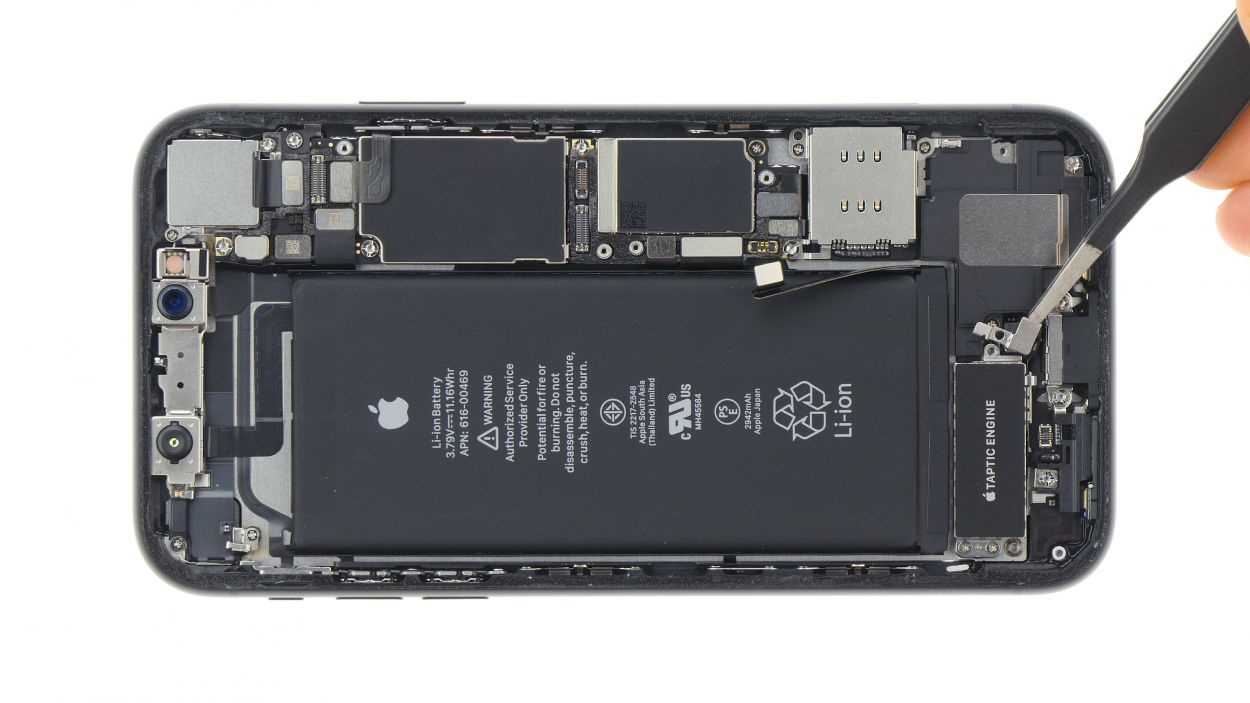
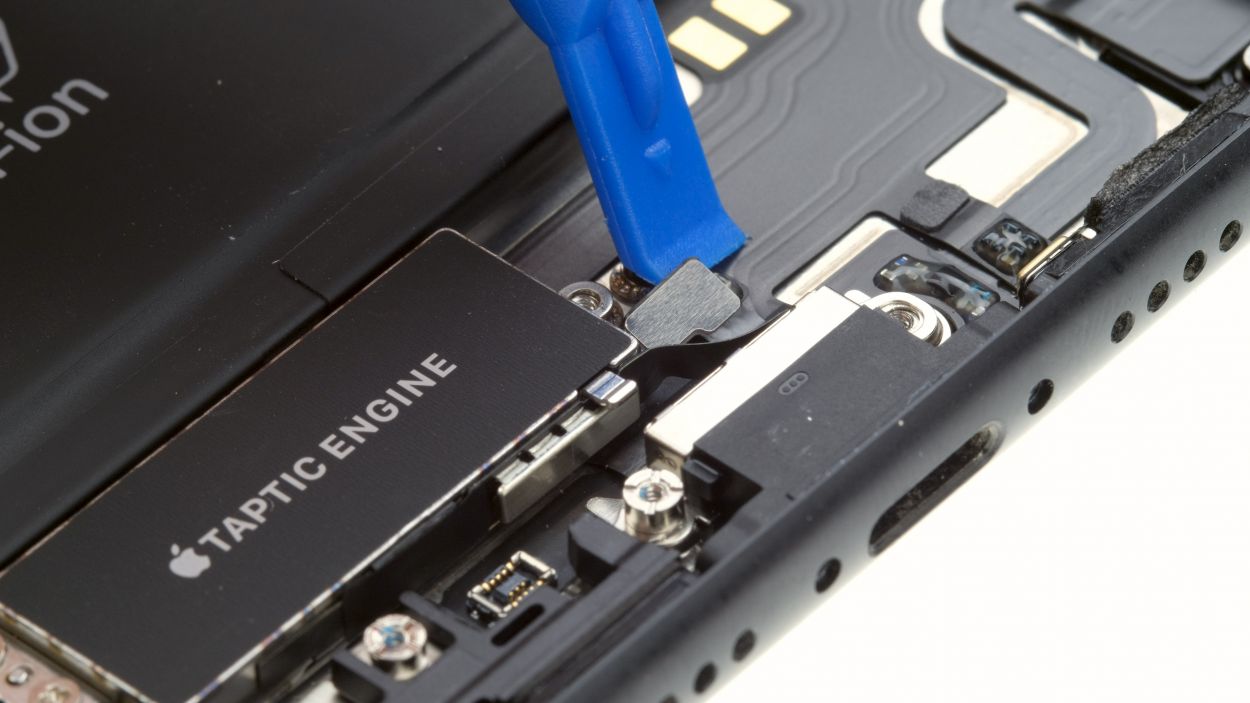
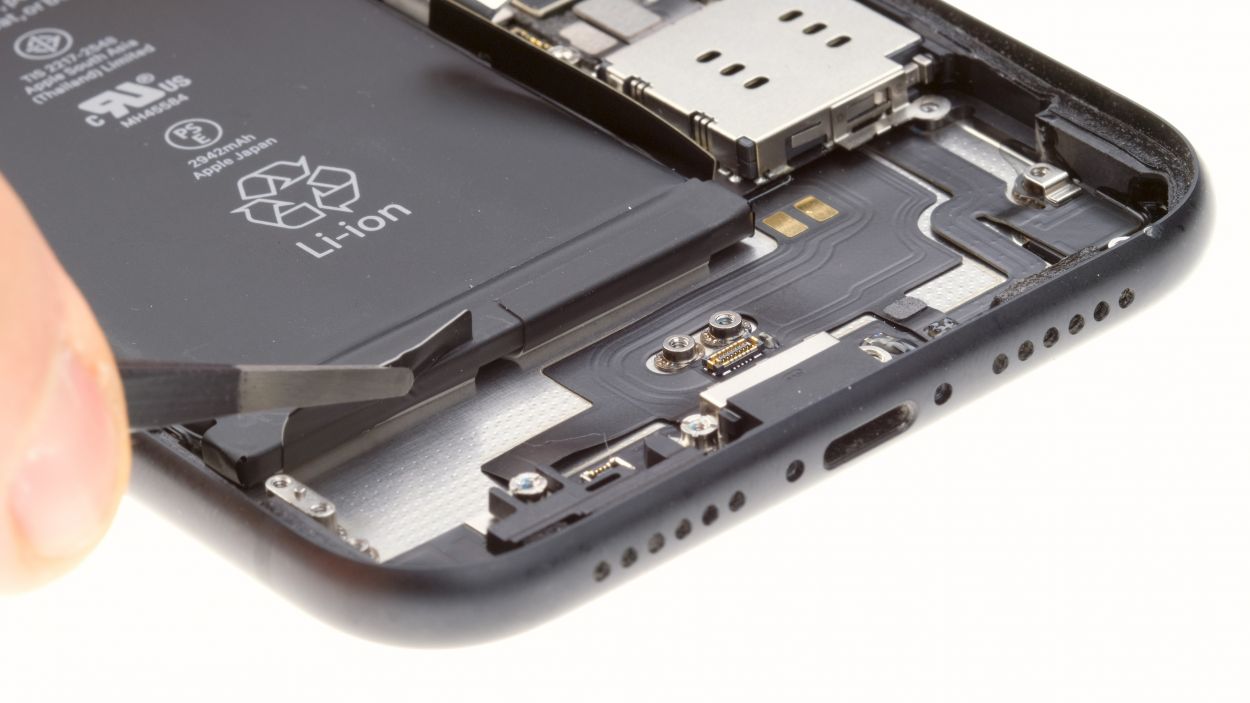
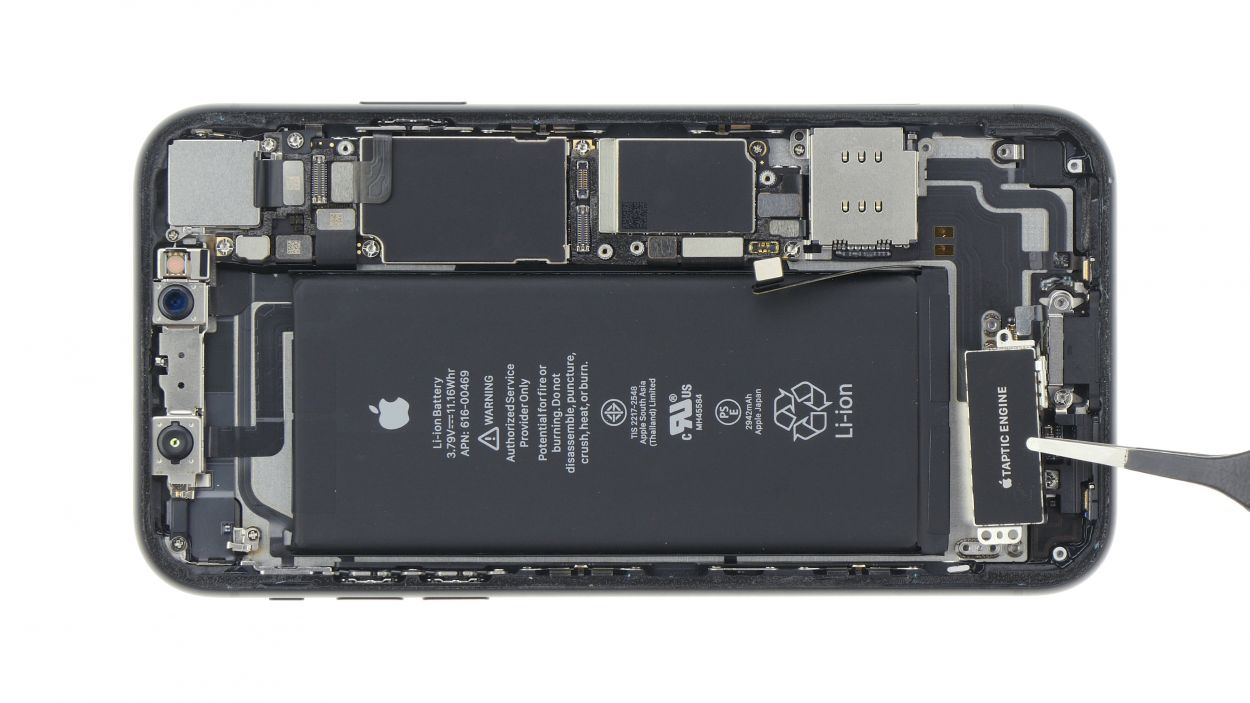
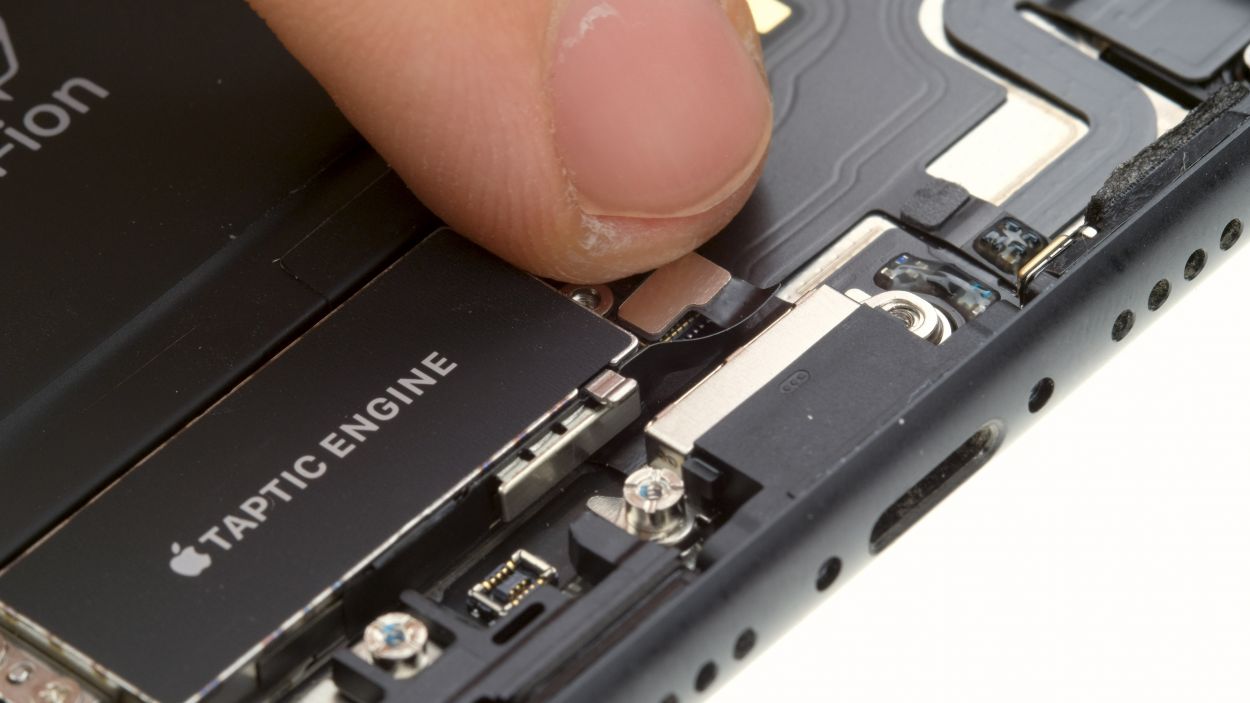
Taptic Engine Connector
– Grab your trusty spudger and gently wiggle that connector loose from the Taptic Engine. You’ve got this!
– Next up, let’s unscrew those Phillips screws holding the Taptic Engine in place. Time to set it free!
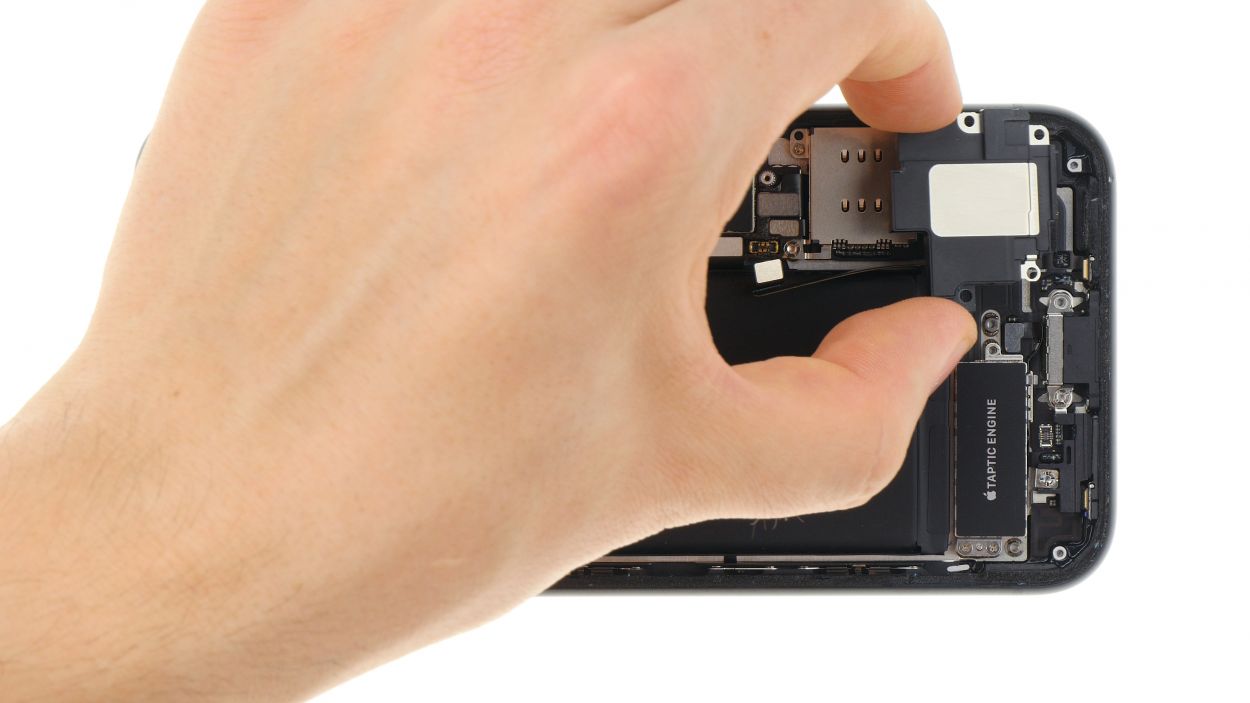
– Now, carefully lift out the Taptic Engine and give it a little wave goodbye.
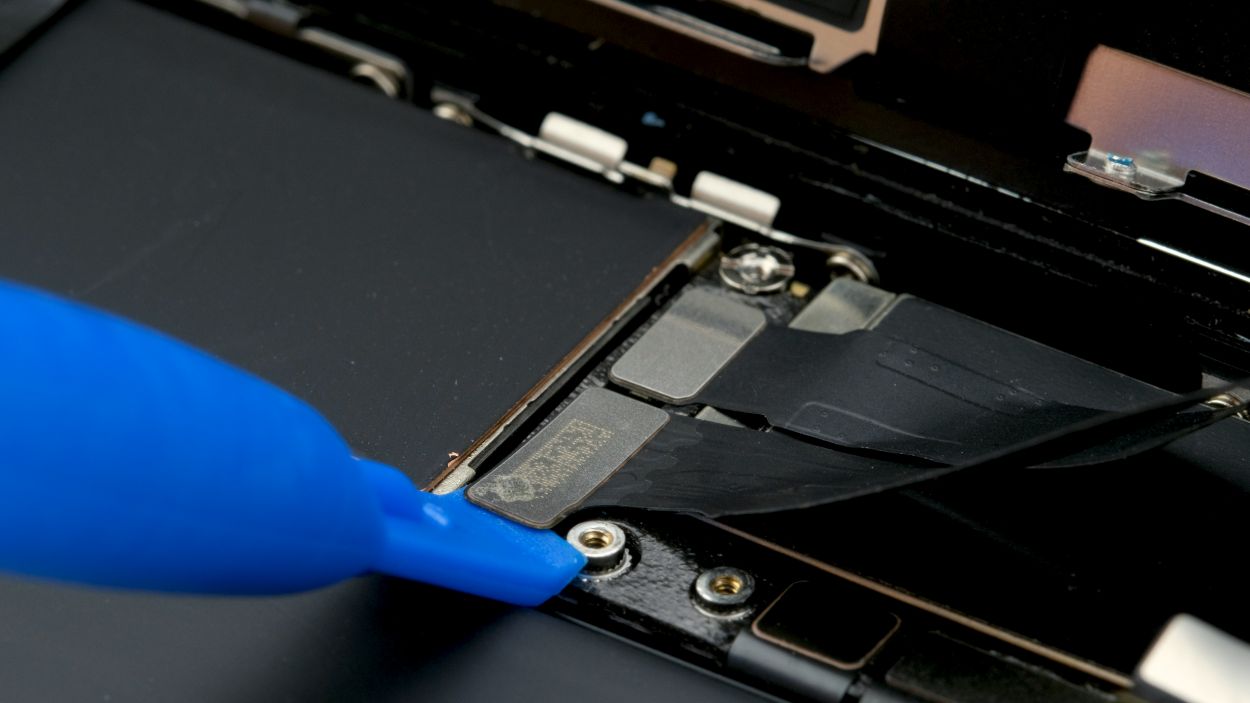
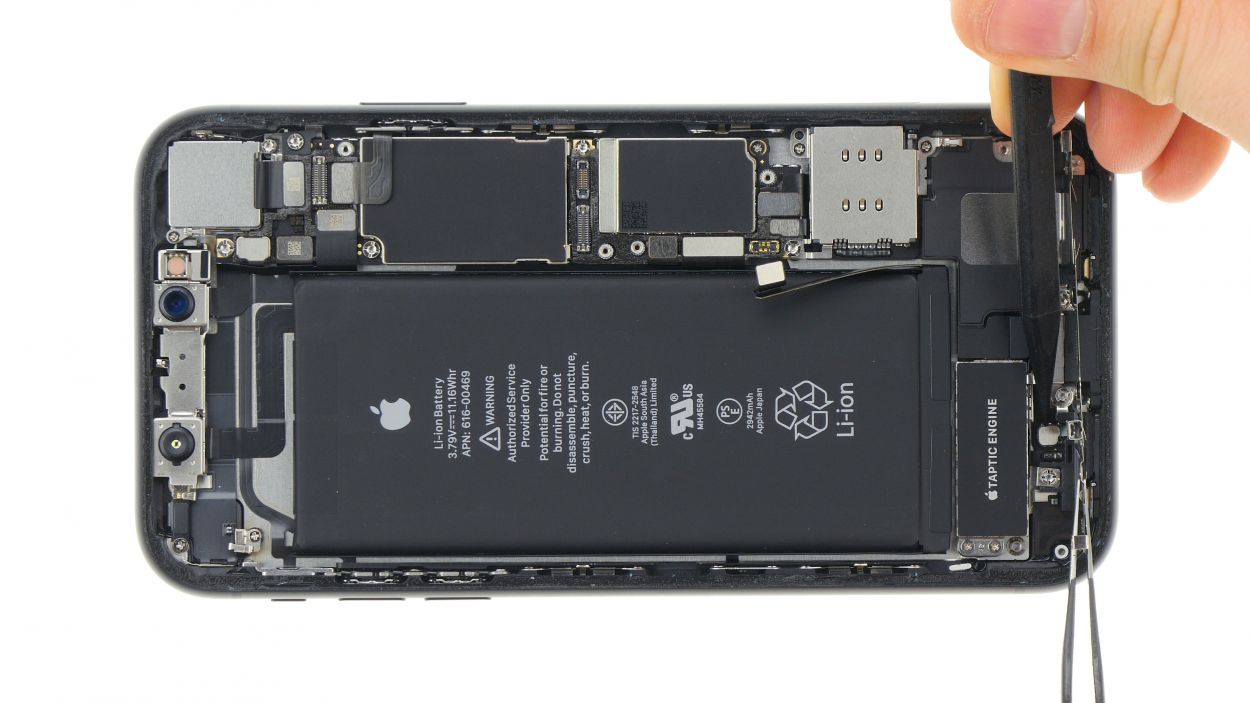
Step 9

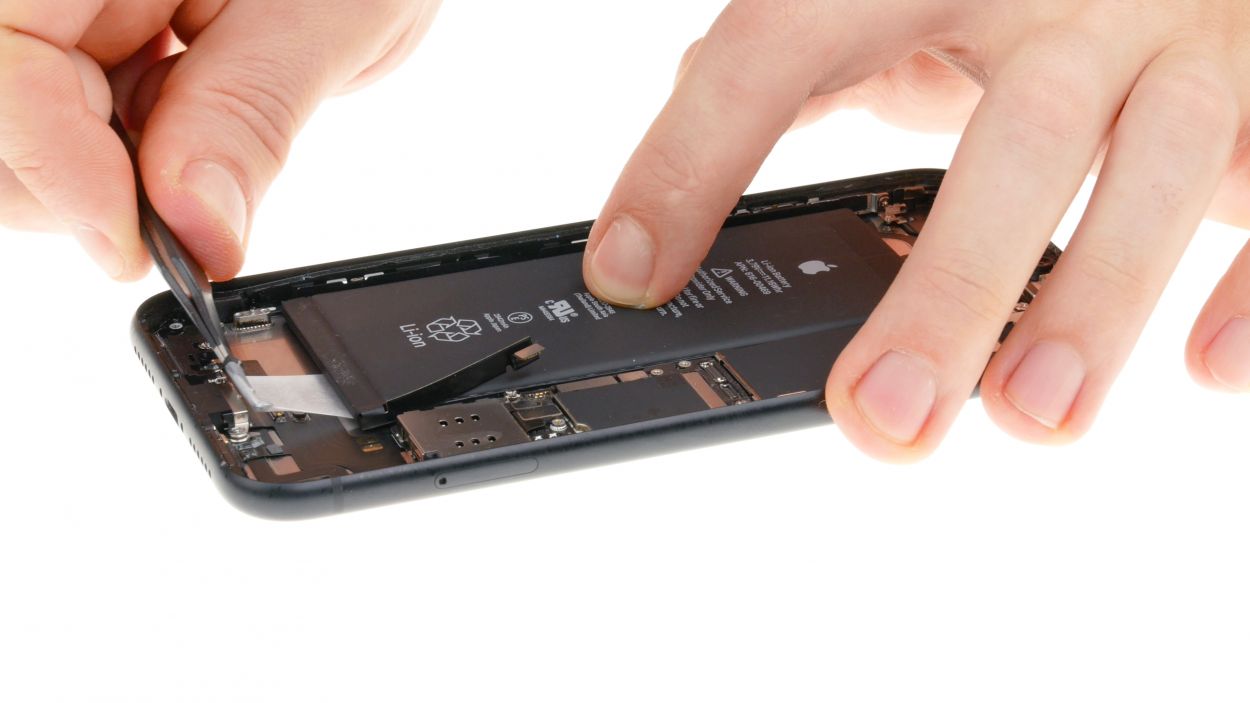

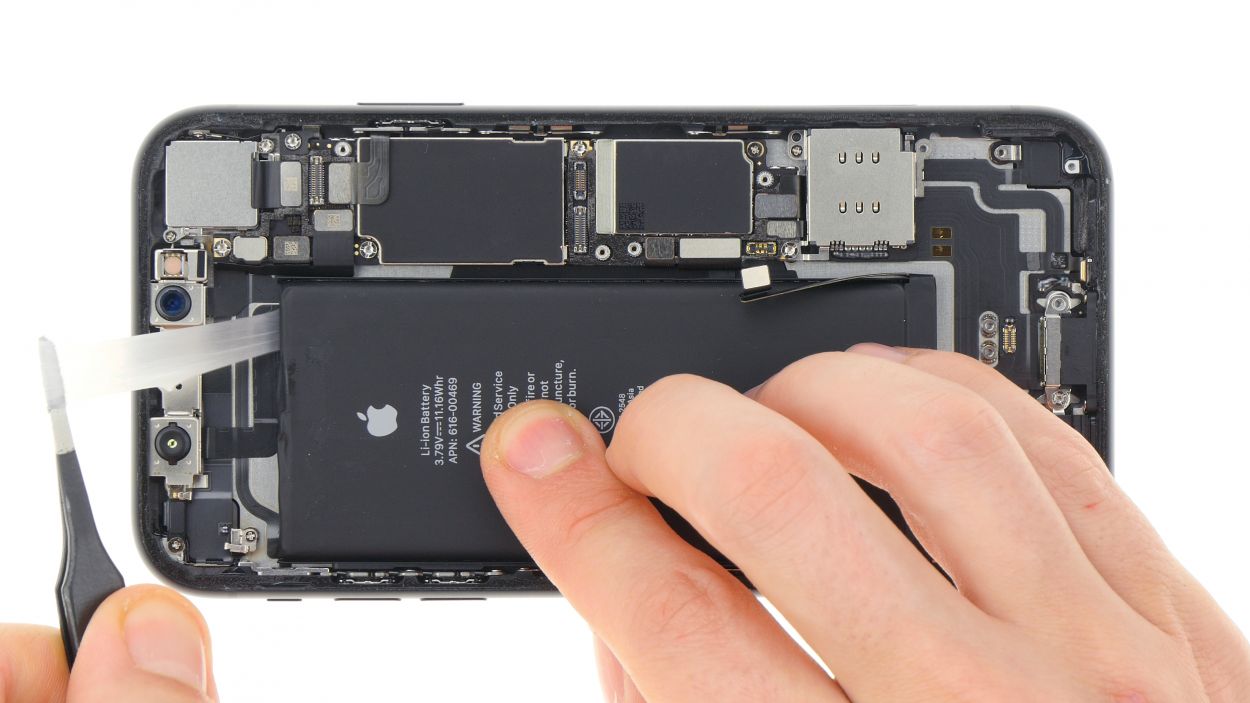
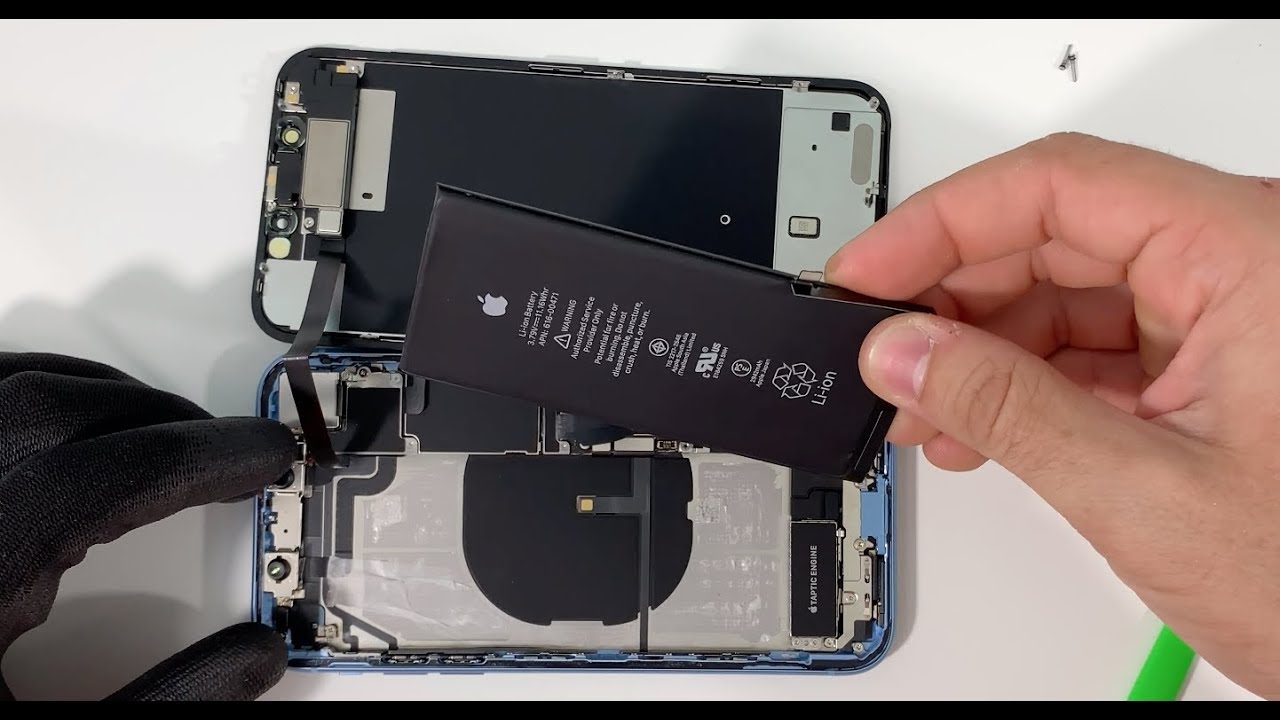
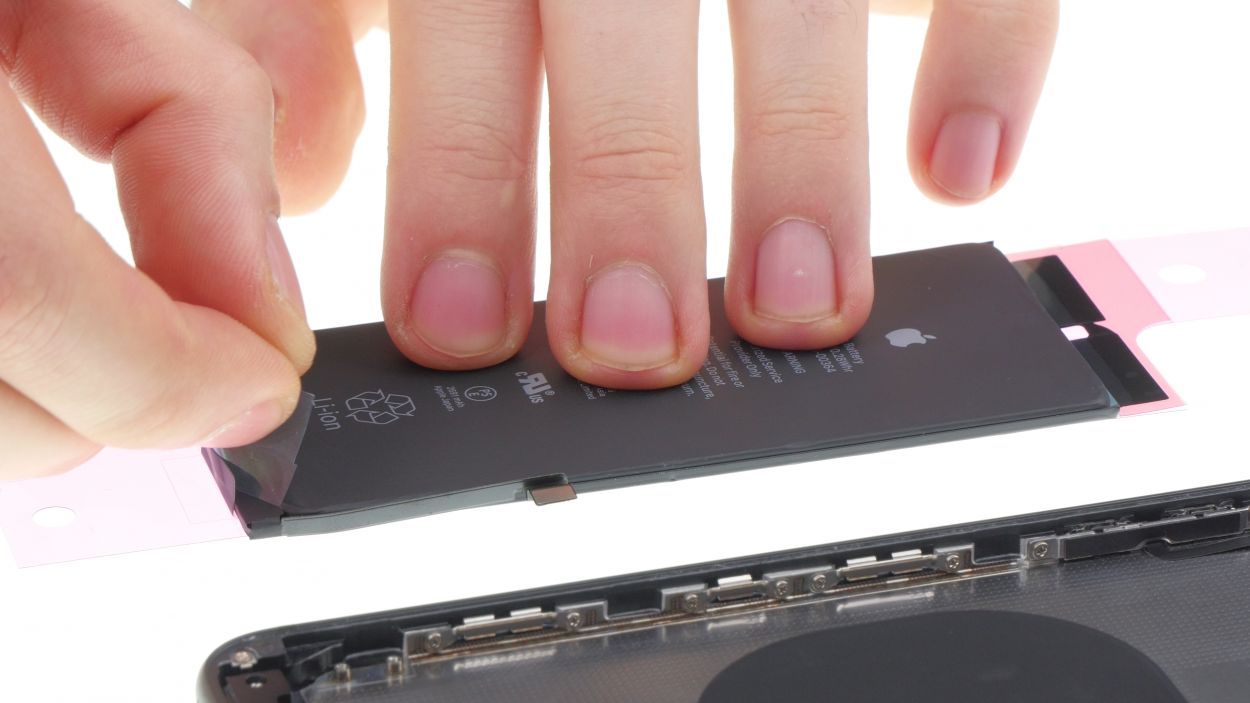
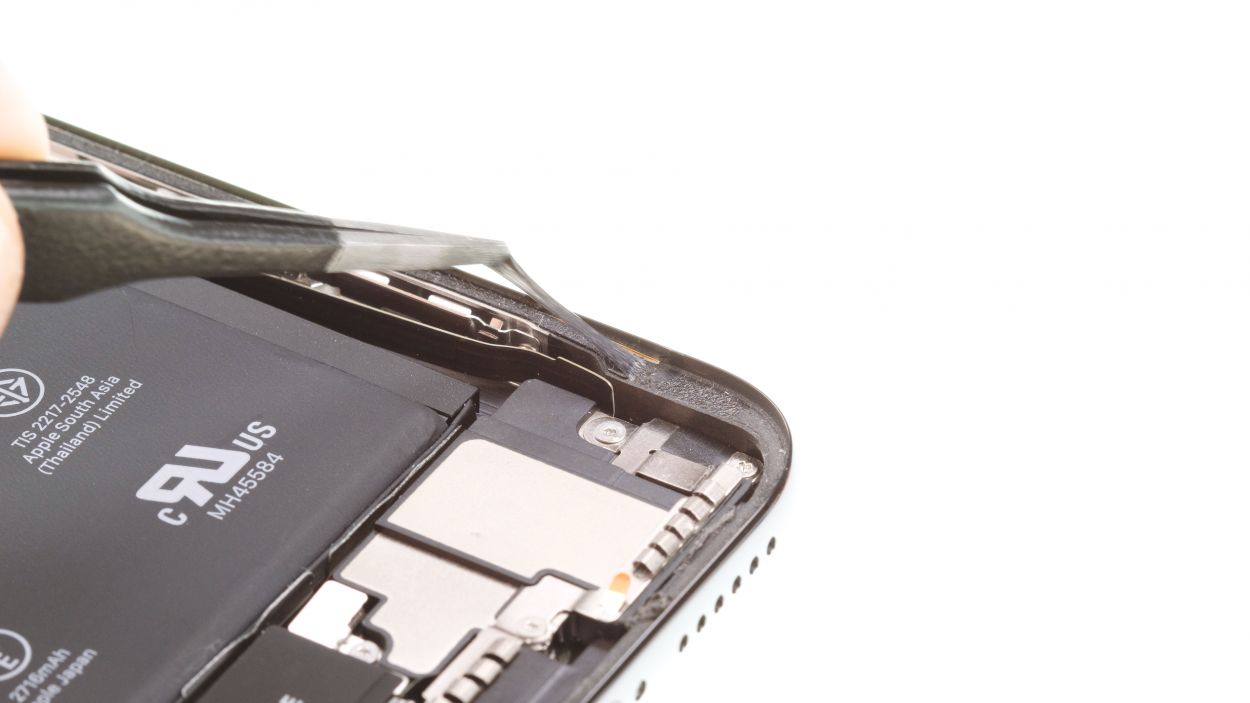
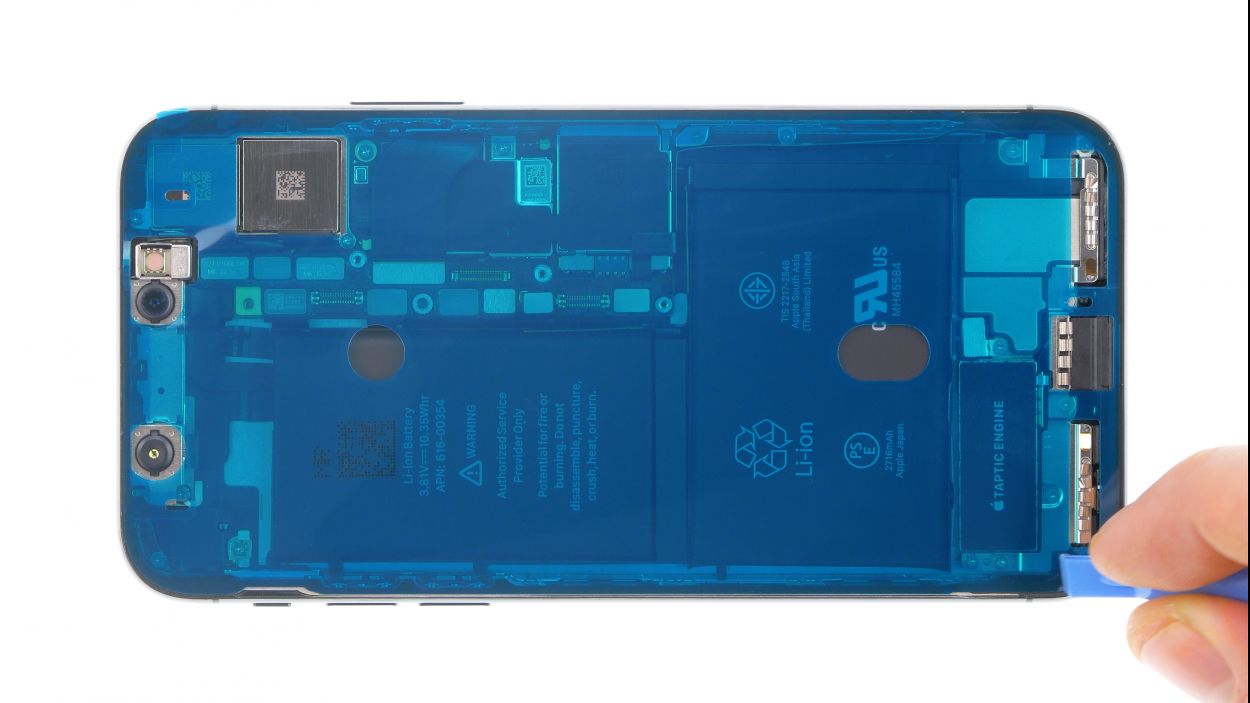
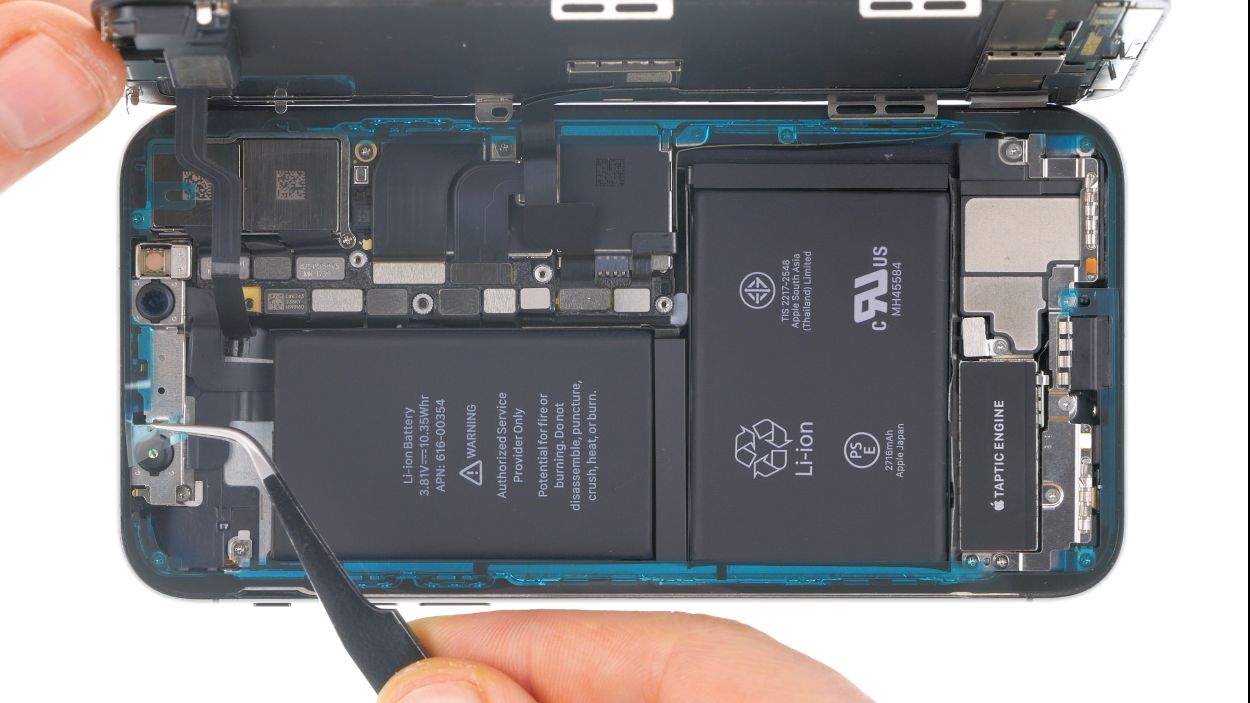
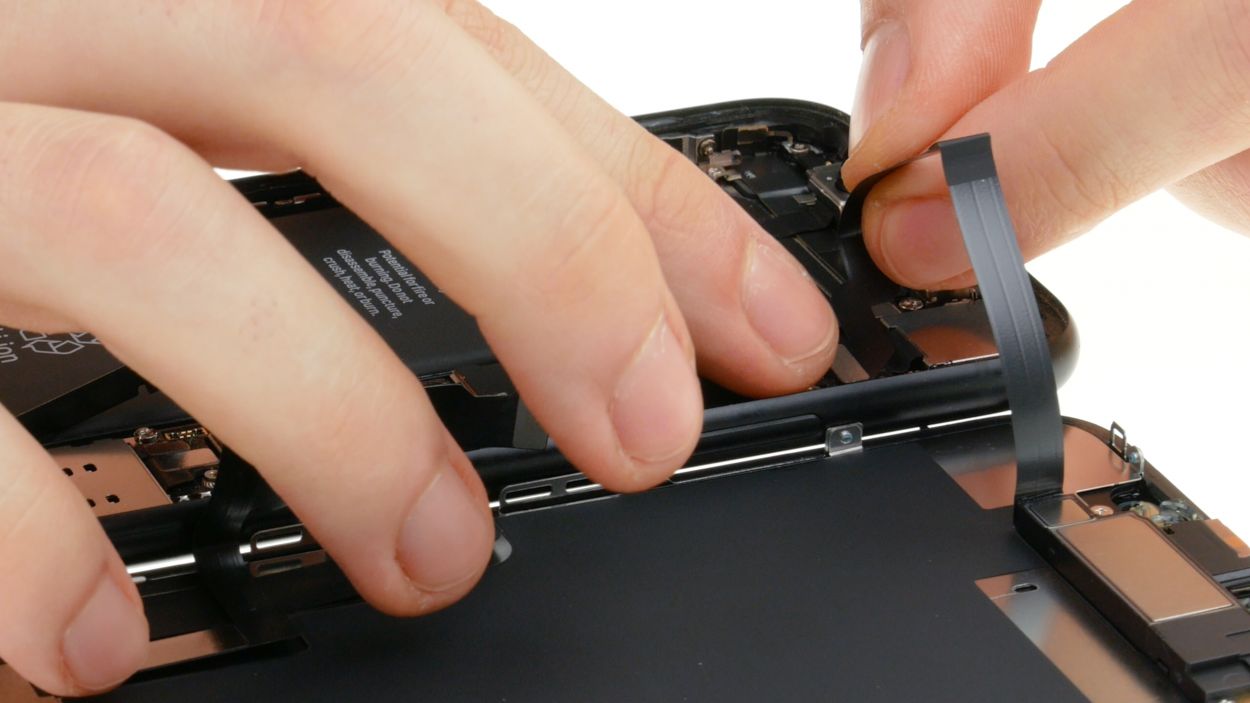
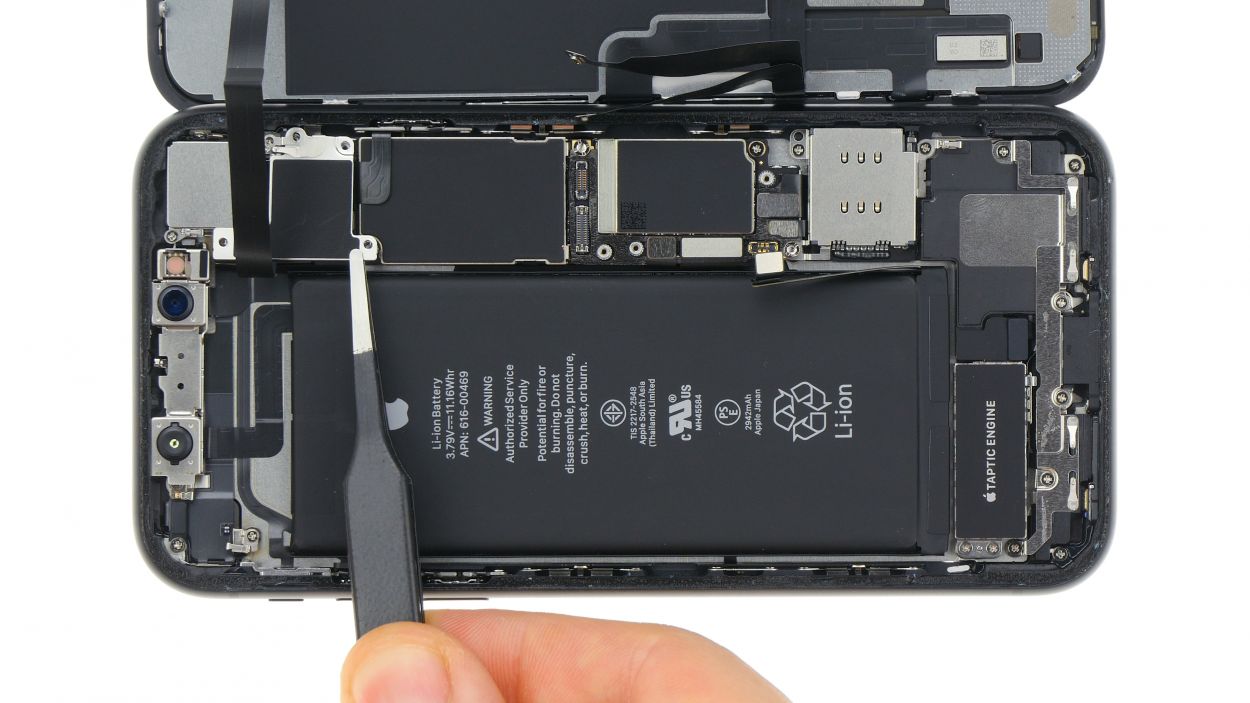
– Grab your trusty tweezers or a spatula and gently peel off those black tabs. Underneath, you’ll find the white adhesive strips just waiting for you.
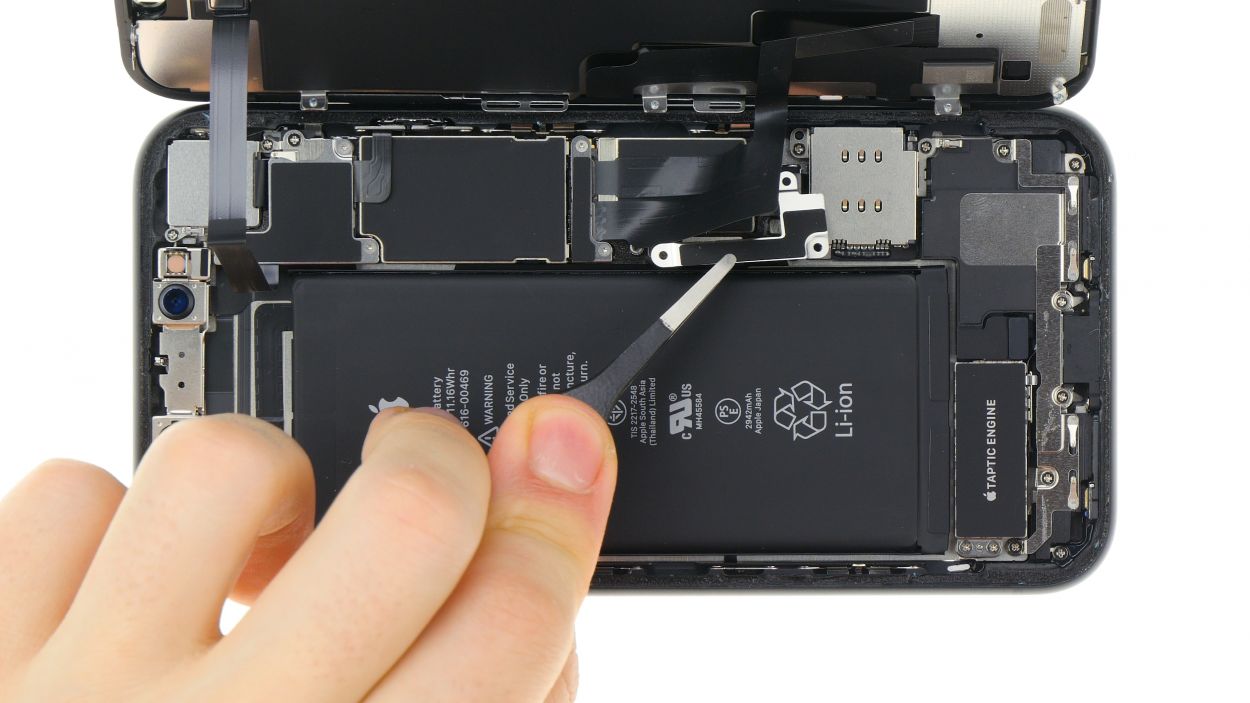
– Now, take your time and slowly pull out those adhesive strips. Keep them nice and flat, right at the level of your iPhone. You’ve got this!
Be super careful not to mess with those two flex cables at the top and bottom of the battery! They’re pretty important, so treat them like the delicate little friends they are.
If one of those pesky adhesive strips decides to play hardball and tears on you, no worries! Just grab a wide Spudger and gently pry out the battery. Remember, the goal is to keep that battery as straight as possible. You’ve got this!
Step 10
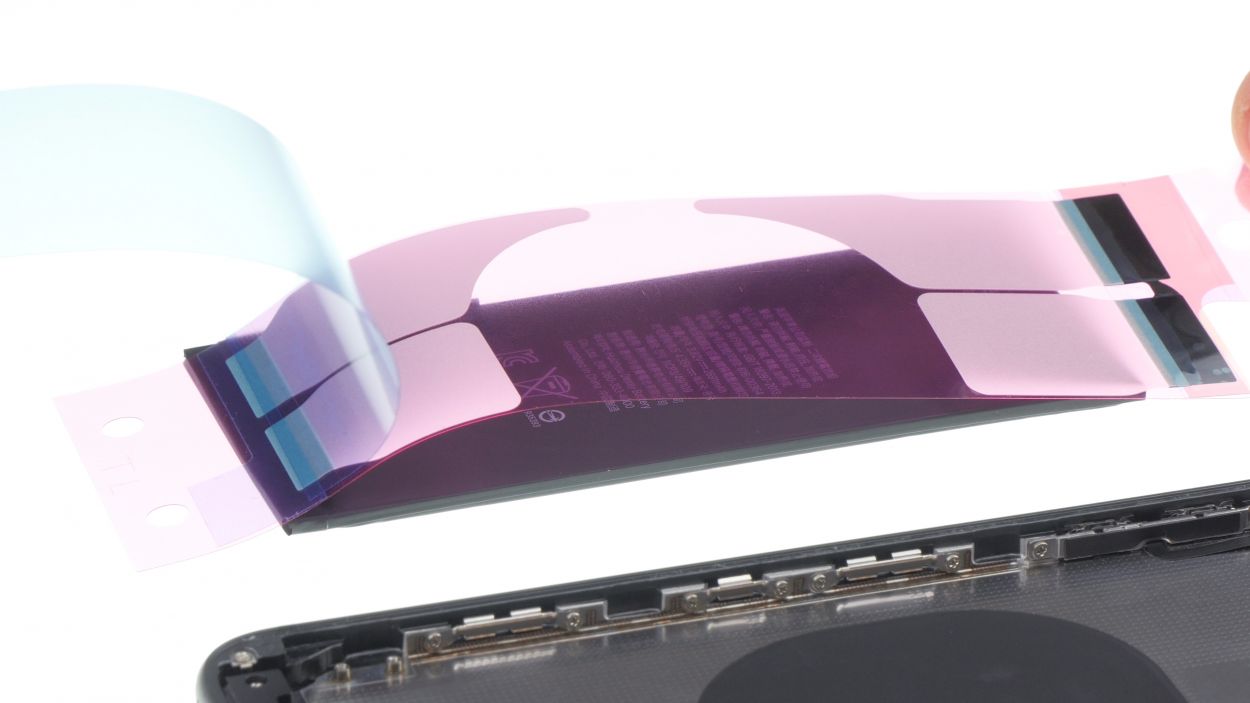
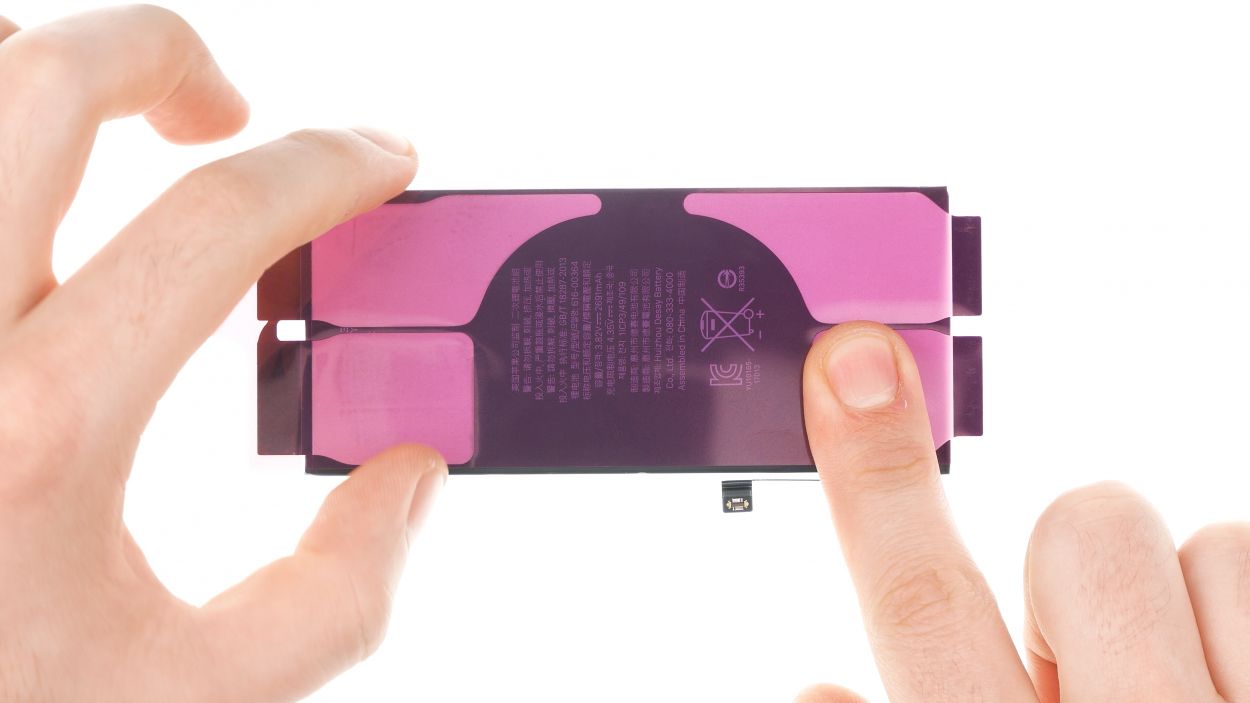

Pop those adhesive strips into your device with the protective films still on, making sure they’re pointing the right way. You got this!
When you’re putting those adhesive strips in place, make sure to leave a little wiggle room on both sides so you can fold over the tabs later. You’ve got this!
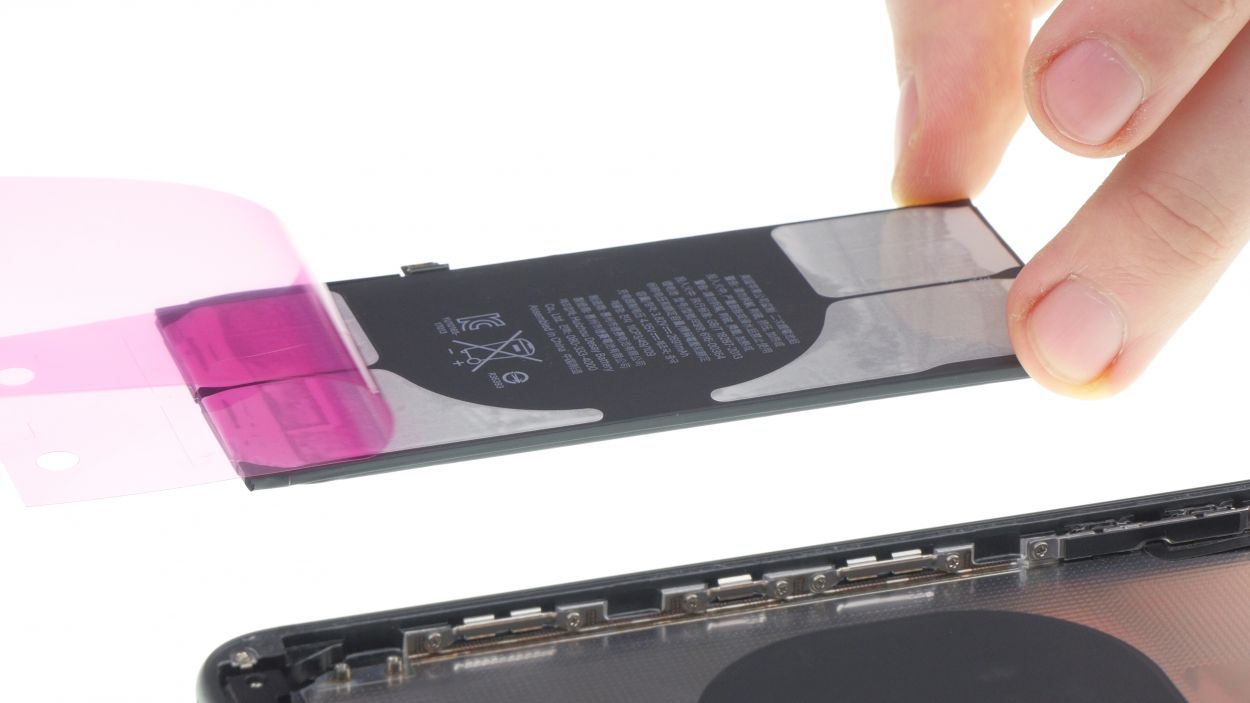
– First, peel away that big blue protective film and stick those adhesive strips right on the bottom of the battery. Keep it straight, like a well-aimed shot!
– Now flip the battery over, fold those tabs down, and stick them to the edges of the battery. You got this!
– Finally, remove the large pink protective film from the adhesive strips. Almost there!
Step 11

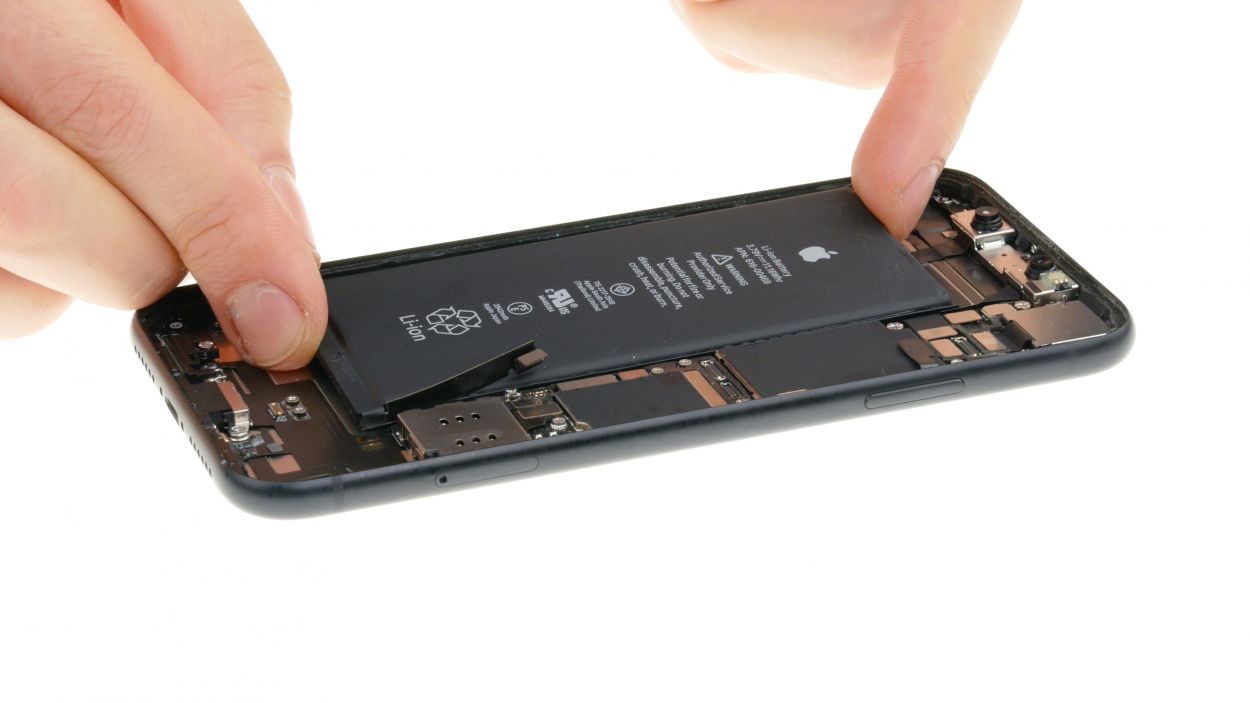
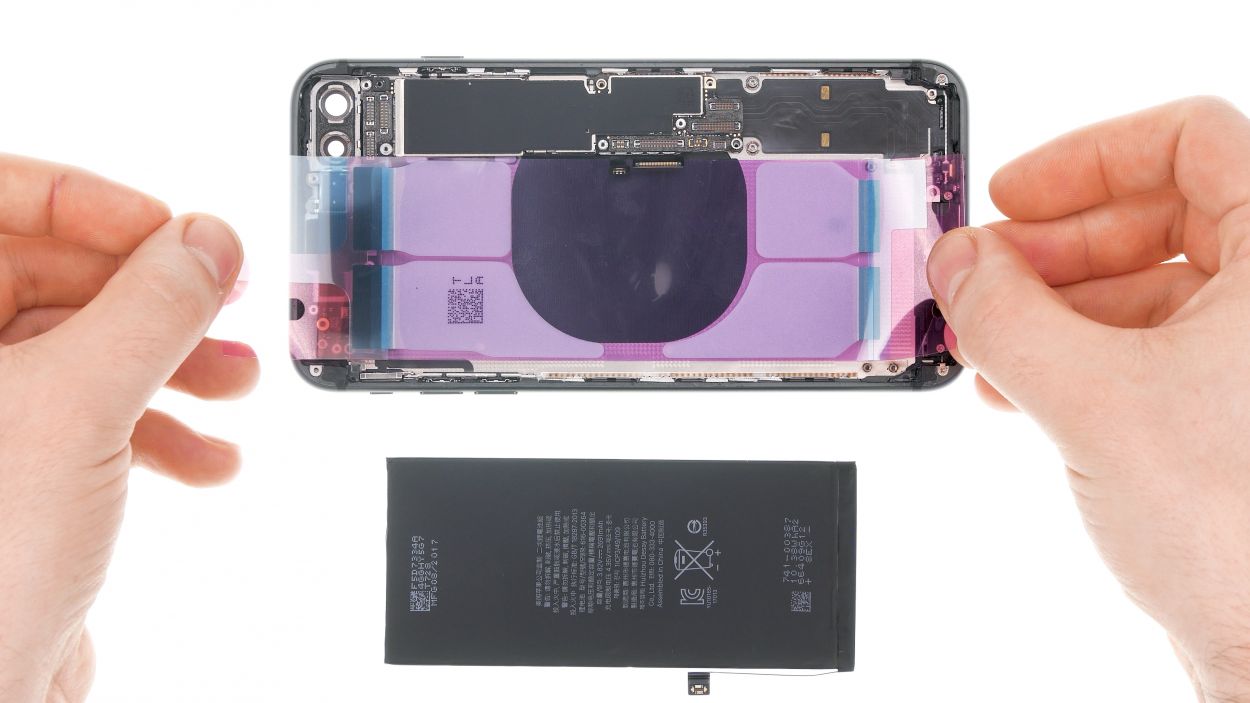
– Pop that battery back into the rear case and give it a little press to make it stick like it means it!
Hey there, battery hero! Make sure you get that battery positioned just right. Align it with the connector sitting snugly above the logic board contact. And don’t forget to leave a little breathing room around the edges so it doesn’t feel cramped—no one likes being jammed in!
You can totally pop that battery in after you’ve got the speaker and taptic engine all set up! It makes positioning a whole lot easier, trust me.
Step 12
2 × 1,4 mm Phillips
Taptic Engine Connector
– Slide the Taptic Engine back into its cozy spot between the battery and the Lightning connector. Make sure those screw holes are lined up just right!
– Connect the Taptic Engine’s connector with a gentle touch.
– Secure the Taptic Engine in place by fastening it with the Phillips screws. You’ve got this!
Step 13

1 × 1,2 mm Phillips
1 × 2,1 mm Standoff
1 × 2,4 mm Standoff
1 × 2,1 mm Phillips
1 × 1,8 mm Phillips
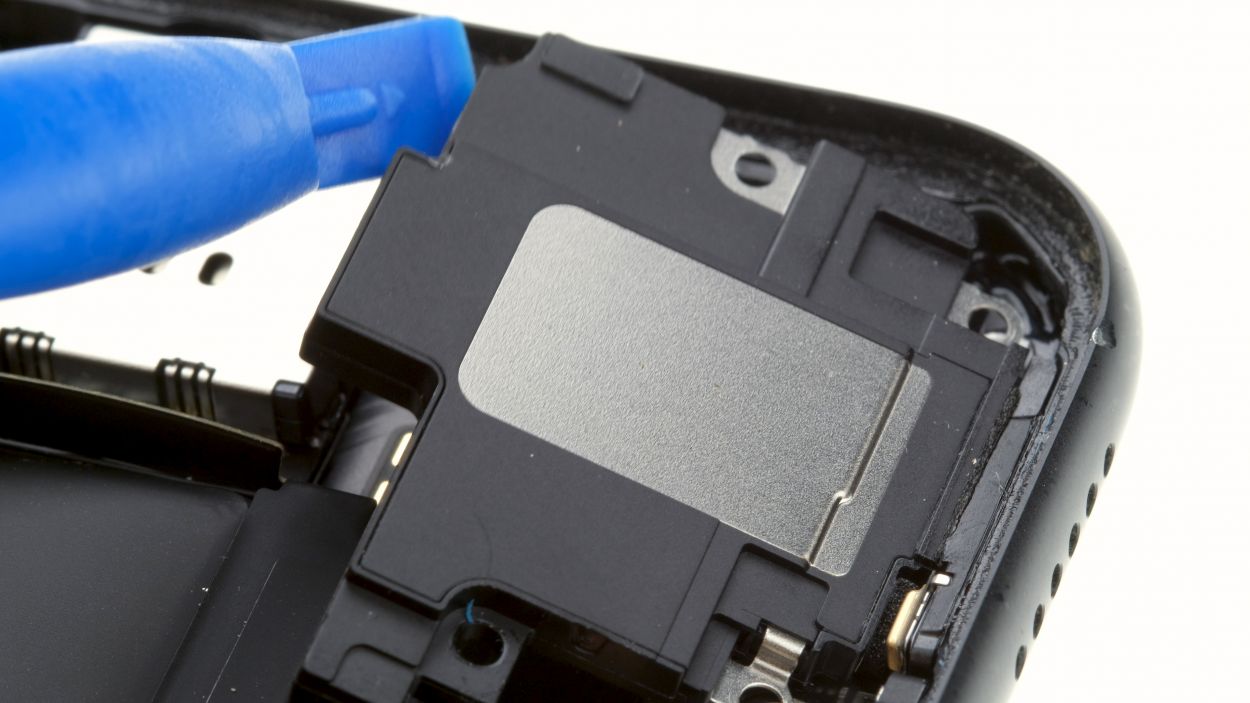
Keep that speaker opening clear of any foam or glue—let’s keep it nice and tidy!
– Let’s get that speaker back where it belongs! Gently press it into its original spot.
– Now, grab the bracket plate and place it over the connector, then give it a good twist with the screws to secure it in place.
– Don’t forget to fasten the metal bracket at the top of the speaker—it’s all about keeping things snug!
– And lastly, let’s seal the deal by gluing on that rubber cover. You’re almost there!
Step 14
1 × 1,9 mm Phillips
1 × 1,4 mm Phillips
2 × 1,6 mm Phillips
3 × 1,2 mm Phillips
– First, let’s plug in that square-shaped connector of the bracket plate like a pro!
– Next, fold down the bracket plate so the screw holes are perfectly aligned over the threads. You’re doing great!
– Finally, secure the bracket plate in place by screwing it in with those various screws. Almost there!
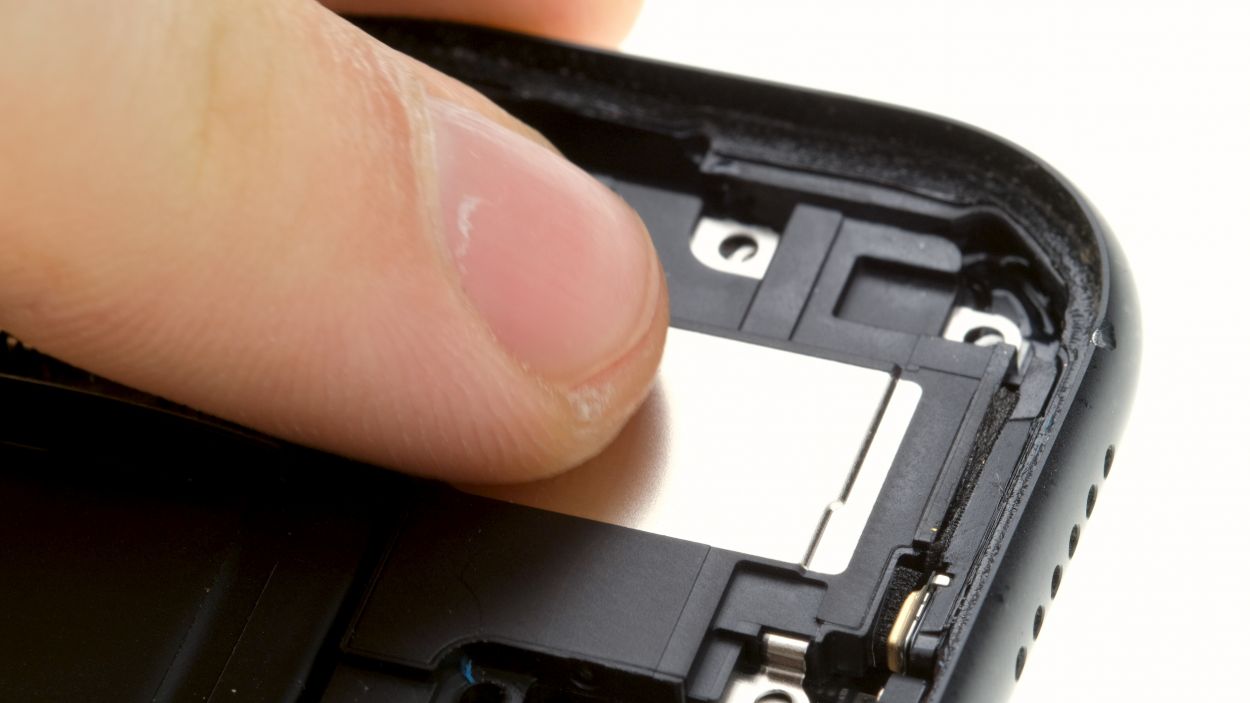
Step 15

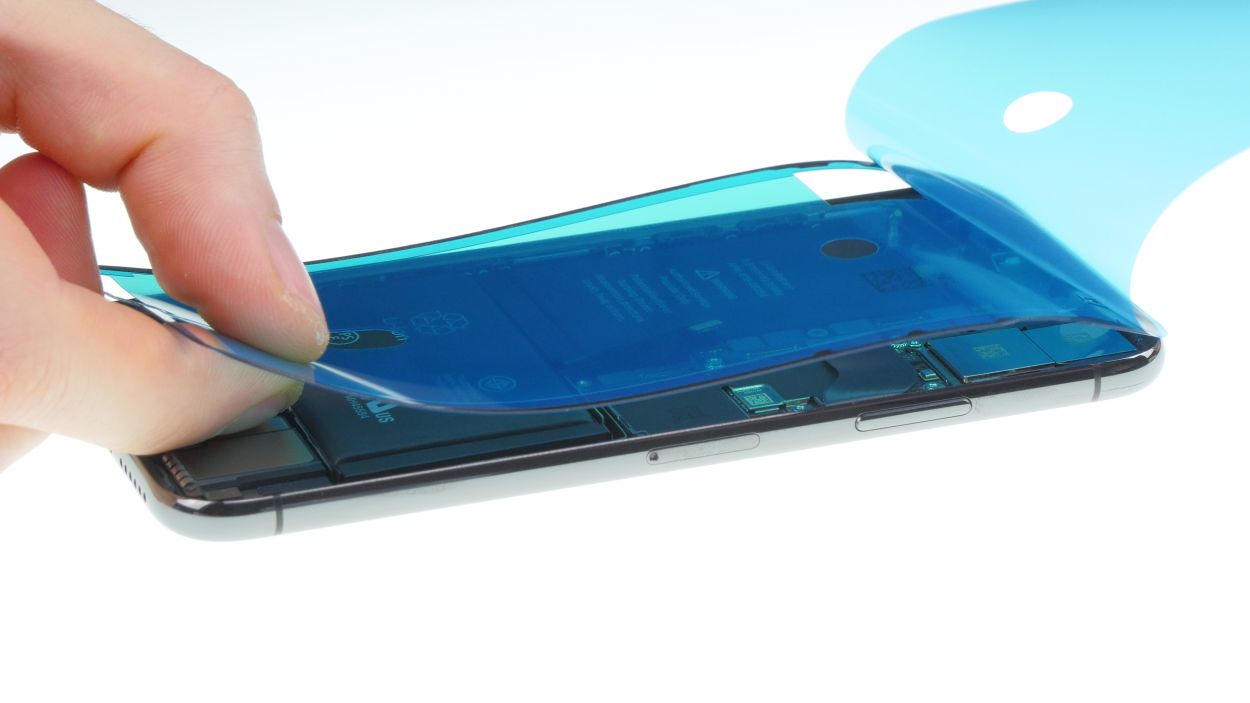

Sure, a frame sticker will keep your iPhone cozy from dust and light splashes, but let’s be real—it’s not going to turn it into an underwater superhero! So, keep it dry and schedule a repair if needed!
Check out the iPhone X in the pics! The iPhone Xr is pretty much its twin, and you can re-glue it just the same way. You’re going to do great!
– First things first, let’s make sure that the new frame sticker sticks like it’s meant to! Start by cleaning off any leftover glue and dirt from the metal frame—it’s like giving it a fresh start.
– Next, peel off the first protective film layer of the frame sticker. It’s like unwrapping a gift!
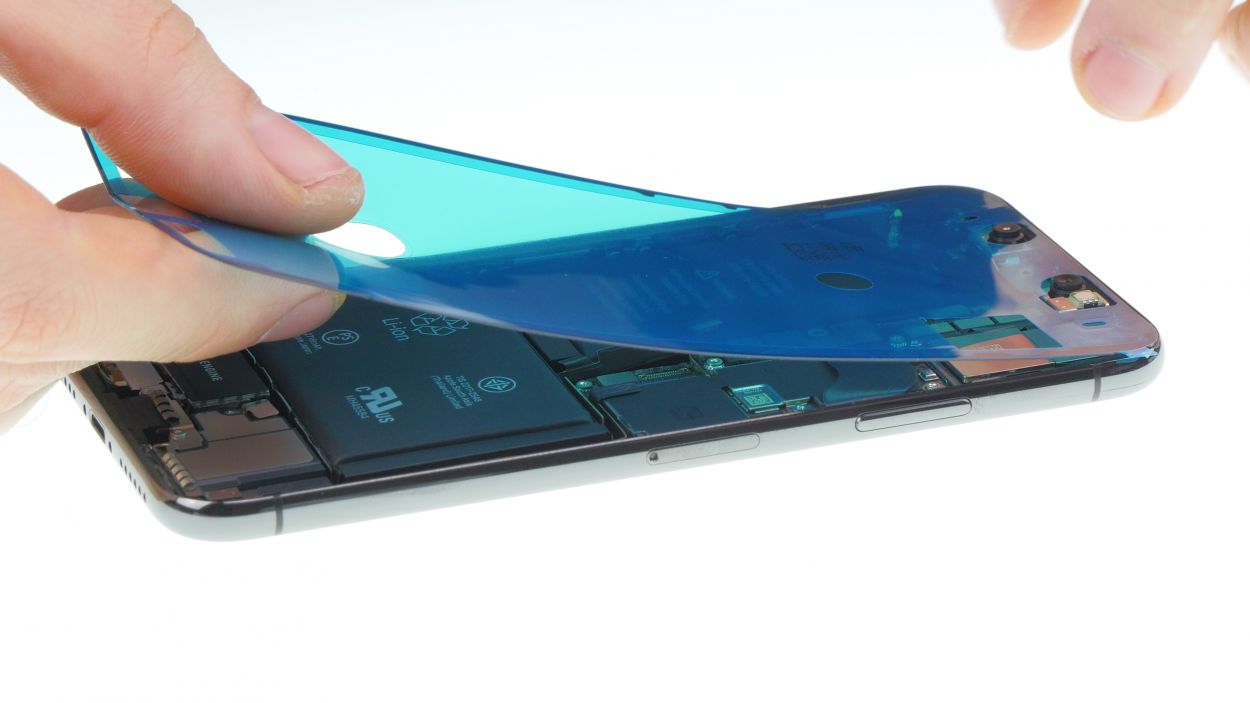
– Now, position that frame sticker just right on one edge of the frame and attach it slowly. Take your time to ensure it’s lined up evenly, and give it a gentle press. If you need a little help, the spudger+iPhone+Xr&crid=1TJIMMAJSUJUZ&sprefix=repair+tools%2Caps%2C165&linkCode=ll2&tag=salvationrepa-20&linkId=c486487cf454ce8edd6f5beefab4110f&language=en_US&ref_=as_li_ss_tl’>plastic spudger is your friend here!
– Once that’s done, go ahead and remove the next large protective film. You’re doing awesome!
– As for those small protective films? You can leave them on for now and take them off once you’ve connected the display and attached the bracket plates. This way, nothing accidentally sticks to the frame sticker before it’s time! But hey, if you want to remove them right away, that works too.


Earpiece connector
3 × 1,2 mm Y-Type
1 × 1,5 mm Phillips
1 × 1,3 mm Phillips
Display connector
2 × 1,2 mm Y-Type
When you’re plugging in those connectors, give them a warm welcome! Make sure they sit snugly in place and avoid sliding them around on the logic board. We wouldn’t want to accidentally throw a wrench in the works by damaging those delicate contacts!
To connect those other connectors, just lean the display against something sturdy. This way, you can keep those delicate flex cables from getting stretched too far. You’ve got this!
Step 17

Battery connector
3 × 1,2 mm Y-Type
– Alright, let’s get that battery connector hooked up! It’s time to make the connection.
– Next, pop in the bracket plate and secure it with those Y-Type screws. You’re doing great!
Step 18
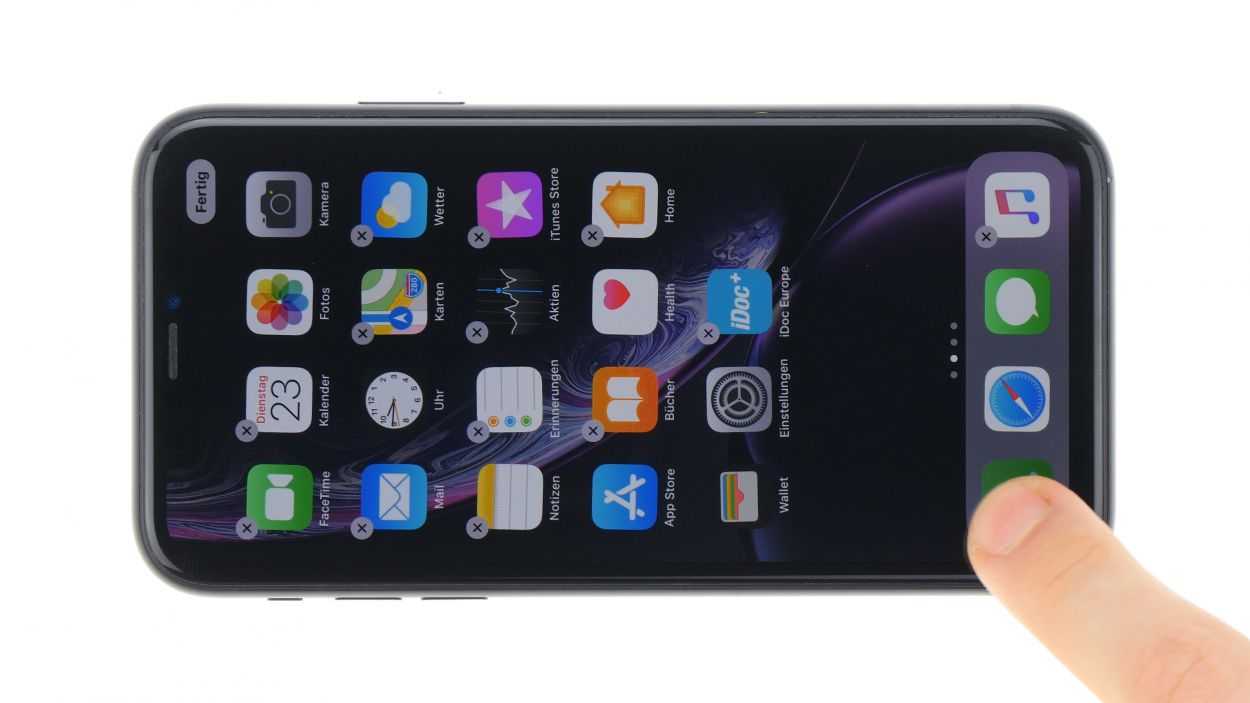


– First up, let’s check out the brightness of that display and make sure it’s shining bright like a diamond!
– Next, give that touchscreen a whirl! Pick an app, drag it all over the display, and if it follows your finger like a loyal puppy, you’re good to go!
– Want to test out the microphone, speakers, earpiece, and proximity sensor? Just fire up the voice memo app and let it do its thing!
Step 19


Check out the iPhone X in the pics! The iPhone Xr is pretty much its twin, and you can re-glue it just the same way. You’re going to do great!
Step 20

2 × 6,8 mm Pentalobe
– Time to get those two pentalobe screws back in their cozy spots on either side of the Lightning connector! Just screw them in and watch your iPhone Xr come together like magic!