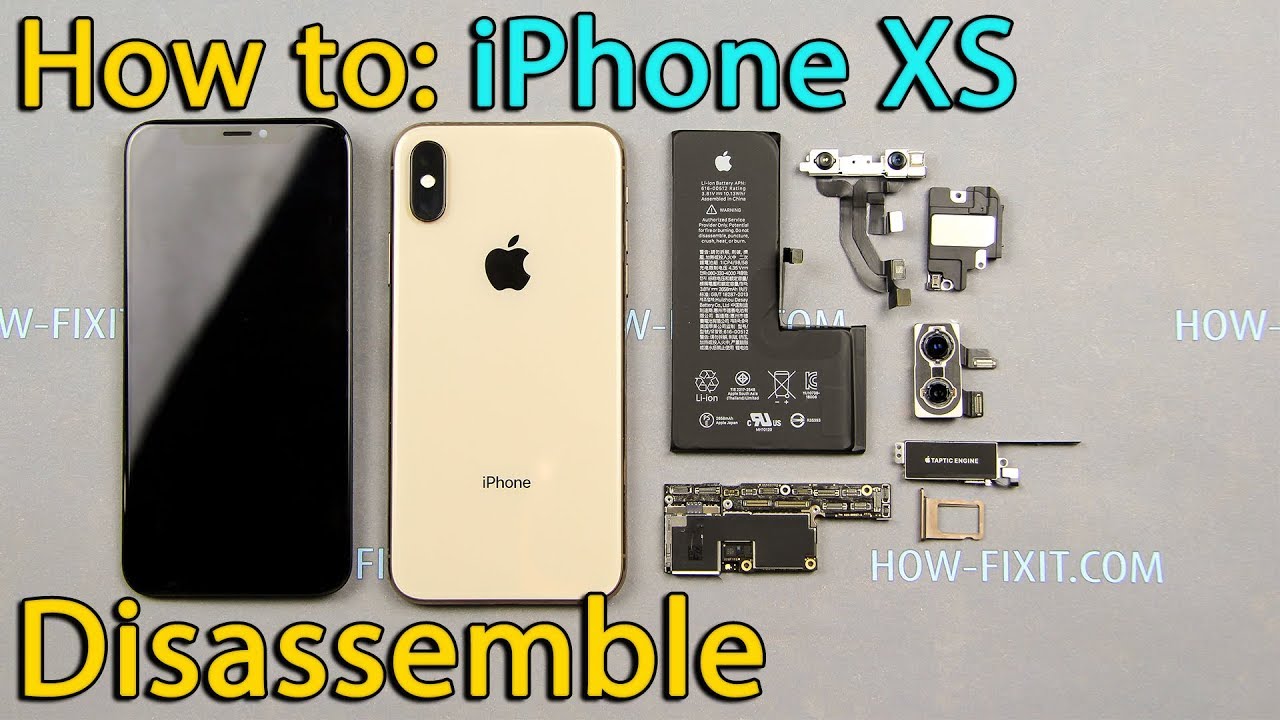
DIY Guide to Replace iPhone Xs Battery Step-by-Step
Duration: 60 min.
Steps: 19 Steps
Is your iPhone Xs feeling a bit sluggish? Can’t seem to keep it charged or it keeps crashing on you? No worries! In this guide, we’ll walk you through the steps to replace that tired battery yourself. This handy repair will come in clutch if your iPhone Xs struggles during intense use, fails to charge, or just won’t turn on. Before diving in, make sure to back up your data, set up a tidy workspace, and take your time. If you hit a snag or have any questions, feel free to use the live chat on our website or drop a comment. Let’s get your iPhone Xs back to its energetic self!
Step 1

– First things first, let’s power down your iPhone completely to keep it safe during the repair. Just press and hold the Standby button along with one of the volume buttons for three seconds, and voilà, the ‘Power off’ slider will pop up!
– Now, give that slider a friendly swipe from left to right. Your iPhone will take about ten seconds to shut down completely, so maybe take a quick stretch while you wait!
Step 2
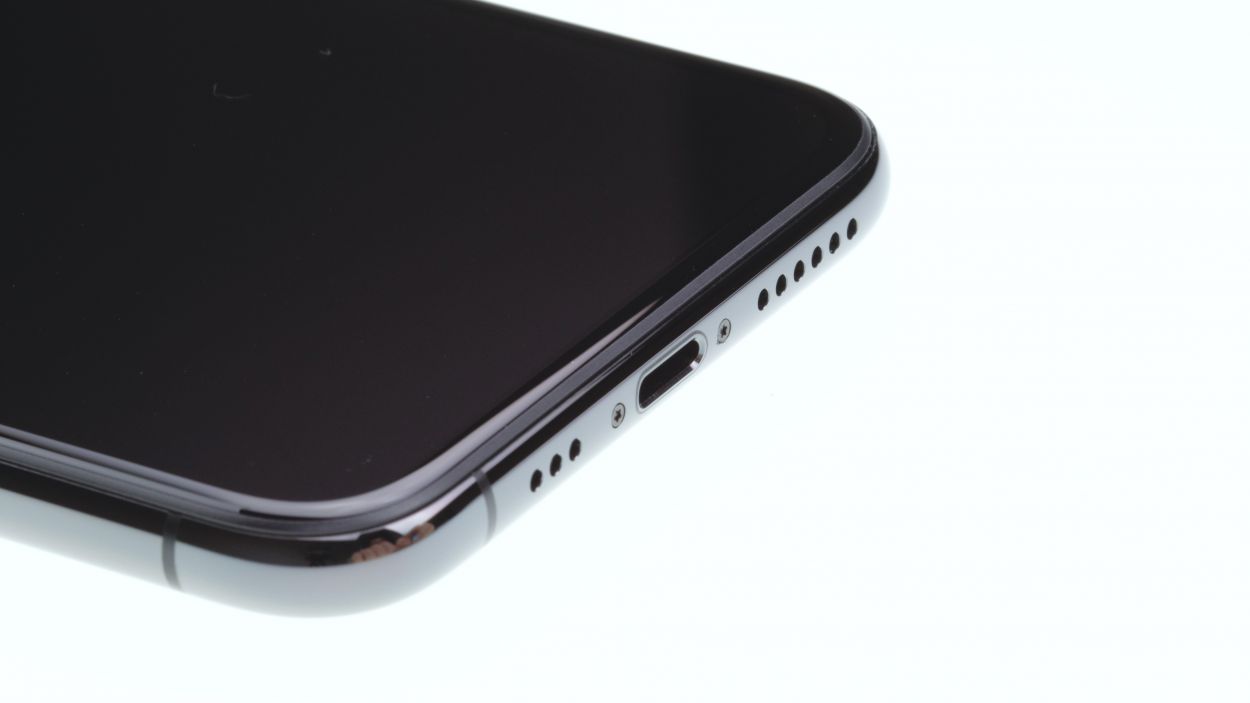
2 × 6,8 mm Pentalobe
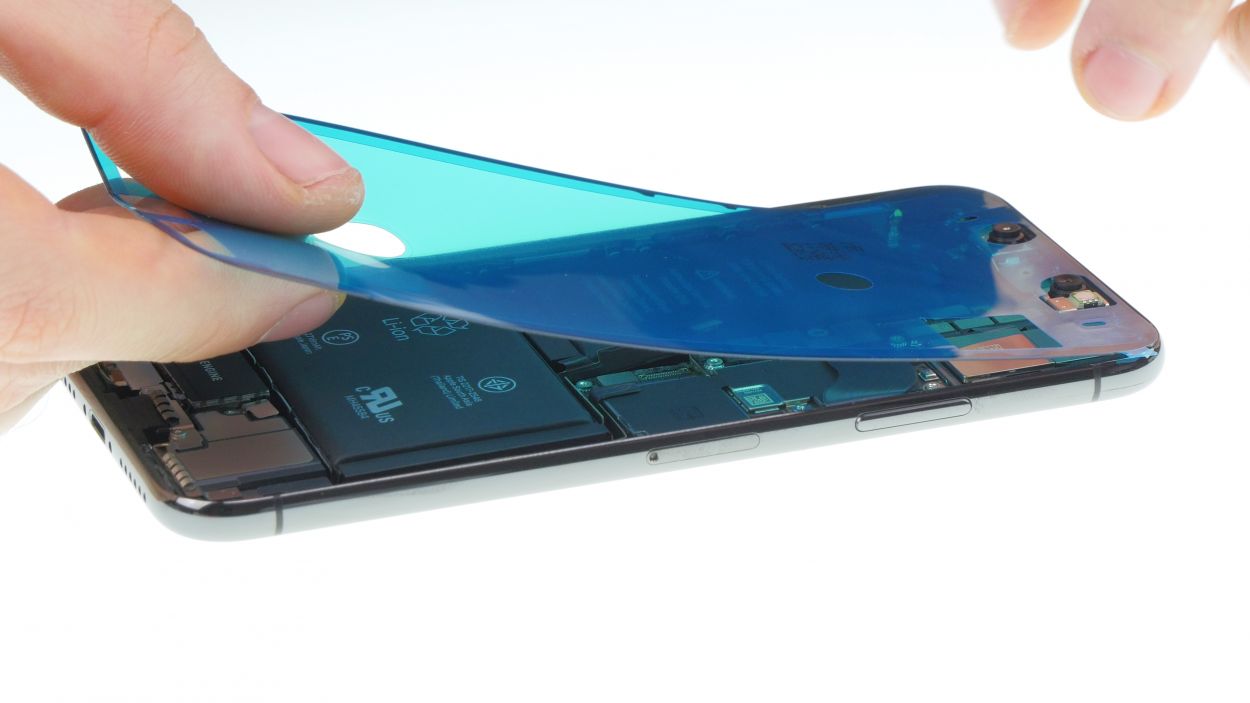
Opening your iPhone Xs means waving goodbye to its dust and splash protection (IP 68 rating). So, handle with care!
– Let’s tackle those two pentalobe screws at the bottom of the back cover! They’re hanging out on either side of the Lightning connector, just waiting for you. Don’t forget to pop them into the same cozy spot on your magnetic pad!
– Next up, place your iPhone Xs on a soft, clean surface to keep that back looking as good as new. We want it to feel pampered!
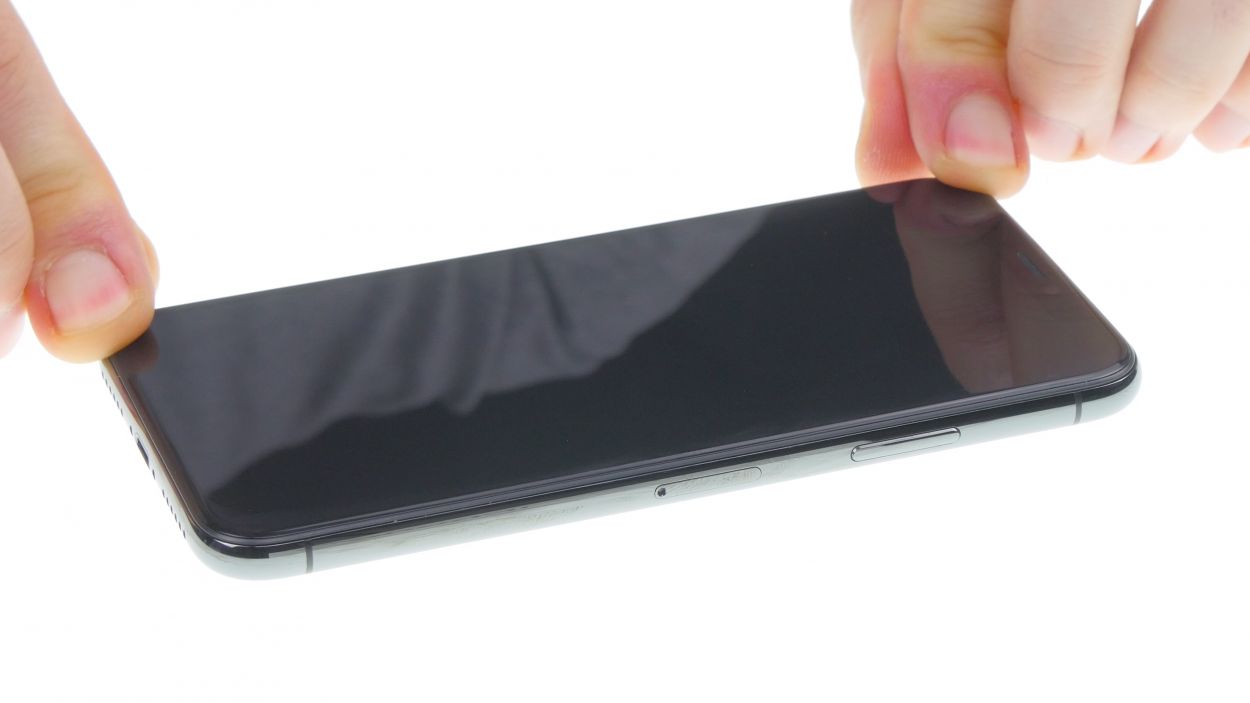
Step 3

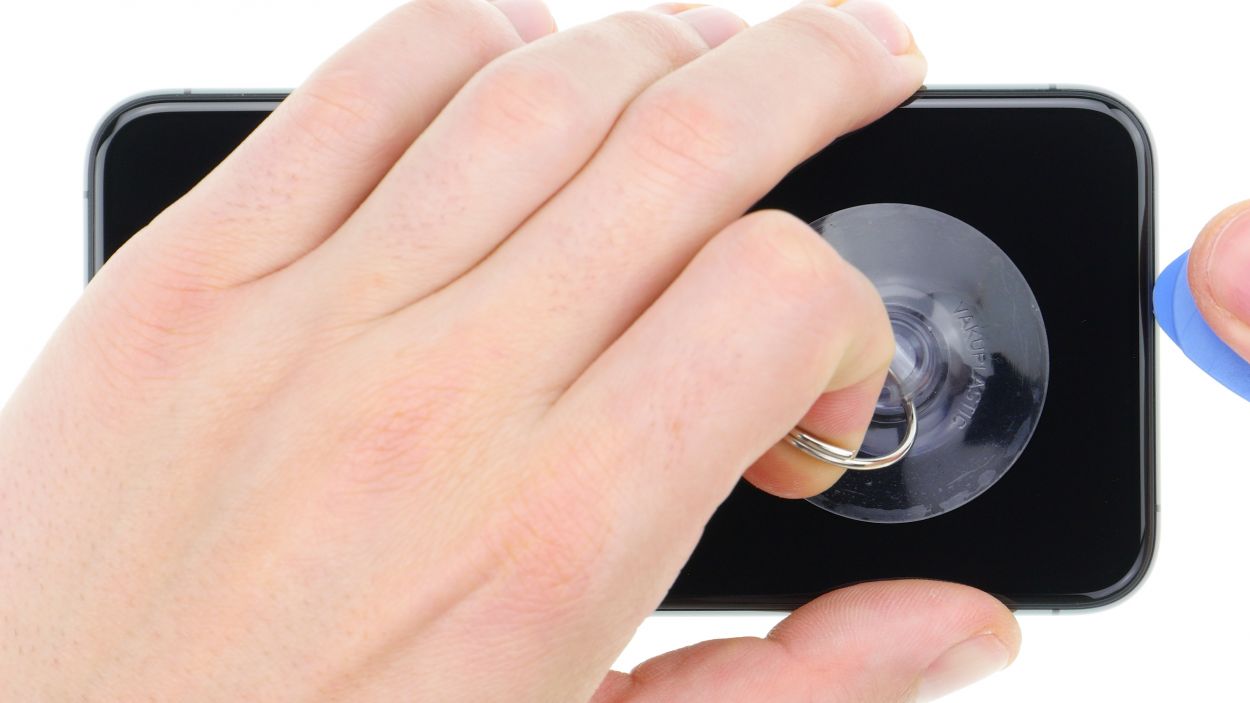
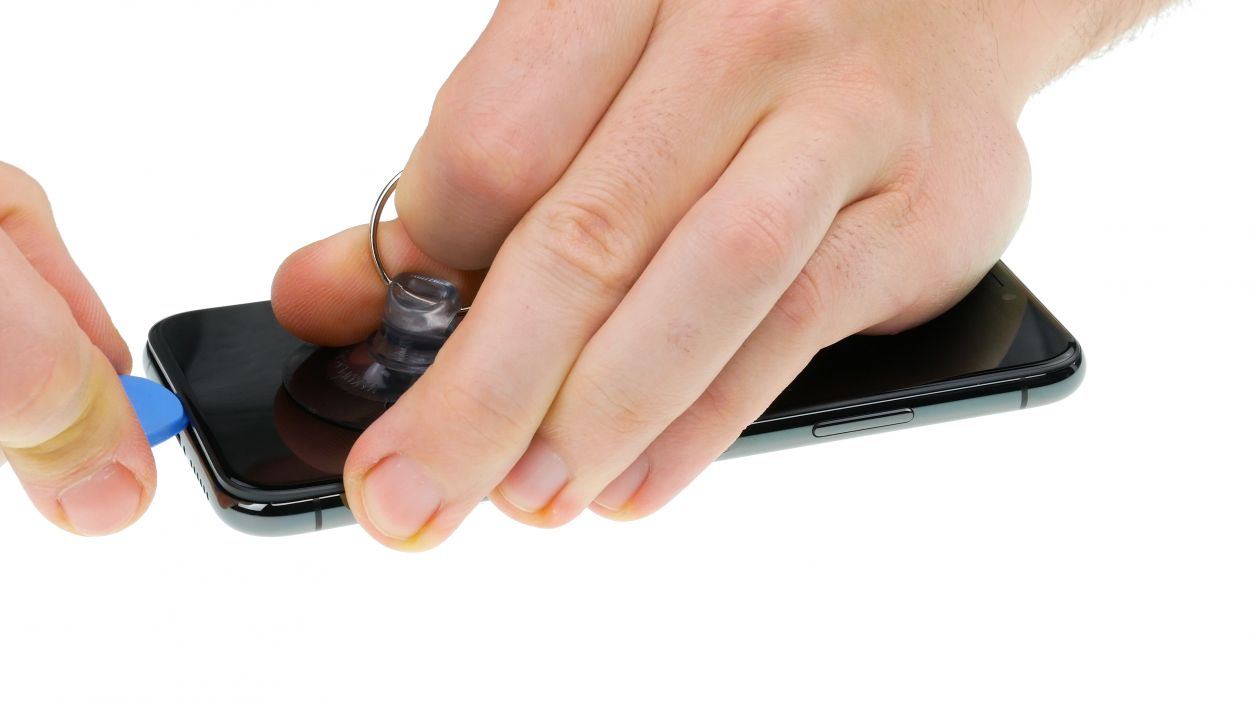
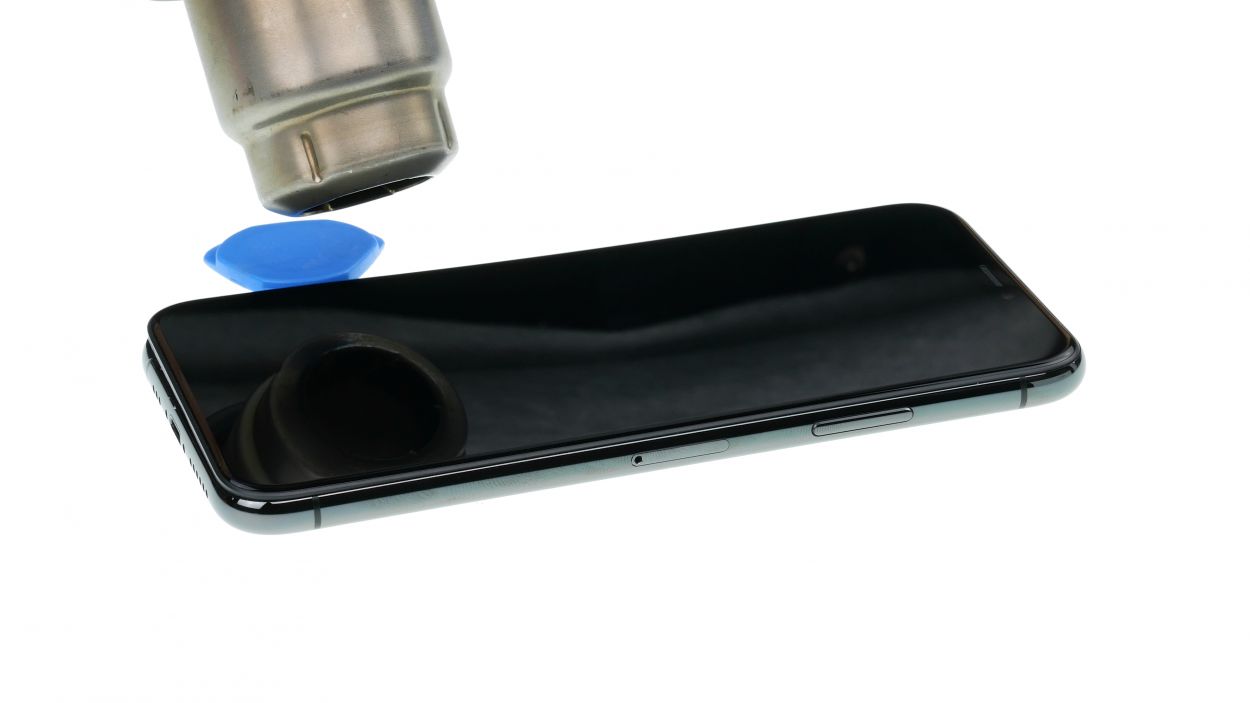

– Alright, let’s get that front panel up! Grab your trusty suction cup, a hard plastic pick, and a heat gun. If your screen looks like it’s been through a battle, cover it with packing tape to keep things tidy before we dive in.
– The screen is stuck on there pretty good. Use your heat gun to warm up the outer edges of the display to about 60°C (140°F) – this will help loosen that adhesive grip.
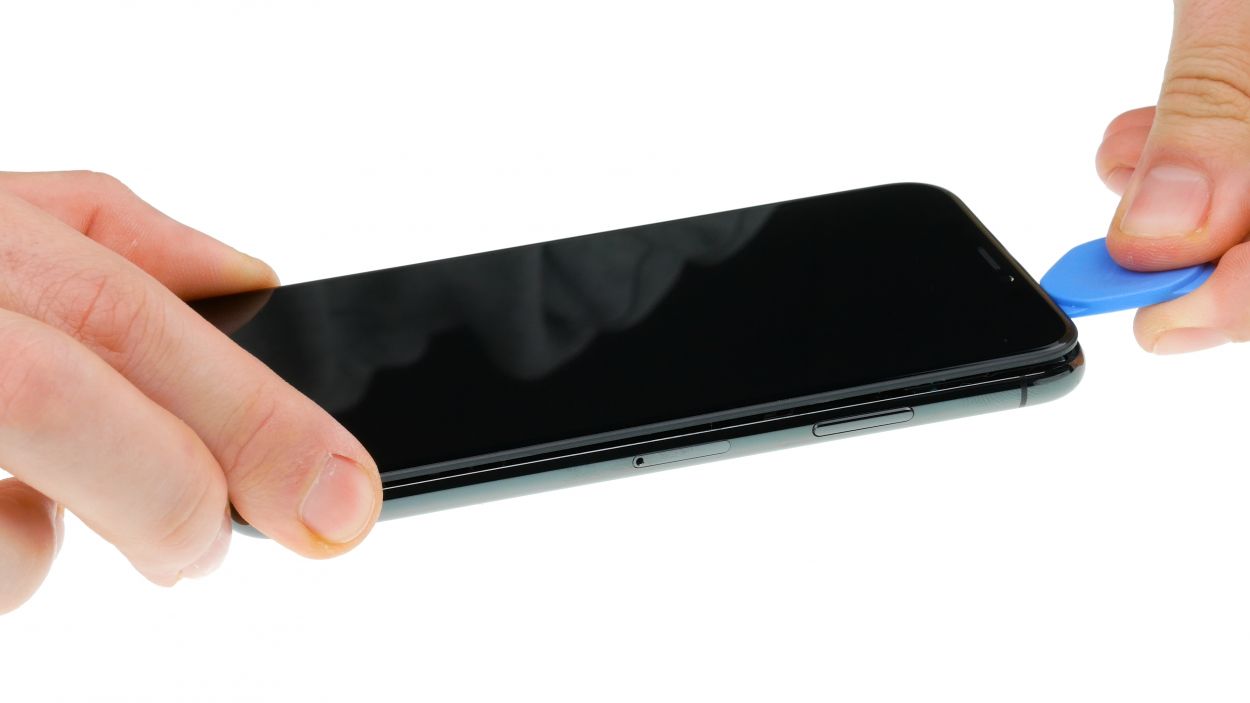
– Now, place the suction cup right over the Home button (if you can) or just beside it. As you gently lift the screen with the suction cup, slide that hard plastic pick between the steel frame and the display frame. Give a little push down on the steel frame to help it along!
Keep your tool to a maximum of 5 mm in the gap—just enough to get the job done without bumping into any tiny parts inside your iPhone!
If you’re having trouble sliding a plectrum into that gap, no worries! Just grab an iFlex for a bit. But do switch to a hard plastic plectrum as soon as you can—your frame will thank you for avoiding those pesky scratches!
Step 4


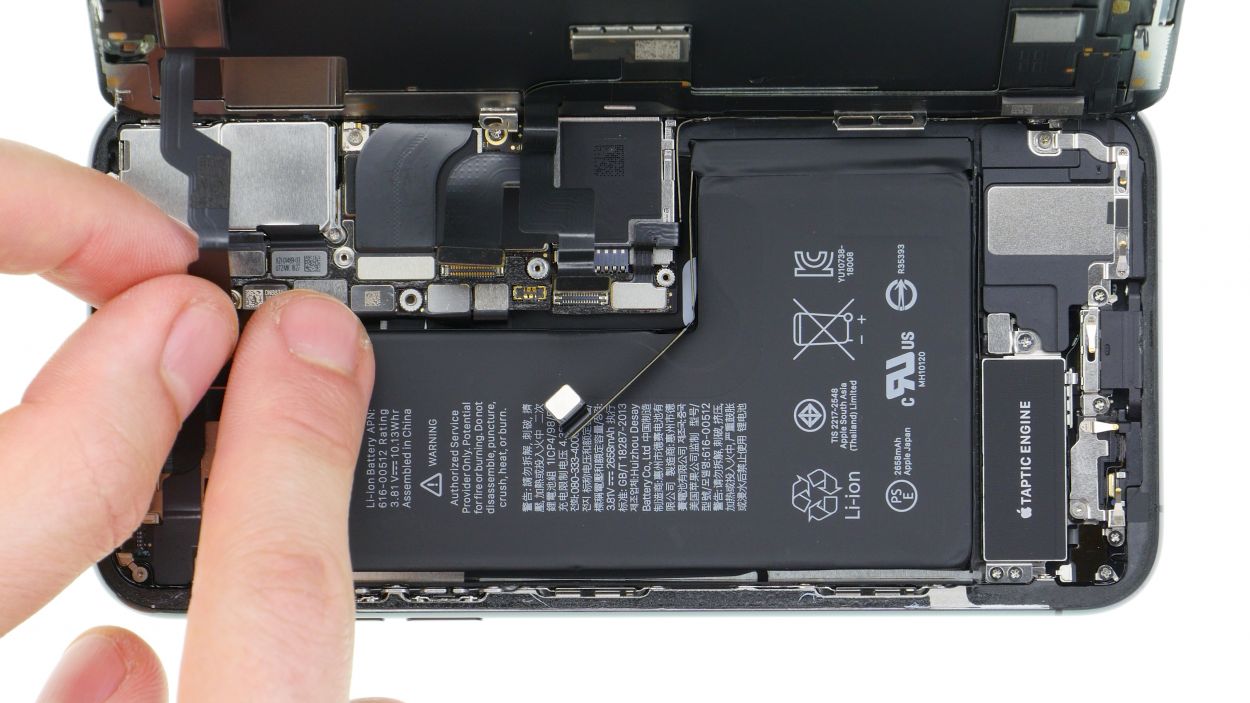
– Grab your Y-Type and Phillips screwdrivers (Y000/PH00) and let’s get those screws out! Once you’ve done that, gently remove the bracket plate. Make sure to keep all those little parts cozy in the same box on your magnetic pad.
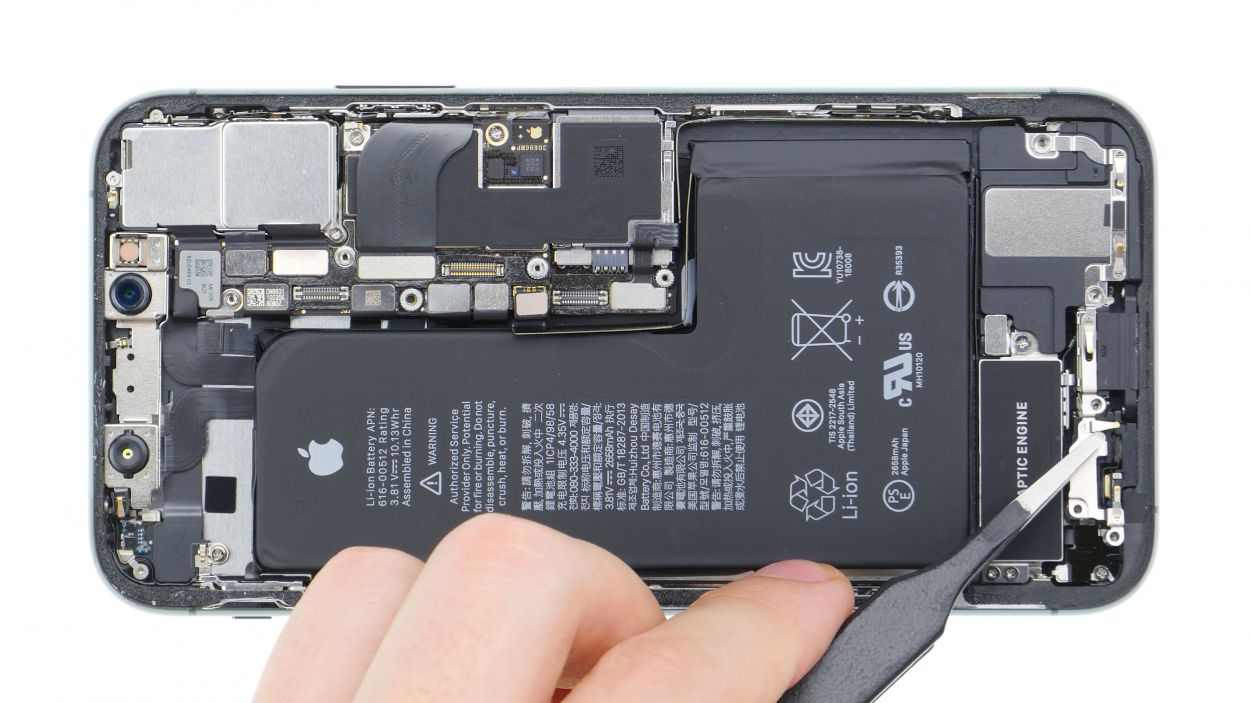
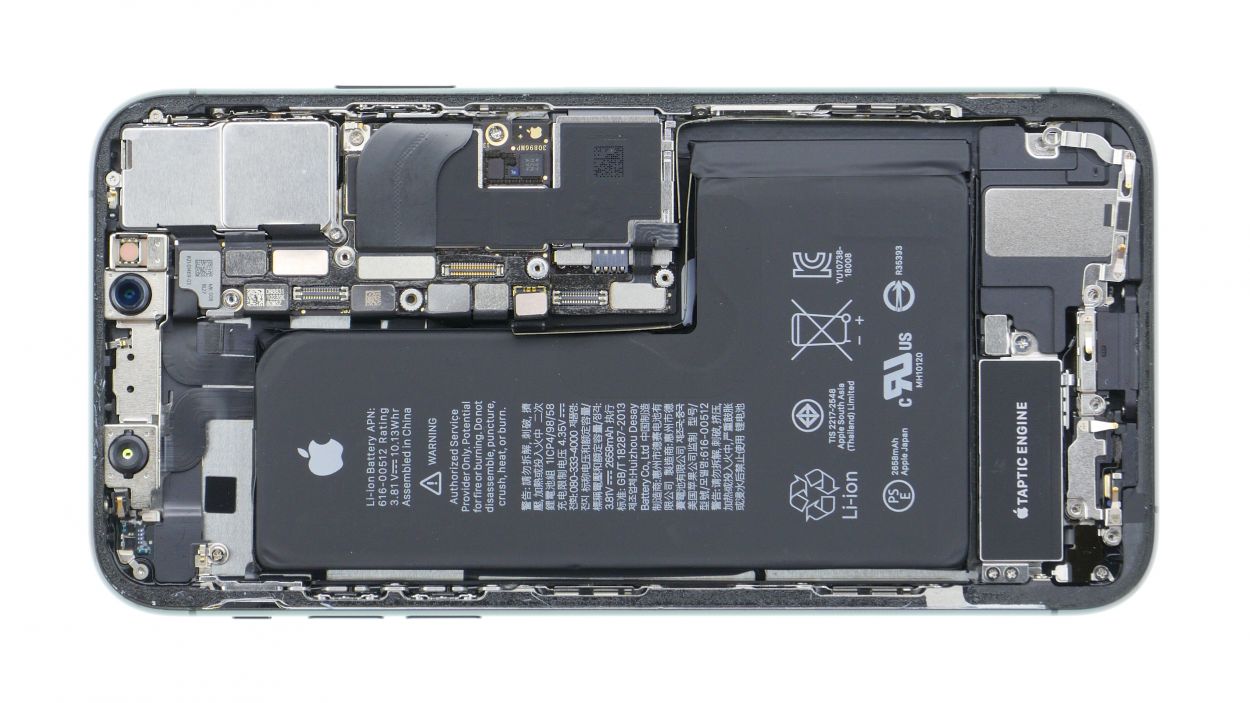
– Now, with a steady hand, use a spudger to carefully pry off the battery contact. Just slide it under the connector and lift it up gently. You’ve got this!
1 × 1,2 mm Y-Type
3 × 1,0 mm Y-Type
1 × 3,7 mm Phillips
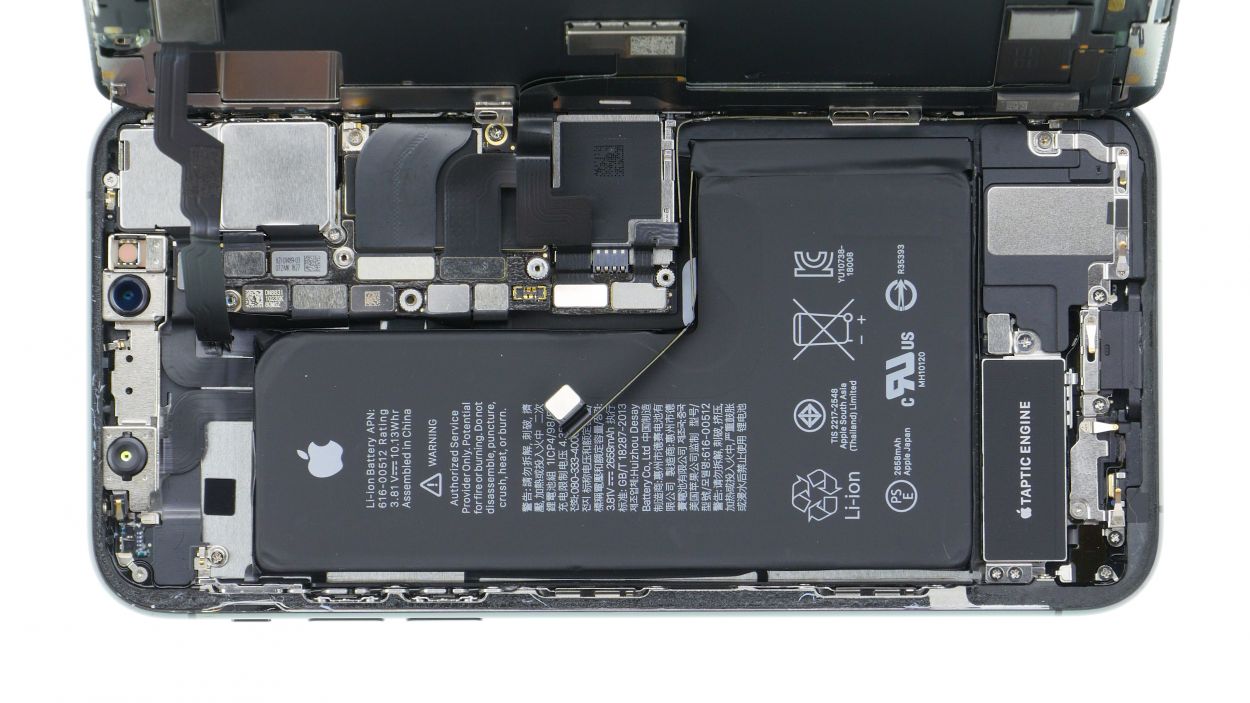
Battery Connector
Before you dive into the repair adventure, don’t forget to disconnect that battery contact! It’s like putting on your seatbelt—keeps you safe from short circuits and accidental power-ups while you’re working your magic!
Apple rolled out Y-Type screws with the iPhone 7, and they sometimes get mistakenly called Tri-Point or Tri-Wing. Make sure to grab the right Y-Type screwdriver for these screws to keep those screw heads from getting stripped. You’ve got this!
Step 5

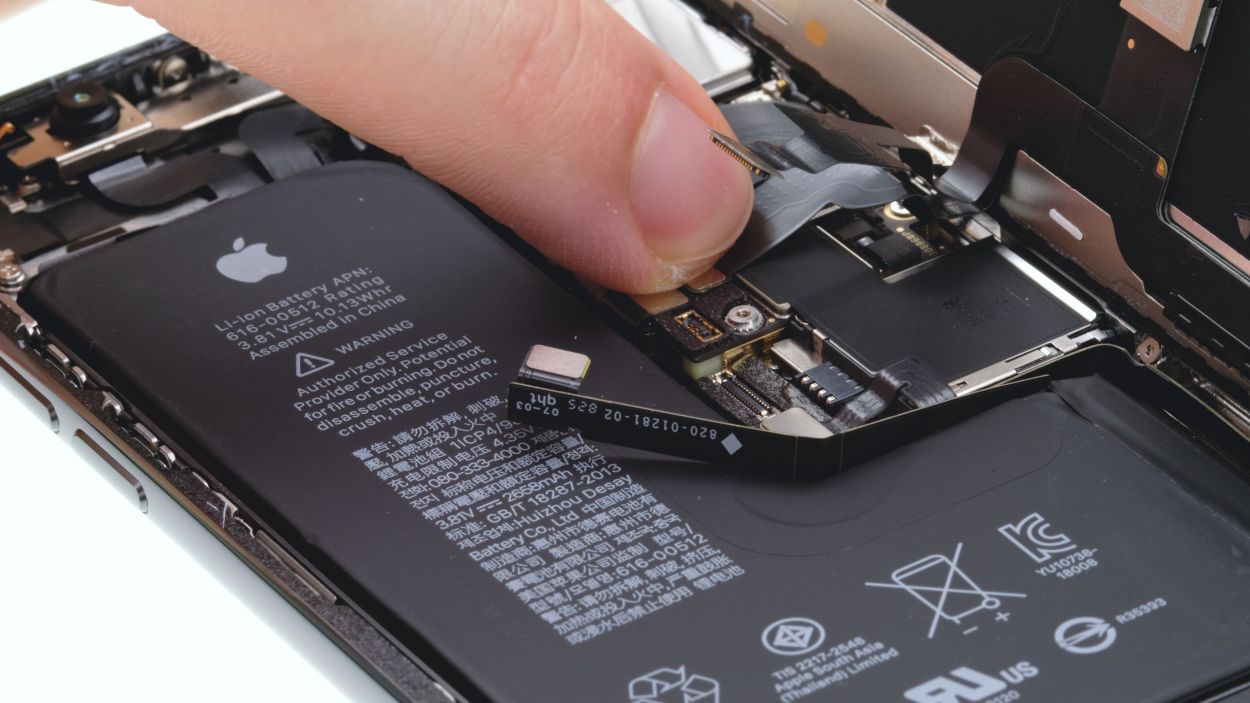
Display Connector
Earpiece connector
When you’re prying off those connectors with the spudger, think of it like a delicate dance! Keep it smooth and gentle to avoid any mishaps.
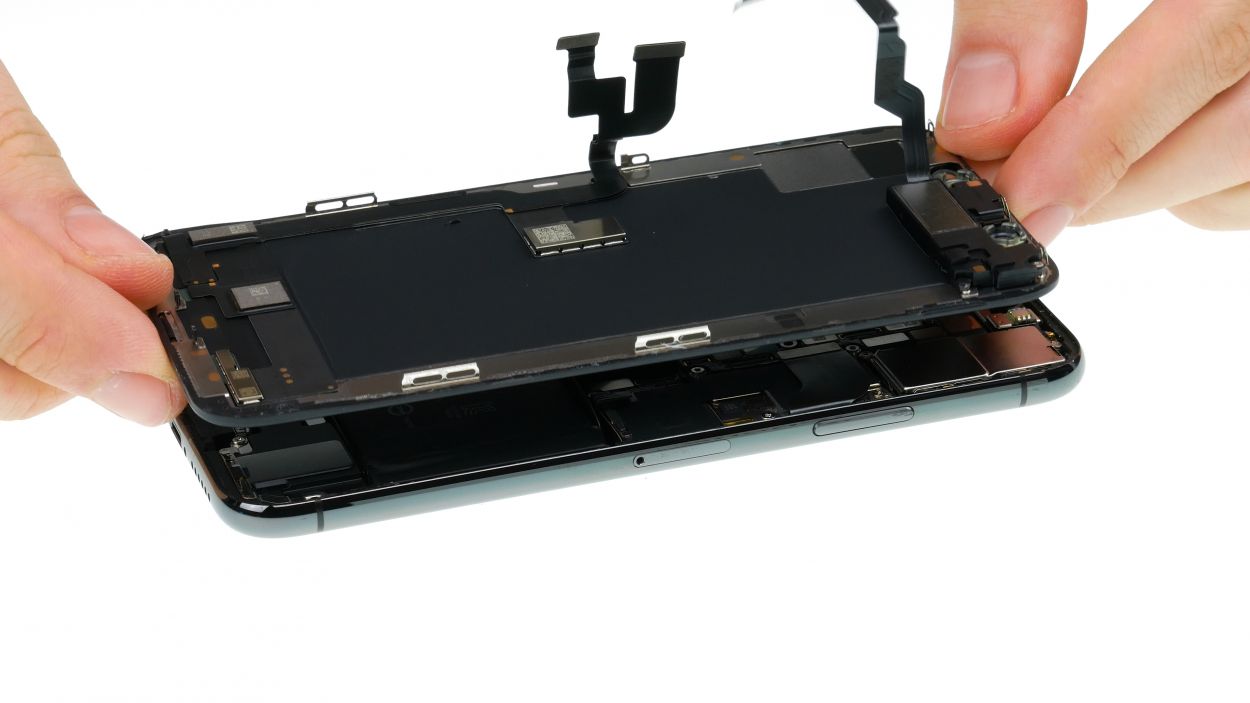
– The display unit is linked by three flexible cables that are just waiting to be freed!
– Grab your trusty spudger and gently pry apart the connectors for the display and the earpiece, one at a time. Think of it as a little puzzle!
– Now, the flex cable of the earpiece might be feeling a bit clingy and glued to the cable below. No worries! Just give it a gentle tug to loosen it up. If it’s being stubborn, a little hot air will do the trick!
Step 6
1 × 1,7 mm Phillips
1 × 1,6 mm Phillips
2 × 1,2 mm Phillips
1 × 1,0 mm Y-Type
– Unscrew those Phillips and Y-Type screws from the two brackets—just a heads up, they come in different lengths! Toss them on your magnet mat so they don’t wander off into the abyss later.
– Next, gently peel away the two metal brackets. They might be a bit clingy, but they’ll come off easily with a little coaxing.
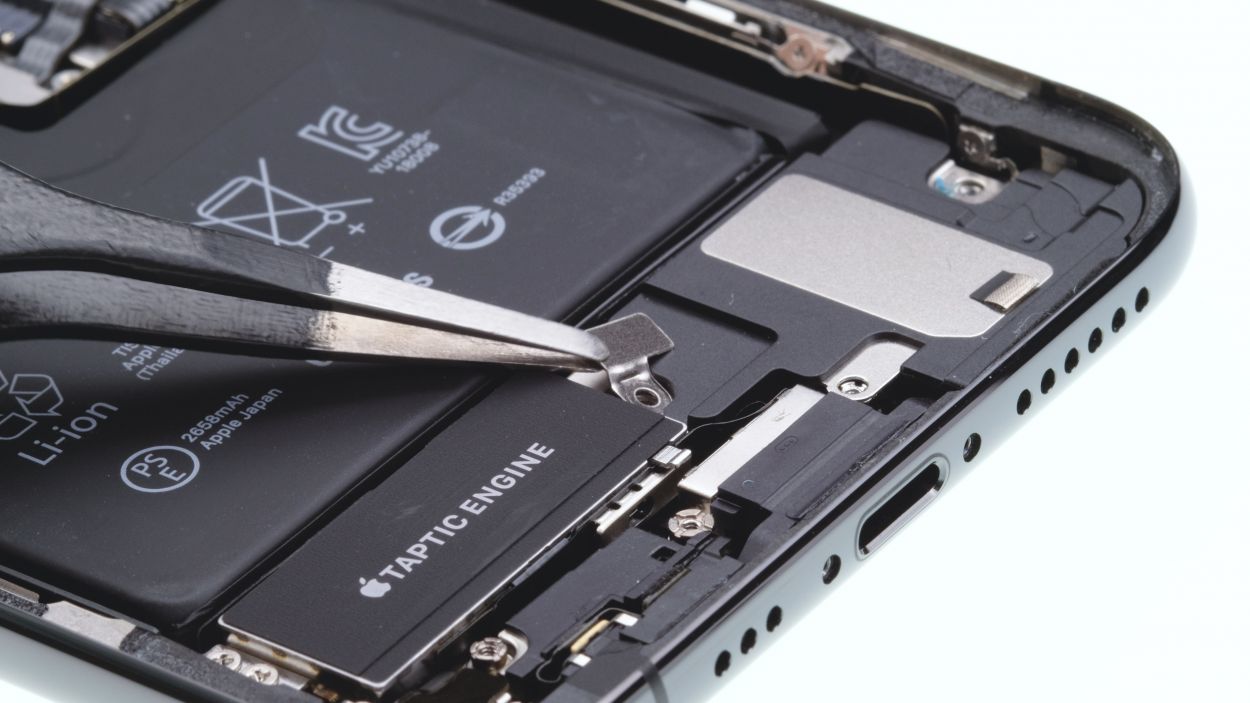
Step 7


1 × 1,7 mm Phillips
Speaker connector
The loudspeaker is really stuck on there! When you’re ready to put it back, make sure to clean up any leftover glue and ensure the adhesive is nice and even.
– First, let’s loosen that lone screw holding the cover plate snugly over the flex cable connector leading to the speaker.
– Next, gently lift off the cover plate and set it aside.
– Now, it’s time to disconnect the flex cable connector and carefully lift it up.
– With that done, you can now pull out the speaker along with the flex cable. Start by lifting the loudspeaker slightly and loosening the rubber strip at the top edge.
– Finally, give the speaker a gentle tug to pull it all the way out.
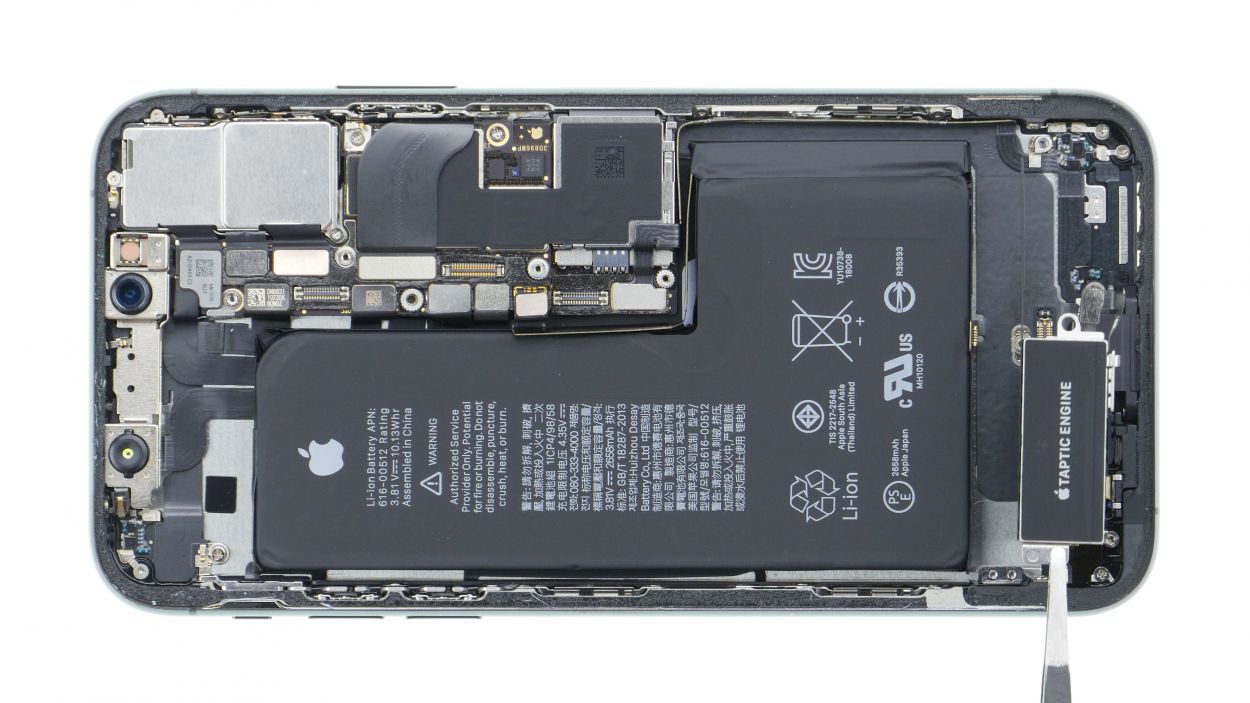
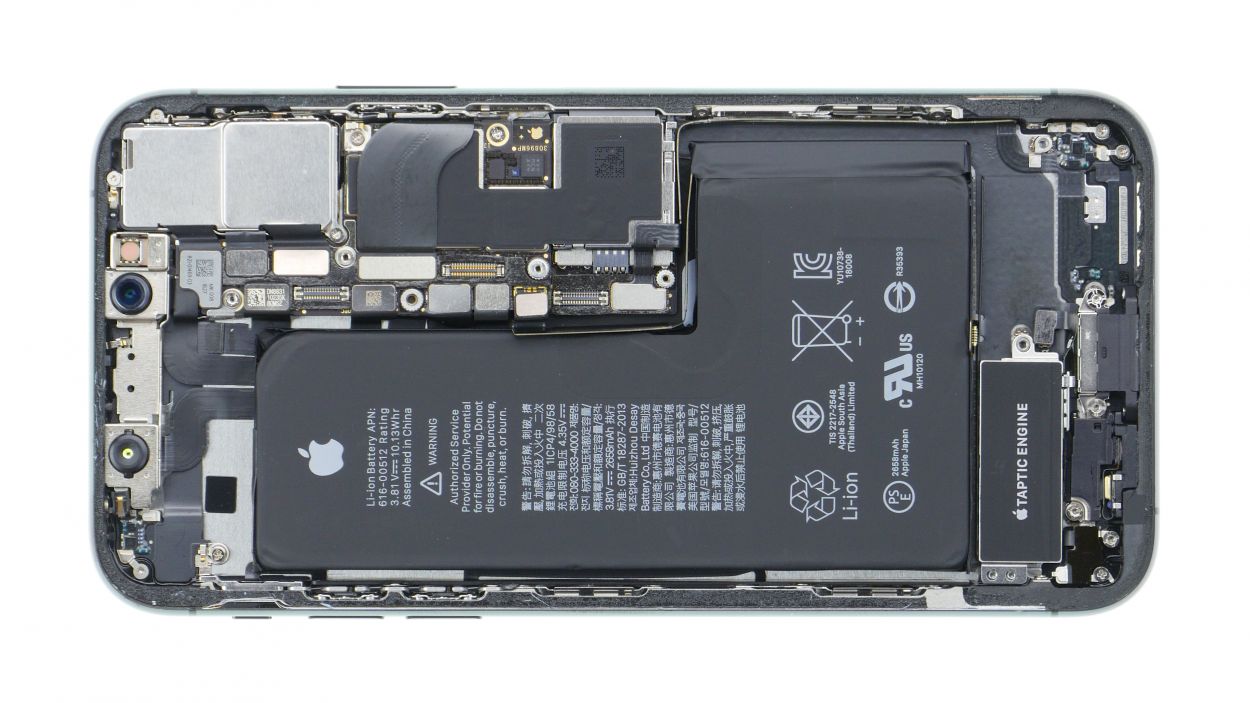
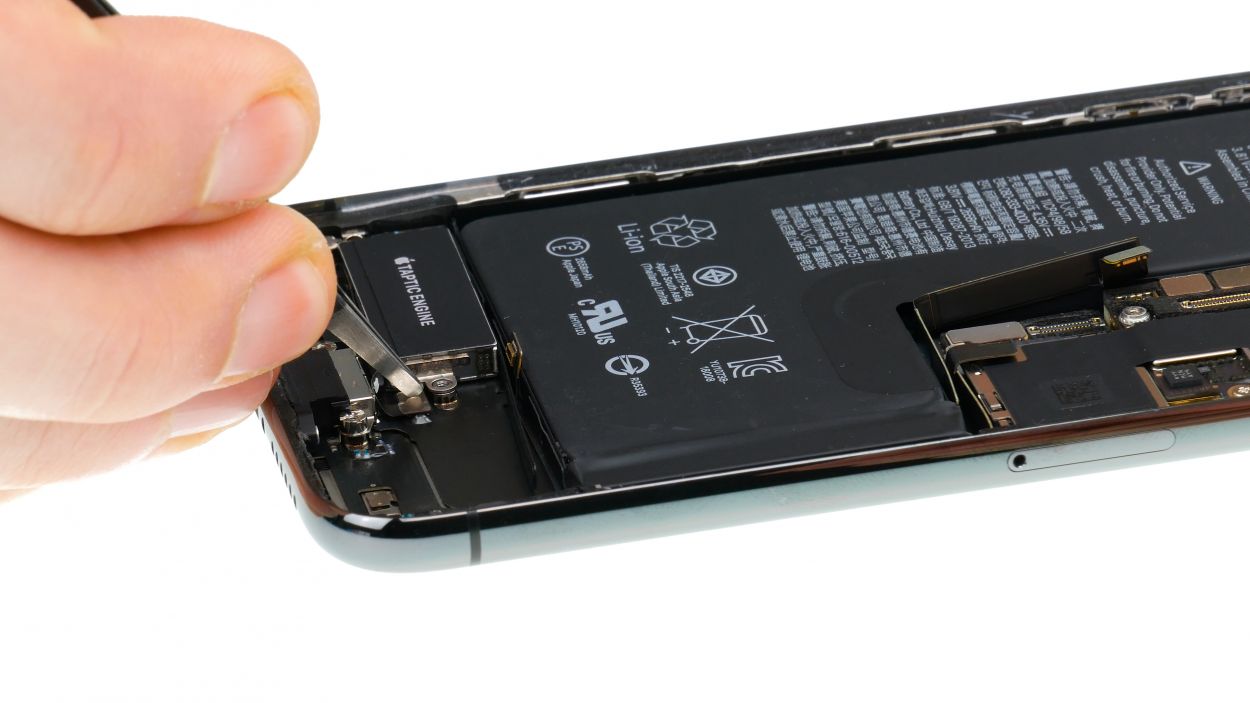
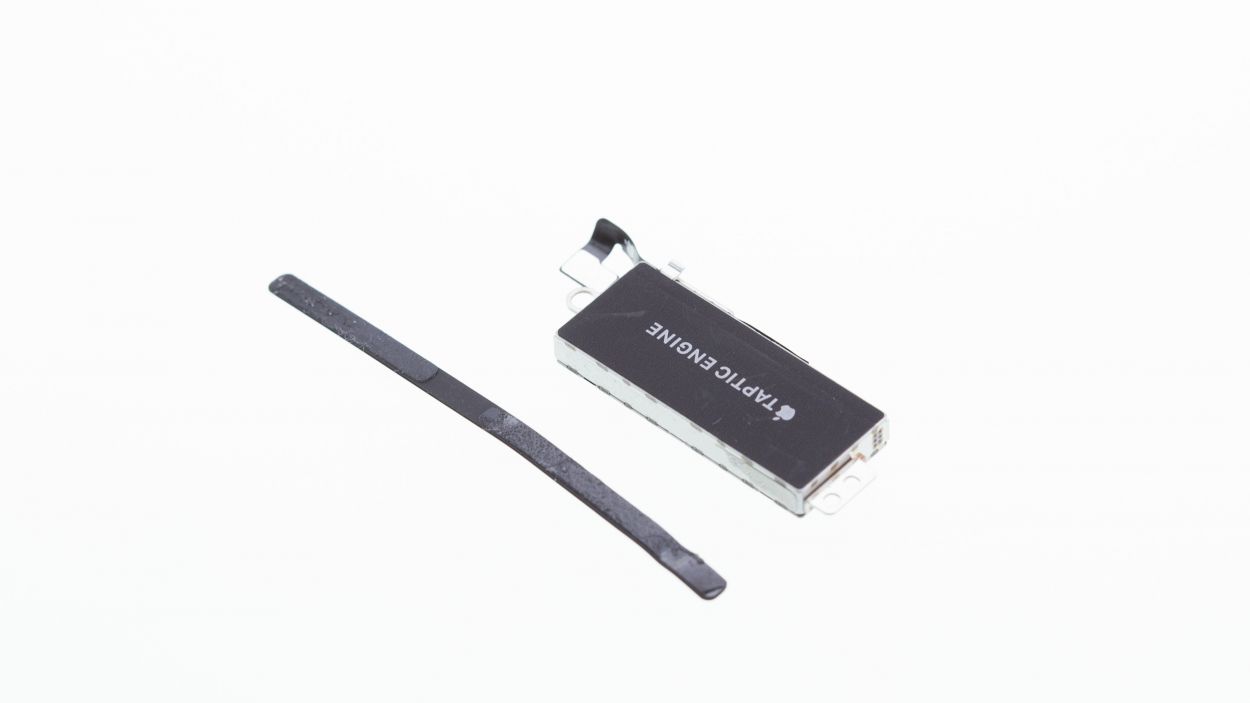
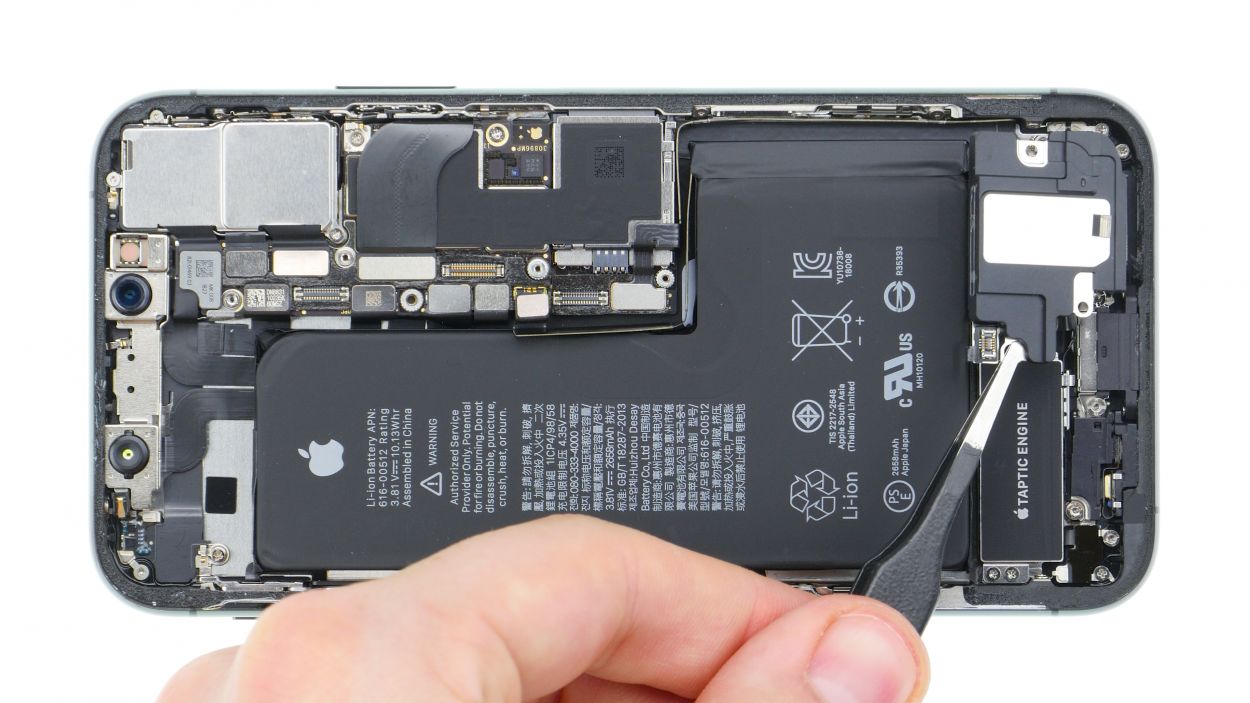
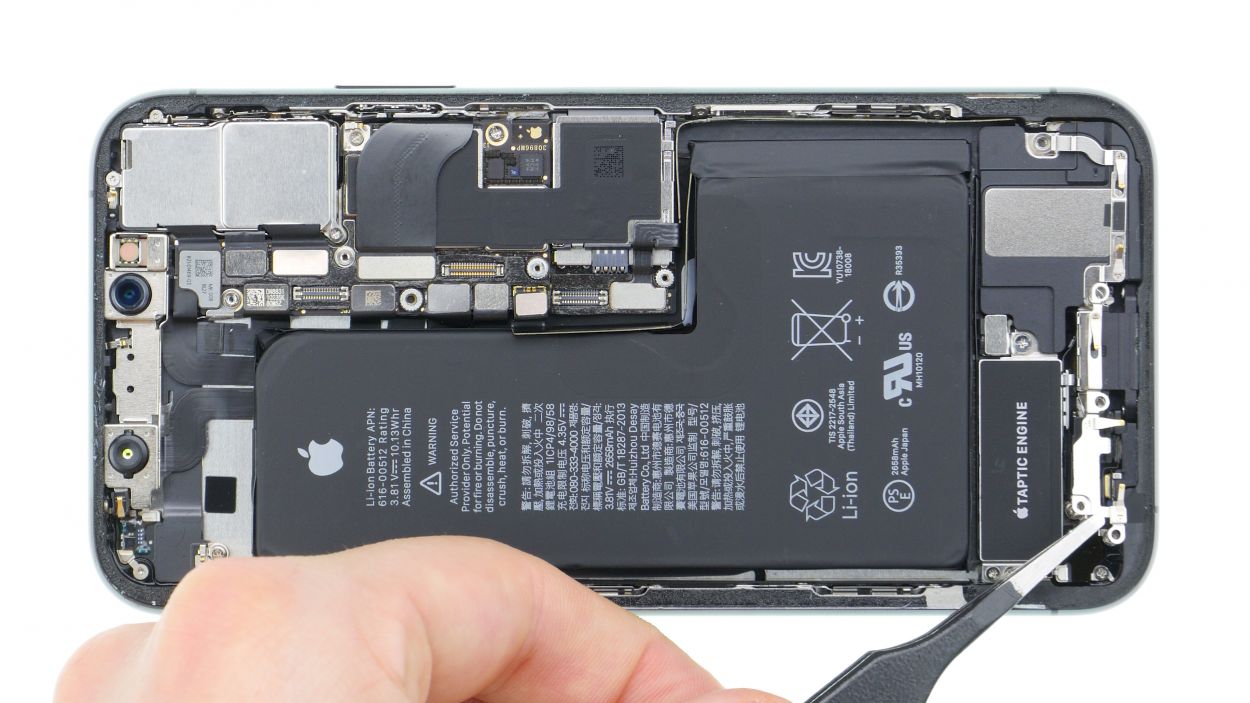
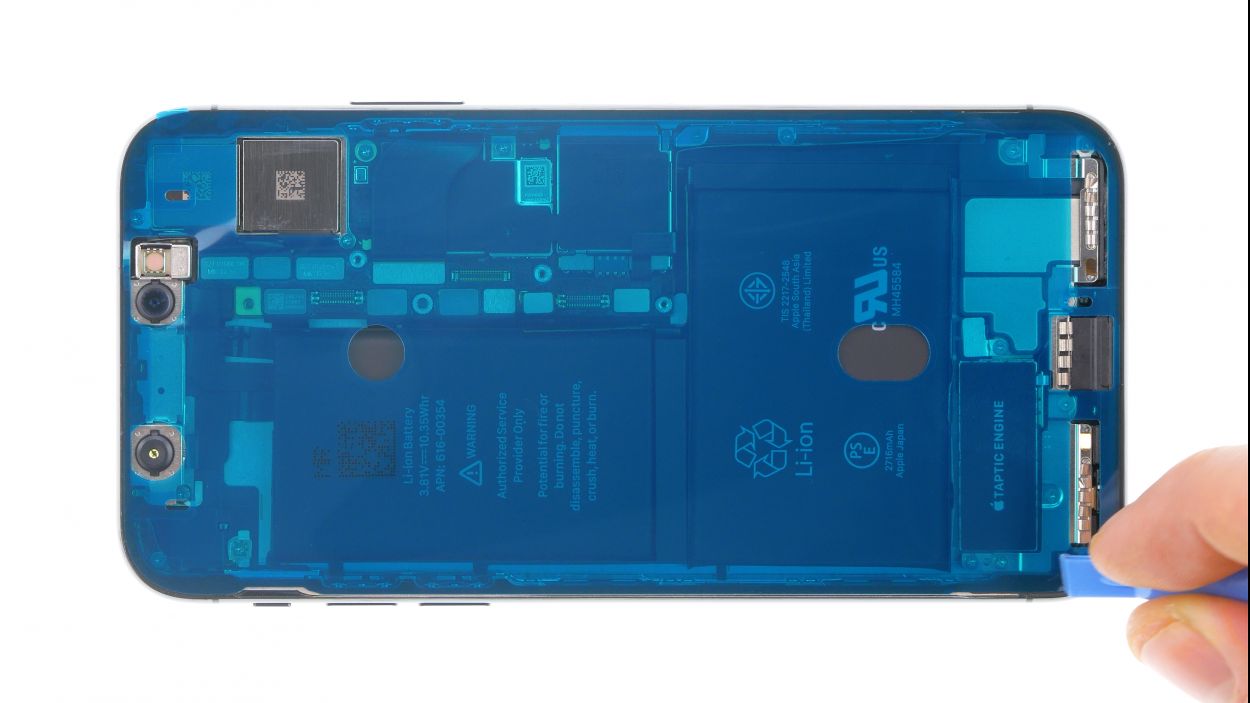
Step 8


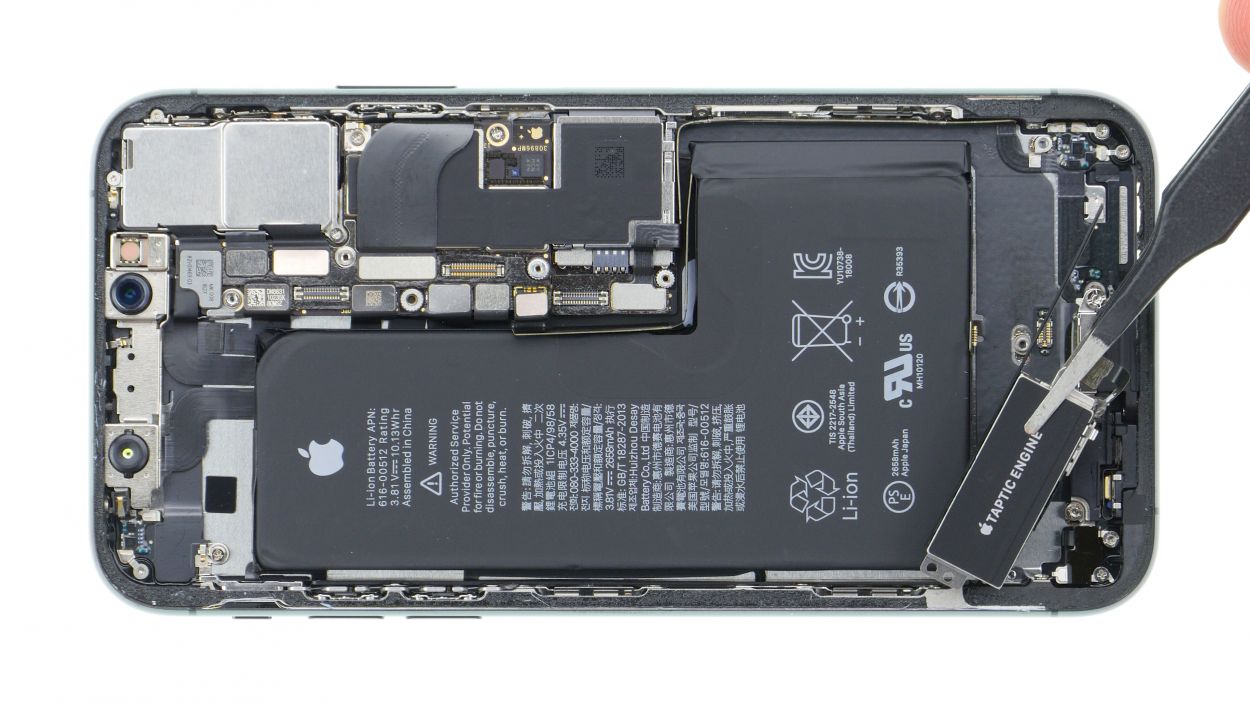
2 × 1,8 mm Phillips
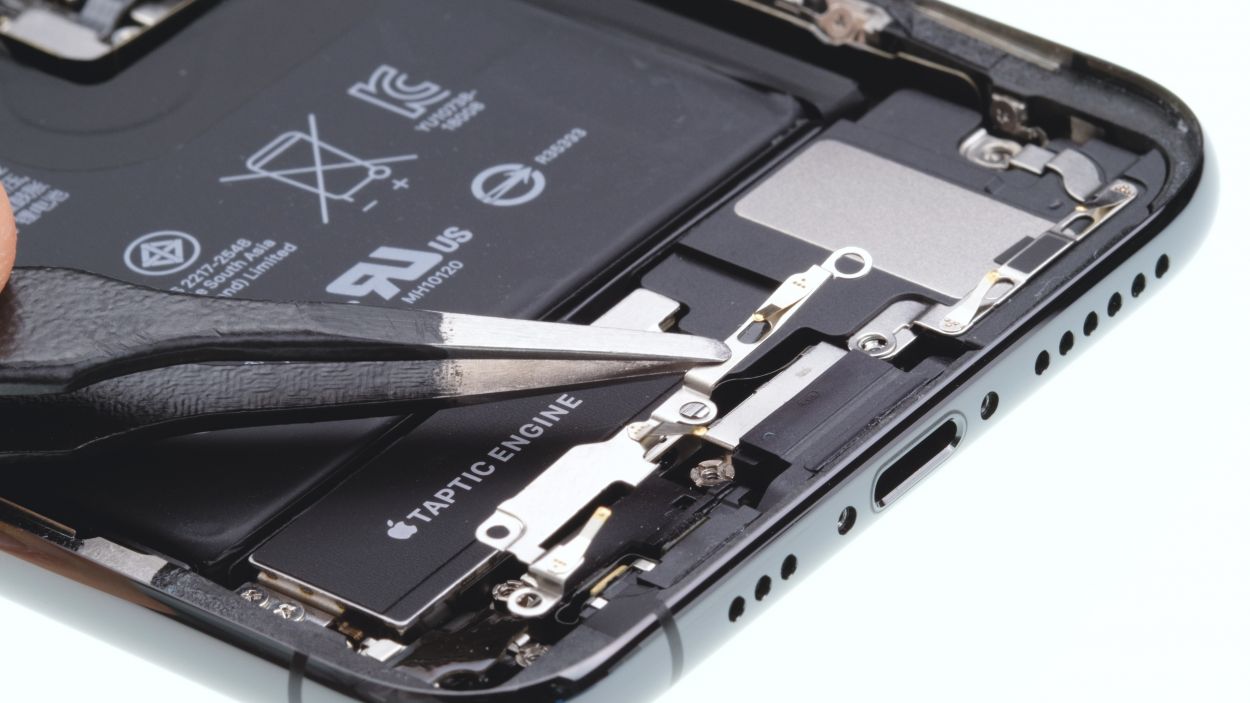
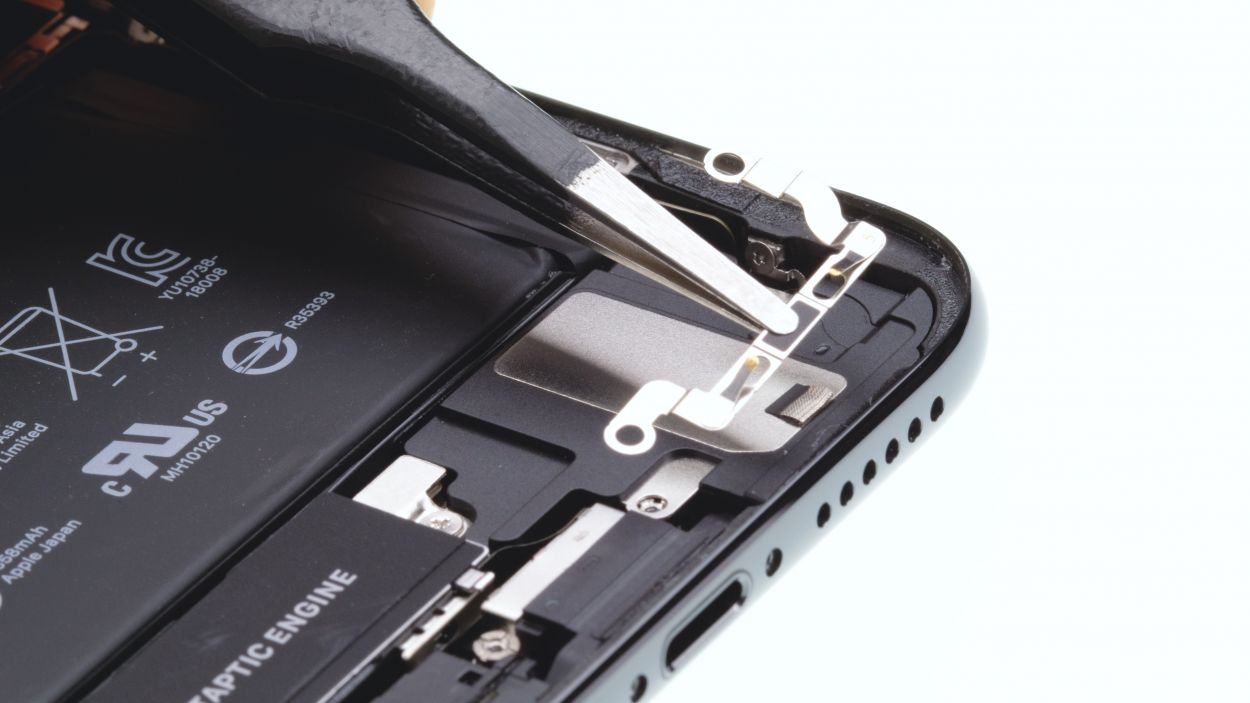
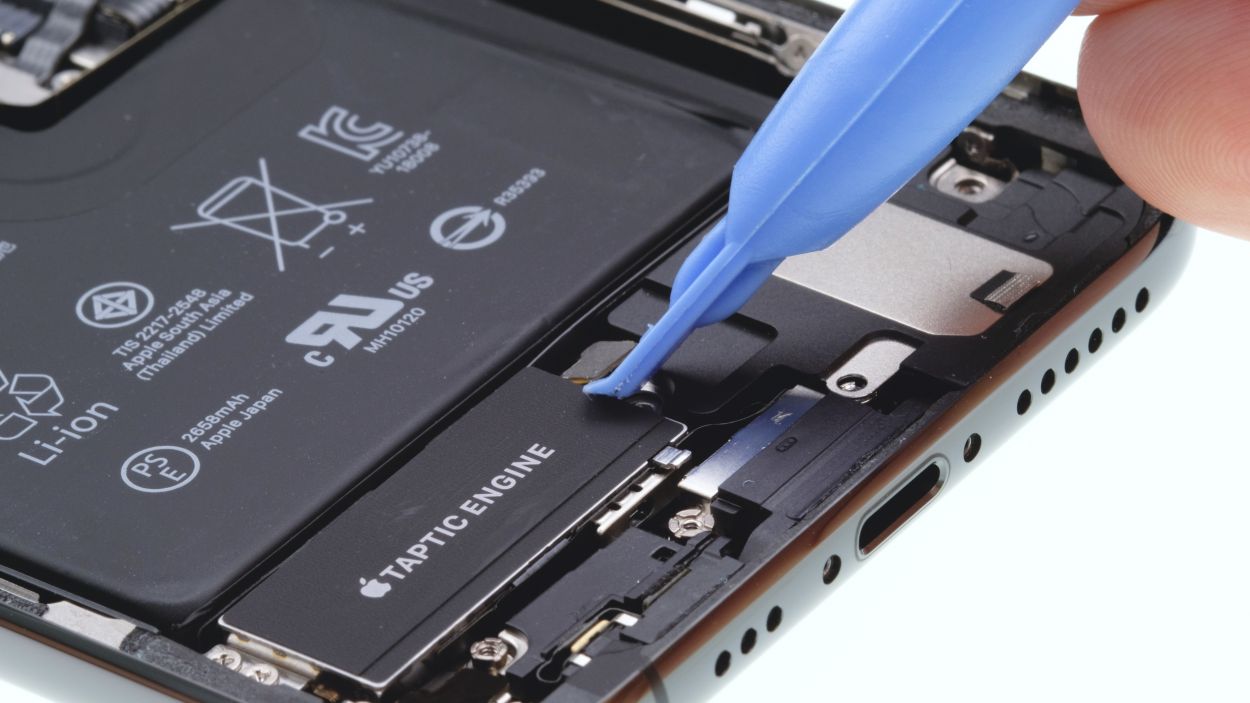
Taptic Engine Connector
– Let’s get that Taptic Engine out of there! Start by unscrewing those Phillips screws holding it in place. They’re just waiting to be freed up!
– Next, grab your trusty spudger and gently disconnect the Taptic Engine’s connector. You’ve got this!
– Finally, give the Taptic Engine a little nudge and remove it from its cozy spot.
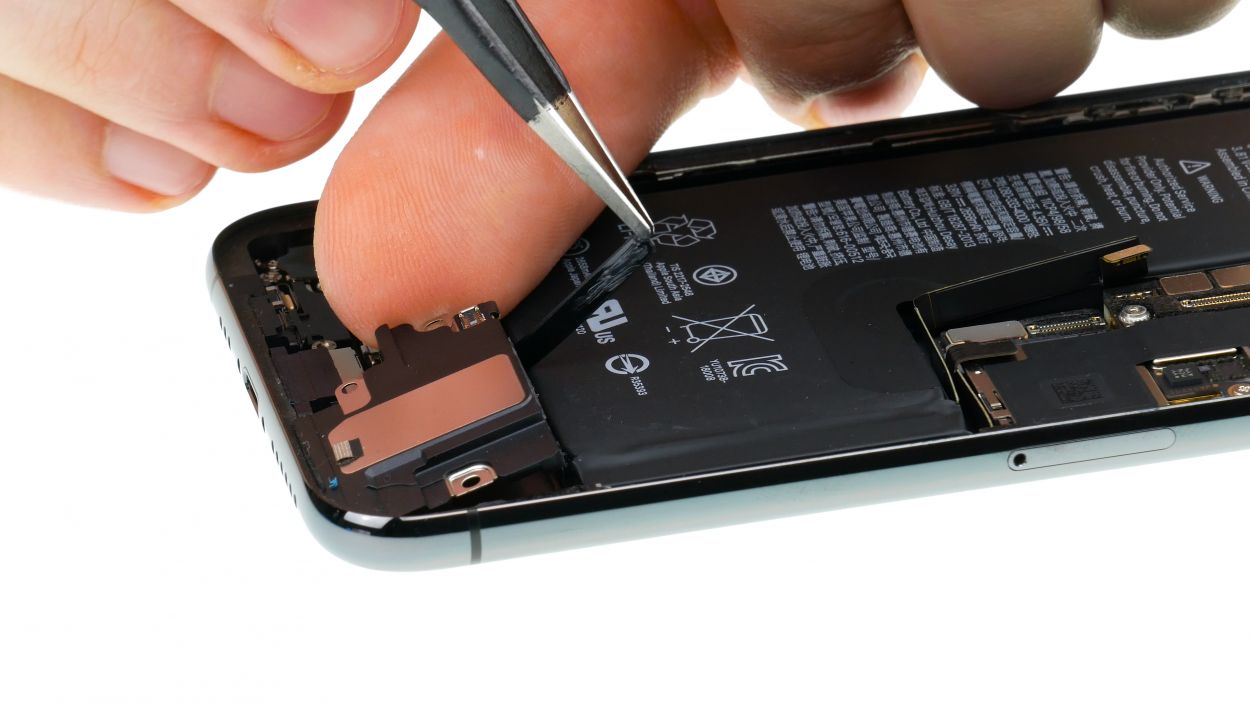
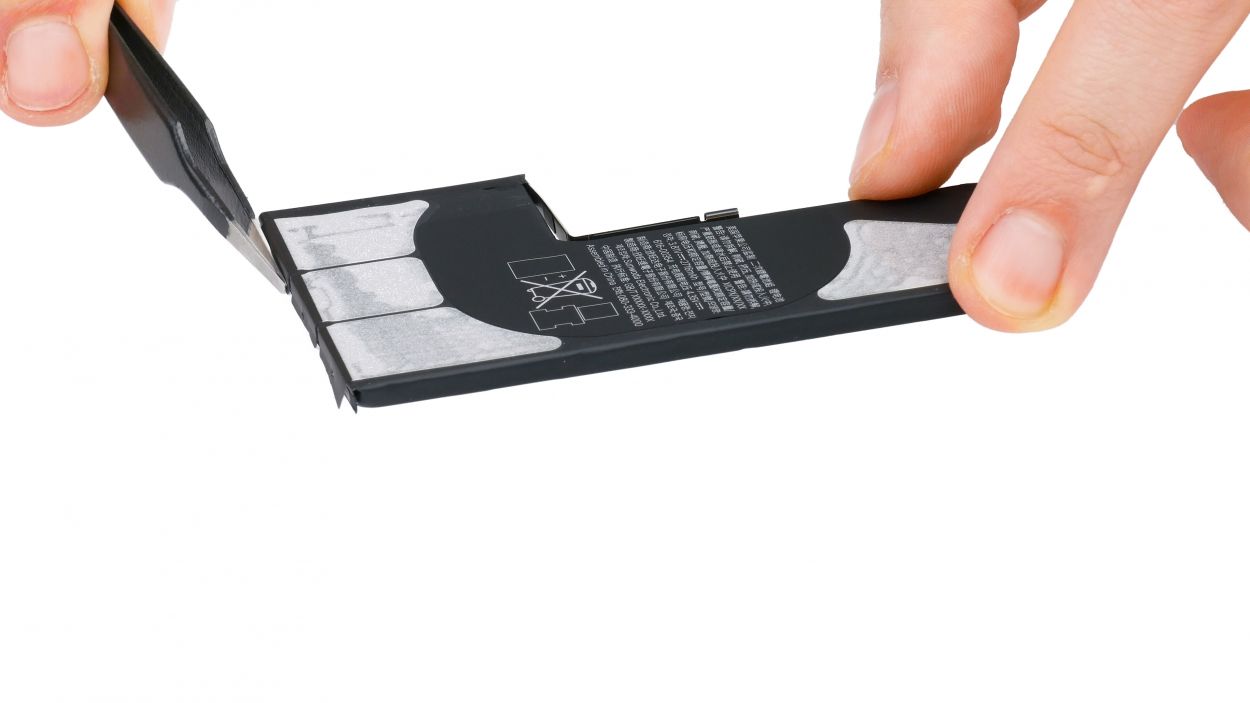
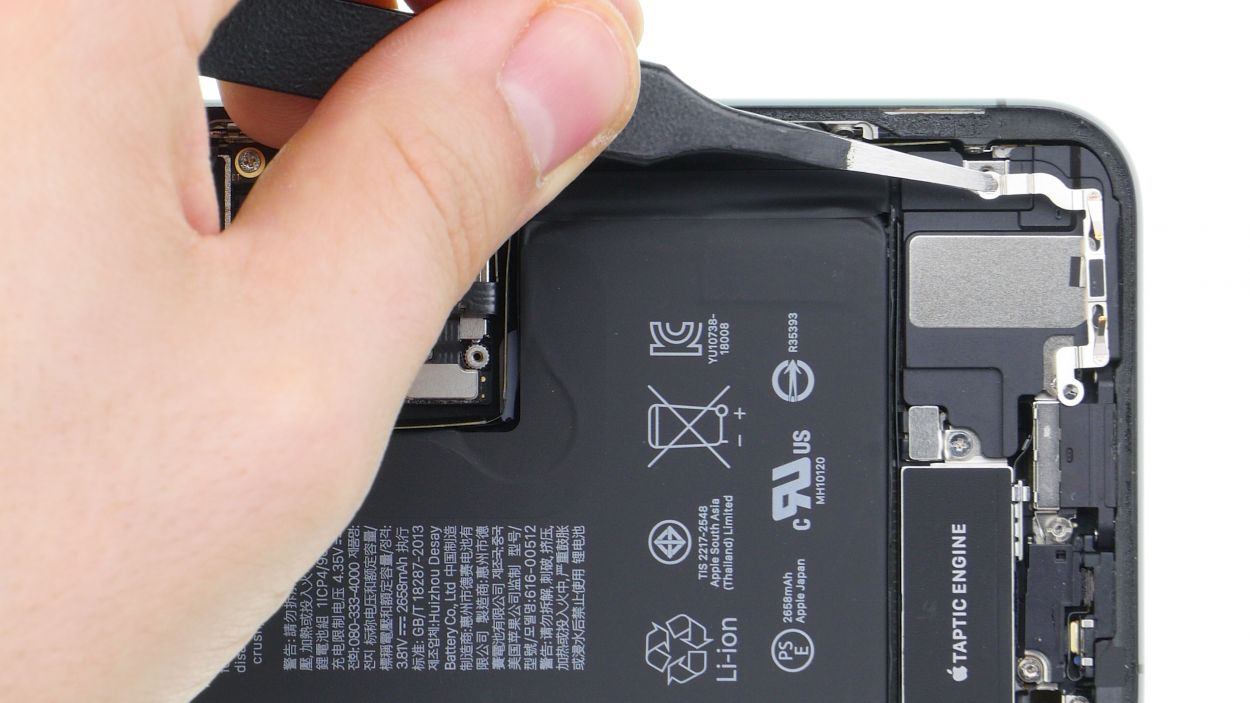
Step 9
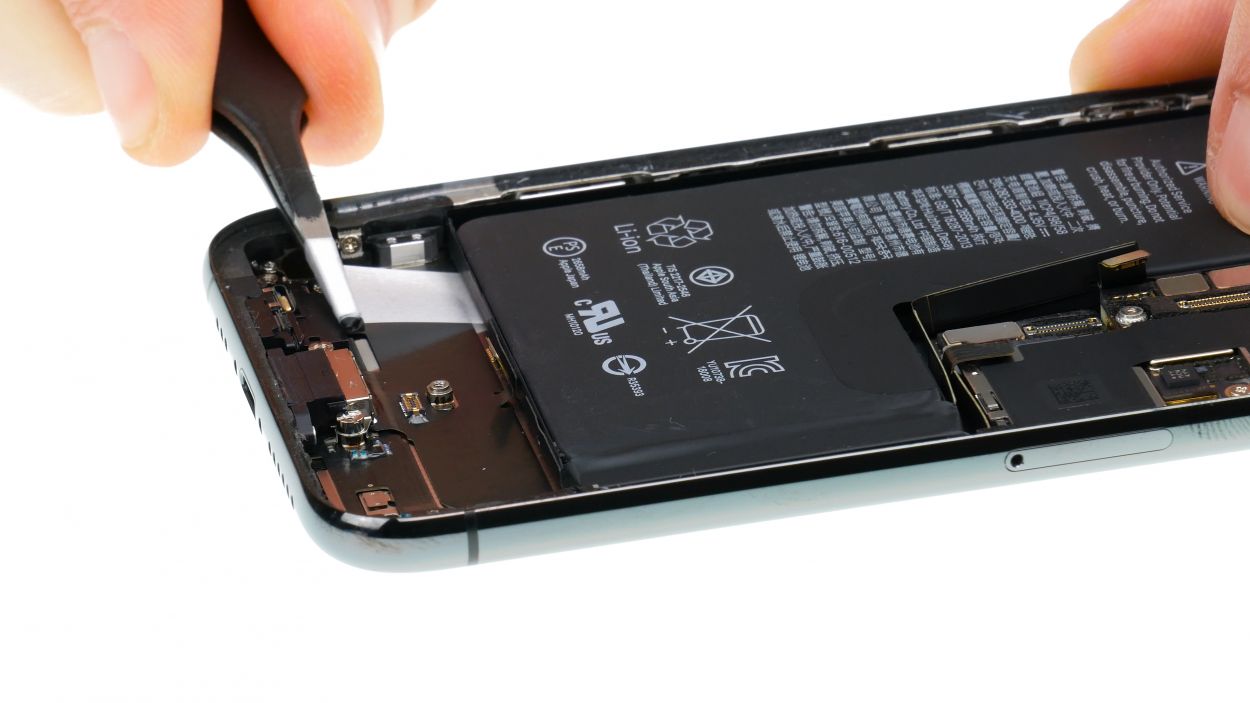
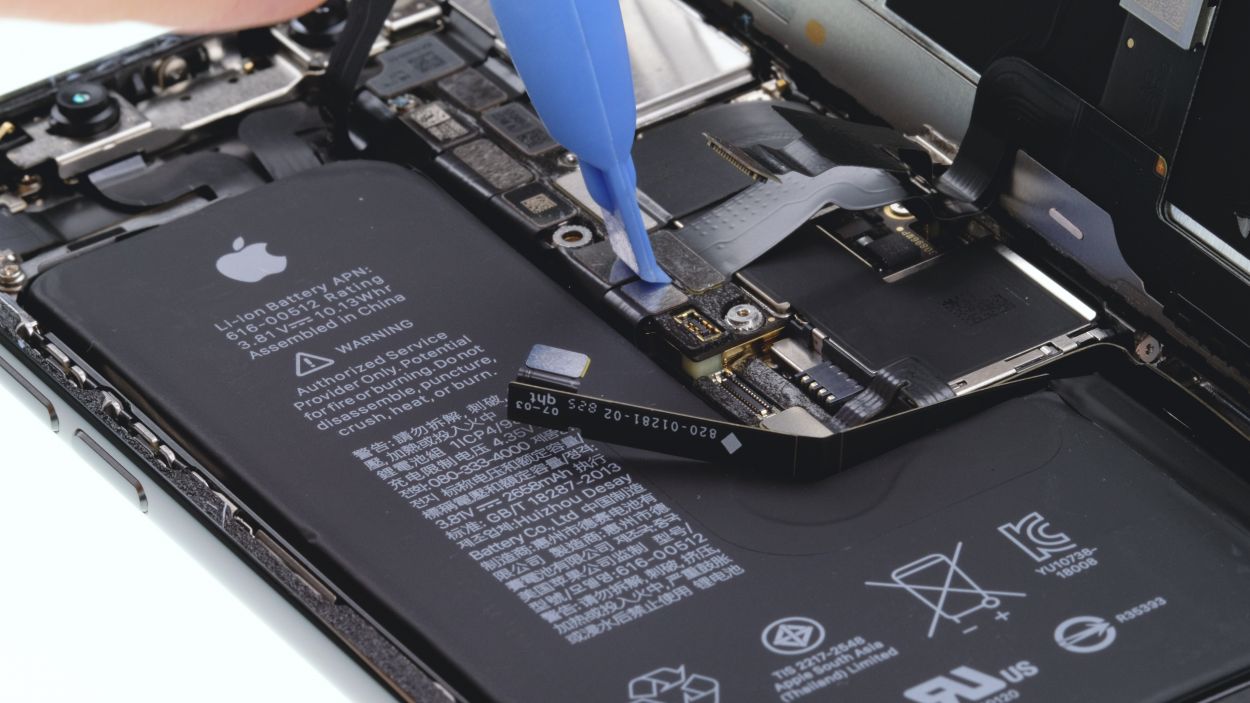
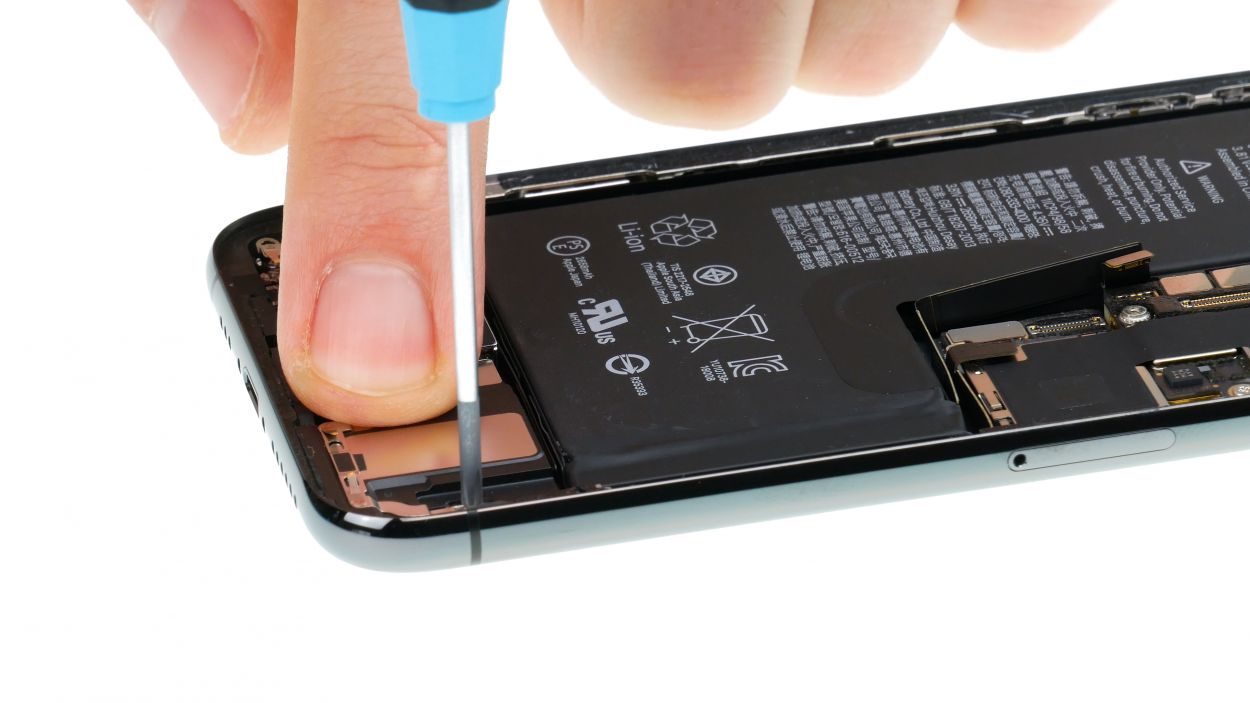
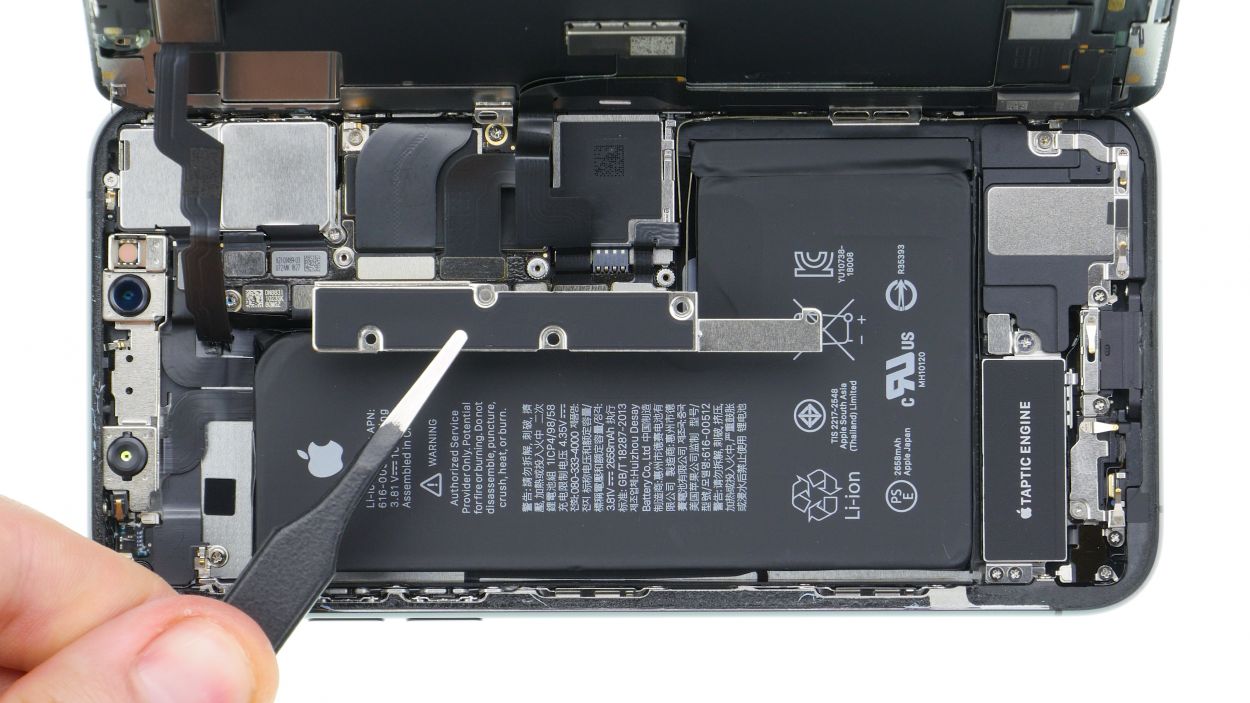
– Grab those tweezers or a spatula and gently peel off the black tabs. Underneath, you’ll find the white adhesive+strips+iPhone+Xs&crid=1TJIMMAJSUJUZ&sprefix=repair+tools%2Caps%2C165&linkCode=ll2&tag=salvationrepa-20&linkId=c486487cf454ce8edd6f5beefab4110f&language=en_US&ref_=as_li_ss_tl’>adhesive strips waiting for you.
– Now, take your time and pull out those adhesive+strips+iPhone+Xs&crid=1TJIMMAJSUJUZ&sprefix=repair+tools%2Caps%2C165&linkCode=ll2&tag=salvationrepa-20&linkId=c486487cf454ce8edd6f5beefab4110f&language=en_US&ref_=as_li_ss_tl’>adhesive strips slowly. Keep them nice and flat along the iPhone’s surface for the best results.
– Feel free to use your fingers to pull out the strips, or you can wrap them around your tweezers. If you’re unsure how to do it, check out the video (just hit the play button in the upper right corner of the first picture).
– Once all the adhesive+strips+iPhone+Xs&crid=1TJIMMAJSUJUZ&sprefix=repair+tools%2Caps%2C165&linkCode=ll2&tag=salvationrepa-20&linkId=c486487cf454ce8edd6f5beefab4110f&language=en_US&ref_=as_li_ss_tl’>adhesive strips are off, you’re all set to remove the battery!
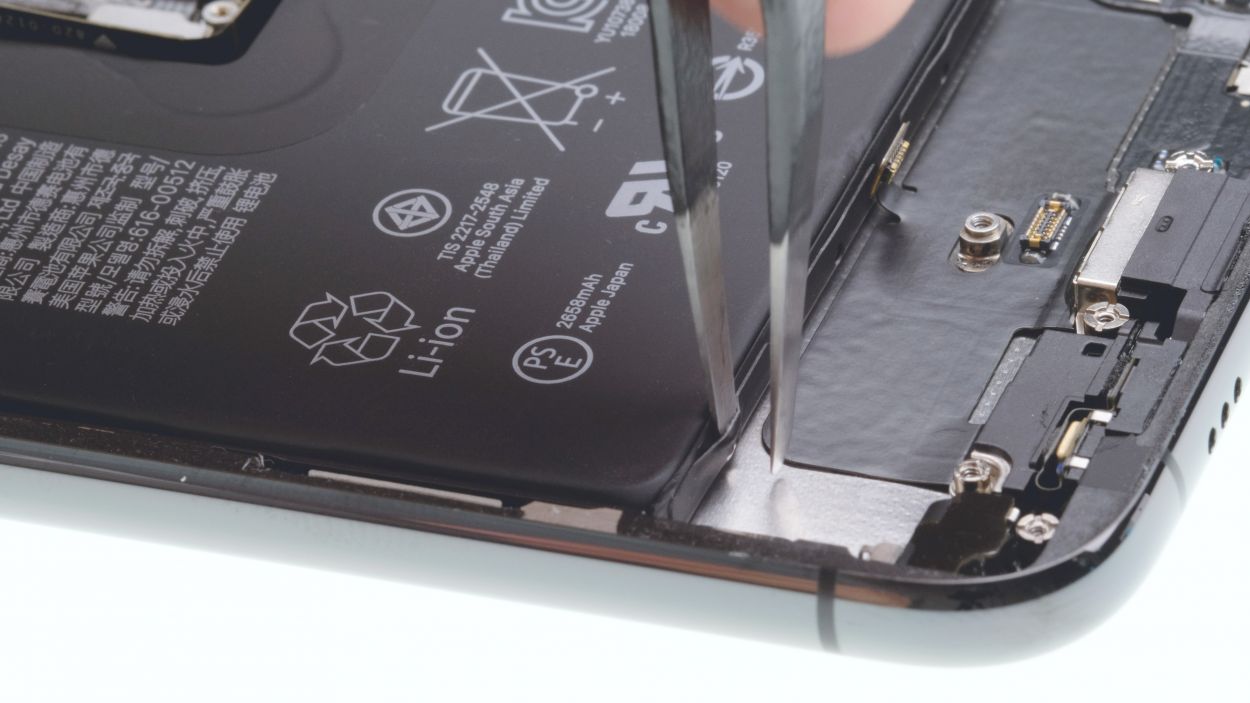
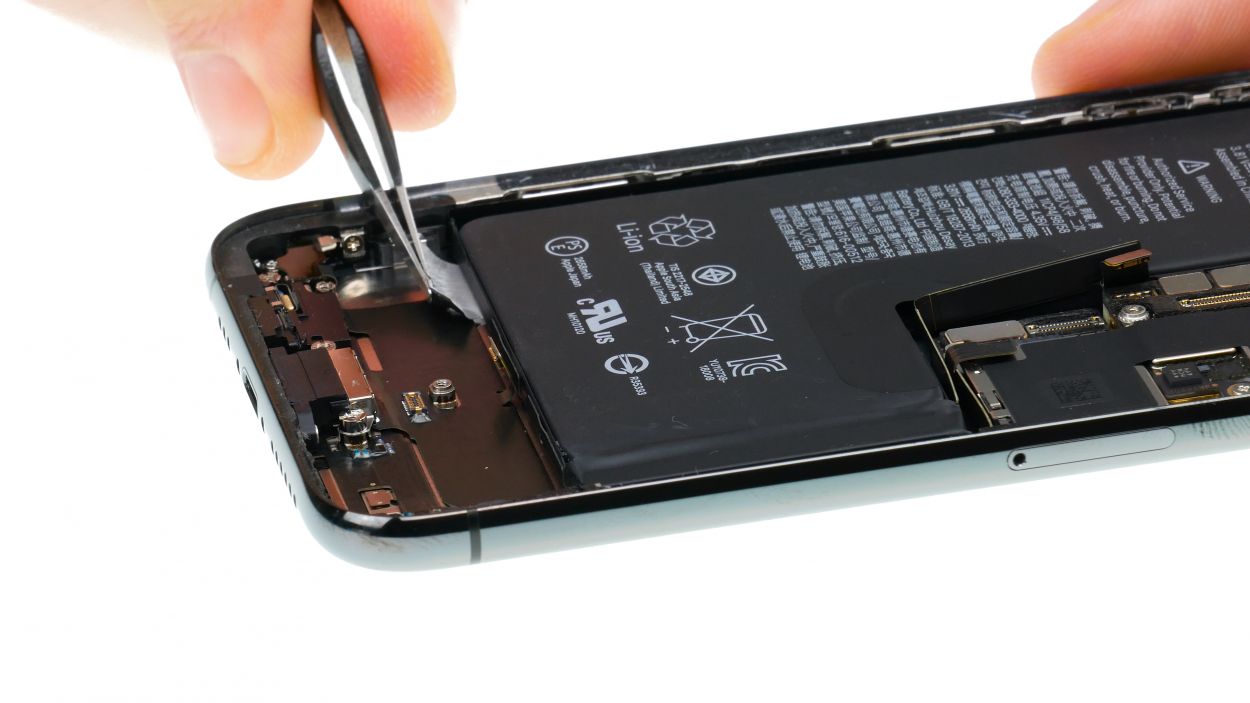
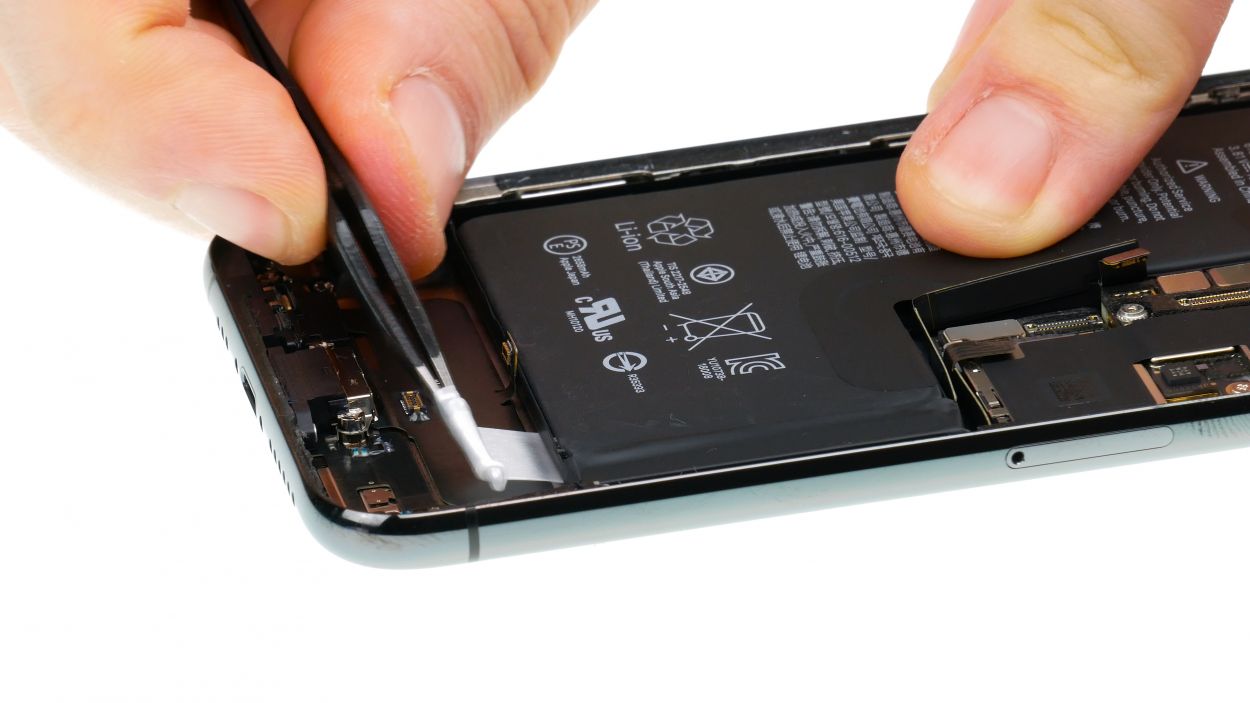
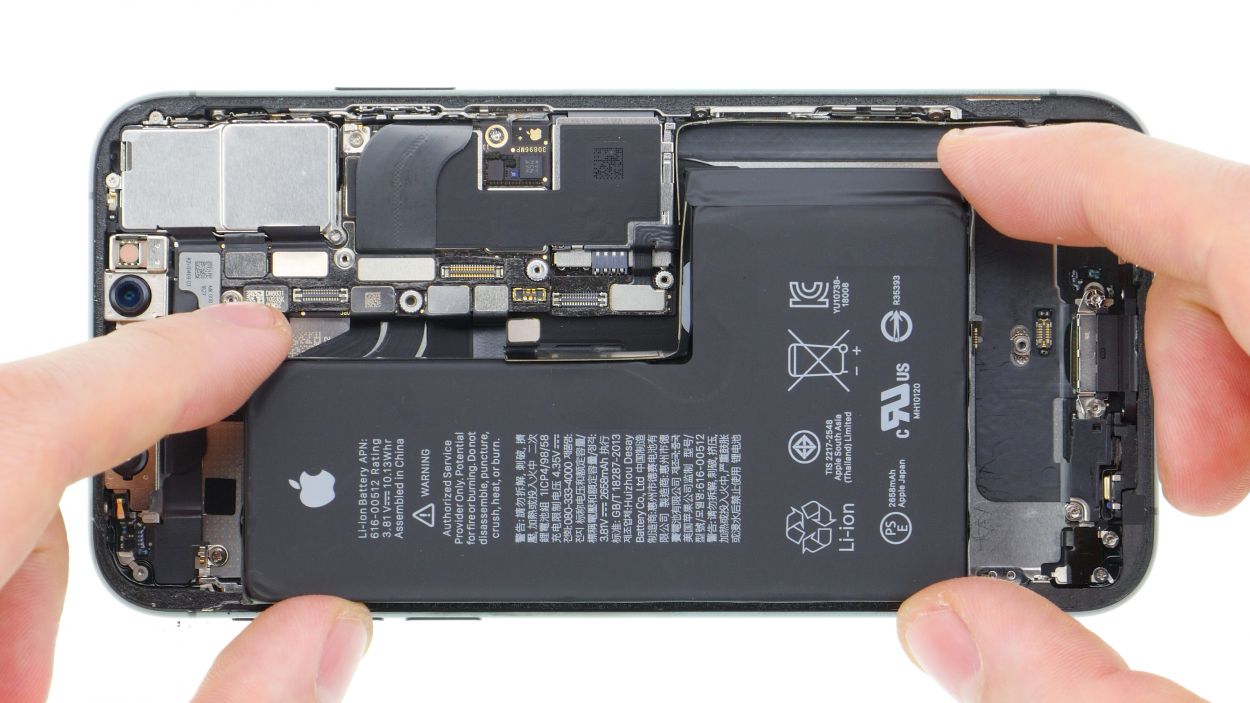
Be super careful not to mess with those flex cables at the top and bottom edges of the battery! They’re like delicate little threads holding everything together.
If one of those pesky adhesive+strips+iPhone+Xs&crid=1TJIMMAJSUJUZ&sprefix=repair+tools%2Caps%2C165&linkCode=ll2&tag=salvationrepa-20&linkId=c486487cf454ce8edd6f5beefab4110f&language=en_US&ref_=as_li_ss_tl’>adhesive strips decides to tear, don’t panic! Just gently pry out the battery using a wide Spudger. Remember, the key here is to bend that battery as little as possible, so take your time and be careful!
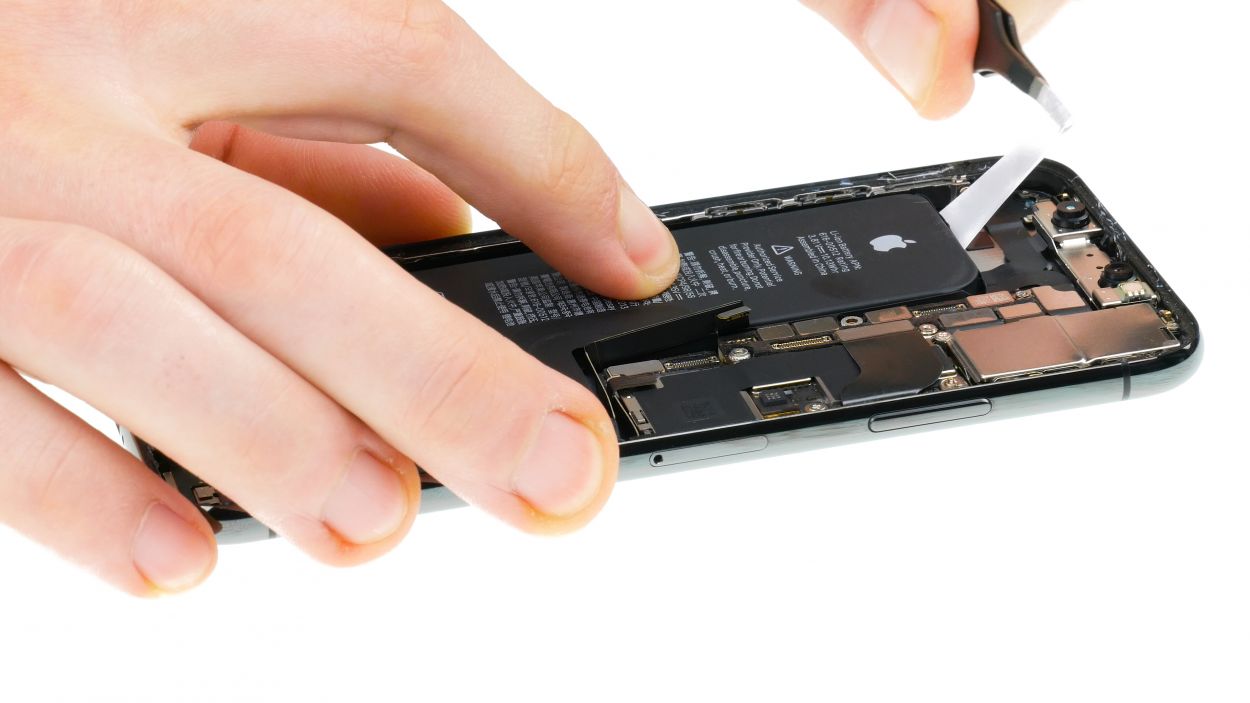
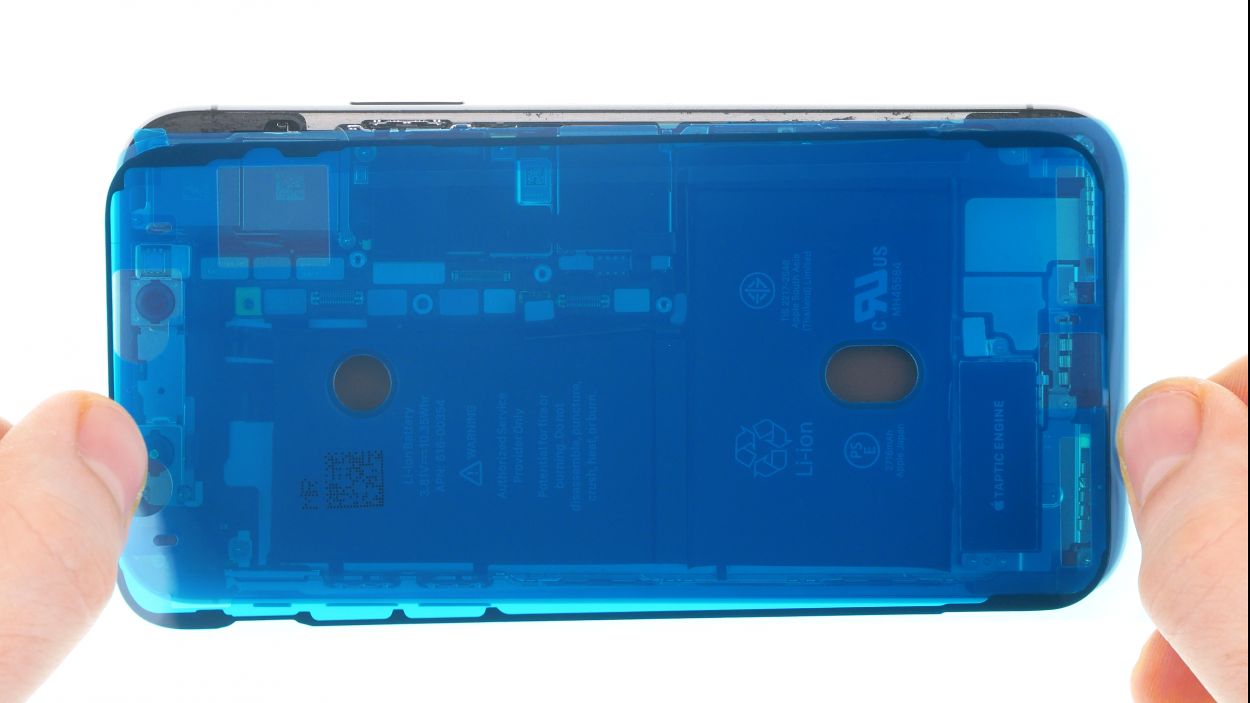
Step 10
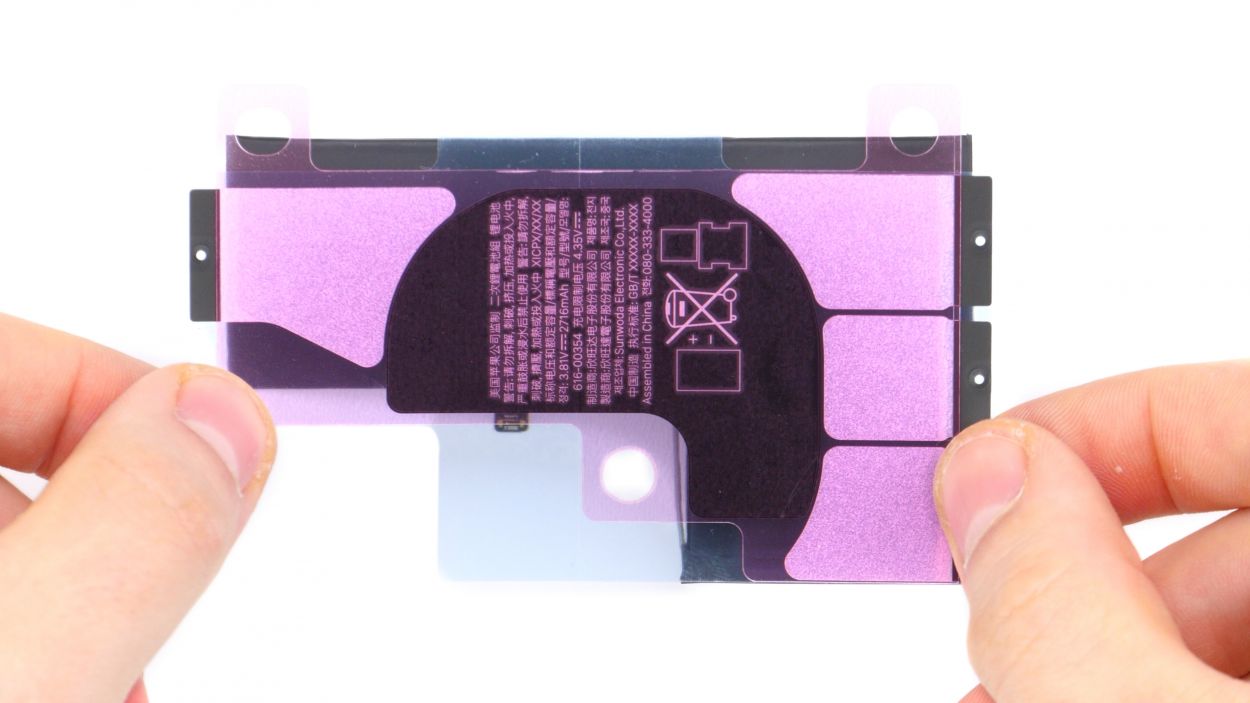
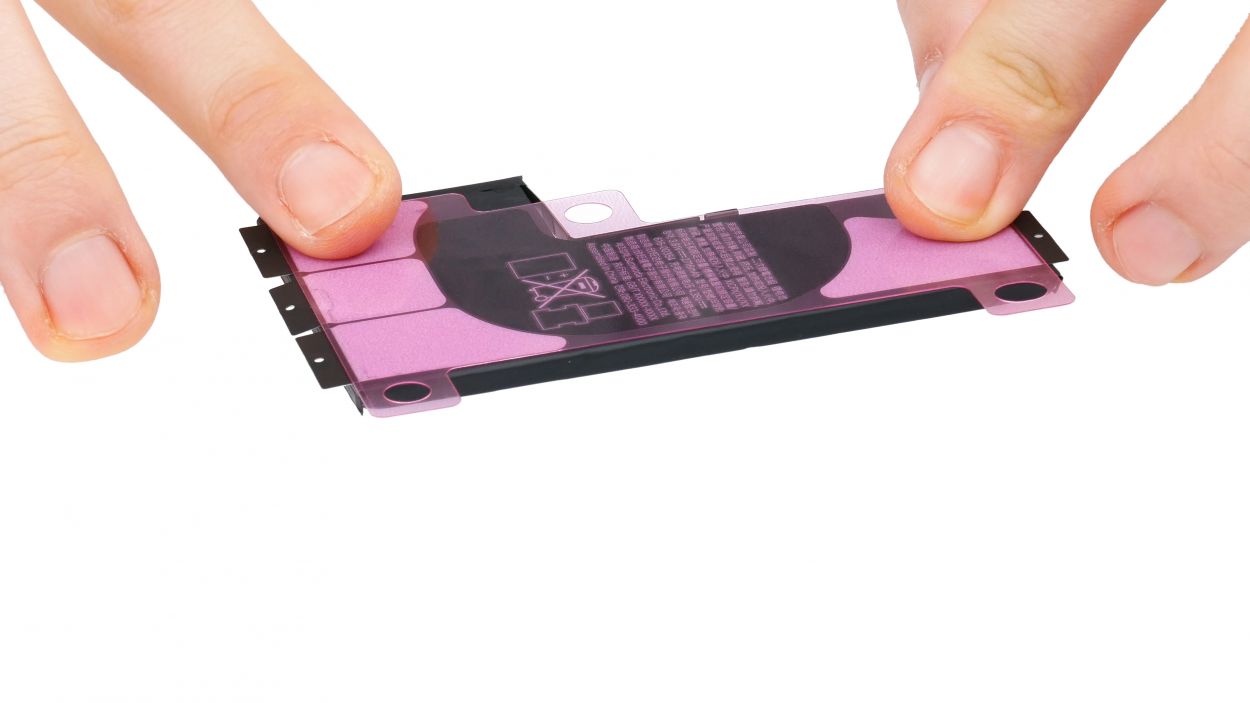
Get those adhesive+strips+iPhone+Xs&crid=1TJIMMAJSUJUZ&sprefix=repair+tools%2Caps%2C165&linkCode=ll2&tag=salvationrepa-20&linkId=c486487cf454ce8edd6f5beefab4110f&language=en_US&ref_=as_li_ss_tl’>adhesive strips ready and make sure they’re facing the right way as you place them in the device. We want everything to stick like glue!
When you’re placing those adhesive+strips+iPhone+Xs&crid=1TJIMMAJSUJUZ&sprefix=repair+tools%2Caps%2C165&linkCode=ll2&tag=salvationrepa-20&linkId=c486487cf454ce8edd6f5beefab4110f&language=en_US&ref_=as_li_ss_tl’>adhesive strips, make sure to leave a little wiggle room on both sides for the tabs to fold over. It’s like giving your battery a cozy blanket to snuggle into!
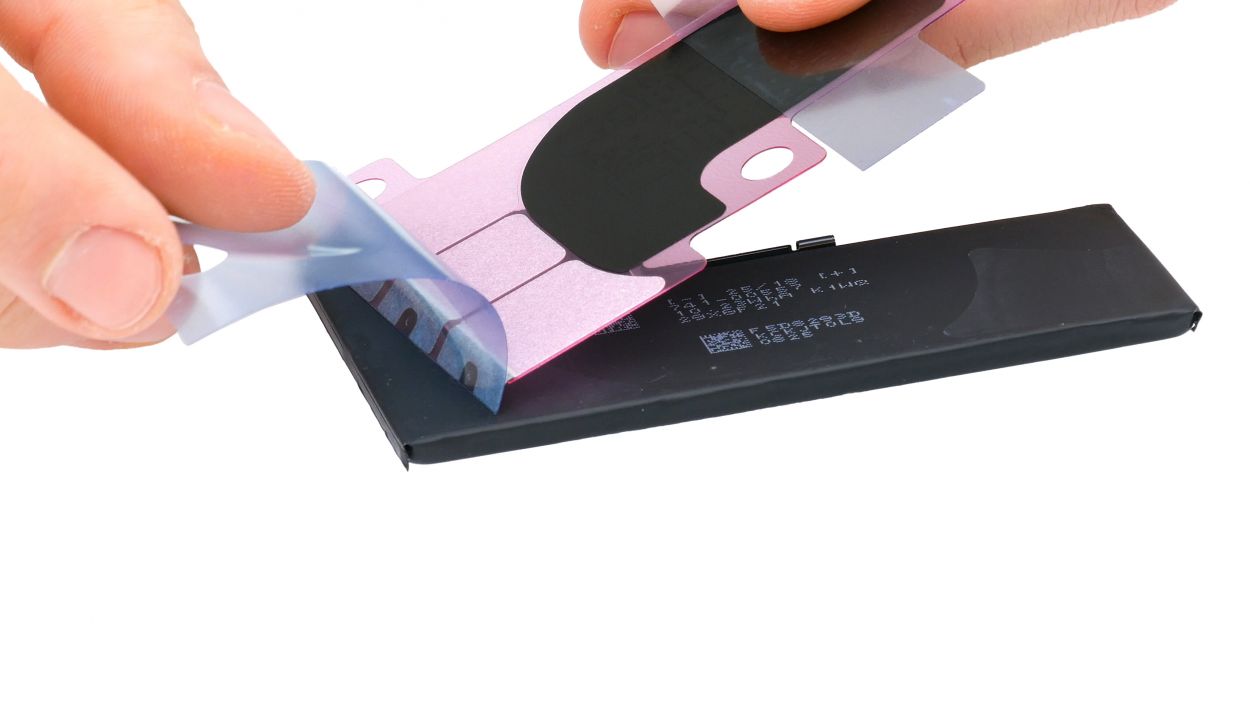
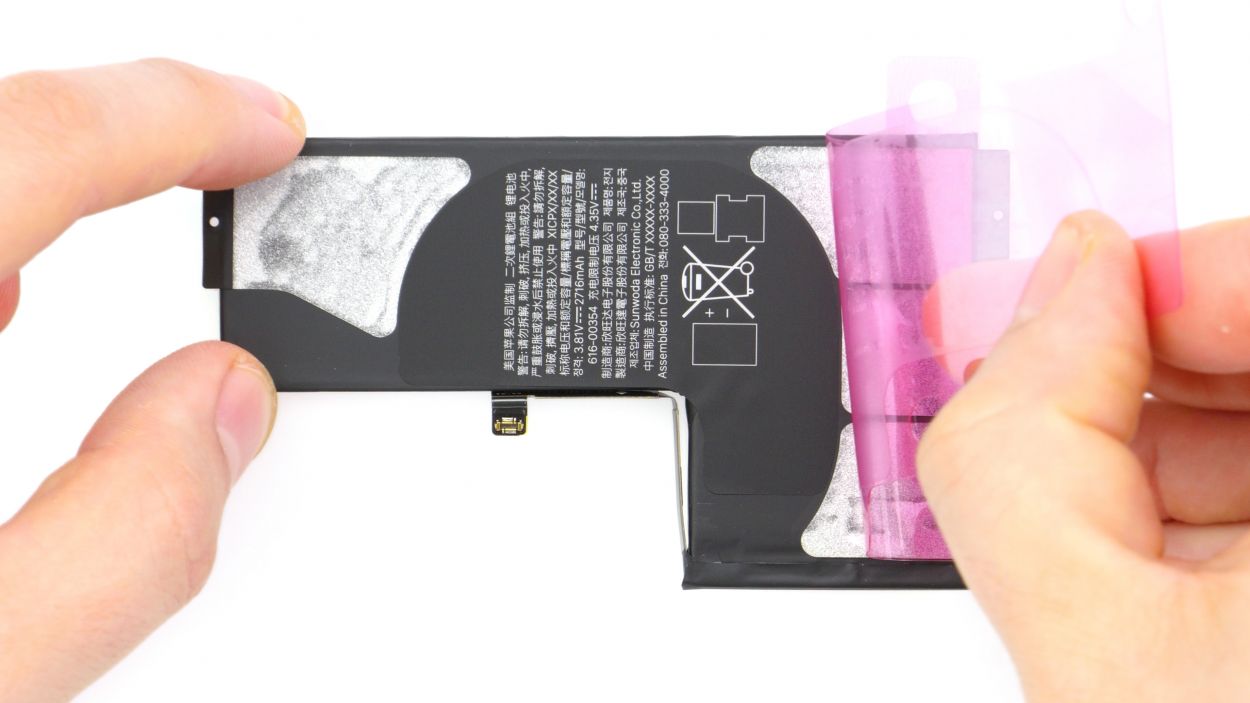
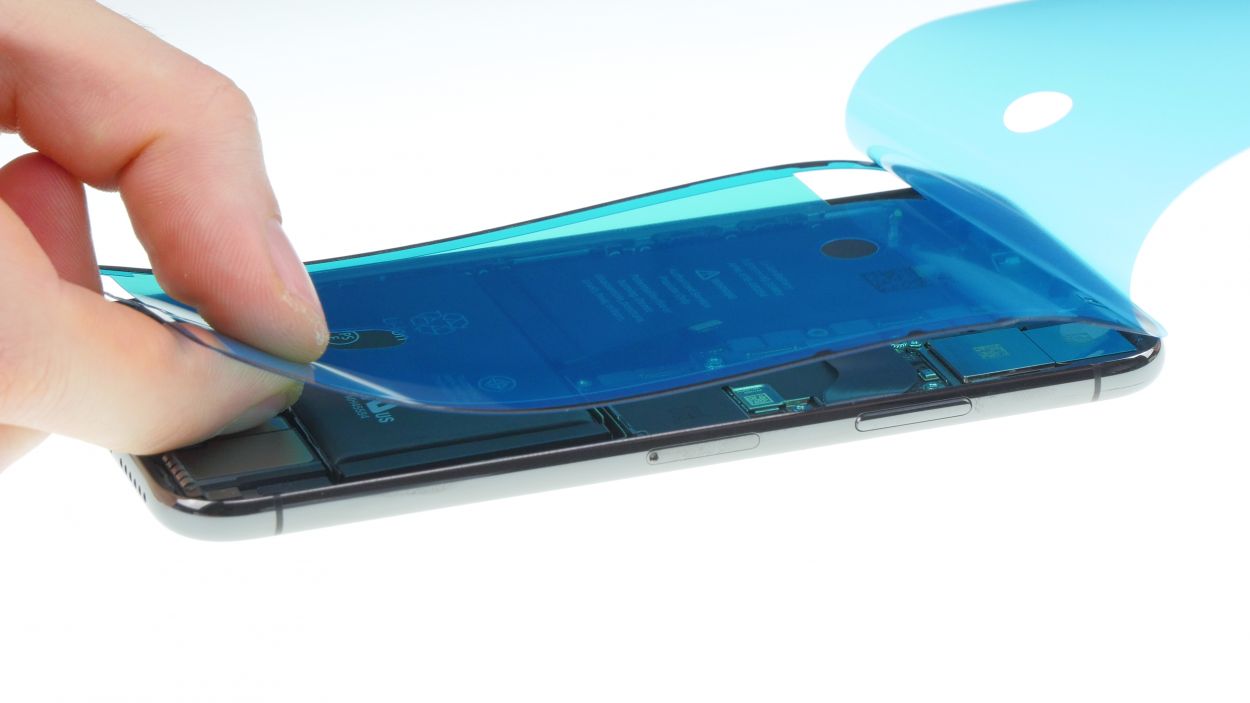
– First, peel off that big blue protective film and stick the adhesive+strips+iPhone+Xs&crid=1TJIMMAJSUJUZ&sprefix=repair+tools%2Caps%2C165&linkCode=ll2&tag=salvationrepa-20&linkId=c486487cf454ce8edd6f5beefab4110f&language=en_US&ref_=as_li_ss_tl’>adhesive strips to the bottom of the battery. Keep it nice and straight for a solid bond!
– Next, remove the large pink protective film covering the adhesive+strips+iPhone+Xs&crid=1TJIMMAJSUJUZ&sprefix=repair+tools%2Caps%2C165&linkCode=ll2&tag=salvationrepa-20&linkId=c486487cf454ce8edd6f5beefab4110f&language=en_US&ref_=as_li_ss_tl’>adhesive strips.
– Now, fold the tabs on the sides and press them firmly against the battery. You’re almost there!
Step 11
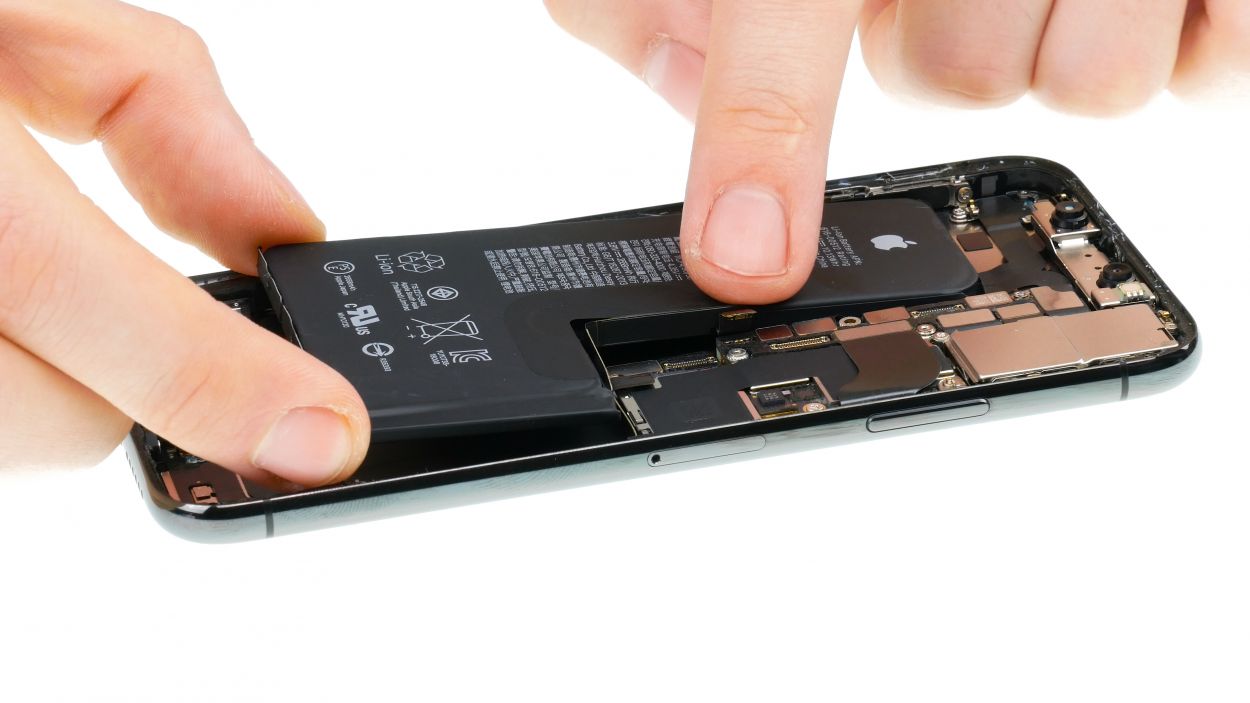
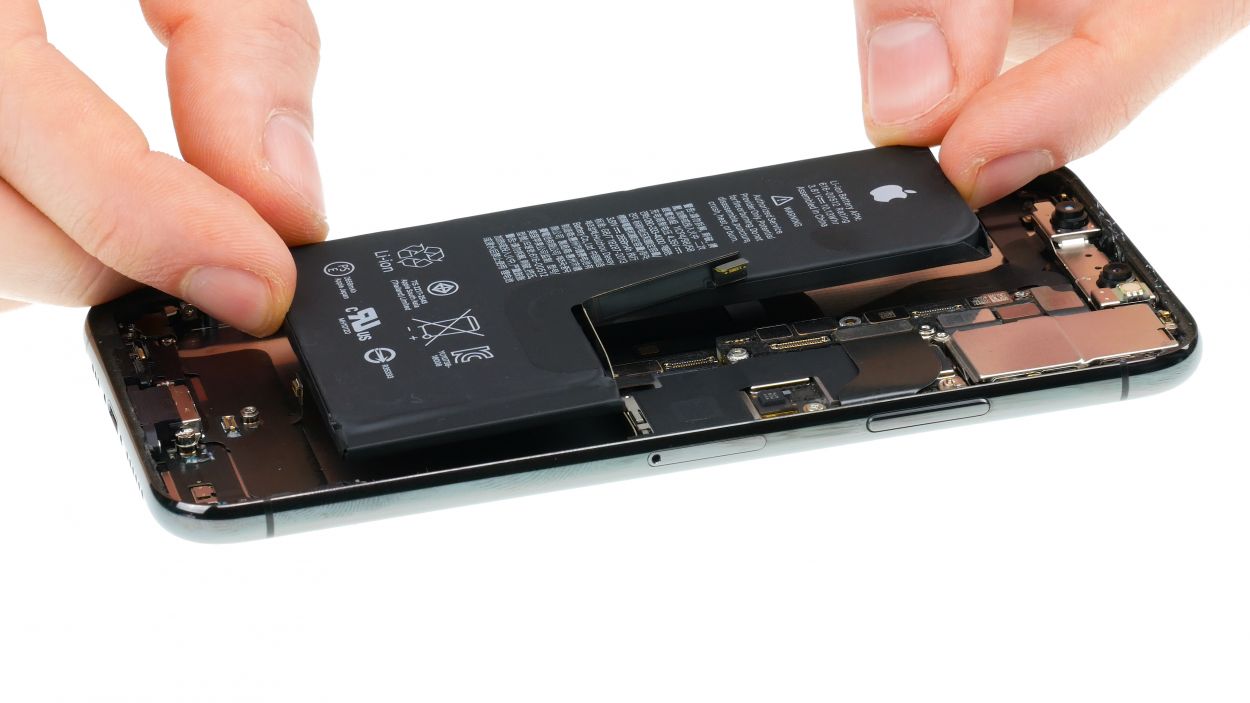
Keep an eye on where that battery goes! Just align it with the connector, which should sit snugly right above the contact on the logic board.
– Pop that battery back into its cozy spot in the rear case and give it a little press to make it snug as a bug!
Step 12
2 × 1,8 mm Phillips
Taptic Engine Connector
Ensure the Taptic Engine is positioned just right and give it a gentle nudge with a tool if you need to. It’s all about making sure it feels at home!
– Alright, let’s slide that Taptic Engine back into its cozy spot between the battery and the Lightning connector. Just make sure those screw holes are lined up perfectly!
– Now, go ahead and connect the Taptic Engine’s connector. You’ve got this!
Step 13


1 × 1,7 mm Phillips
Speaker connector
Just double-check that connector is snug and secure! It’s like giving your device a little hug—it needs to feel right at home.
– First, gently place that speaker back where it belongs and give it a little nudge toward the bottom until it clicks into place.
– Watch out for that rubber strip under the speaker; we don’t want to pinch it!
– Now, connect the speaker’s connector and secure everything with that one trusty screw.
Step 14
1 × 1,7 mm Phillips
1 × 1,6 mm Phillip
2 × 1,2 mm Phillips
1 × 1,0 mm Y-Type
– Time to get those brackets in position! Just place them where they belong and hold them steady. Remember, the plate on the left of the charging port likes to sit on top of the other one.
– Now, grab your Phillips and Y-Type screwdrivers and secure both covers in place. You’ve got this!
Step 15


– To ensure that the new frame sticker adheres perfectly, start by cleaning off any glue residue and dirt from the metal frame. We want it to be as smooth as a fresh canvas!
– Next, peel off the first protective film layer from the frame sticker. It’s like unveiling a surprise!
– Carefully position the frame sticker on one edge of the frame and attach it gradually. Make sure it’s aligned just right and press it down firmly. A spudger+iPhone+Xs&crid=1TJIMMAJSUJUZ&sprefix=repair+tools%2Caps%2C165&linkCode=ll2&tag=salvationrepa-20&linkId=c486487cf454ce8edd6f5beefab4110f&language=en_US&ref_=as_li_ss_tl’>plastic spudger can come in handy for pressing the adhesive into place!
– Now, remove the next large protective film. Let’s get this show on the road!
– Feel free to leave the small protective films on for now. You can remove them once you’ve connected the display and attached the bracket plates. This little trick helps prevent anything from sticking to the frame sticker before installation. But hey, if you’re feeling bold, you can peel them off right away!
If you give your iPhone a frame sticker makeover, it’ll be shielded from dust and splashes, but don’t expect it to dive into the deep end—it’s not fully waterproof!
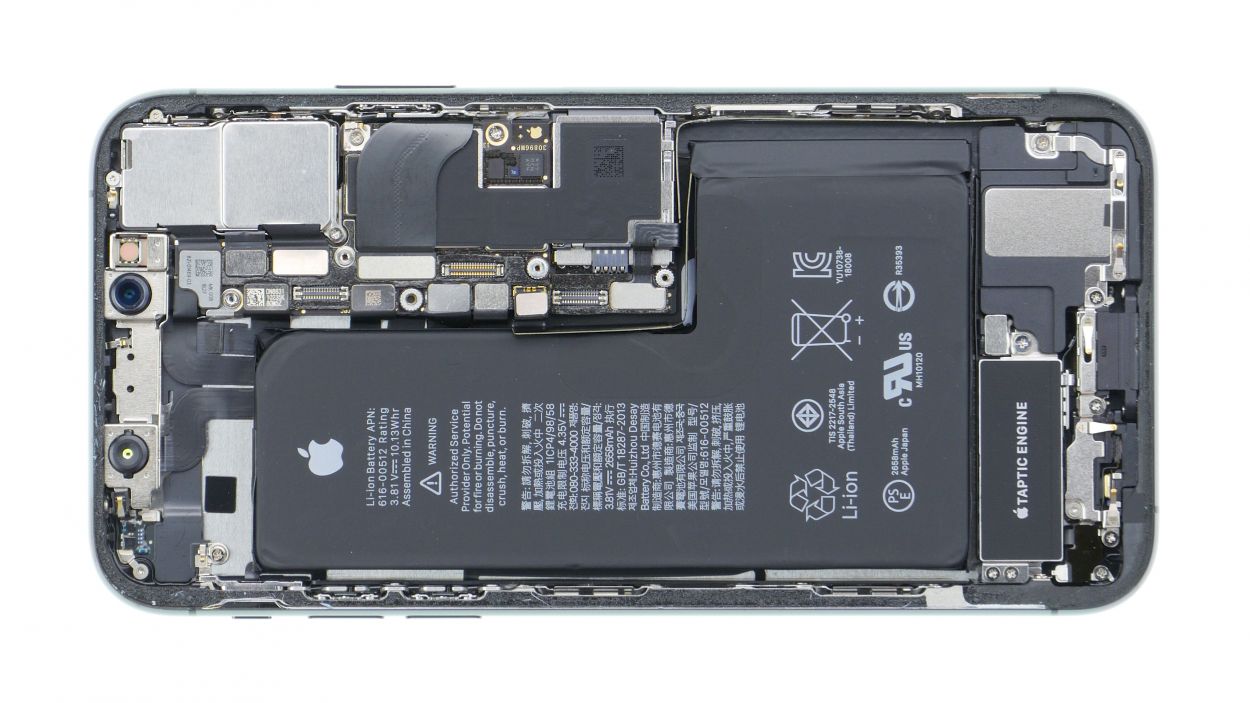
Check it out! The iPhone X is your star of the show here, and guess what? The iPhone Xs is its twin! They’re both put together the same way and re-glued in a similar fashion. So, if you can tackle one, you can definitely handle the other!
Step 16
Display Connector
Earpiece Connector
Ensure those connectors are snug as a bug! Just be careful not to slip and bend the socket contacts on the logic board—nobody wants a logic board drama!
– Start by gently placing the display unit on the edge of the frame, propping it against something sturdy. We want to keep those sensitive flex cables comfy and avoid any overstretching. And hey, make sure your device is secure and doesn’t decide to take a tumble!
– Connect the two display connectors with care.
– You might need to give a little push to the lower connector with a spudger to ensure it sits just right.
– Use your tweezers to carefully position the earpiece connector right over its socket on the logic board.
– With a gentle touch, press to secure the connector into its socket.
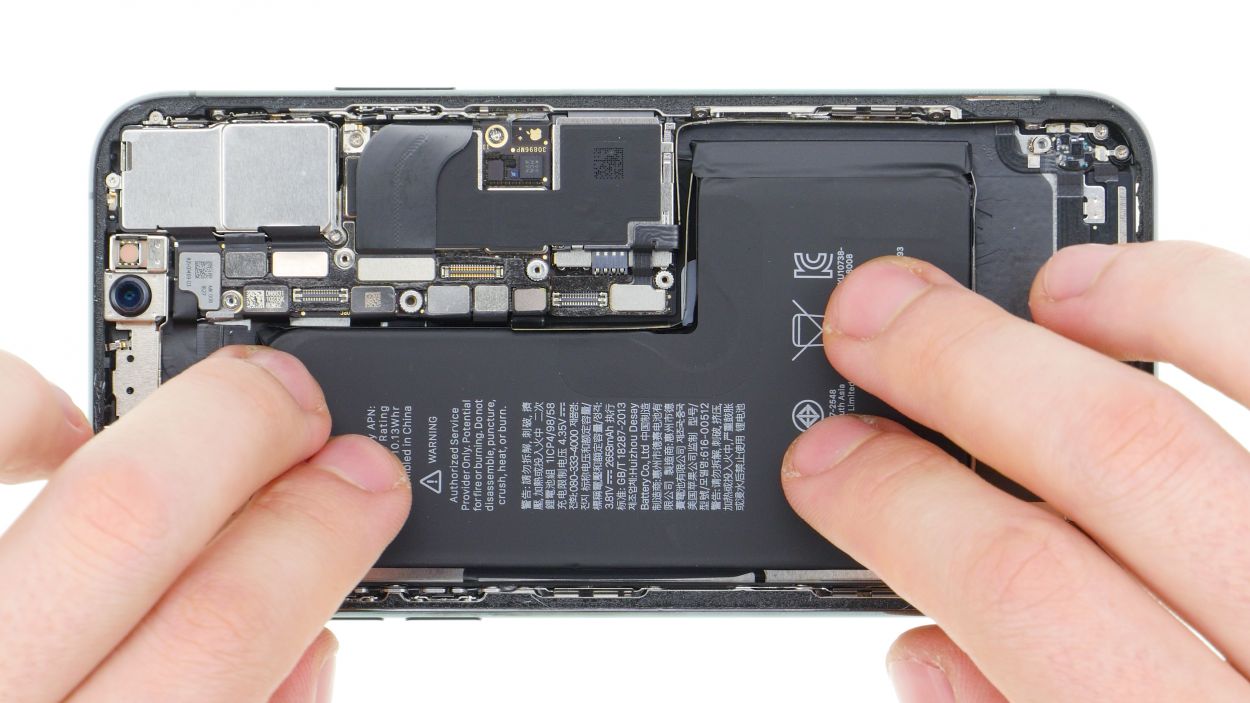
Step 17


Battery Connector
1 × 1,2 mm Y-Type
3 × 1,0 mm Y-Type
1 × 3,7 mm Phillips
– Alright, let’s get that battery connector back in place! Just snap it in like you mean it.
– Next up, slide that bracket plate into position and secure it with the various screws. You’re almost there!

Step 19
2 × 6,8 mm Pentalobe
– Let’s fasten those two pentalobe screws snugly into their cozy spots on either side of the Lightning connector. They’re just waiting for you to give them a little twist!