DIY Guide to Replace Taptic Engine in iPhone Xs
Duration: 45 min.
Steps: 16 Steps
Welcome to your go-to guide for swapping out that pesky Taptic Engine in your iPhone Xs! If your phone is feeling a bit too quiet and hardly vibrates, it’s time for this repair. Before diving in, make sure to back up all your important data—better safe than sorry! And hey, give yourself a little zap-free boost by touching something metal, like a radiator, to discharge any static electricity. Let’s get that phone buzzing again!
Step 1

– First things first, let’s power down your iPhone completely to keep it safe during the repair. Just press and hold the Standby button along with one of the volume buttons for about three seconds until the ‘Power off’ slider pops up.
– Now, simply swipe that slider from left to right. Your iPhone will take a little break and shut down completely—this might take around ten seconds. Hang tight!
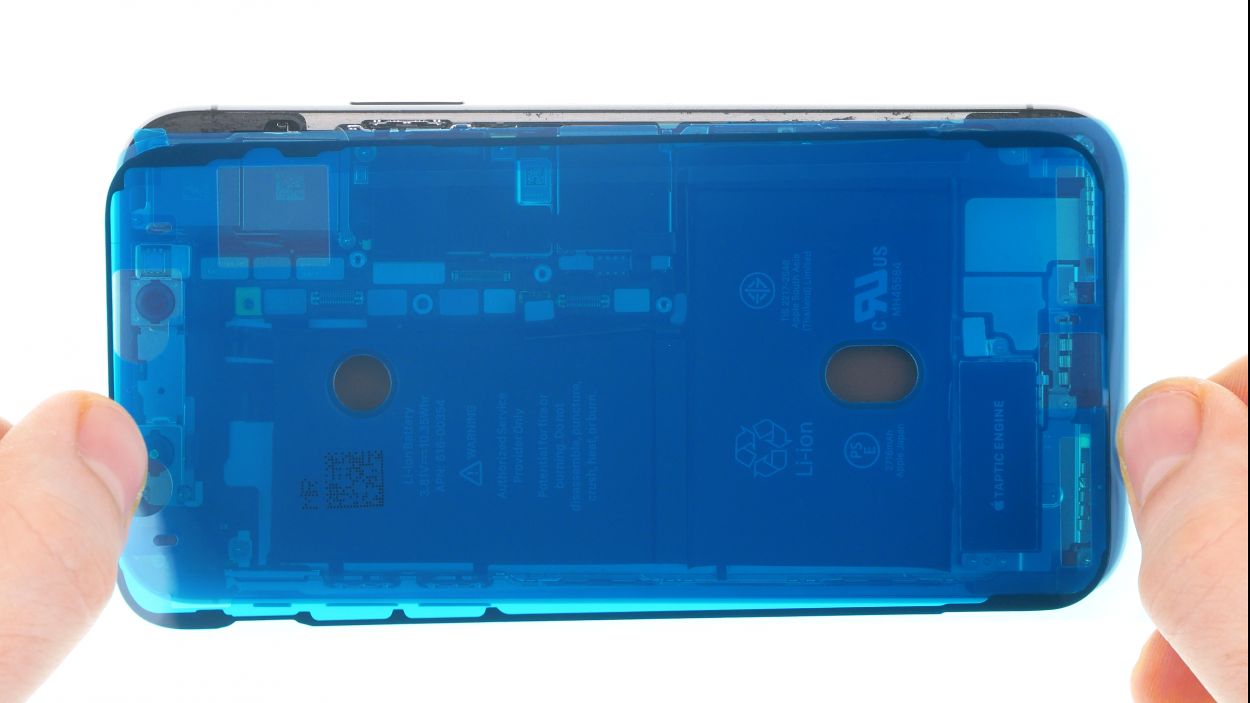
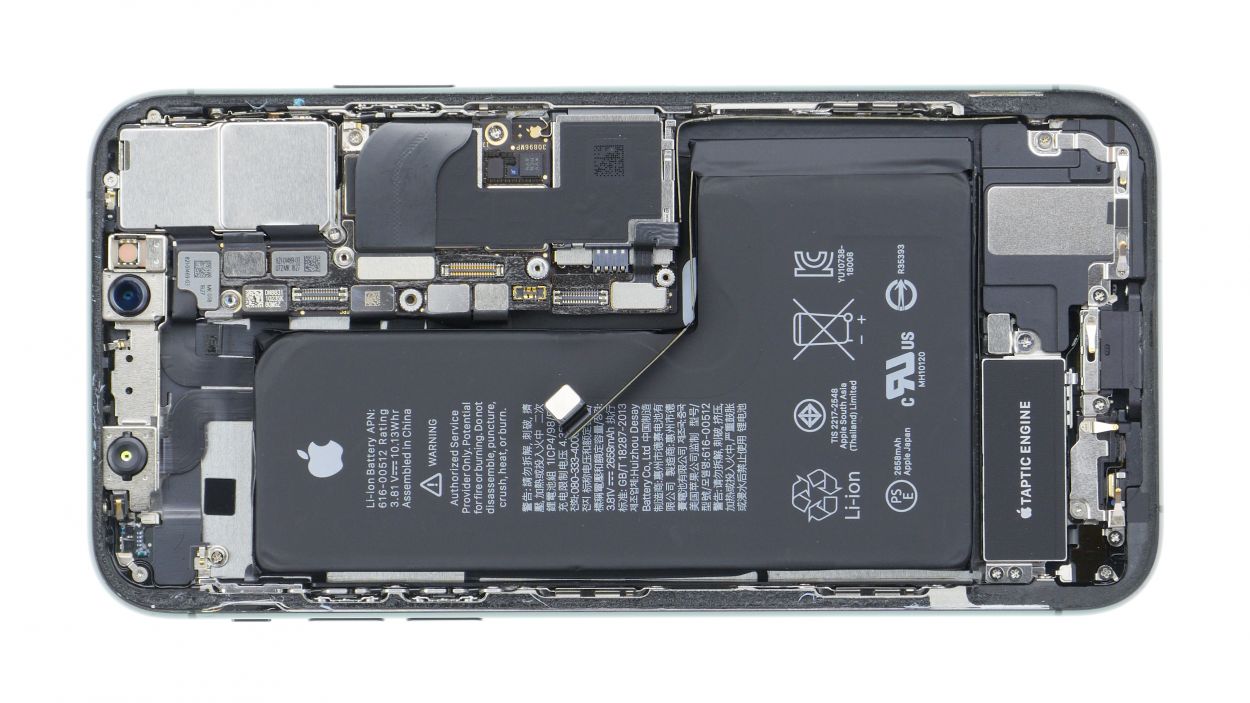
Step 2
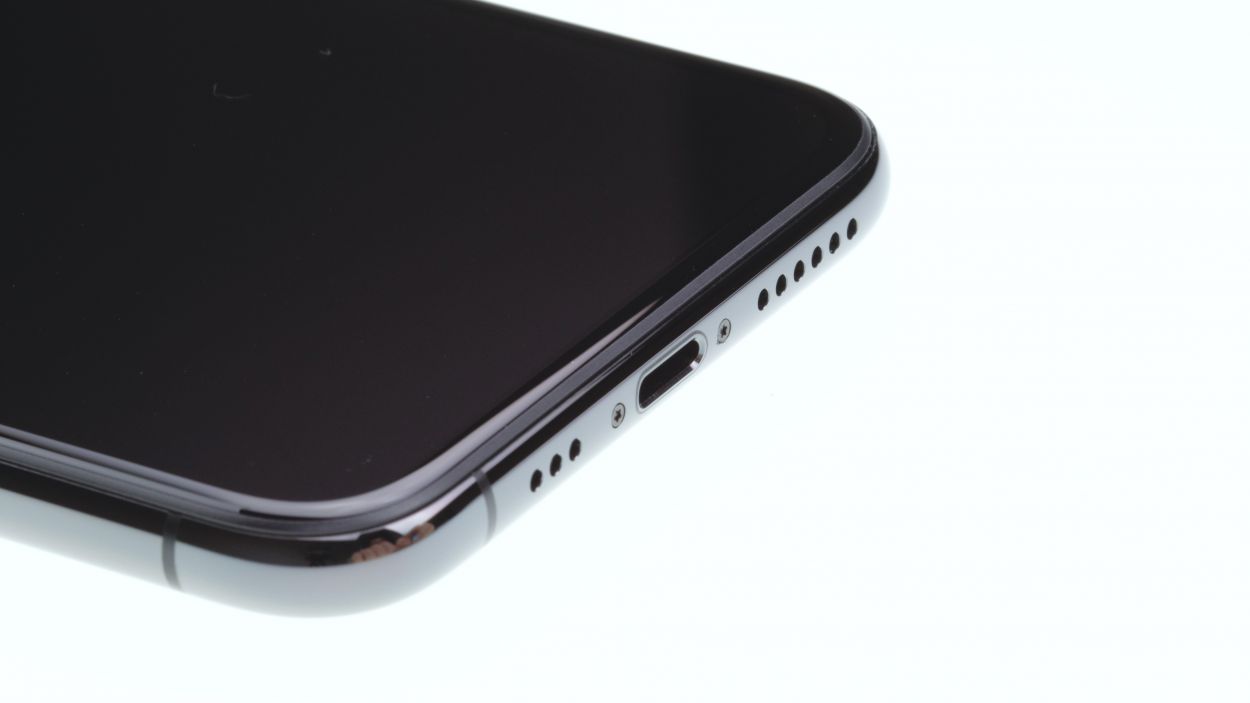
2 × 6,8 mm Pentalobe
Once you crack open your iPhone Xs, it’s important to note that its dust and splash protection (IP 68 rating) takes a vacation. So, handle with care!
– Unscrew the two pentalobe screws located at the bottom edge of the back cover, right next to the Lightning connector. Don’t forget to stash those screws in the same box of your magnetic pad—trust me, future you will thank you!
– Gently place your iPhone Xs on a soft, clean surface to keep that sleek back from getting scratched. We want it to look as good as new!
Step 3

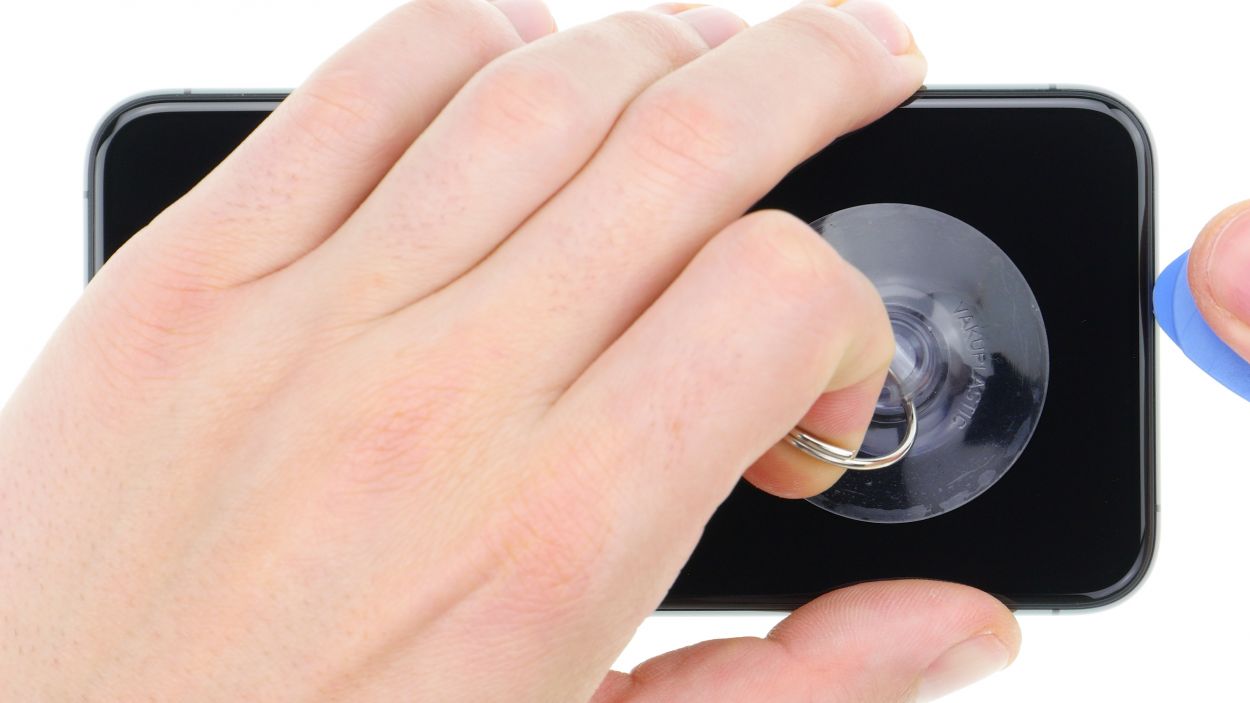
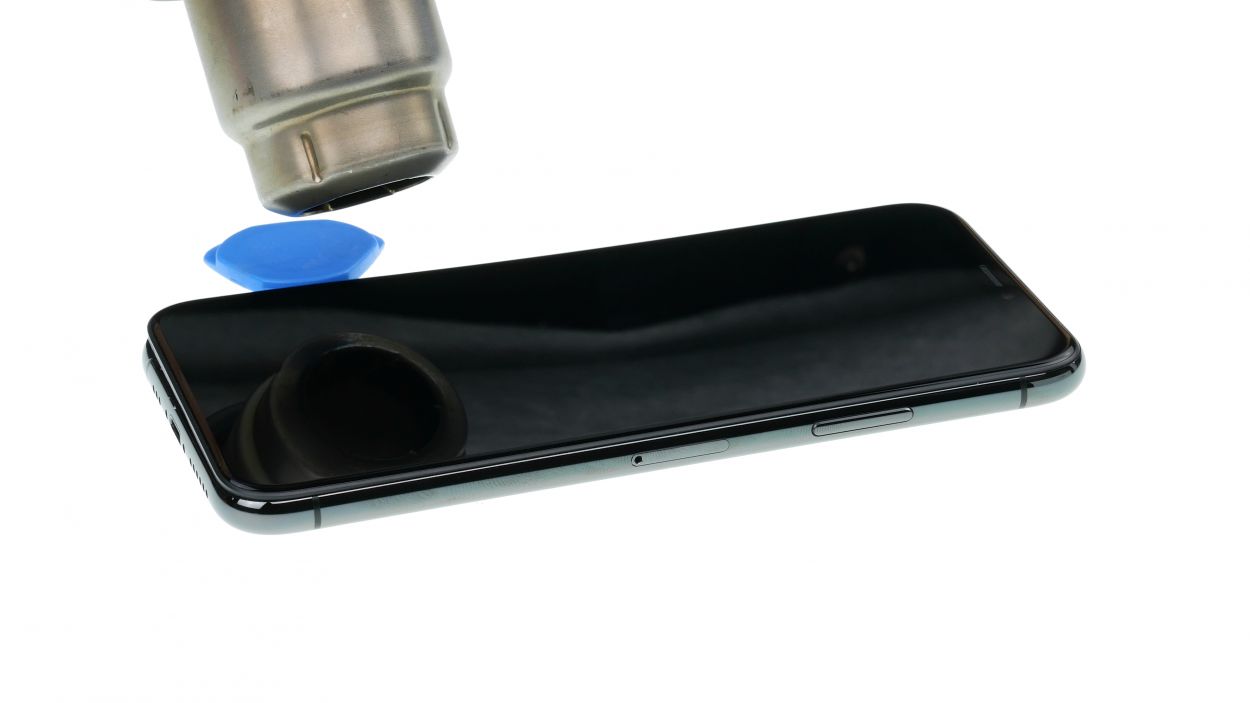

– Alright, let’s get that front panel lifted! Grab your trusty suction cup, a hard plastic pick, and a heat gun. If your screen is looking like a spider web, go ahead and cover it with packing tape before moving on.
– The screen is stuck to the frame like glue (oh wait, it is!). Warm up the outer edges of the display with your heat gun to about 60°C (140°F) to help loosen things up.
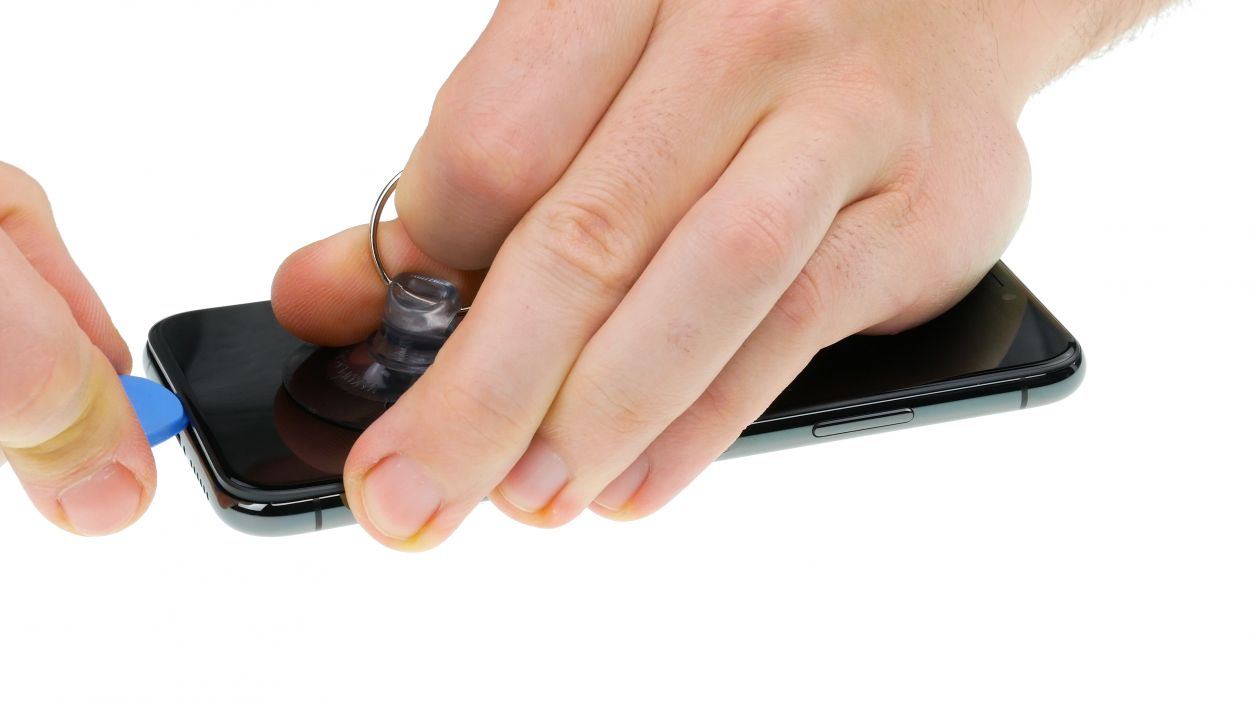
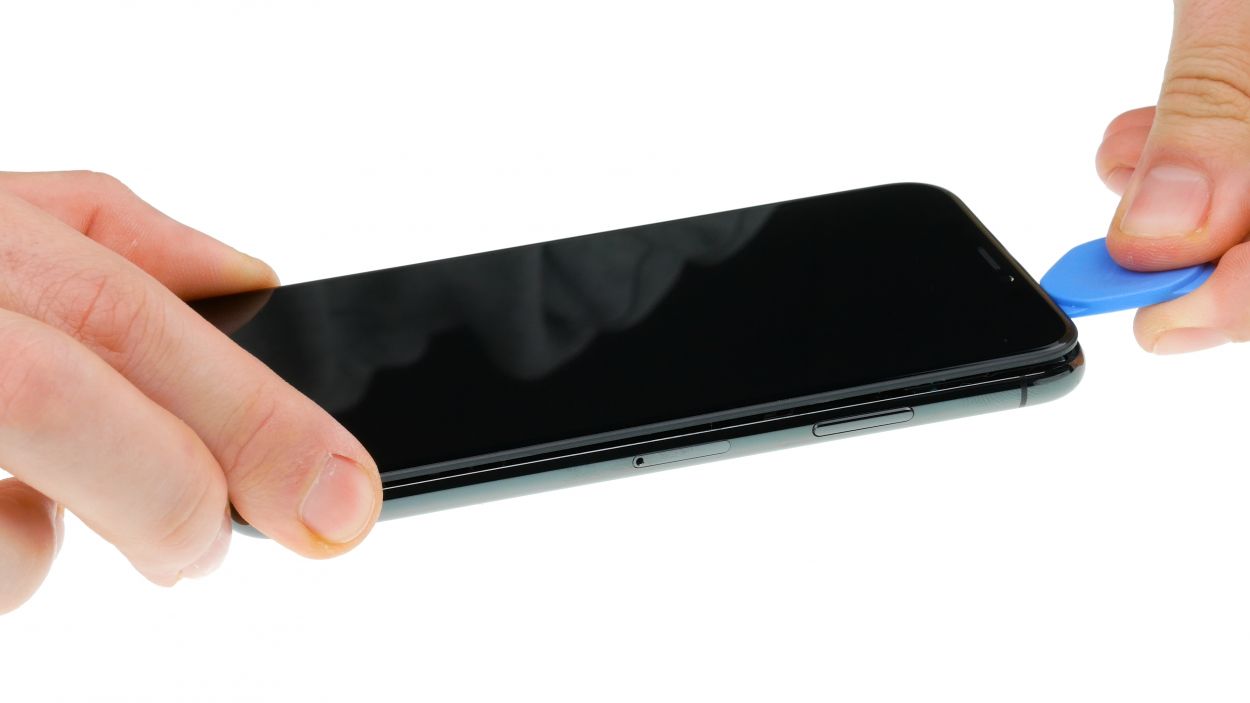
– Now, place the suction cup over the Home button (if you can) or right next to it. As you lift the screen with the suction cup, slide that hard plastic pick between the steel frame and the display frame and gently press down the steel frame. Easy peasy!
When you’re diving into that gap, remember to keep your tool’s dive depth to a cool 5 mm max! We want to keep those tiny iPhone parts safe and sound inside.
If you’re having trouble slipping a plectrum into that gap, don’t fret! Grab an iFlex instead. Just make sure to switch to a sturdy plastic plectrum as soon as you can to keep that frame looking sharp and scratch-free!
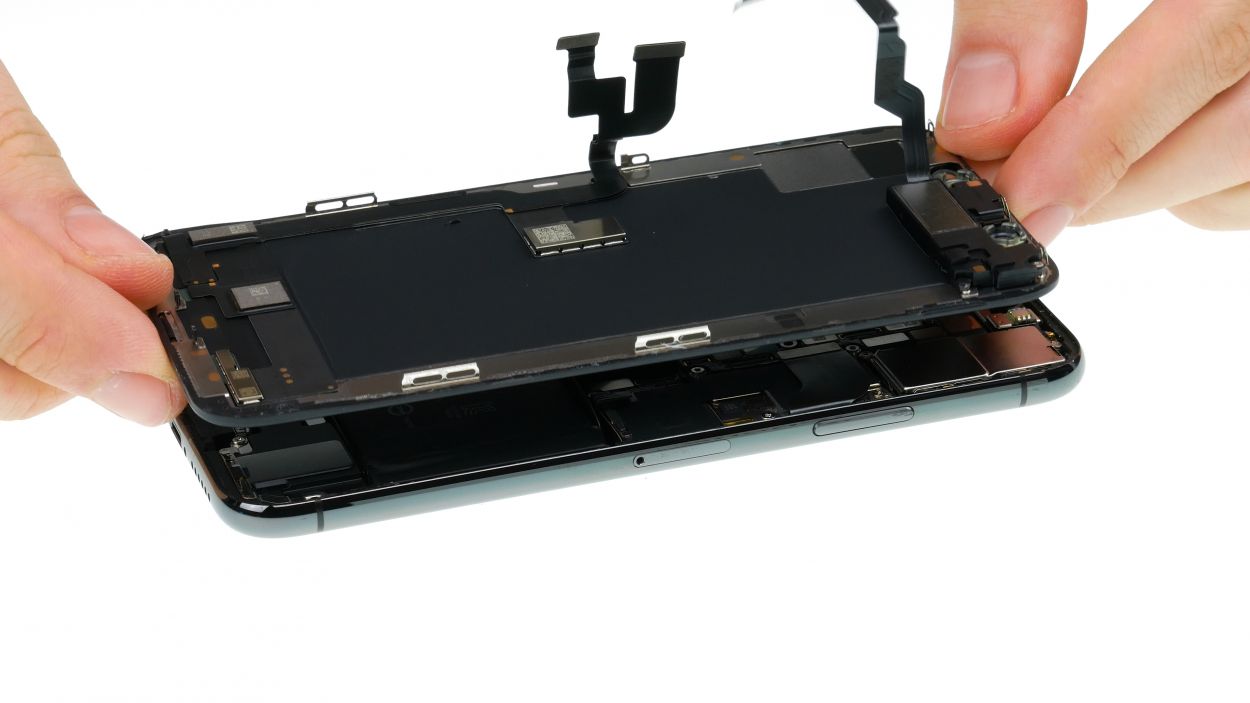
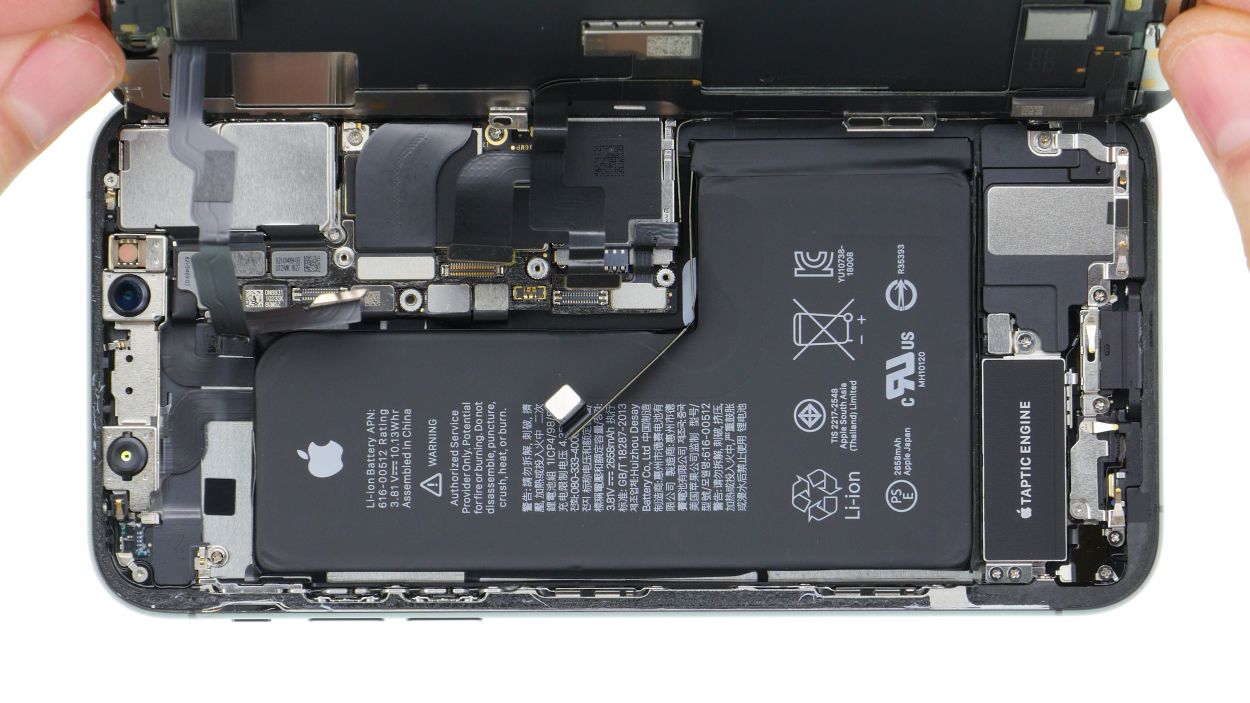
Step 4


– Grab your Y-Type and Phillips screwdrivers (Y000/PH00) and let’s unscrew those bad boys! Once you’ve got them off, gently lift the bracket plate away. Don’t forget to keep all the little pieces safe in your magnetic pad box—future you will appreciate it!
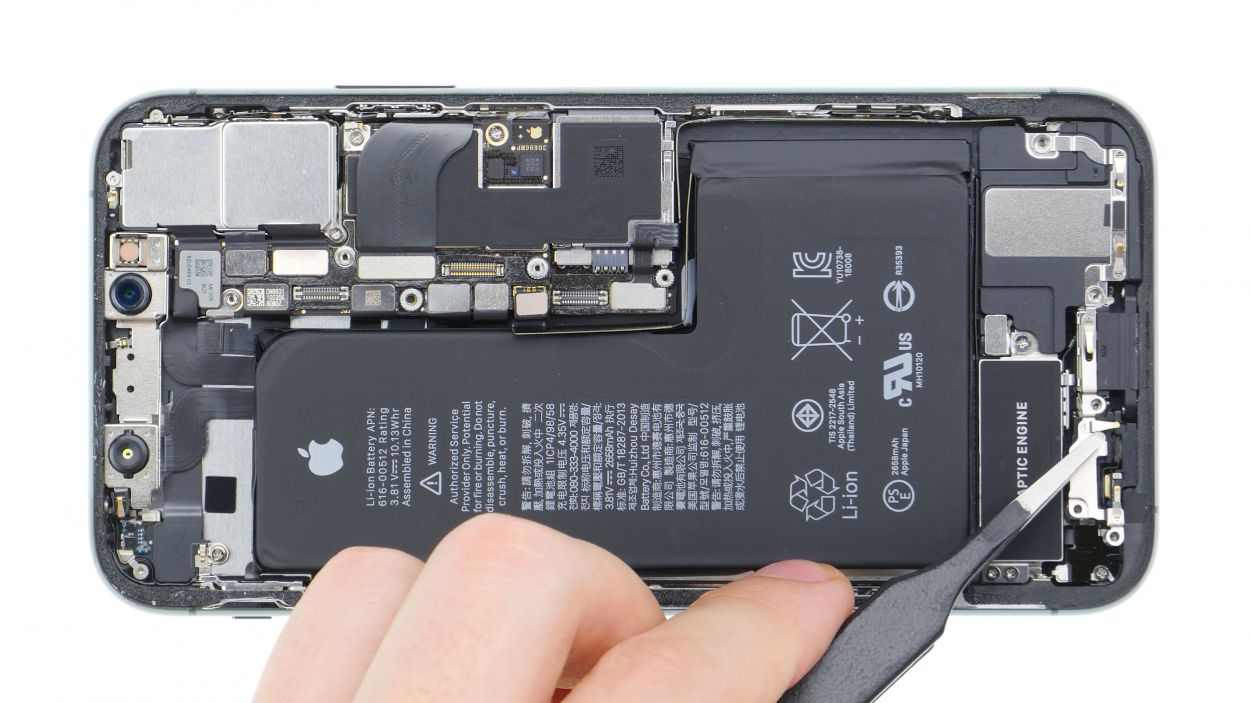
– Now, with utmost care, use a spudger to gently pry off the battery contact. Slide it under the connector and lift it away like a pro!
1 × 1,2 mm Y-Type
3 × 1,0 mm Y-Type
1 × 3,7 mm Phillips
Battery Connector
Before you get your hands dirty with this repair, make sure to disconnect the battery contact! This little step is key to avoiding any surprise short circuits or accidental device wake-ups during your repair adventure.
Apple rolled out Y-Type screws with the iPhone 7, and while some folks mistakenly call them Tri-Point or Tri-Wing, let’s set the record straight! Make sure to grab the right Y-Type screwdriver to keep those screw heads in tip-top shape and avoid any stripping mishaps.
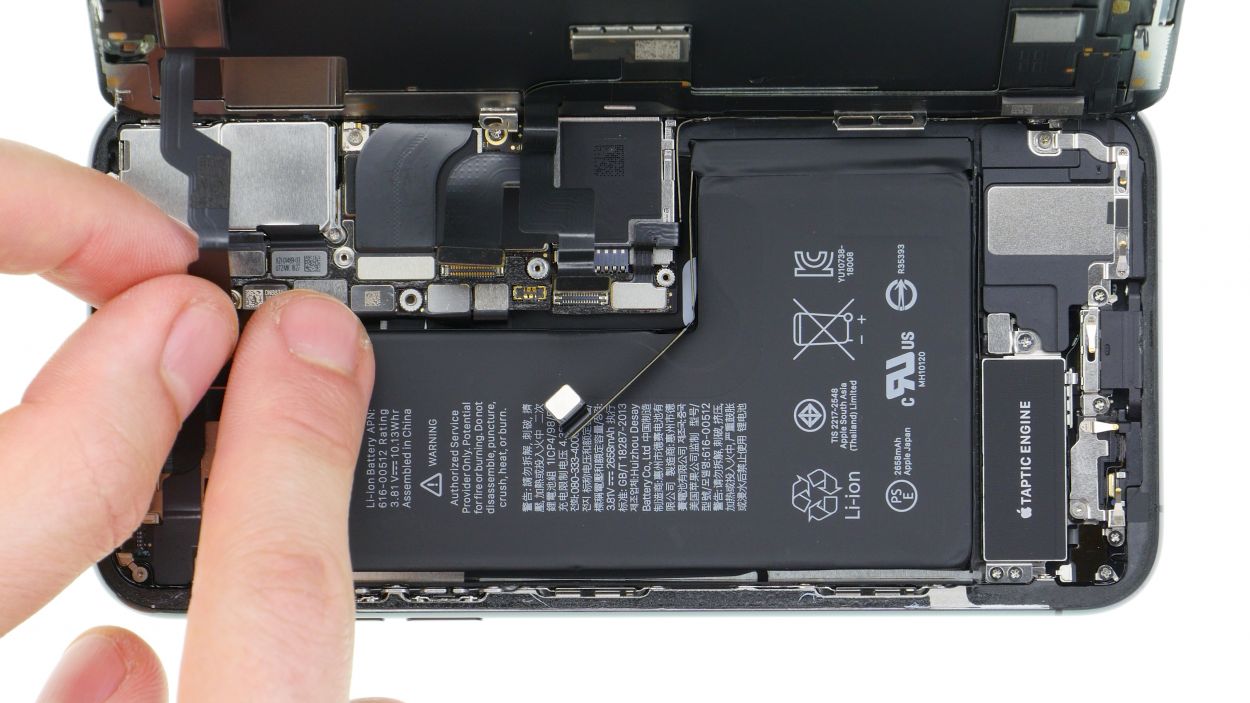
Step 5
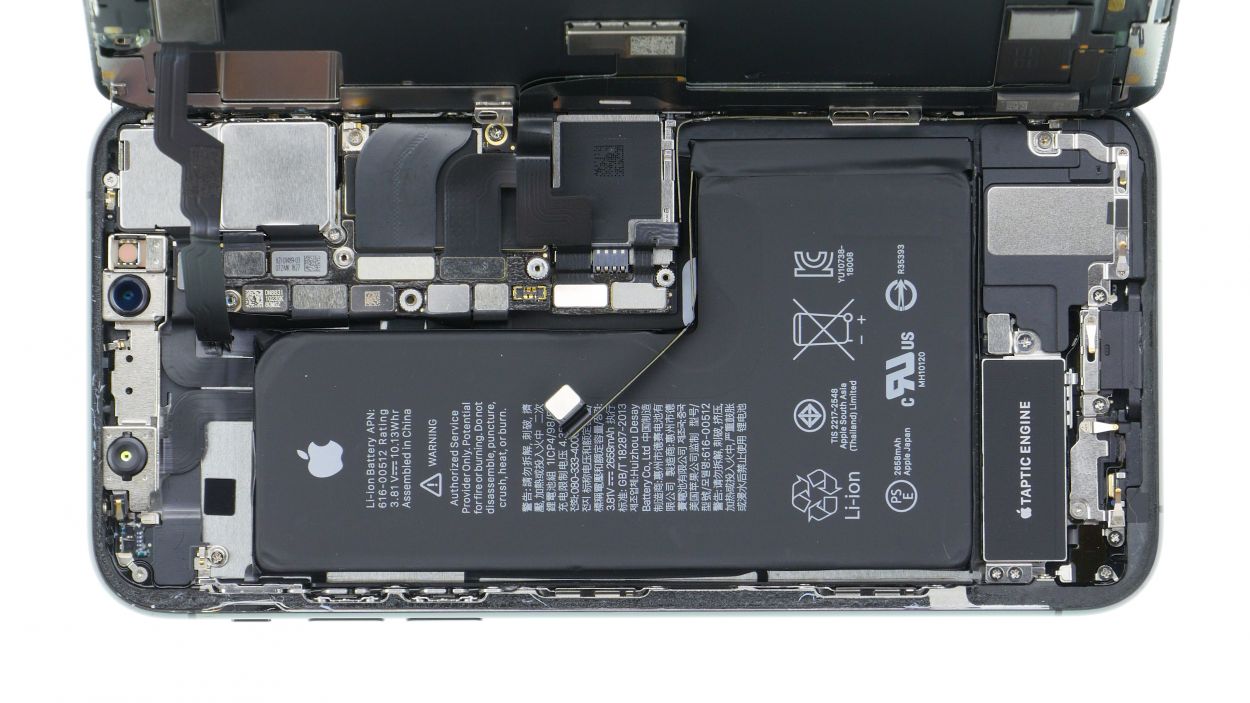

Display Connector
Earpiece connector
When you’re gently nudging those connectors apart with the spudger, just remember to treat them like a delicate dance partner—no sudden moves! We want to keep everything in one piece!
– The display unit is held in place by three flexible cables, just waiting for you to give them a little TLC!
– Grab your spudger and carefully work your magic to separate the connectors for the display and the earpiece, one at a time. Remember, gentle is the name of the game!
– Now, the earpiece flex cable might be a bit shy and still slightly glued down. Give it some love by gently pulling it off. If it’s being stubborn, a little hot air can work wonders to loosen that adhesive.
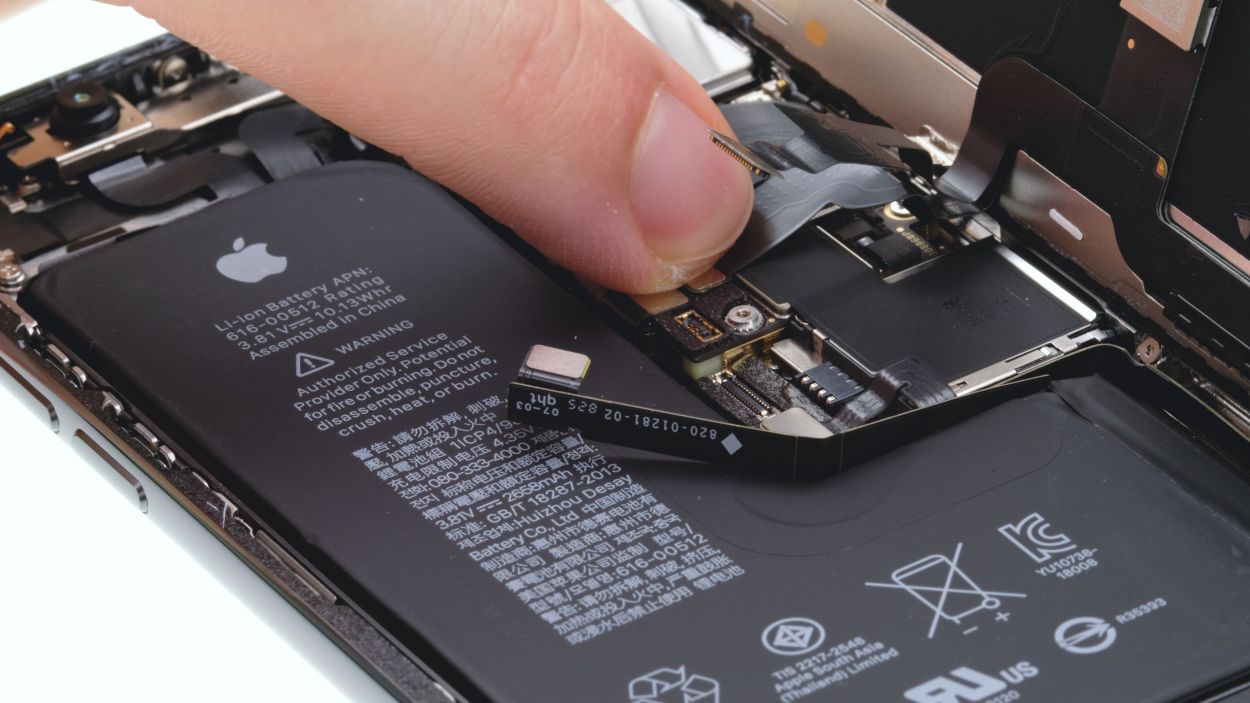
Step 6
1 × 1,7 mm Phillips
1 × 1,6 mm Phillips
2 × 1,2 mm Phillips
1 × 1,0 mm Y-Type
– Unscrew the Phillips and Y-Type screws from the two brackets. Remember, these screws come in different lengths, so be sure to place them on your magnet mat for easy reassembly later—future you will appreciate this little organization hack!
– Next up, gently detach the two metal brackets. They might be glued on, but with a little patience, they’ll come off without a hitch!
Step 7


1 × 1,7 mm Phillips
Speaker connector
– Start by loosening the lone screw on the cover plate that guards the connector of the flex cable heading to the speaker.
– Next, gently remove that cover plate.
– Now it’s time to disconnect the flex cable connector and lift it up with care.
– You can now lift the speaker along with the flex cable. Just raise the loudspeaker a bit and ease off the rubber strip at the top edge.
– Finally, pull the speaker out completely.
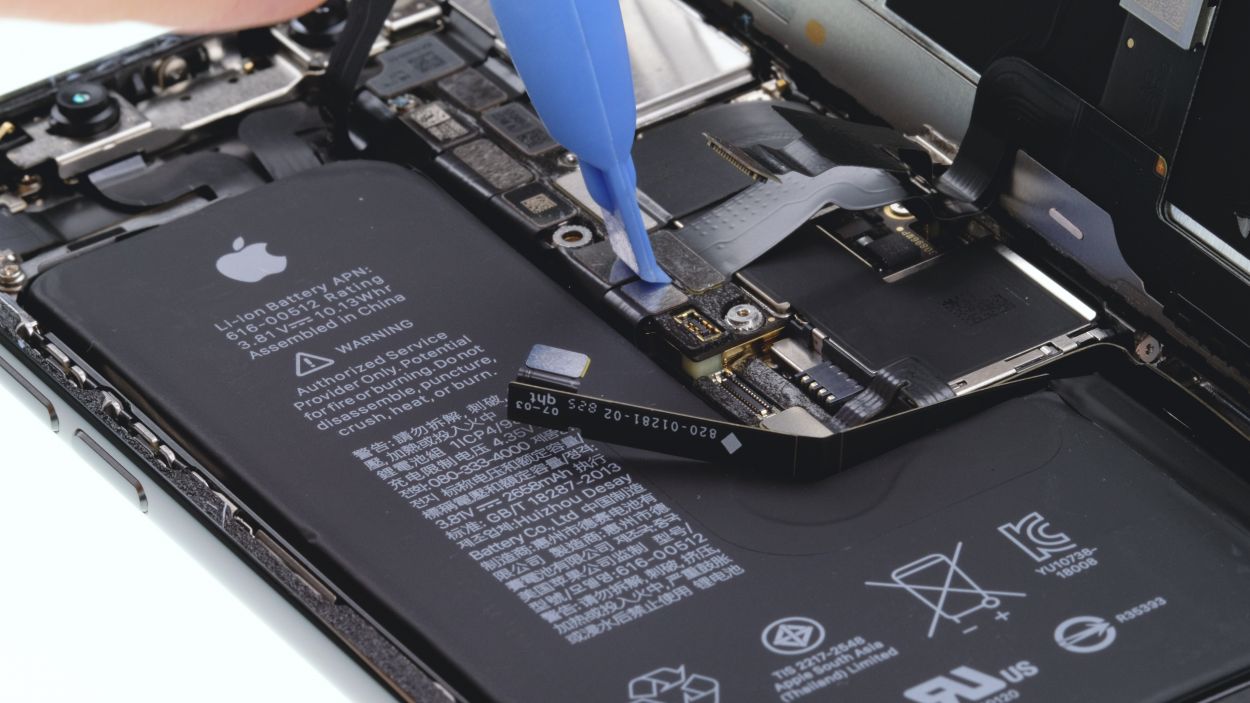
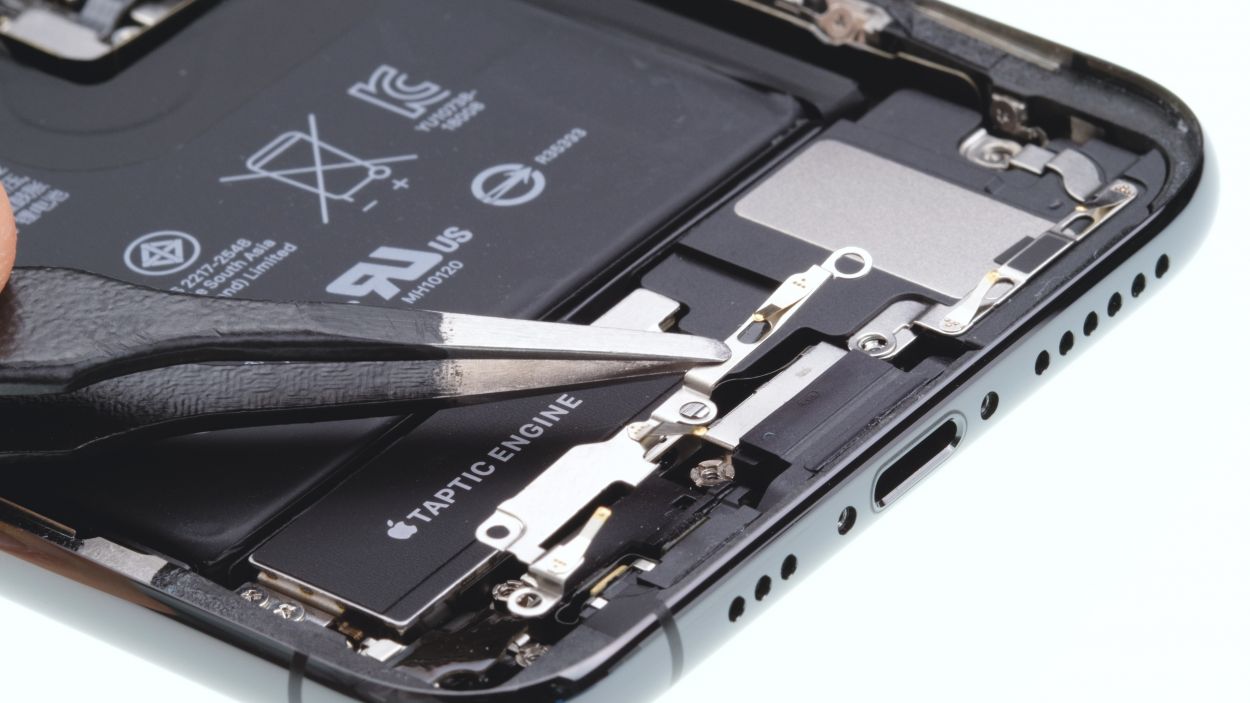
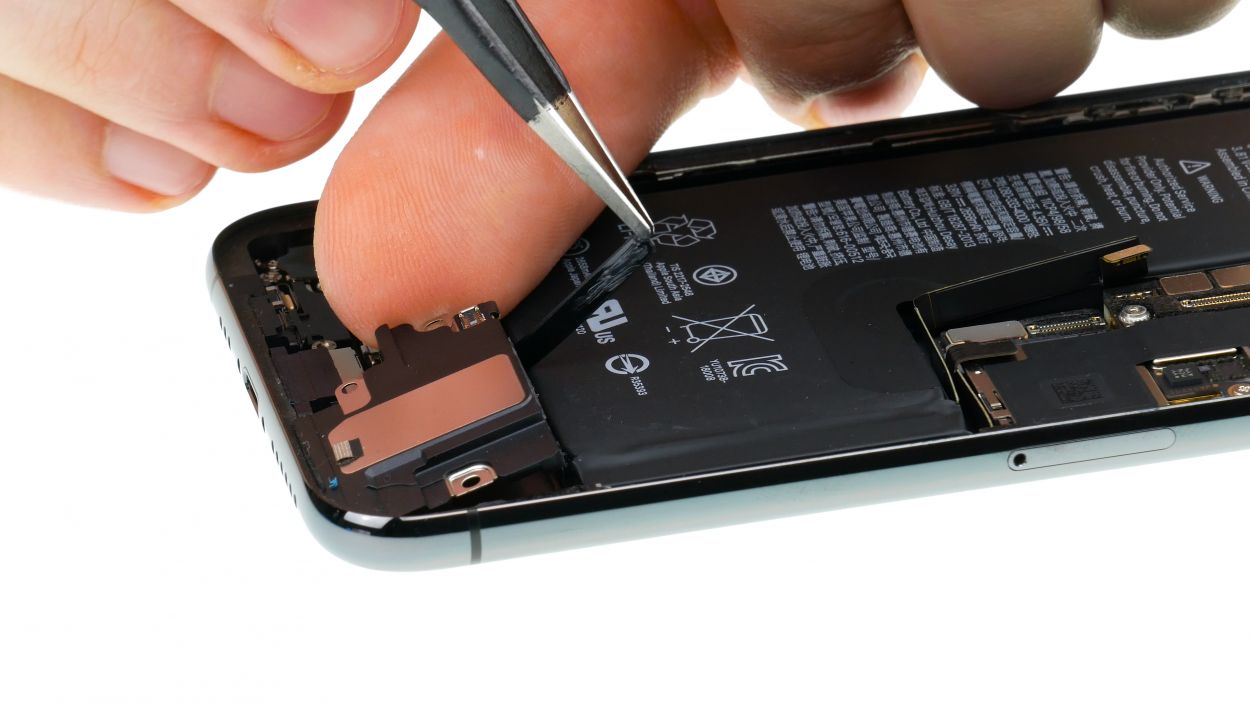
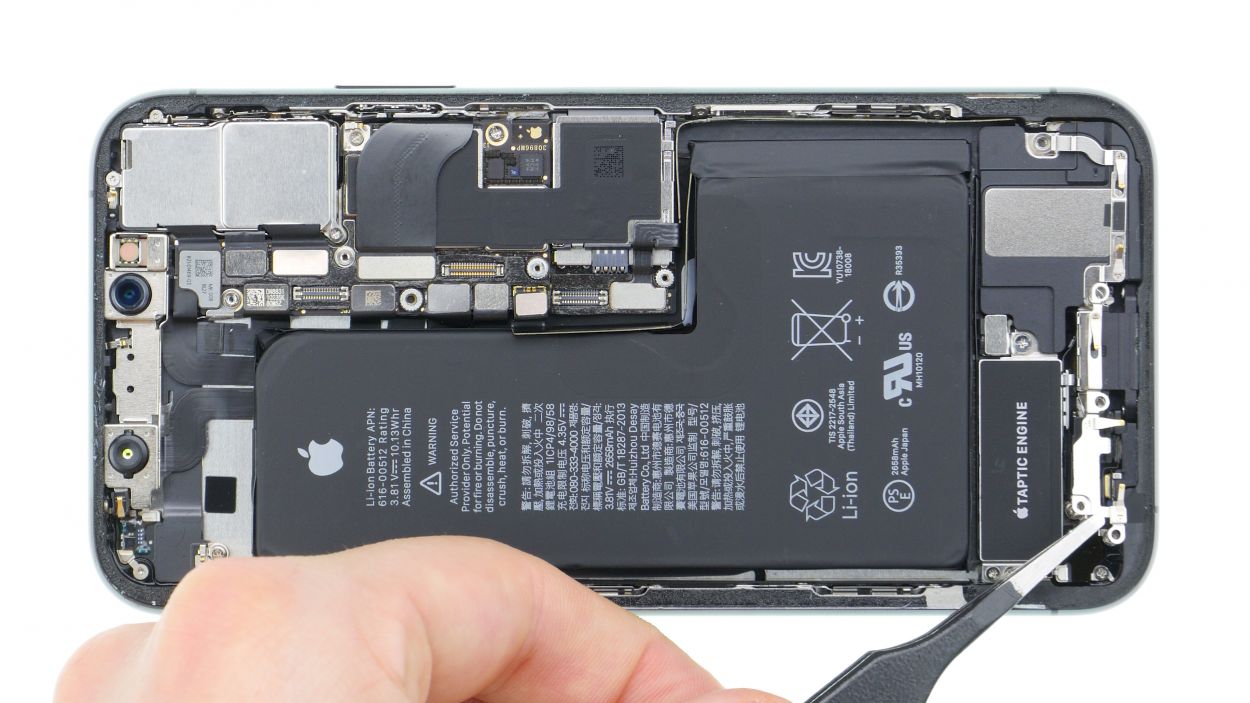
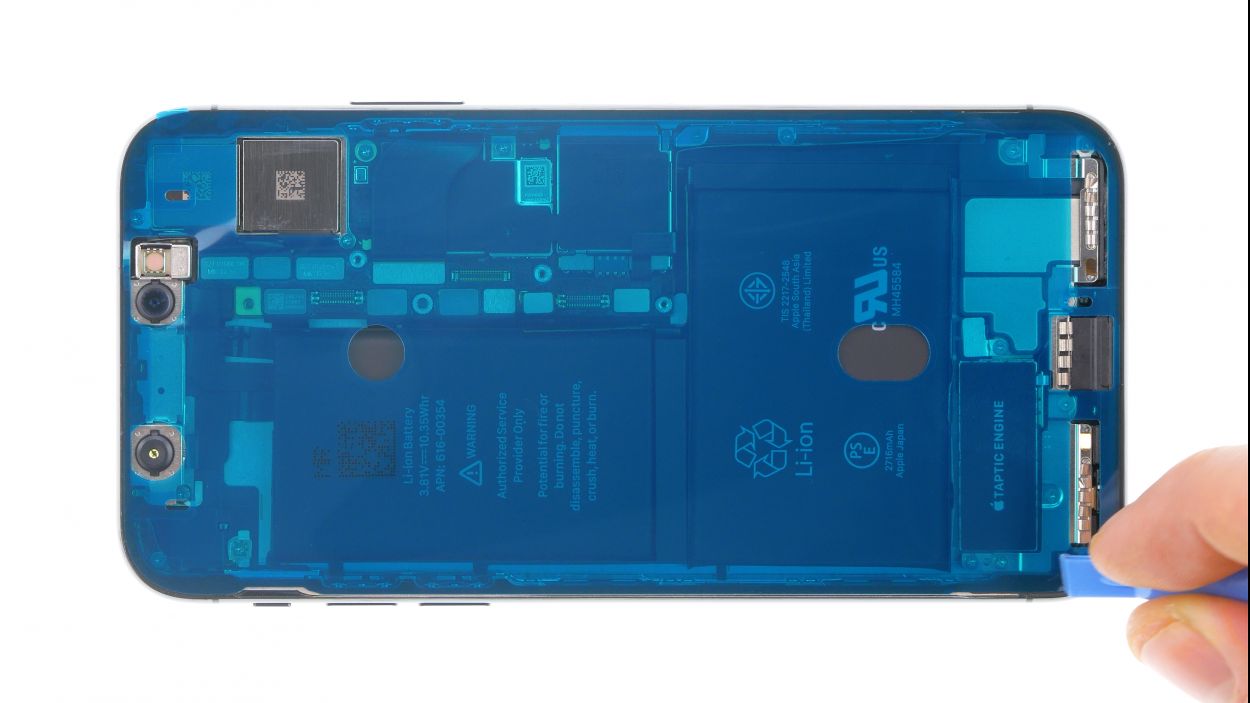
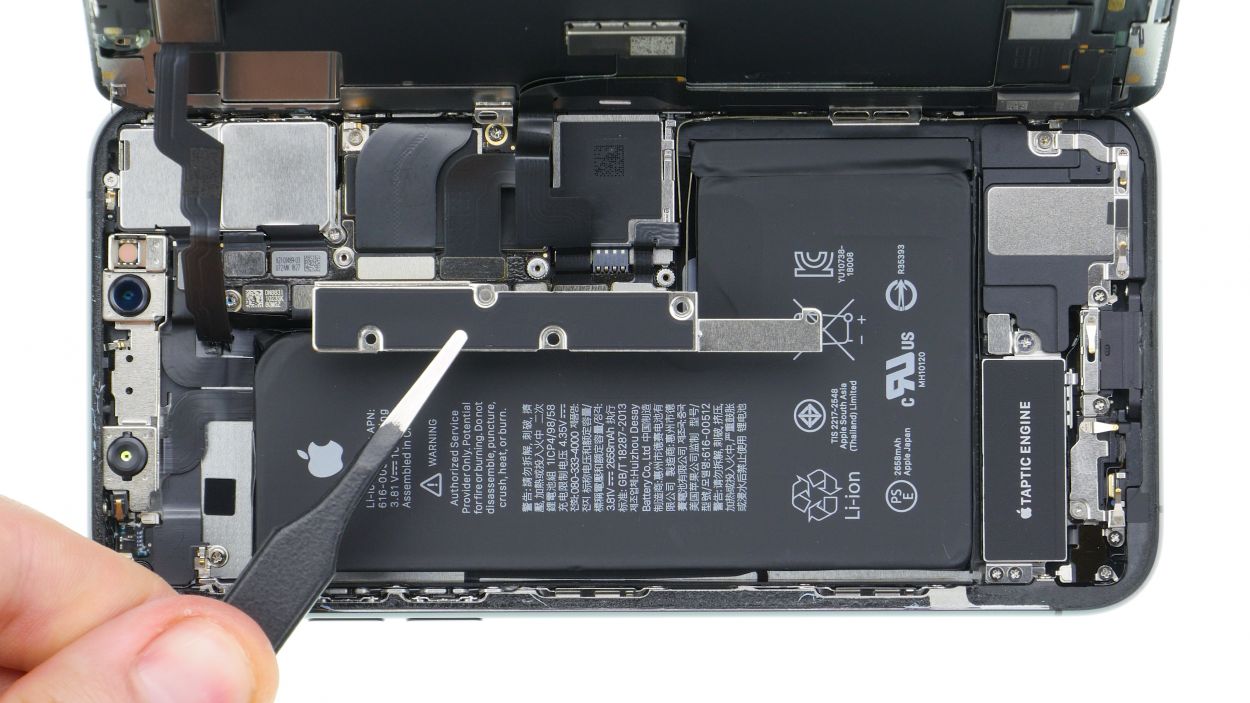
Step 8


2 × 1,8 mm Phillips
Taptic Engine Connector
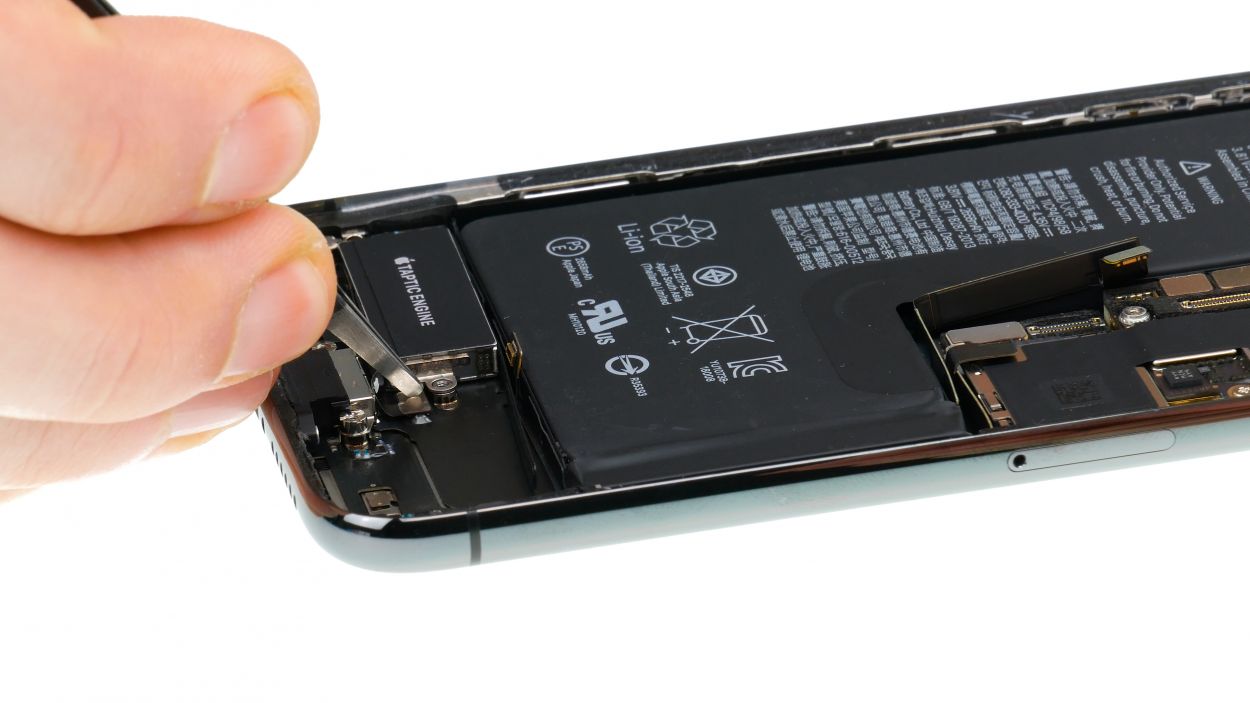
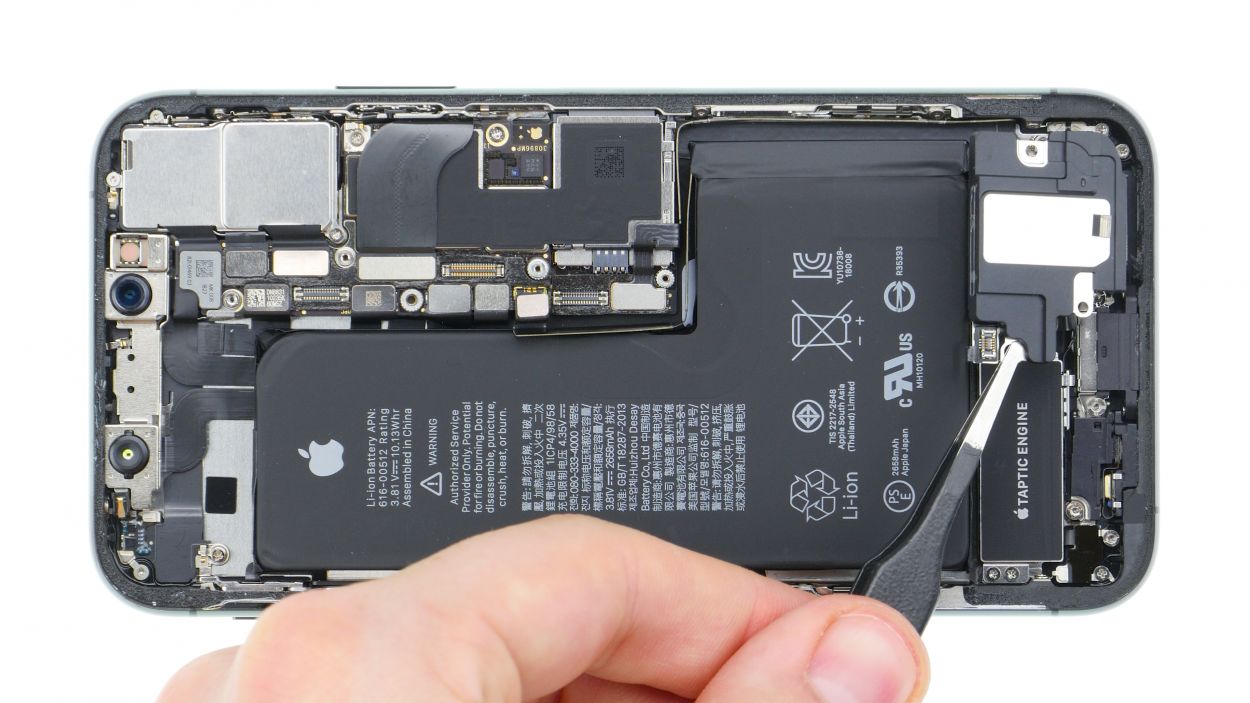
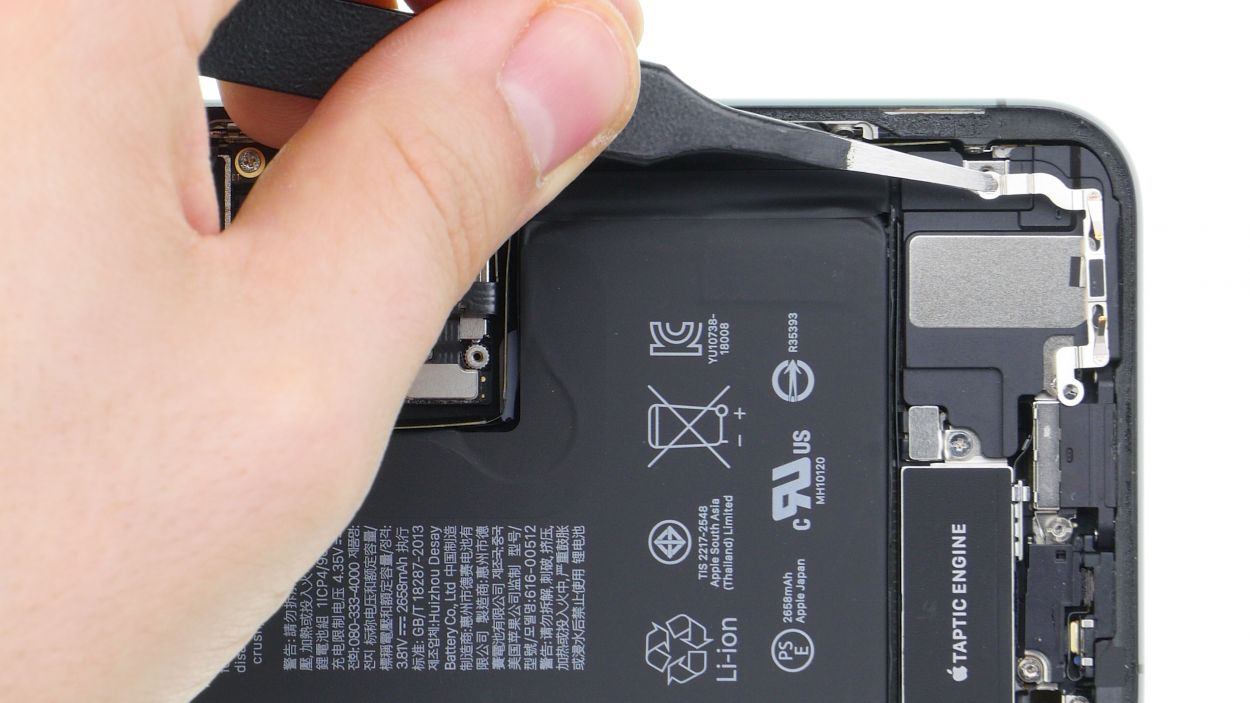
– First, let’s tackle those Phillips screws holding the Taptic Engine in place. Give them a little twist and watch them come loose!
– Next up, grab your trusty spudger and carefully disconnect the Taptic Engine’s connector. It’s like unhooking a seatbelt, easy peasy!
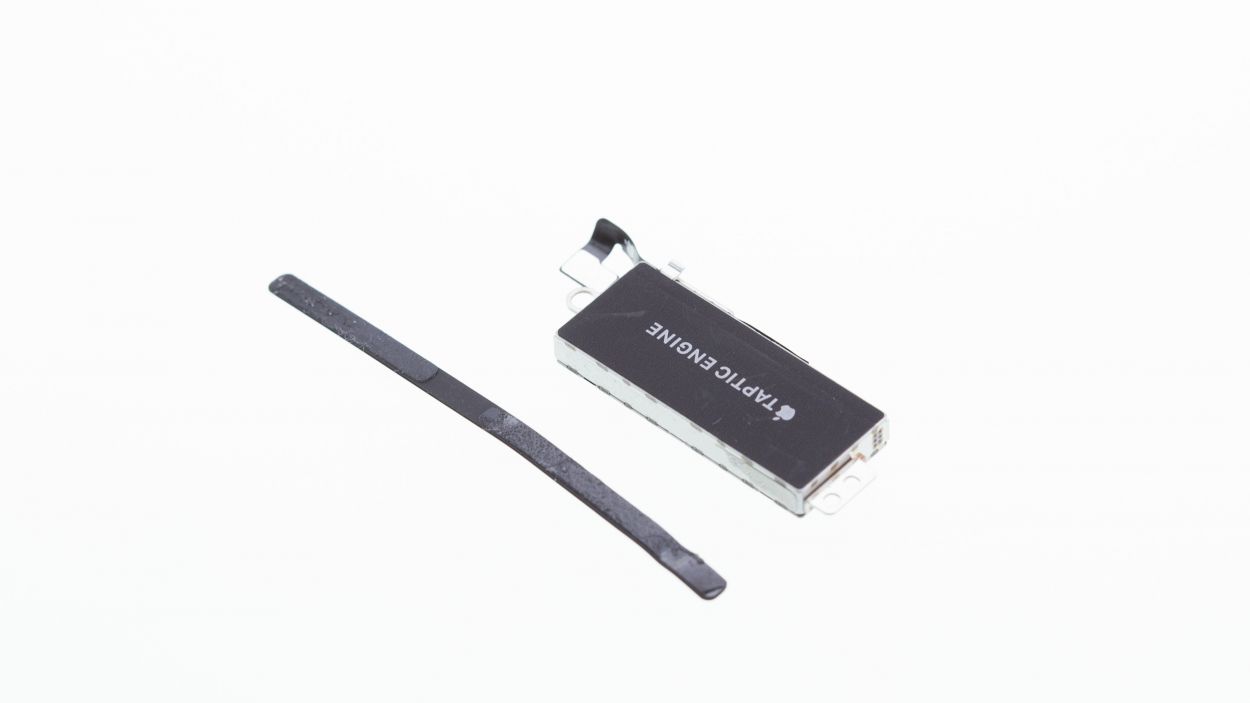
– Now, gently lift out the Taptic Engine and say goodbye to the old one!
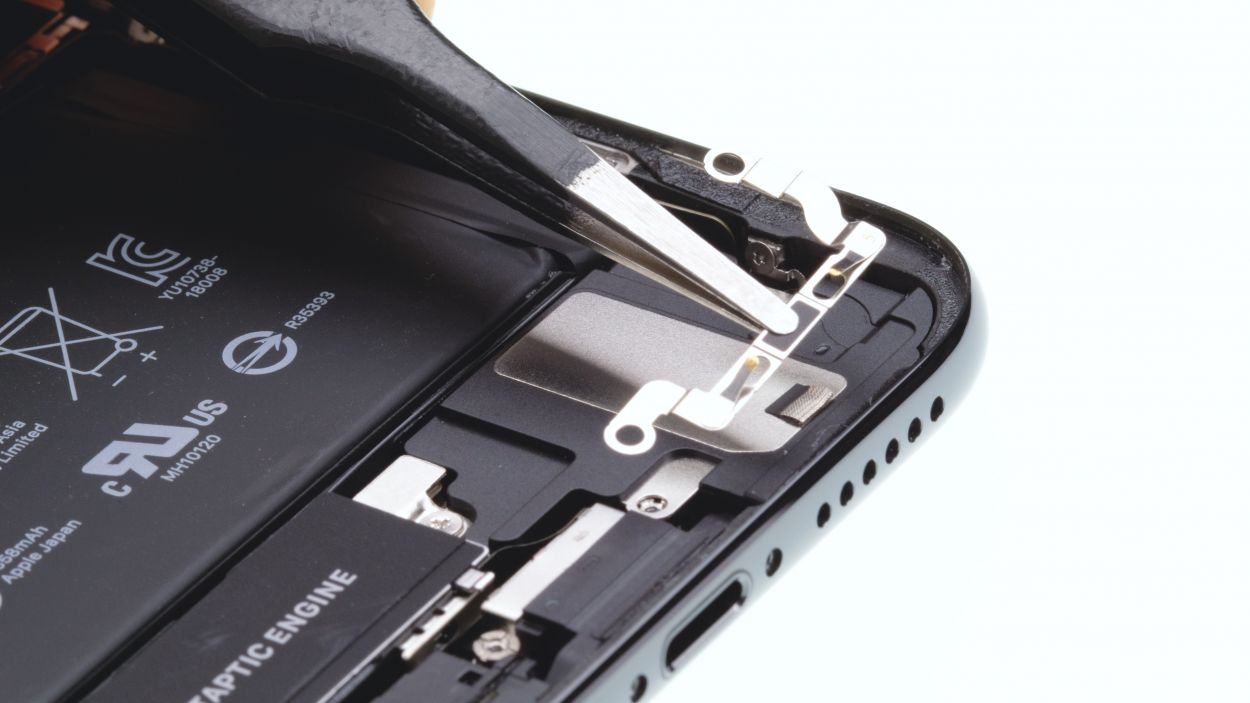
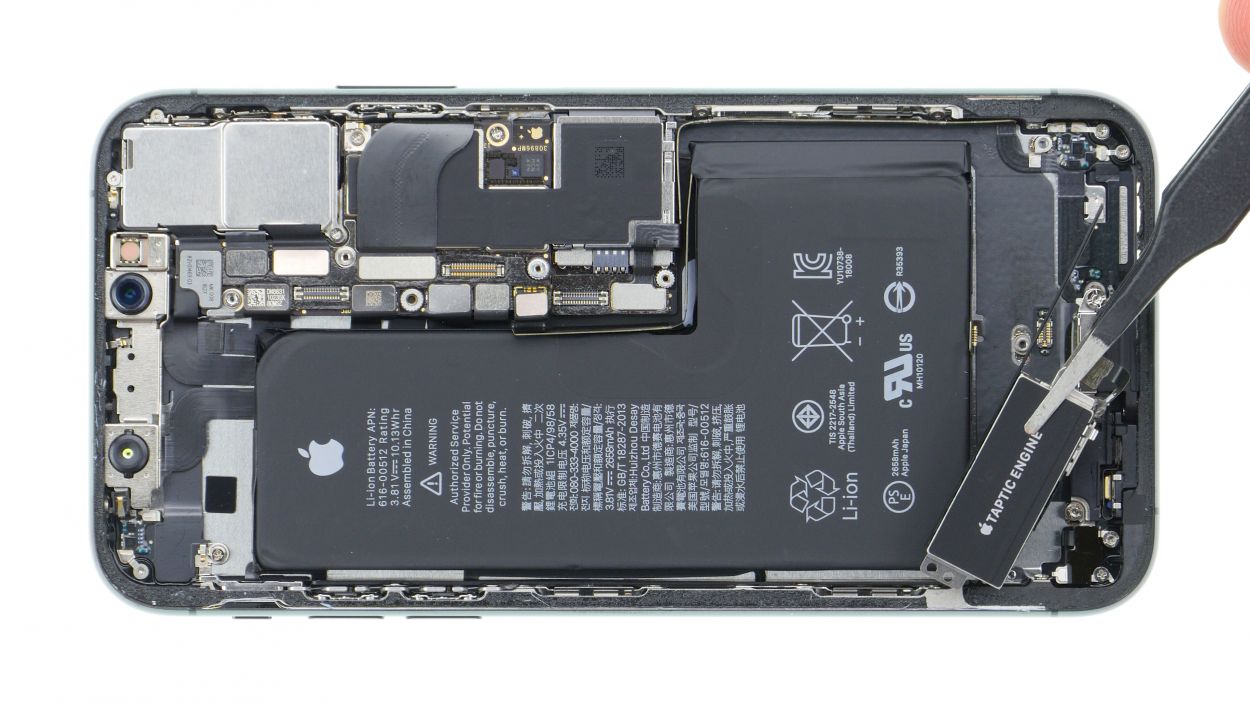
Step 9
2 × 1,8 mm Phillips
Taptic Engine Connector
Ensure that it fits snugly and give it a gentle nudge into place with a tool if needed.
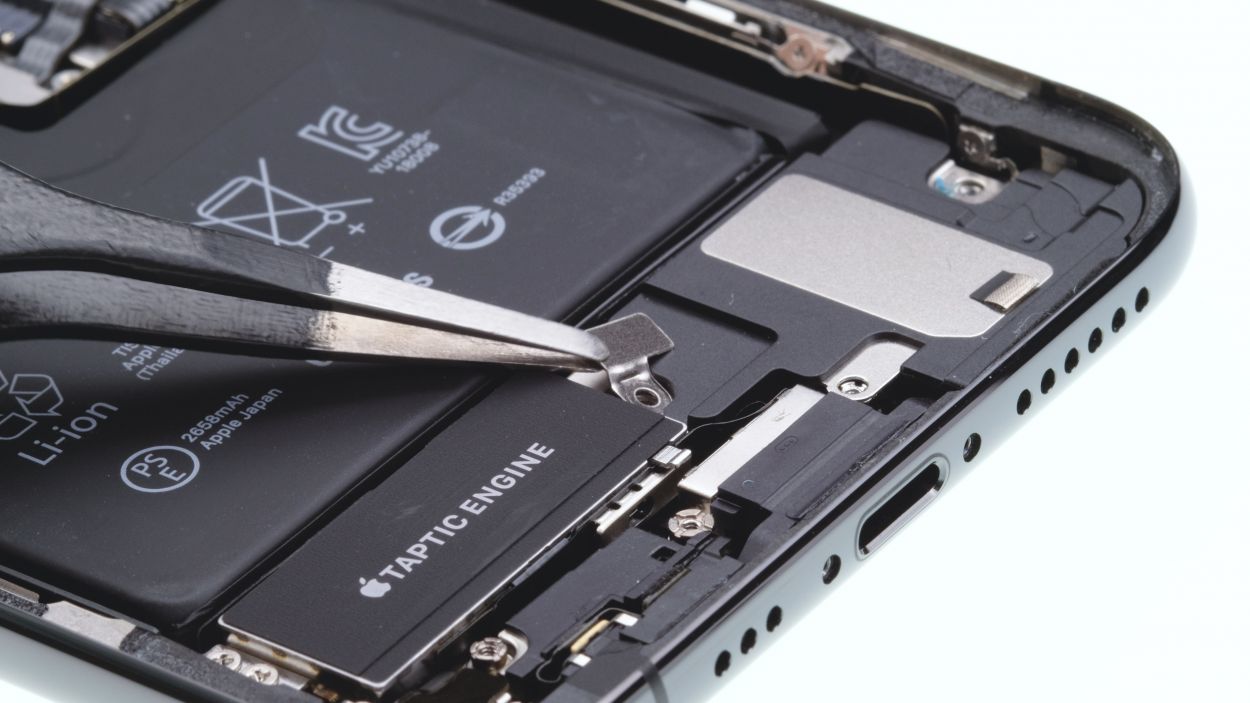
– Slide that Taptic Engine back in between the battery and the Lightning connector. Make sure those screw holes are lined up just right!
– Now, let’s connect the Taptic Engine’s connector and secure it in place.
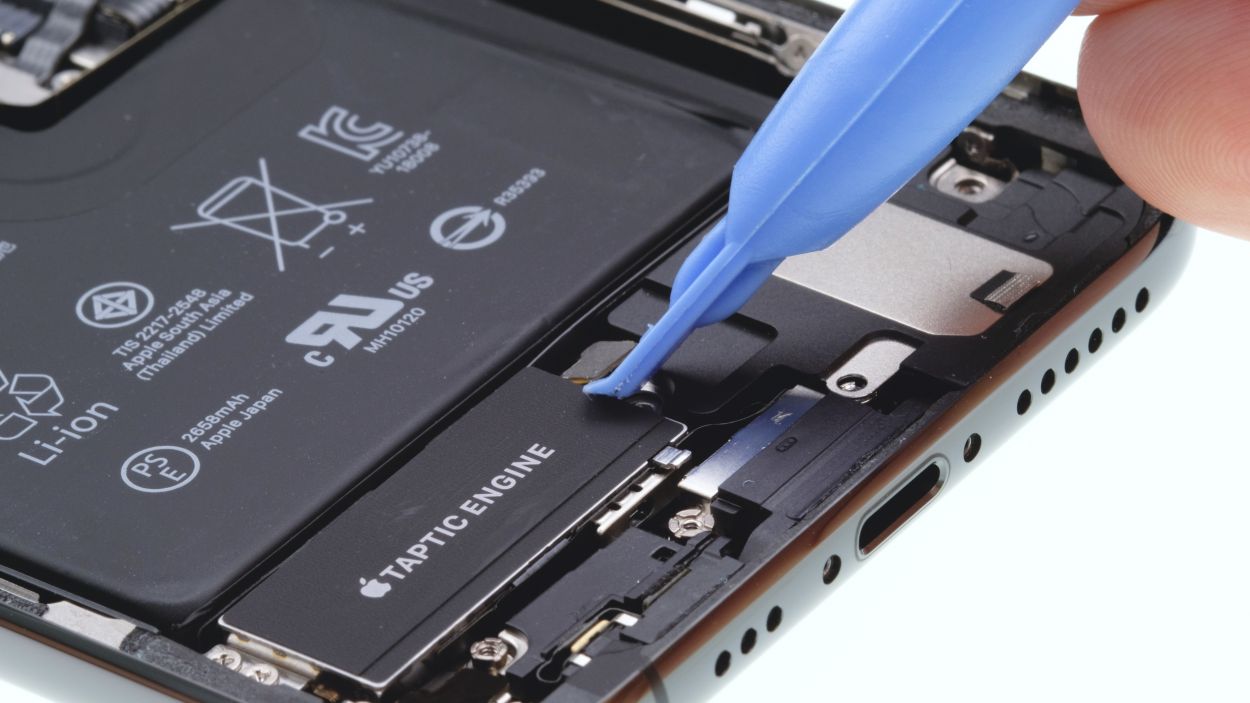
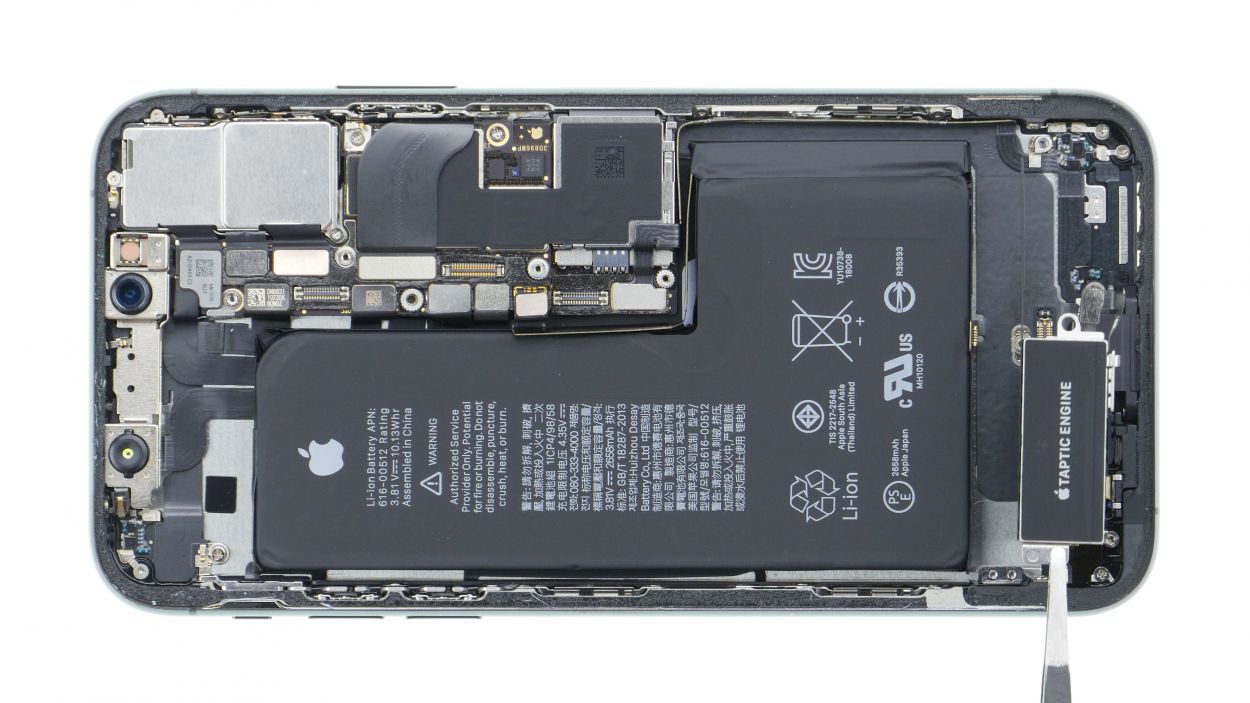
Step 10


1 × 1,7 mm Phillips
Speaker connector
Double-check that the connector is snug and happy in its spot before moving on!
– First, let’s gently place the speaker back where it belongs and give it a little nudge towards the bottom so it sticks just right.
– Be mindful not to pinch that rubber strip hiding underneath the speaker; it likes its space!
– Next up, connect the speaker’s connector and secure the cover plate with that one trusty screw.
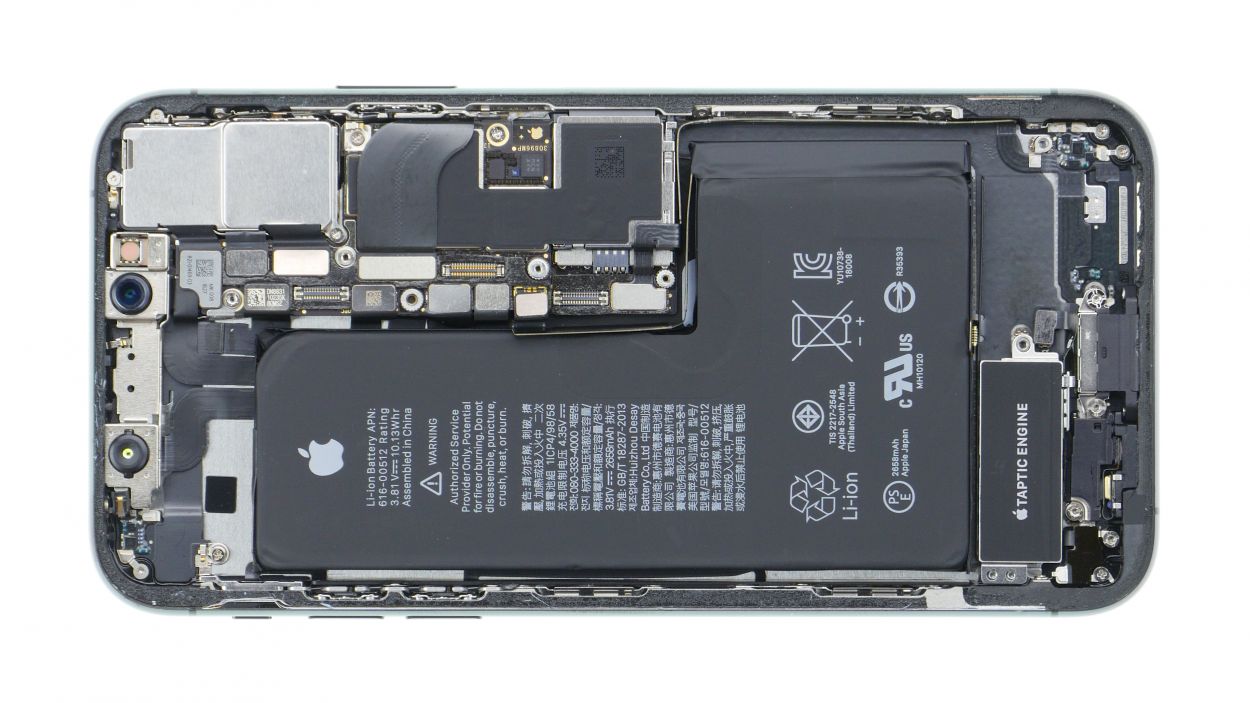
Step 11
1 × 1,7 mm Phillips
1 × 1,6 mm Phillip
2 × 1,2 mm Phillips
1 × 1,0 mm Y-Type
– Time to get those brackets in place! Hold them steady while making sure the plate on the left of the charging port is sitting pretty above the other.
– Now, grab your Phillips and Y-Type screwdrivers and secure both covers with a twist of those screws. You’re doing great!
Step 12

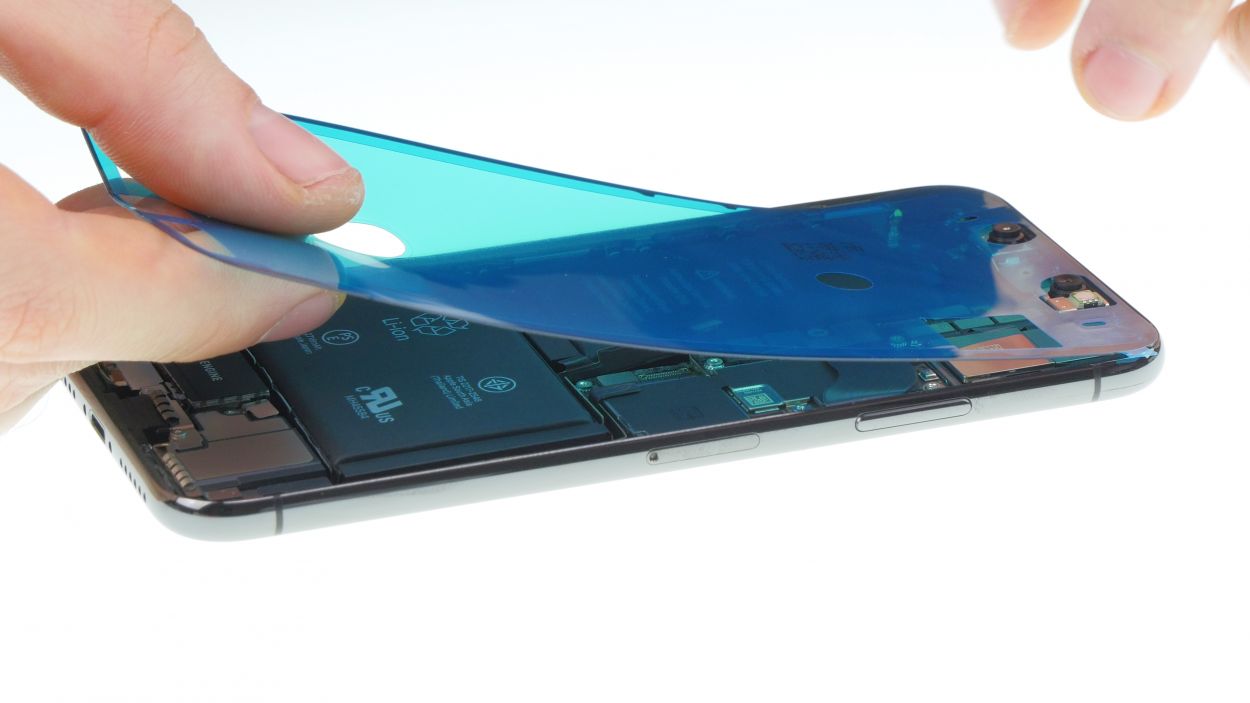


If you give your iPhone a makeover with a frame sticker, it’ll be like putting on a stylish raincoat—great for keeping out dust and splashes, but don’t expect it to go swimming anytime soon!
Check it out! In the images, you’ll spot the iPhone X. The iPhone Xs is crafted just like it and gets re-glued in the same stylish way.
– To ensure that your new frame sticker sticks like a champ, start by cleaning off any leftover glue and dirt from the metal frame. A clean slate is key!
– Peel off the first protective film layer of the frame sticker—let’s get to the good stuff!
– Carefully place the frame sticker on one edge of the frame and attach it little by little. Make sure it’s even and give it a good press. A spudger+iPhone+Xs&crid=1TJIMMAJSUJUZ&sprefix=repair+tools%2Caps%2C165&linkCode=ll2&tag=salvationrepa-20&linkId=c486487cf454ce8edd6f5beefab4110f&language=en_US&ref_=as_li_ss_tl’>plastic spudger can help you get that adhesive nice and snug!
– Now, it’s time to remove the next big protective film.
– Feel free to leave those small protective films on for now. You can take them off once you’ve connected the display and attached the bracket plates. This keeps everything tidy and prevents any premature sticking. But hey, if you’re feeling bold, you can remove them right away!
Step 13
Display Connector
Earpiece Connector
Double-check that those connectors are snug as a bug! We definitely don’t want any socket contacts on the logic board doing the bend and break dance.
– Alright, let’s get that display unit settled! Place it on the edge of the frame and lean it against something stable—this will help avoid any stretching of those delicate flex cables. And hey, let’s make sure your device stays put and doesn’t go sliding around!
– Now, it’s time to connect those two display connectors.
– You might need to give a little press down on the lower connector with a spudger to ensure it fits just right.
– Grab your tweezers and position the earpiece connector right over its socket on the logic board.
– With a gentle touch, press to attach that connector to its socket.
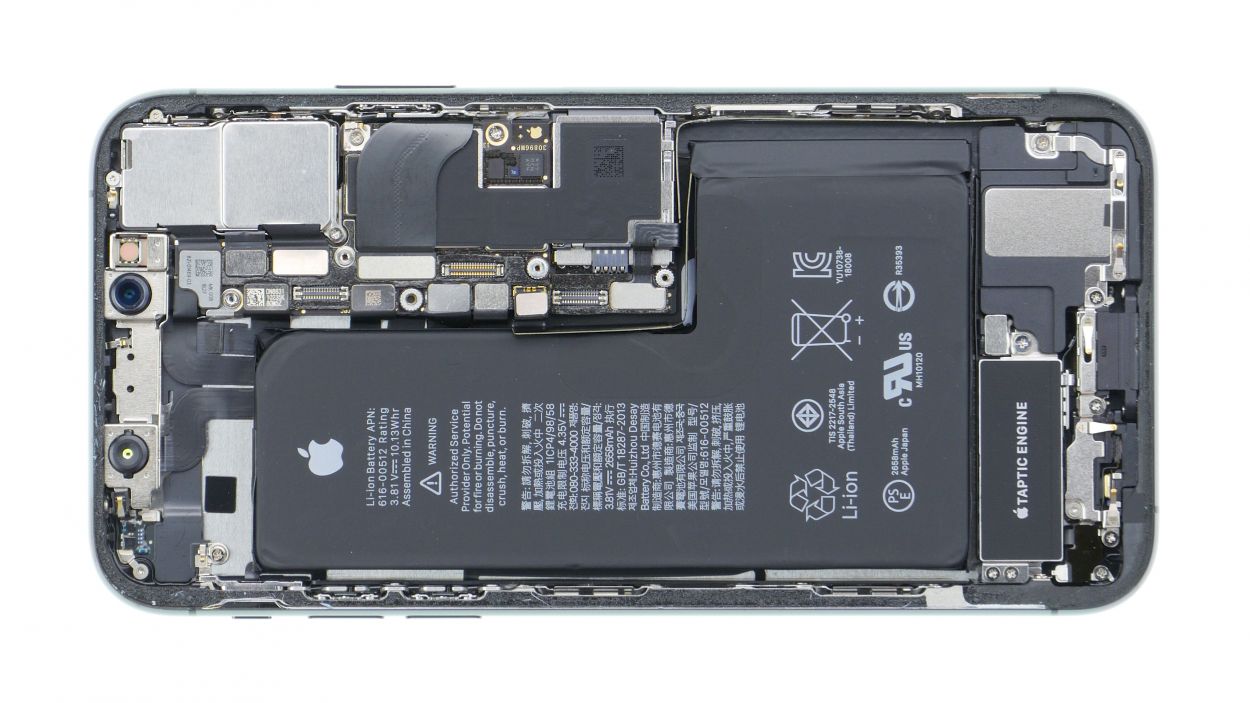
Step 14


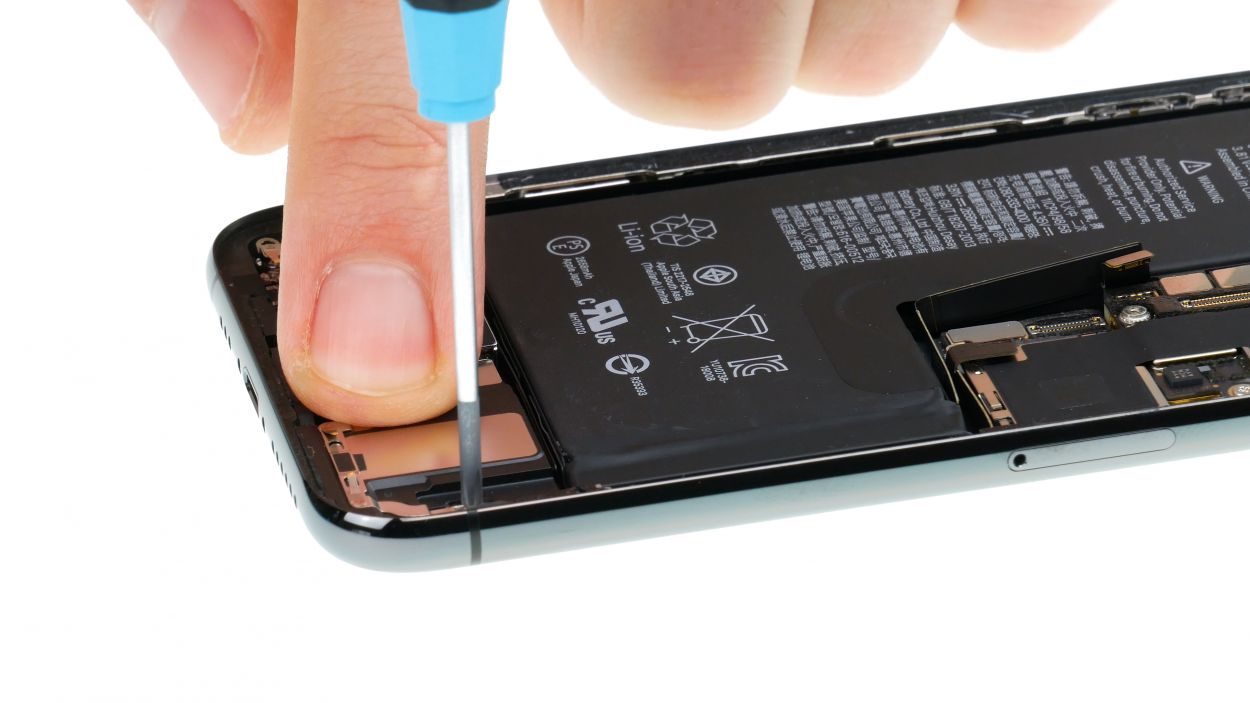
Battery Connector
1 × 1,2 mm Y-Type
3 × 1,0 mm Y-Type
1 × 3,7 mm Phillips
– Alright, it’s time to connect that battery connector! Just snap it back into place like a pro.
– Next up, pop in the bracket plate and secure it with those trusty screws. You’ve got this!

Step 16
2 × 6,8 mm Pentalobe
– Screw in the two pentalobe screws, one on each side of the Lightning connector, to secure everything back in place. You’re almost there!