How To Replace iPhone 7 Plus Battery – Step-by-Step Guide
Duration: 30 min.
Steps: 18 Steps
Is your iPhone 7 Plus battery feeling a bit lazy? Time for a fresh one! Even if your phone is throwing tantrums under pressure, refusing to power up, or playing hard to charge, a battery swap might just be what it needs. In this guide, we’ll walk you through the steps to replace that tired battery in your iPhone 7. Before diving in, make sure to back up your precious data and gather all the necessary tools and parts. Check out the handy list on the right for everything you’ll need. To make your repair journey smoother, we’ve packed in detailed instructions and some quick video clips to give you a front-row seat to each step. So let’s get started and breathe new life into your iPhone 7 Plus!
Step 1
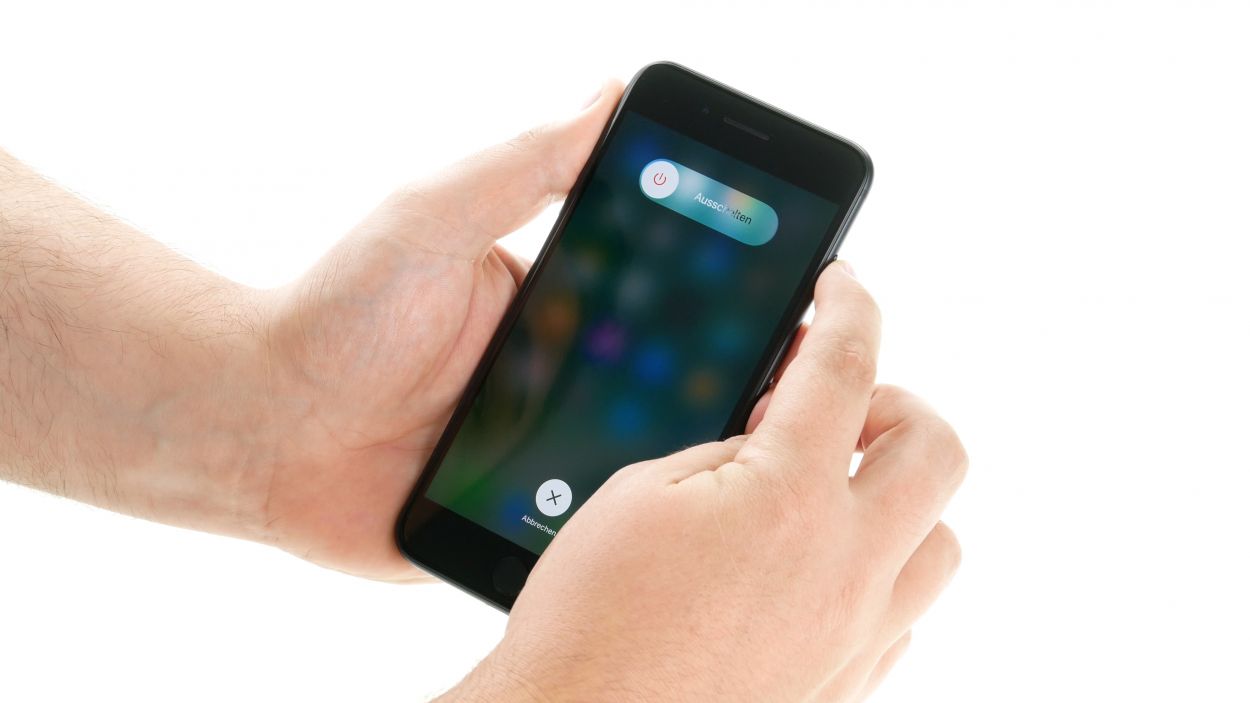
– First things first, let’s give your iPhone a little break! Completely power it down to keep it safe during the repair. Just press and hold the Sleep/Wake button for about three seconds until you see that handy slider labeled ‘power off’.
– Now, swipe that slider from left to right. Your iPhone will take a moment to shut down, which should take about ten seconds. You’re doing great!
Step 2
2 × 3,3 mm Pentalobe
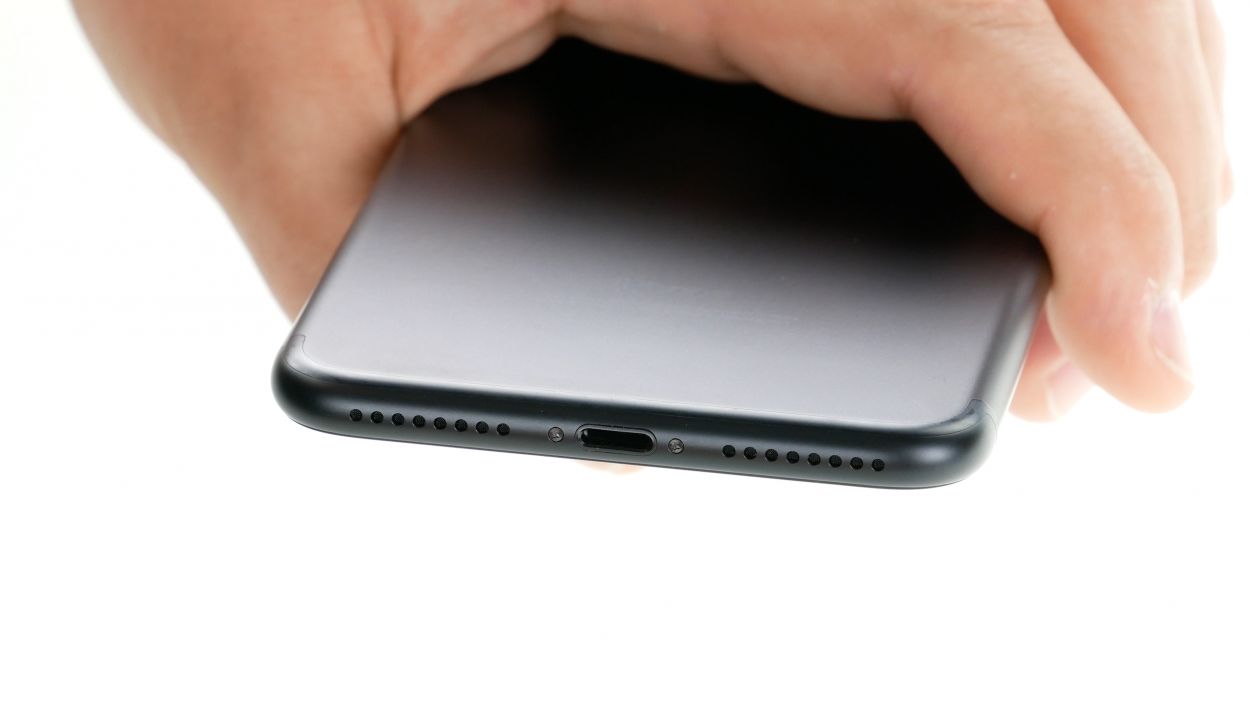
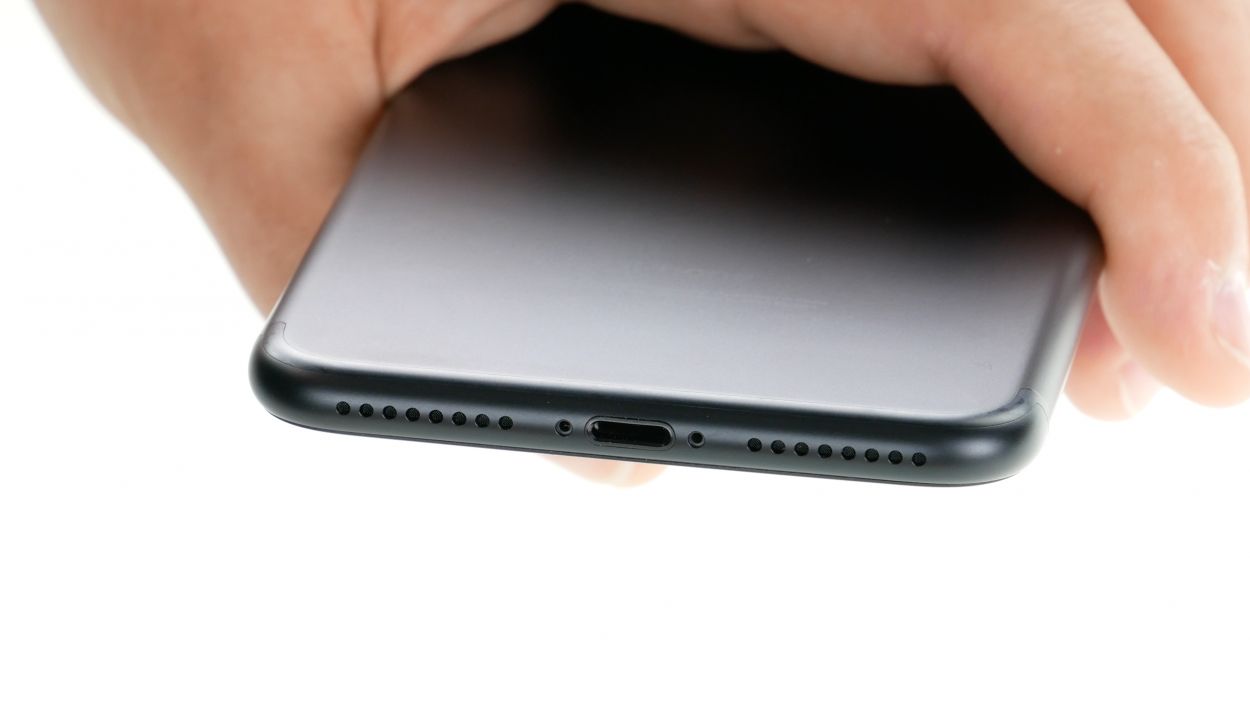
– Grab your trusty pentalobe screwdriver (PL1) because it’s time to pop open that iPhone 7 Plus!
– Carefully take out the two pentalobe screws located at the bottom of the enclosure, right next to the Lightning connector. Make sure to keep those little screws safe on your magnetic pad!
Step 3


If you find yourself in a sticky situation, give those outer edges of the display a little love with some heat. Just a friendly reminder: the flex cables for the display are cozying up on the side with the Sleep/Wake button. And hey, the display is also snugged up at the edge of the earpiece!
– Keep your iPhone 7 looking fresh by placing it on a soft, clean surface. No scratches here!
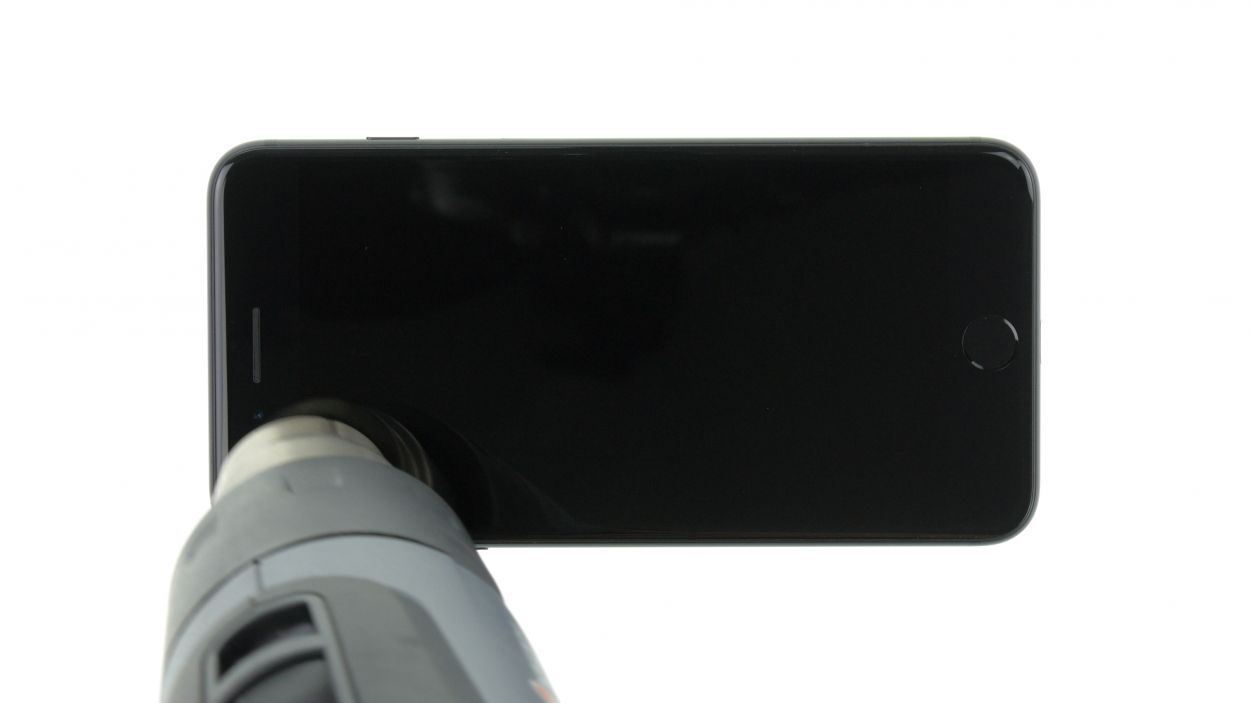
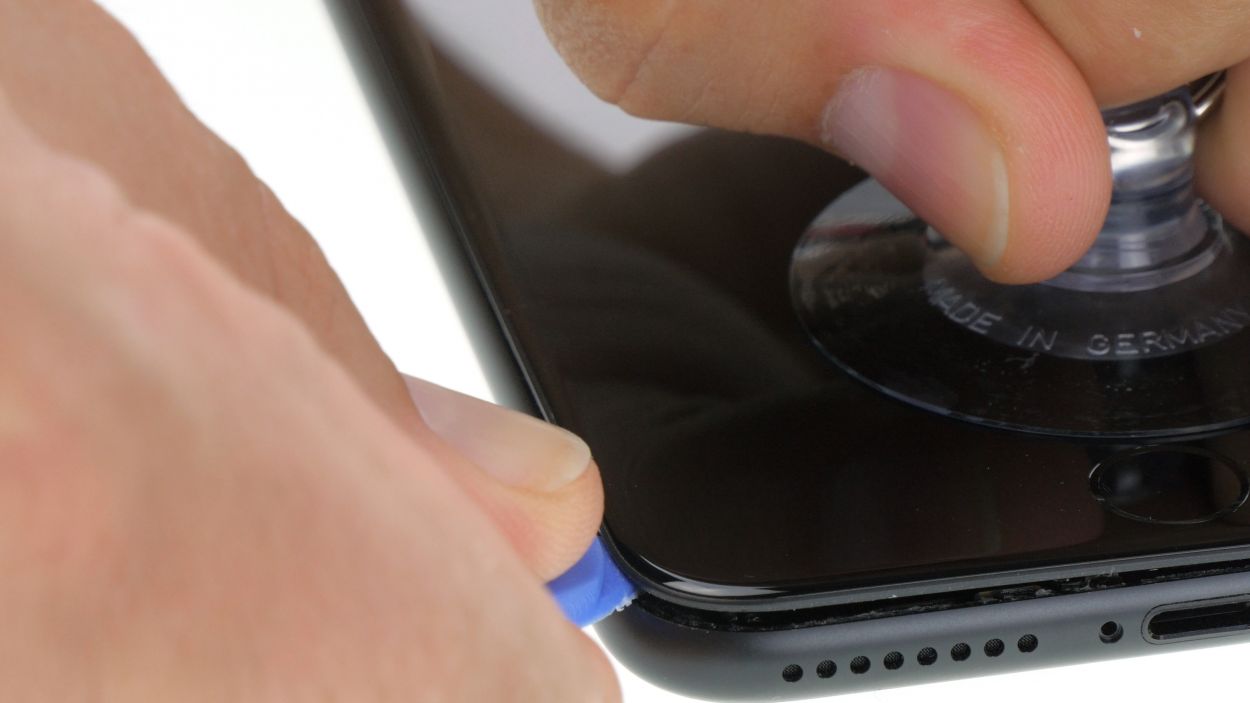
– Ready to lift that front screen? Grab a suction cup, a hard plastic plectrum, and a heat gun. If the screen is really cracked, don’t forget to tape it up first with some package tape.
– The screen is glued to the frame, so let’s heat things up! Use your heat gun around the edges to get the display to about 60°C.
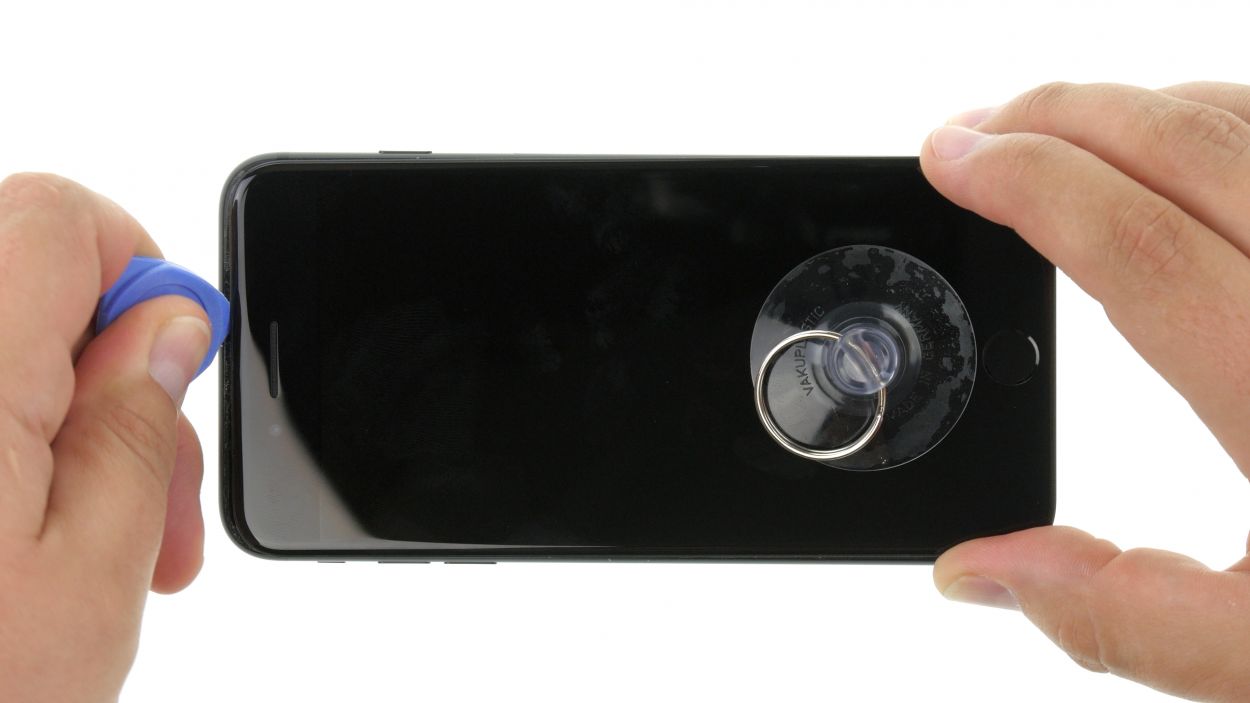
– Pop that suction cup over the Home button (if you can) or right next to it. As you lift the screen, slide the hard plastic pick between the aluminum frame and the display while gently pressing down on the aluminum frame. Since the display is glued, you’ll need to slide the pick all around the iPhone. Just a heads up: don’t go too deep on the side with the Sleep/Wake button to avoid any damage to the display cables.
– Now, push the display toward the Lightning connector with the pick so those tabs can pop out of the aluminum frame.
– Rest the display on the aluminum frame to avoid overstretching those flex cables.
Step 4


1 × 2,4 mm Y-Type
3 × 1,1 mm Y-Type
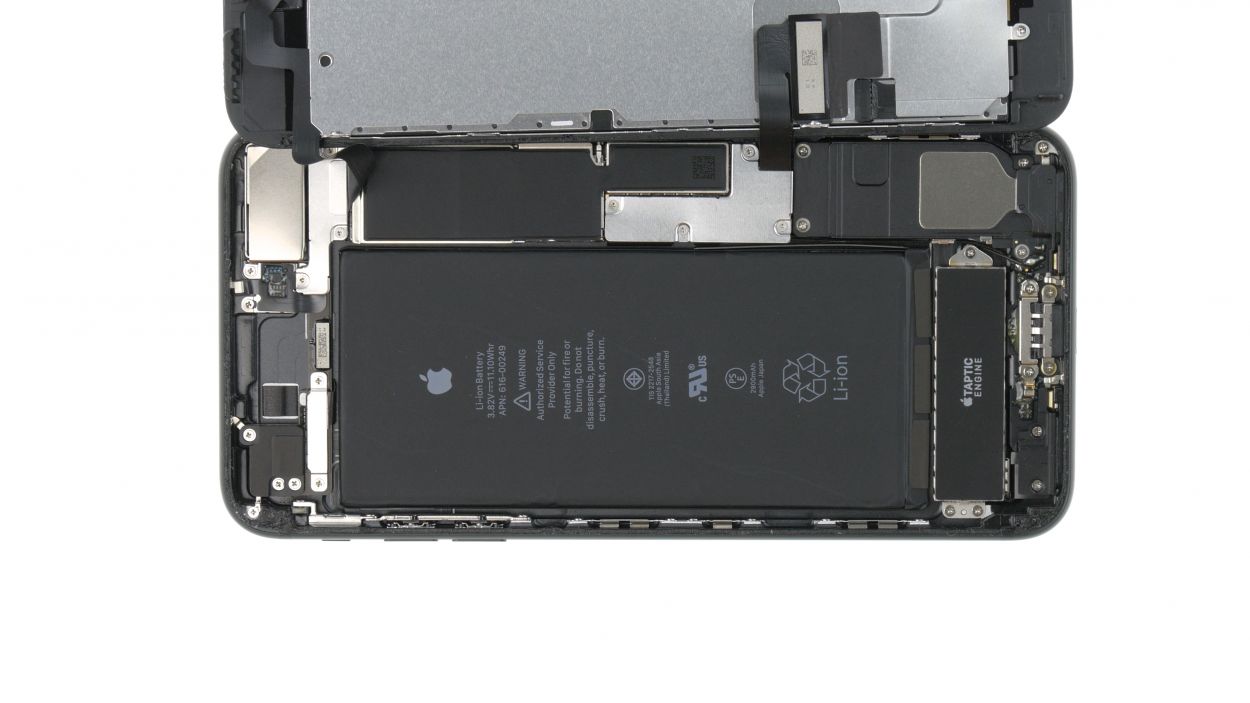
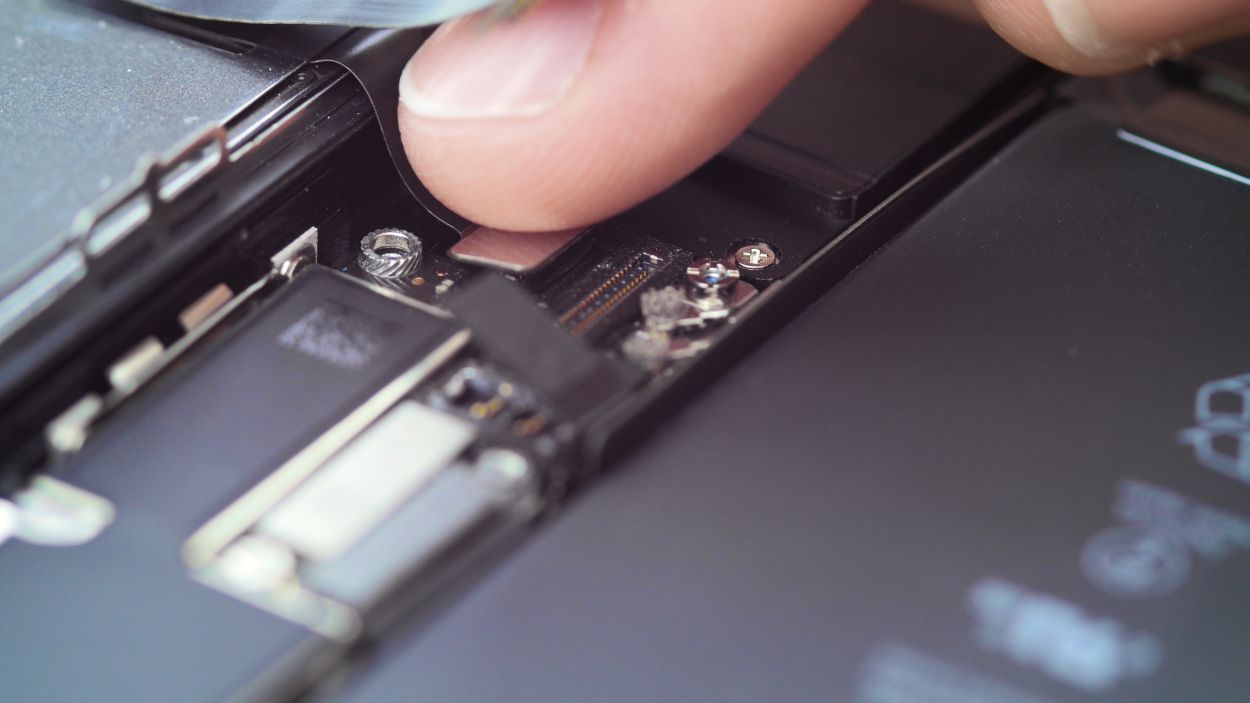
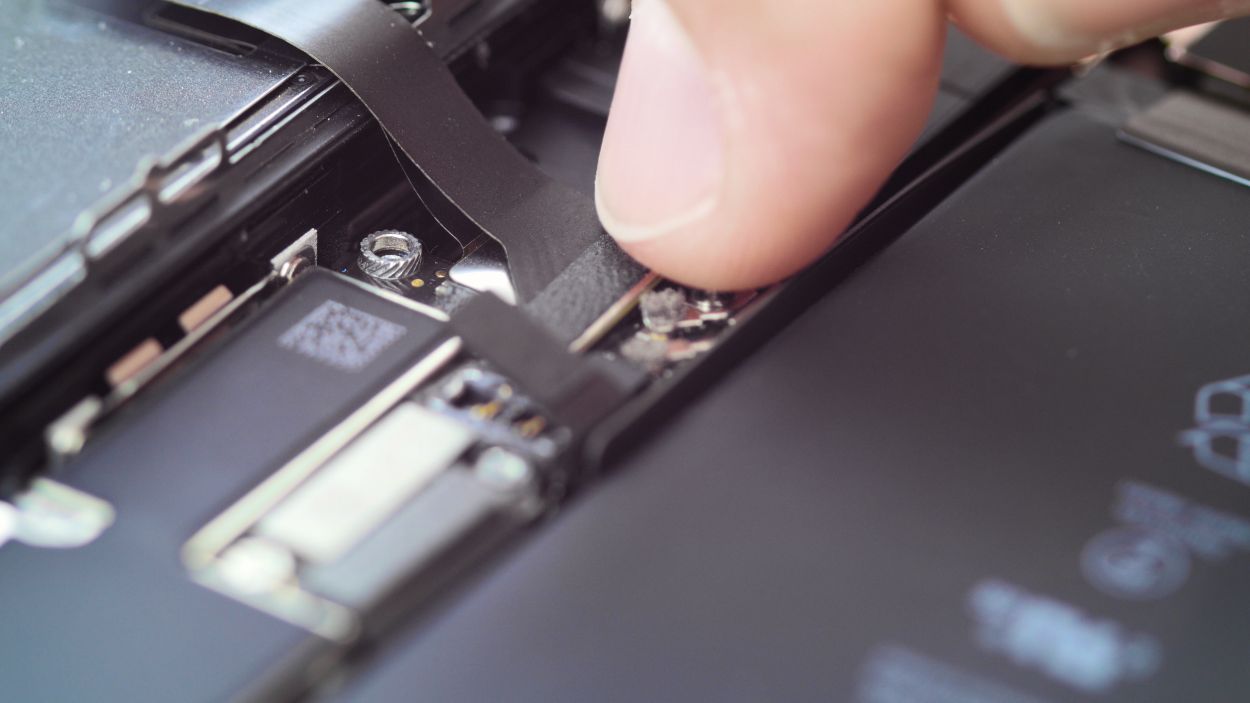
Battery Connector
Before you jump into the repair fun, make sure to disconnect the battery contact. This little step helps you dodge any pesky short circuits and keeps your device from accidentally powering on while you’re in the zone!
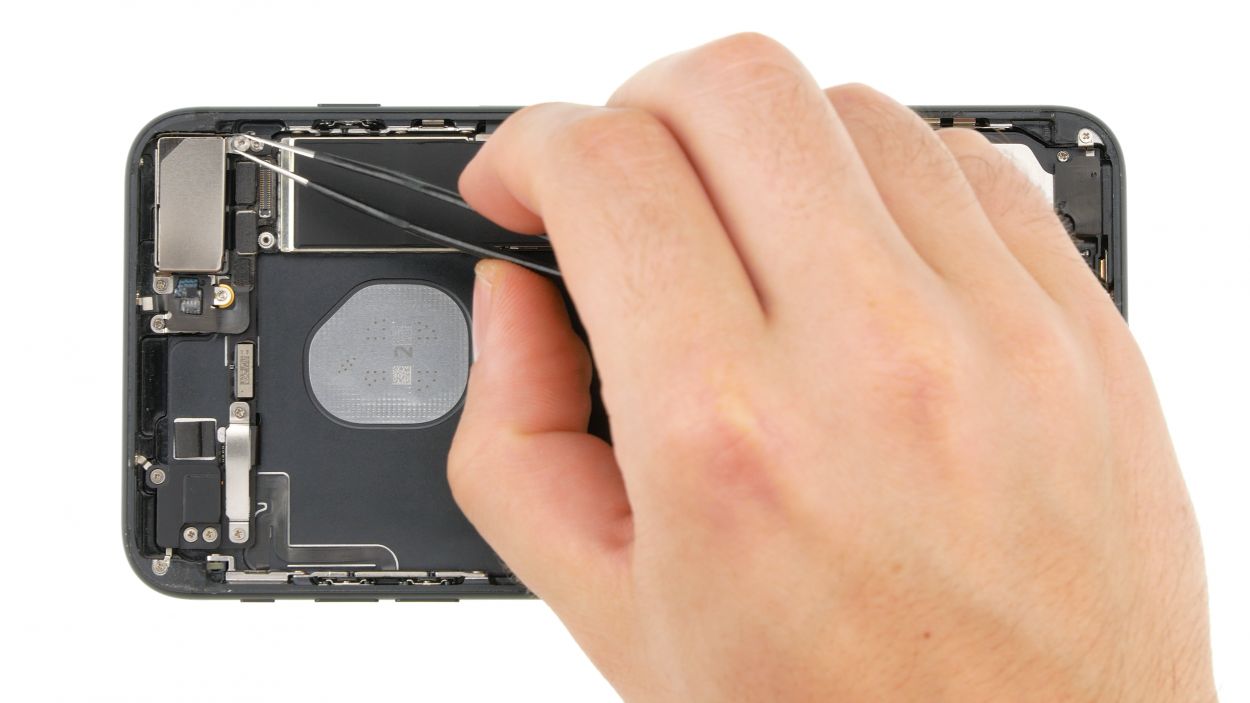
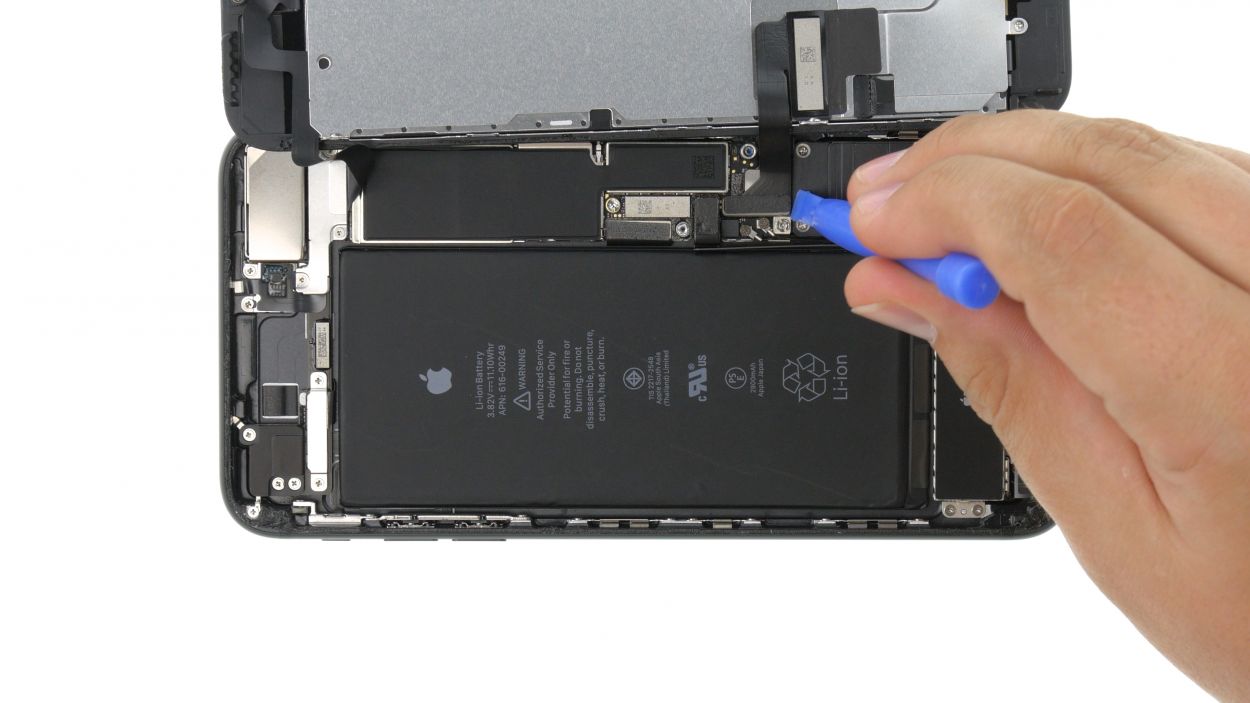
– Start by taking out those three Y-Type screws using your trusty Y-Type screwdriver (Y000). Once they’re out, gently lift off the bracket plate. Remember to toss all those little parts into the same box on your magnetic pad – let’s keep things organized!
– Next up, it’s time to free the battery connector! Carefully slide a spudger underneath it to pry it off. If you’re feeling adventurous and don’t have a spudger handy, your fingernail can do the trick too! You’ve got this!


Step 6


1 × 1,3 mm Y-Type
2 × 1,0 mm Y-Type
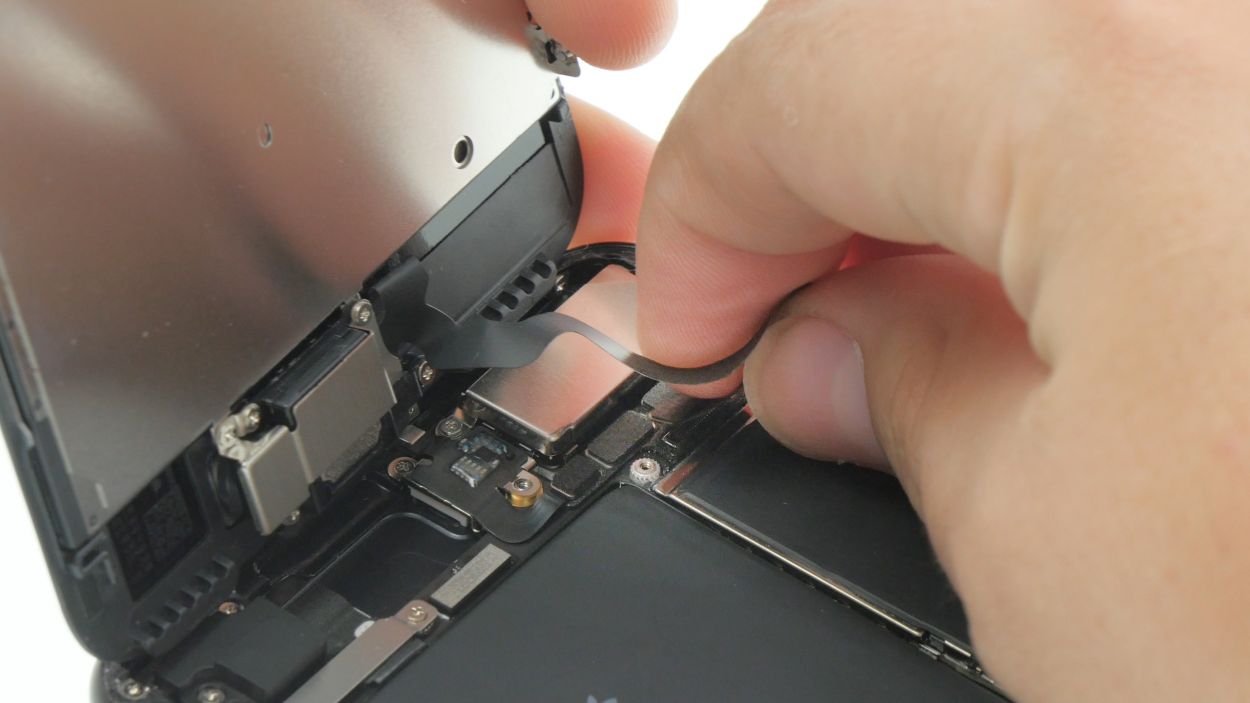
Facetime Connector
– Start by unscrewing those three Y-Type screws with your Y-Type screwdriver (Y000) and gently lift off the cover. Keep all those little parts cozy in the same box on your magnetic pad!
– Now, grab your spudger and carefully disconnect the FaceTime connector from the circuit board. You’re doing awesome!
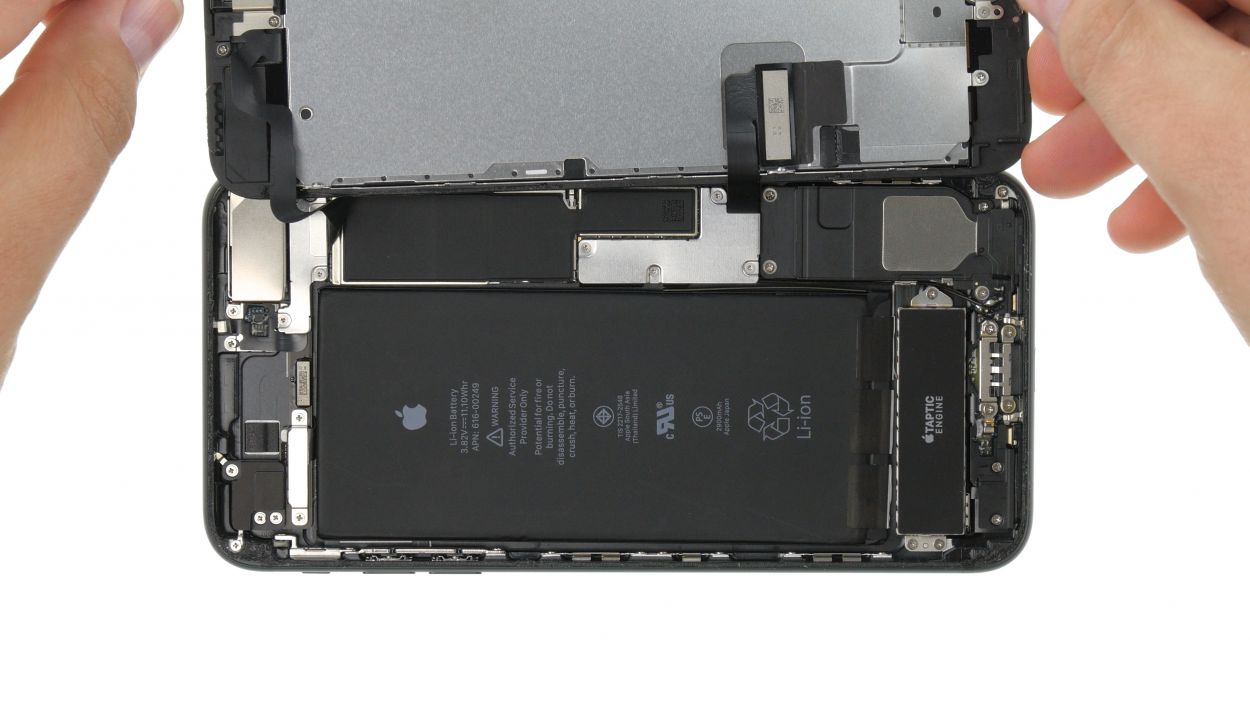
– And just like that, you can fully remove the display! Keep up the great work!
Step 7


1 × 2,9 mm Phillips
1 × 2,1 mm Phillips
3 × 1,5 mm Phillips
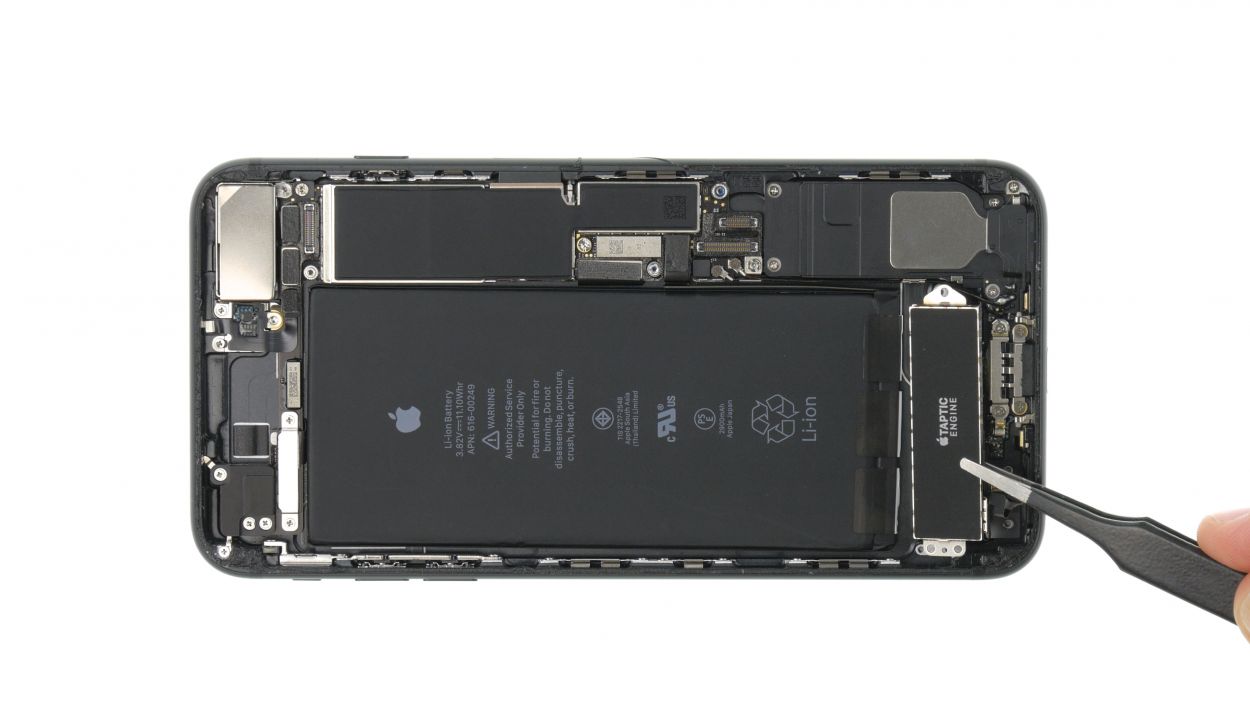
– Start by taking out those two Phillips screws in the plastic bracket using your trusty Phillips screwdriver (PH00).
– Next, grab your spudger and gently wiggle it to disconnect the Taptic Engine connector. You’re doing great!
– Now, it’s time to remove the three Phillips screws that are keeping the Taptic Engine snug in its spot. Use that Phillips screwdriver (PH00) like a pro!
– Finally, lift out the Taptic Engine and give yourself a pat on the back for a job well done!
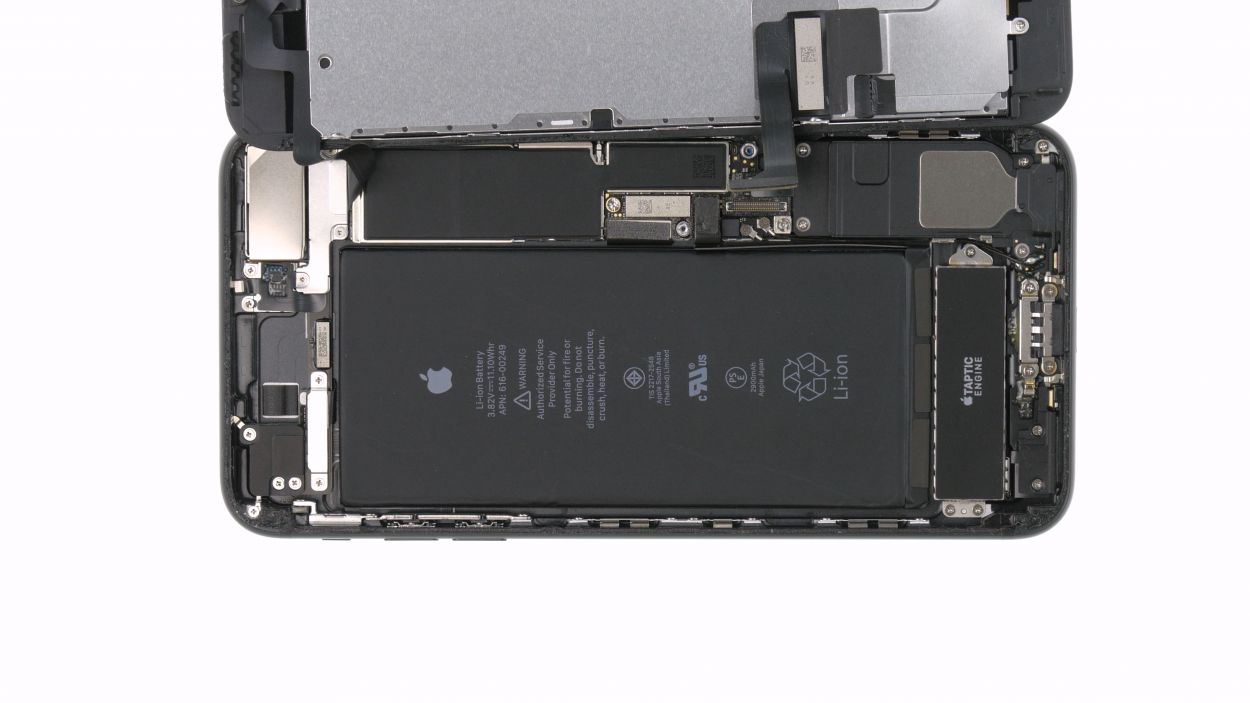
Step 8
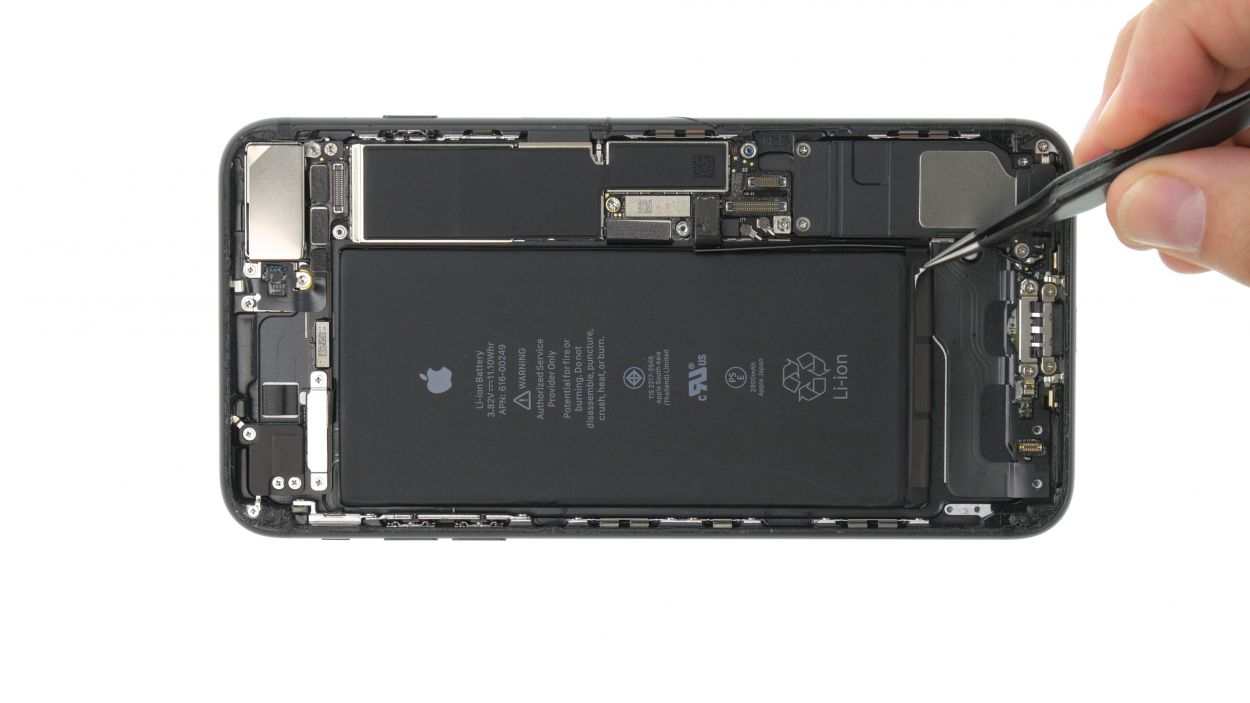


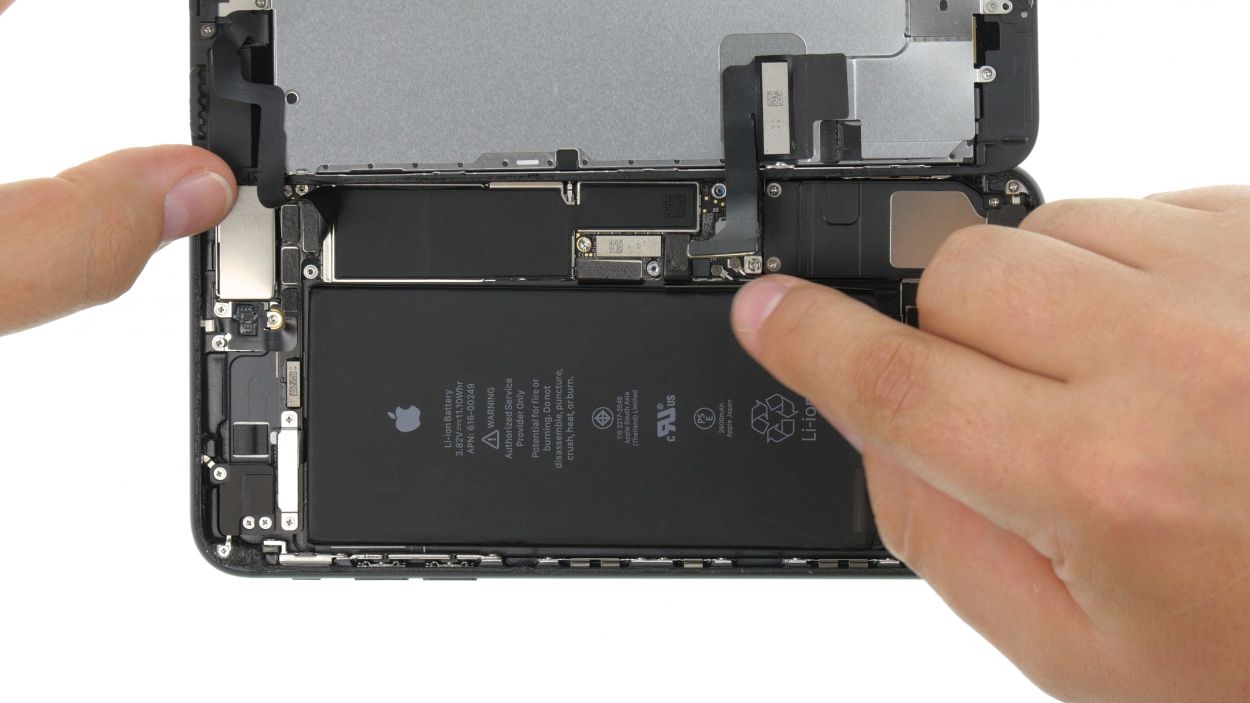
– Grab those tweezers or a spatula and gently peel off the black tabs. Underneath, you’ll discover the white adhesive strips waiting for you.
– Now, take your time and slowly pull out the adhesive strips. Keep them nice and flat, right at the level of your iPhone. You’re doing awesome!
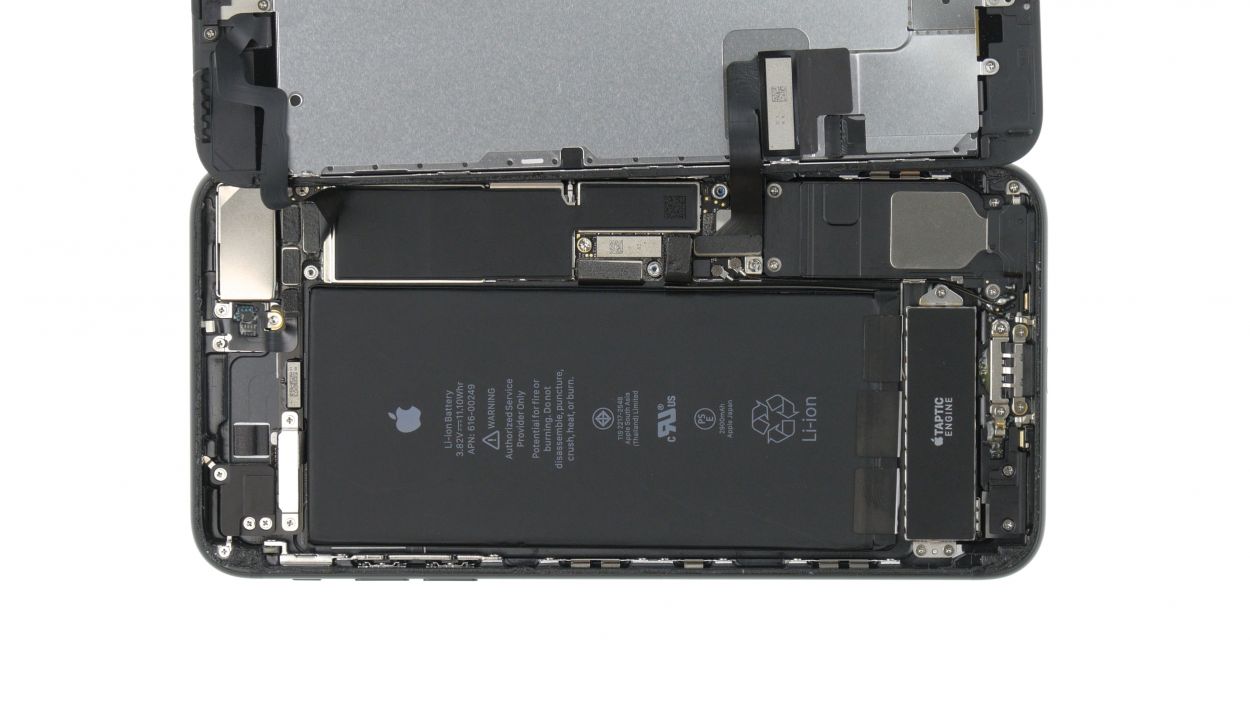
– Once all the adhesive strips are free, it’s time to say goodbye to the old battery and remove it from your device.
Hold onto that battery and your iPhone like it’s a precious treasure while you gently pull out the last adhesive strip. We don’t want that battery making a surprise exit from your device!
If one of those adhesive strips decides to play hard to get, gently coax the battery out with a wide spudger. Just remember, try not to bend that battery too much – we want it to feel as good as new!
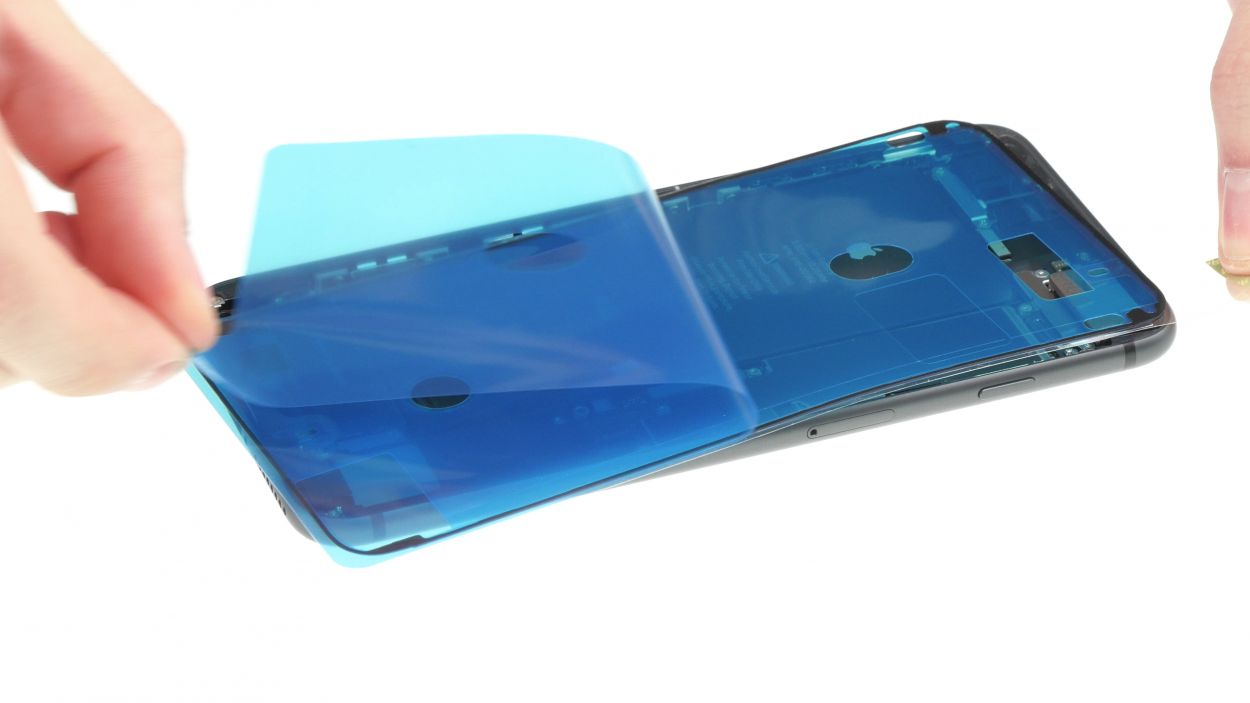
Step 9

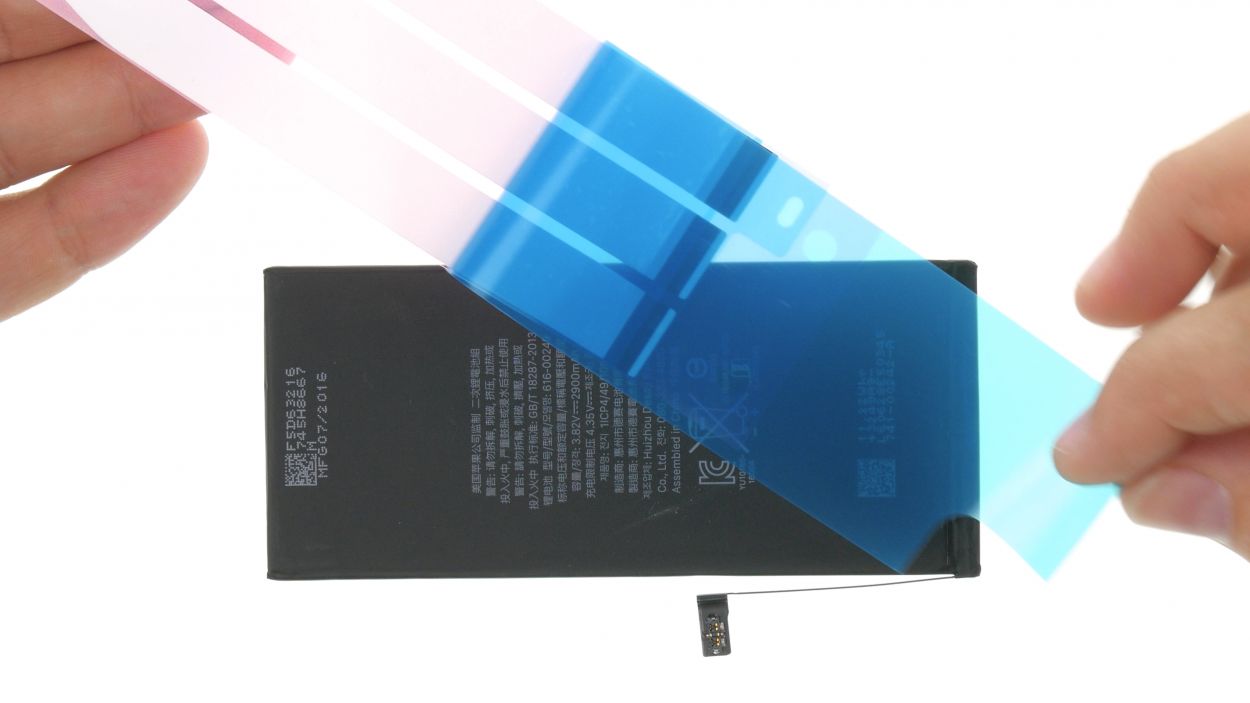


Get those adhesive strips ready! Place them in your device with the protective films still on, making sure they’re pointing in the right direction. You got this!
When you’re placing those adhesive strips, make sure to leave a little wiggle room on both sides for those tabs to fold over nicely.
– First, peel away the large blue protective film and stick those adhesive strips right onto the bottom of the battery. Keep them nice and straight for a smooth ride!
– Now, flip the battery over and gently peel off the small blue protective film from the tabs. We’re almost there!
– Fold those tabs over and press them down onto the top of the battery. It’s like giving your battery a cozy blanket!
– Finally, remove the large pink protective films from the tabs. You’re doing fantastic!


Step 11


3 × 1,5 mm Phillips
1 × 2,9 mm Phillips
1 × 2,1 mm Phillips
– Slide the Taptic Engine back into its cozy spot between the battery and the Lightning connector.
– Secure the Taptic Engine by tightening those three Phillips screws like a pro.
– Connect the Taptic Engine’s cable to the Lightning connector—let’s make sure it stays connected!
– Place the plastic bracket back into your iPhone and fasten it down with the two Phillips screws. You’re almost there!
Step 12


Just a heads up: even with a shiny new frame sticker, your iPhone’s water resistance might not be back to its original glory!
Keep an eye on how you place that frame sticker! The corners are your friends and will guide you to the right fit.
– To ensure that the new frame sticker sticks like a champ, make sure to clean off any leftover glue and grime from the old one.
– Peel off the first backing film.
– Carefully line it up on one side and give it a gentle press.
– Now, go ahead and remove the second piece of film.
Step 13


Facetime Connector
2 × 1,0 mm Y-Type
1 × 1,3 mm Y-Type
– Stand the display tall and proud on the frame, then connect that FaceTime connector right to the logic board like a pro.
– Gently lay the display down on the right edge of the frame—it’s taking a little rest!
– Time to bring back the bracket plate for the FaceTime connector! Slide it back into the iPhone and secure it with those three Phillips screws. You’re nailing this!
Step 14
Display Connector
Home Button Connector
– Time to connect the Home button and display cables to the logic board! Just make sure everything is snug and secure, and you’re on your way to a fully functional device!
Step 15


Battery Connector
3 × 1,1 mm Y-Type
1 × 2,4 mm Y-Type
– Reconnect that battery cable like a pro!
– Now, let’s get that bracket plate back into your iPhone and secure it with those four Y-type screws. You’ve got this!
Step 16


Your phone is no longer water-protected. You have to reglue the display to restore water protection.
– Let’s get that display cozy on the right side of the frame and gently fold it over onto your iPhone. It’s like tucking it in for a good night!
– Now, slide the display towards the standby button so those tabs can click into place. You’re doing awesome!
– Finally, give the display a little press all around the frame to lock it in tight. You’ve got this!
Step 17
2 × 3,3 mm Pentalobe
– Screw in those two pentalobe screws flanking the Lightning connector into the case. You’ve got this!
Step 18

Heads up! When you take out the battery, your iPhone’s clock decides to throw it back to 1:00 a.m. on 1/1/1970. If you don’t set the time, you might have a bit of a hiccup connecting to the cellular network.
– Let’s get your iPhone back on track! Sync it with iTunes or connect to a WiFi network and hang tight until the time is set.
– Just a heads up: the time won’t magically adjust itself unless you toggle that feature on in the settings.
– Head over to Settings > General > Date & Time > Set Automatically to enable it.
– Don’t forget to pop out the SIM tray with the SIM card and then slide it back in.
– Flip on airplane mode and then turn it off again to give your device a little nudge.
– You can find this in Settings > Airplane Mode.