
iPhone XS Max Battery Replacement Guide DIY Step-by-Step Tutorial
Duration: 45 minutes
Steps: 50 Steps
Heads up! Get ready to roll up your sleeves, because we’re about to dive into some serious repair action. It might get a tad tricky, but don’t sweat it—we’ve got your back! If at any moment you feel like you could use a hand, remember, you can always schedule a repair. Let’s make that device as good as new!
Alright, so here’s the deal with iPhone batteries – they’re designed to keep about 80% of their juice for around 500 charge cycles, giving you a solid 18-24 months of usage. Once that party’s over, your iPhone might start begging for more frequent charges, with iOS sending you not-so-subtle messages about its need for a boost (translation: your phone’s gonna slow down). Fear not, my friend! This handy guide will show you how to swap out the battery and get your iPhone back to its snappy self. And hey, if your battery’s acting all puffed up, just take some precautions, okay? Quick tip: Don’t freak out if your iPhone throws a ‘genuineness’ fit post-repair, even if you’ve gone all-in with original Apple parts. As long as everything else is running smoothly, feel free to give that warning the cold shoulder. For top-notch performance, once you’ve nailed the battery swap, give it some extra love: Charge it up to 100% and keep the good vibes flowing for a couple more hours. Then, let your iPhone do its thing until it taps out from low battery. Finally, show it some love by topping it up all the way to 100% without any interruptions. High-five, battery hero!
Step 1


Whoa there, not so fast! Before you start, make sure your iPhone battery’s down to about 25% or less. Just a heads up, a fully charged lithium-ion battery can go kaboom if it meets an untimely end. If you need help, you can always schedule a repair
– Before you start, make sure to power off your iPhone – it’s an important safety step to avoid any accidents.
– Next, remove the two 6.9 mm-long pentalobe screws at the bottom edge of your iPhone. Take your time and be gentle.
– Now it’s time to open up your iPhone’s display. Keep in mind that this will affect its waterproof seals, so have some replacement seals ready or be careful not to expose your iPhone to liquids if you plan to reassemble it without replacing the seals. If you need help, you can always schedule a repair with Salvation Repair.
Step 2


To keep your device safe, be careful not to push your opening pick in too deep. This step will help you mark your pick and avoid any unintentional mishaps.
– Measure 3 millimeters from the edge and give that opening pick a little mark with a marker that won’t budge.
Step 3


Put on those safety glasses to keep your eyes safe from any sneaky glass bits that might try to escape during the repair.
If your iPhone’s screen has seen better days with a crack, let’s keep that glass from getting any crazier and avoid any accidental ouchies during your repair. A little tape action over the glass will do the trick!
– Cover the iPhone’s screen with clear packing tape, making sure to overlap the strips until it’s fully protected.
– If the suction cup isn’t cooperating in the upcoming steps, try a creative workaround by fashioning a sturdy piece of tape (like duct tape) into a handy handle for lifting the screen instead.
Step 4


In the next three steps, we’re introducing you to the Anti-Clamp, our nifty little helper designed to make opening your device a breeze. If you’re not rocking the Anti-Clamp, no worries! Just scroll down three steps for a different method.
– Give that blue handle a tug backwards to set the Anti-Clamp’s arms free.
– Let the arms glide over the left or right edge of your iPhone like they’re on a fun ride.
– Make sure to place those suction cups snugly near the bottom edge of the iPhone—one on the front and one on the back. It’s like giving your phone a little hug.
– Squeeze those cups together to create a solid suction in the area you want to work on. Teamwork makes the dream work!
Step 5


– Put on some music and dance while you pull the blue handle forward to lock the arms.
– Imagine you’re a DJ and give the handle a smooth clockwise turn like you’re spinning a record 360 degrees or until the cups start to stretch.
– Keep those suction cups in perfect harmony – if they start to veer off course, just give them a little breather, realign, and get back to grooving with the arms.
Step 6


– Get that iOpener warmed up and slide it through the Anti-Clamp’s arms.
– Fold the iOpener and lay it along the bottom edge of your iPhone.
– Give it a little minute to let the adhesive loosen up and create a gap.
– Gently slip an opening pick into the gap under the screen, right between the screen and the plastic bezel – not the screen itself.
– No need to worry about the next three steps, just skip right ahead!
Tools Used


Step 8


– When you’re ready to get started, pop a suction handle onto the bottom edge of your phone—just be sure to steer clear of that curved glass section!
Tools Used

Step 9


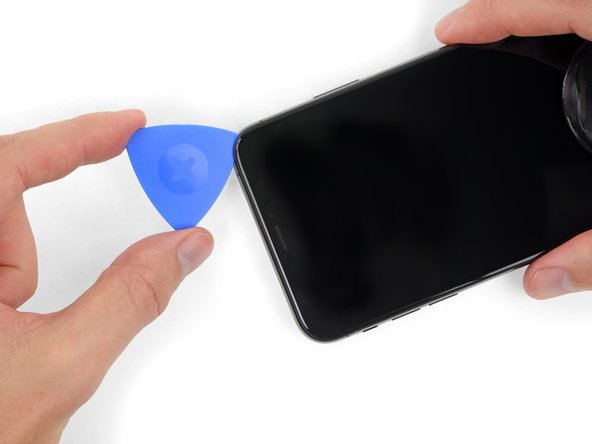
– Gently pull up on the suction cup with steady pressure to open a little gap between the front panel and the rear case. Just a bit of wiggle and you’ll have it!
– Slide an opening pick into that newly created gap beneath the screen and the plastic bezel, steering clear of the screen itself. You’re on the right track!
Step 10


– Gently glide the opening pick in a carefree manner around the lower left corner and up the left edge of your device, effortlessly slicing through the adhesive that’s holding the display in place.
Step 11

When working on your iPhone, remember that the right edge is home to some delicate cables. Be gentle and avoid inserting your tool in this area to prevent any unintended cable chaos!
Step 12


– Slide your pick back into the bottom edge of the iPhone, then gently glide it up the right side to keep loosening that adhesive like a pro.
Step 13


To keep the top edge of the display in place, it’s a mix of glue and clips working together like a dynamic duo.
– Gently glide the opening pick around the upper edge of the display, encouraging it to descend towards the Lightning port with a subtle wiggle.
– Continue sliding the pick over to the opposite corner, skillfully cutting through any leftover adhesive holding the display in place.
Step 14

– Alrighty, tech lovers! Let’s embark on this adventure and yank that pesky suction cup off the front panel like a tech-savvy superhero! If you run into a snag, you know who to call – our liebe bunch at schedule a repair.
Step 15
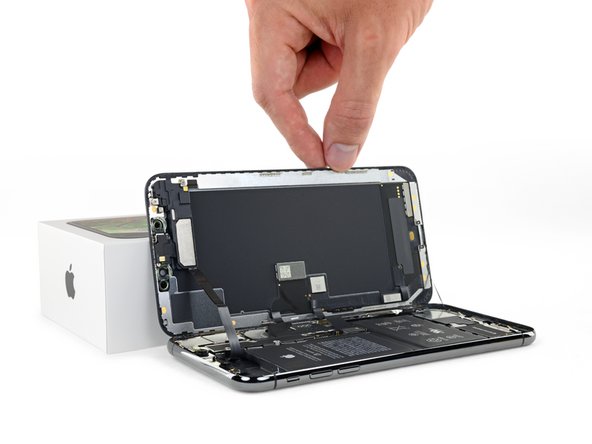


Take it easy! Hold off on separating the display completely just yet. There are some delicate ribbon cables still keeping it connected to the iPhone’s logic board.
– Start by gently lifting the display from the left side, just like flipping open a book. You’ve got this!
– Prop the display up against something sturdy so you can keep it out of the way while you work your magic on your phone.
– When it’s time to put everything back together, carefully place the display in position. Make sure those clips at the top are lined up, then give the top edge a little press to snap it into place. If it’s being stubborn and doesn’t click in easily, take a moment to check the clips around the edges to ensure they’re not bent. You’ve got the skills to make it happen!
Step 16


As you dive into this repair adventure, make sure to keep an eye on each screw and remember where it belongs. This way, you’ll keep your iPhone safe and sound—no harm done!
– Time to get your hands a little dirty! Start by unscrewing those four Y000 screws that are holding down the logic board cover bracket. They come in different lengths, so make sure to keep track of them!
Step 17

– Time to bid adieu to the bracket – it’s gotta go.
– When putting things back together, why not give your iPhone a little power-up to make sure everything’s A-OK before you lock in the display? And hey, remember to give your iPhone a nice little nap before you get back to work.
Step 18


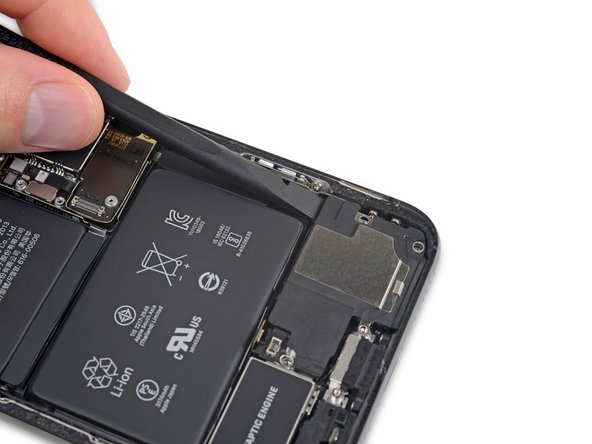
– Grab a spudger or your trusty clean fingernail and gently lift the battery connector out of its cozy little socket on the logic board.
– Give that connector a little bend away from the logic board to keep it from sneaking back into its socket and powering up your phone while you’re working your magic.
Tools Used

Step 19


– Unscrew those three Y000 screws holding down the display connector bracket and let’s get this show on the road!
Step 20

– Let’s get started by removing that bracket.


Step 24


The front panel sensor assembly flex cable is only gently stuck in place.
– Gently raise the cable until the sticky stuff gives way.

Step 26


– Carefully take out the five 1.4 mm tri-point Y000 screws that are keeping the bracket snugly in place beneath the Taptic Engine and main speaker. You’ve got this!
Step 27


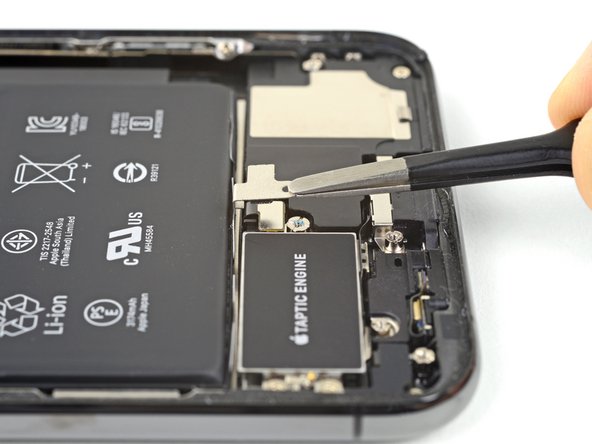
Don’t worry if the bracket is stuck on there – it’s just a little adhesive holding it in place.
– Lift up gently to unstick and remove the bracket, making sure not to bend it.
Step 28


– Let’s get started by removing the 1.3 mm tri-point Y000 screw that’s holding the speaker connector cover in place. If you need help, you can always schedule a repair
Step 29


– Gently nudge the speaker connector cover towards the battery, then give it a little lift to unclip and pop it off. You’ve got this!


Step 31

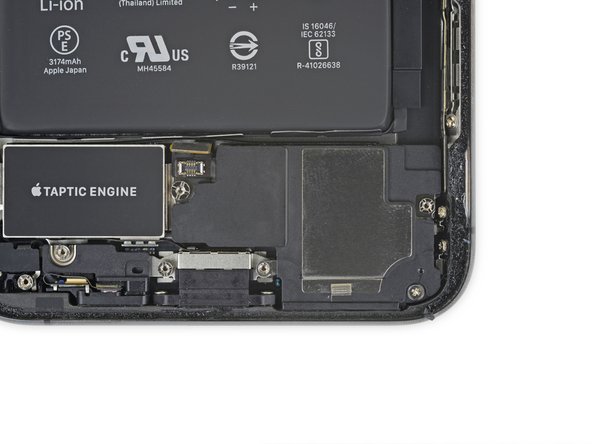
– Unscrew the three little champions that are holding the speaker in place:
Step 32

Hey there! When lifting up the speaker, remember to handle it with care so as not to harm the speaker flex cable you just disconnected. If needed, gently guide the cable towards the battery to give the speaker ample space to be removed.
– Slide a spudger under the top edge of the speaker, just by the iPhone’s case. No need to be shy!
– Carefully nudge up and lift the top edge of the speaker a little bit. You’re doing great!
– As you put the speaker back in, take a moment to check the flex cable’s position. We want to make sure it doesn’t get stuck underneath the speaker!
Tools Used


Step 34


– Grab the speaker by its side edges and give it a gentle wiggle from side to side. This will help loosen up the adhesive that’s keeping it snug against the bottom edge of your iPhone.
– Once you’ve got that adhesive nice and loose, carefully pull the speaker away from the bottom edge of the iPhone until the adhesive gasket gives way.
Step 35


– Let’s kick things off by removing the speaker. No biggie!
– Now, the adhesive gasket that was holding it in place is a one-time deal. Grab some tweezers and gently peel away any leftover adhesive residue.
– To keep your device safe from sneaky water and dust, it’s a smart move to pop in a new adhesive gasket when you’re putting it back together. Start by giving the area a little TLC with isopropyl alcohol and a lint-free cloth or coffee filter, ensuring the new gasket sticks well. Once that’s done, place the new gasket onto the speaker and snugly fit the speaker back in its home.
Tools Used
Step 36


– To separate the Taptic Engine flex cable, gently use a spudger to lift it straight up from its socket.
Tools Used
Step 37


– Let’s get those tiny screws outta there! Carefully unscrew the two 1.9 mm Phillips screws holding the Taptic Engine. No need to rush, just take your time and you’ll be on your way to a repaired device in no time! If you need any assistance, don’t hesitate to schedule a repair with our friendly technicians at schedule a repair.
Step 38


– Grab the plastic bumper strip and gently lift it over the speaker connector like you’re giving it a friendly little boost!
Step 39
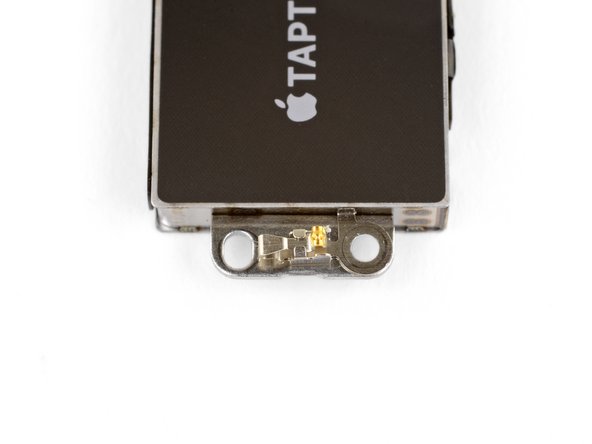

– Start by gently removing the Taptic Engine assembly. Just a friendly reminder: the little contact clip on the left side of the Taptic Engine might decide to take a vacation, so double-check that it’s snug and secure before you pop the Taptic Engine back into your iPhone!
Step 40

– Each little piece of adhesive comes with a tiny black pull-tab on the end, which is only slightly stuck to the side edge of the battery. Don’t worry, you’ve totally got this! If you need help, you can always schedule a repair.
Step 41


Remember, be gentle with the battery. No poking! We want to avoid any leaks or fires.
Each tab features a nifty little loop right in the middle; if you’re finding it tricky to get a grip on the tab, feel free to slide a tool through that loop for a little extra help.


Step 43


Don’t fret if the strips happen to give way! Sometimes things don’t go according to plan. Keep on reading for extra steps on how to deal with broken strips.
– Want to boost your chances of nailing this? Here’s a little tip: If a strip happens to break off and hide under the battery, don’t sweat it! Just move on to the other strips and keep rolling with the steps below.