Lenovo Yoga 2 11″ Battery Replacement
Duration: 45 minutes
Steps: 6 Steps
Over time, batteries can lose their spark and struggle to hold a charge. This guide is here to help you pop off that back panel and swap out the tired battery for a fresh one. Just a friendly reminder: make sure to power down your laptop before diving into the repair!
Step 1
– Grab your trusty T5 Torx screwdriver and get ready to work some magic! Carefully unscrew ten 6.35 mm screws from the back of your laptop. You’ve got this!
Tools Used
Step 2
– Gently pry the back panel away from the laptop, taking your time to avoid any mishaps.
Step 3
– After you’ve tackled the prerequisite guide, it’s time to find that laptop battery! Just a friendly reminder: make sure to disconnect the battery before diving in.
Step 4
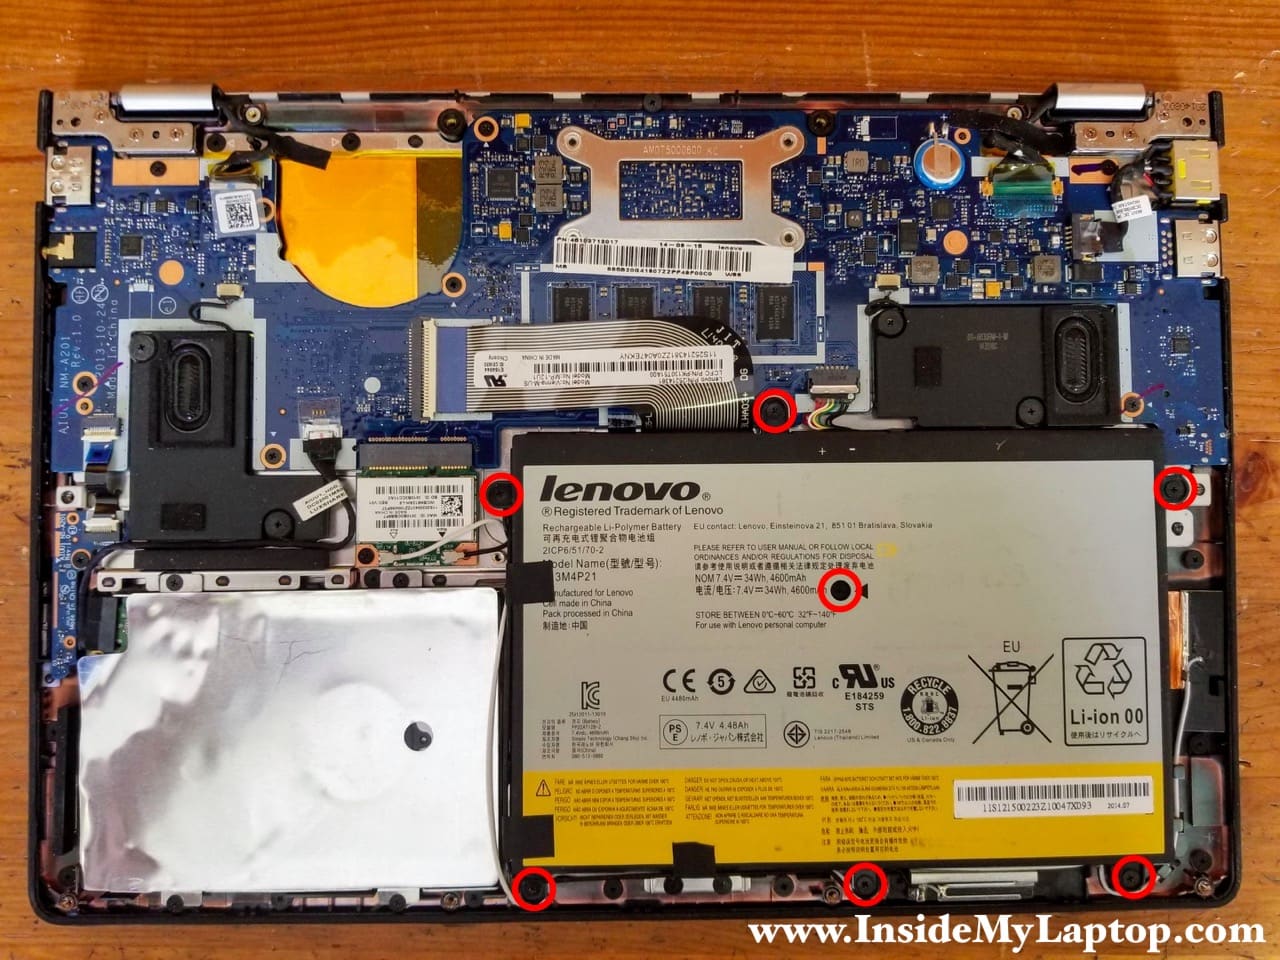
– Grab your trusty #00 Philips Precision Screwdriver and unscrew the seven 3.175mm little soldiers keeping the battery locked in (six along the edges and one solo in the middle).
Step 5
– You’ll spot a clip connecting the battery to the laptop. Grab your trusty tweezers and gently pop that clip loose to fully liberate the battery. You’ve got this!
Tools Used
Step 6
– Put your device back together by reversing the steps—simple as that!
– If you need help, you can always schedule a repair.
Success!


