Lenovo Yoga 2 11″ Screen Replacement
Duration: 45 minutes
Steps: 6 Steps
Before you dive into replacing that screen, make sure those hinges are up! If they’re not, you might end up with a screen that’s more broken than a bad joke. Let’s keep it smooth and easy, shall we?
Step 1


Remember to unplug the device and disconnect the battery to keep yourself safe and sound!
– Spot those tiny rubber rectangles hanging out on both sides of the computer, just under the screen. Yep, that’s the spot!
– Beneath each rectangle hides a sneaky 3mm screw. Grab your trusty Philips 00 screwdriver and evict those screws. Easy-peasy!
Step 2


Gently flip the keyboard under the screen to make your repair journey a breeze!
– Grab your trusty plastic opening tool and gently pry off that little plastic piece at the bottom of the screen. You’ve got this!
Step 3

– Grab your trusty Philips 00 Screwdriver and unscrew the nine screws of different sizes holding the screen to the rest of the computer—four by each hinge and one right in the middle. Keep those screws safe; they’ve got places to be later!
Step 4

Be gentle when separating the screen from the back, it’s super fragile and we want to keep it in one piece!
Pro tip: on some models, sliding the two halves apart is the way to go – prying them apart can break those pesky tabs and leave your screen wobbly when you put it back together.
First things first, pop open that computer and lift those hinges up! Once that’s done, gently lower the screen down. Remember, the hinges need to be up before you attempt to detach the screen—it’s like a little dance move!
Keep an eye on the open end of the hole where those screws are coming out. It’s your guide to a smooth operation!
– Keep a solid grip on the back of the display panel, then gently slide the screen upward to pop those plastic tabs loose and separate the two halves of the display. You’ve got this!
Step 5
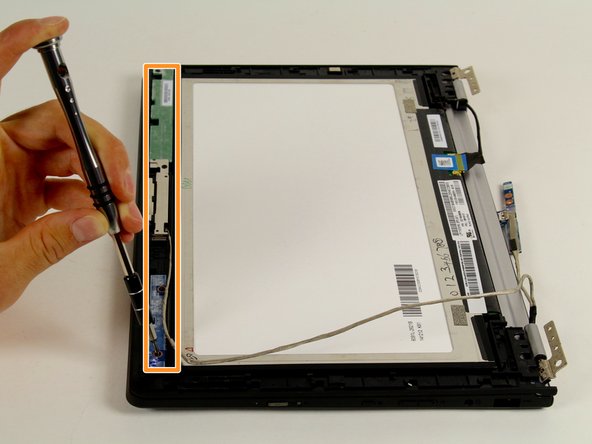

– Grab your trusty Philips 00 screwdriver and carefully unscrew the four screws holding the screen to the rest of the computer. Keep track of the varying sizes—don’t let them play hide and seek with you!
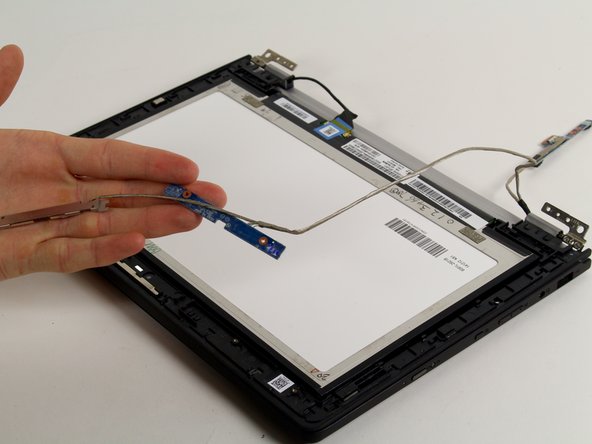
– With the screws out of the way, gently disconnect the components of the computer that are wired together. Take your time and show those connections some love as you remove them!
Step 6

– To put your device back together, just follow these steps in reverse. Easy as pie!
– If you need help, you can always schedule a repair.
Success!

