Samsung Galaxy A51 Screen Replacement Guide: Step-by-Step DIY Tutorial
Duration: 90 min.
Steps: 14 Steps
Ready to give your Galaxy A51 a new lease on life? It’s battery replacement time! In this easy-to-follow photo guide, we’ll walk you through each step. The A51’s plastic back cover is a breeze to remove, especially when compared to those slippery glass backs. So, even if you’re not a pro at phone repairs, you’ll find this pretty straightforward. Wishing you the best of luck—and remember to enjoy the process! And if you need tools, check out our online store for the perfect tool kit for your Samsung Galaxy A51.
Step 1


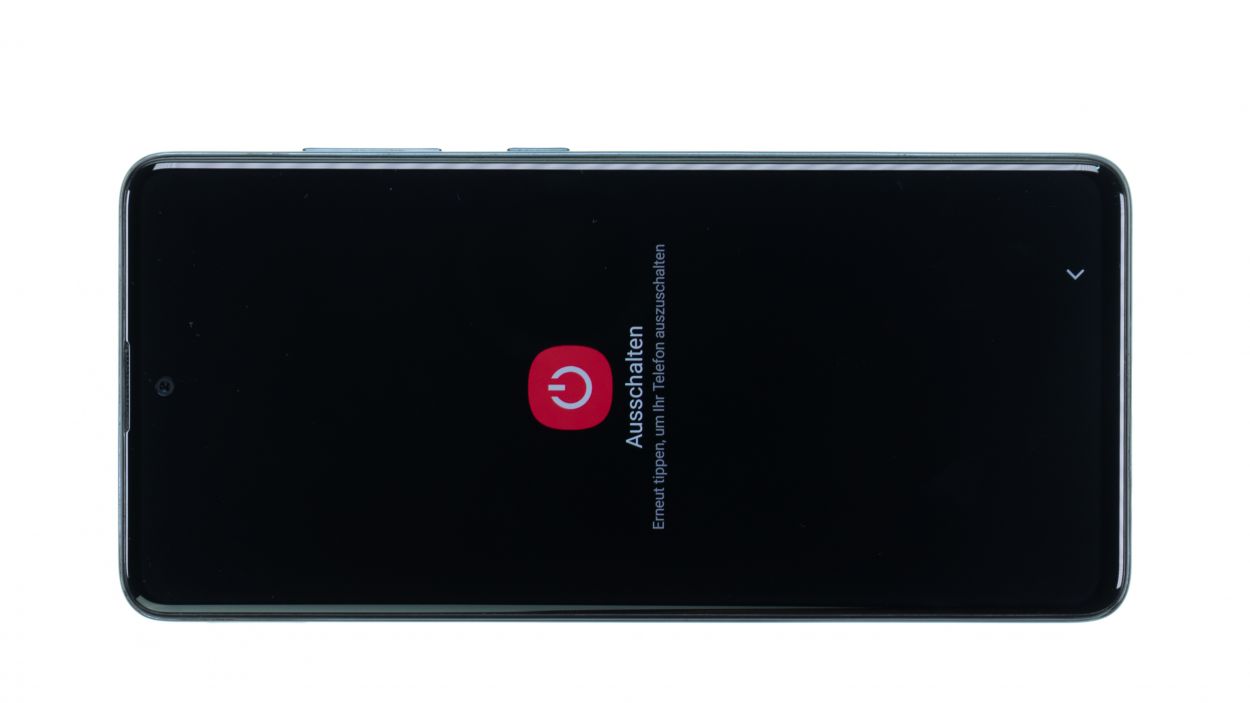
– Alright, let’s get this party started! First, press and hold both the side and volume down buttons at the same time for a few seconds.
– Next, tap on ‘Switch off’ in the menu that pops up.
– Your phone will gracefully shut down in just a few seconds. Easy peasy!
Step 2

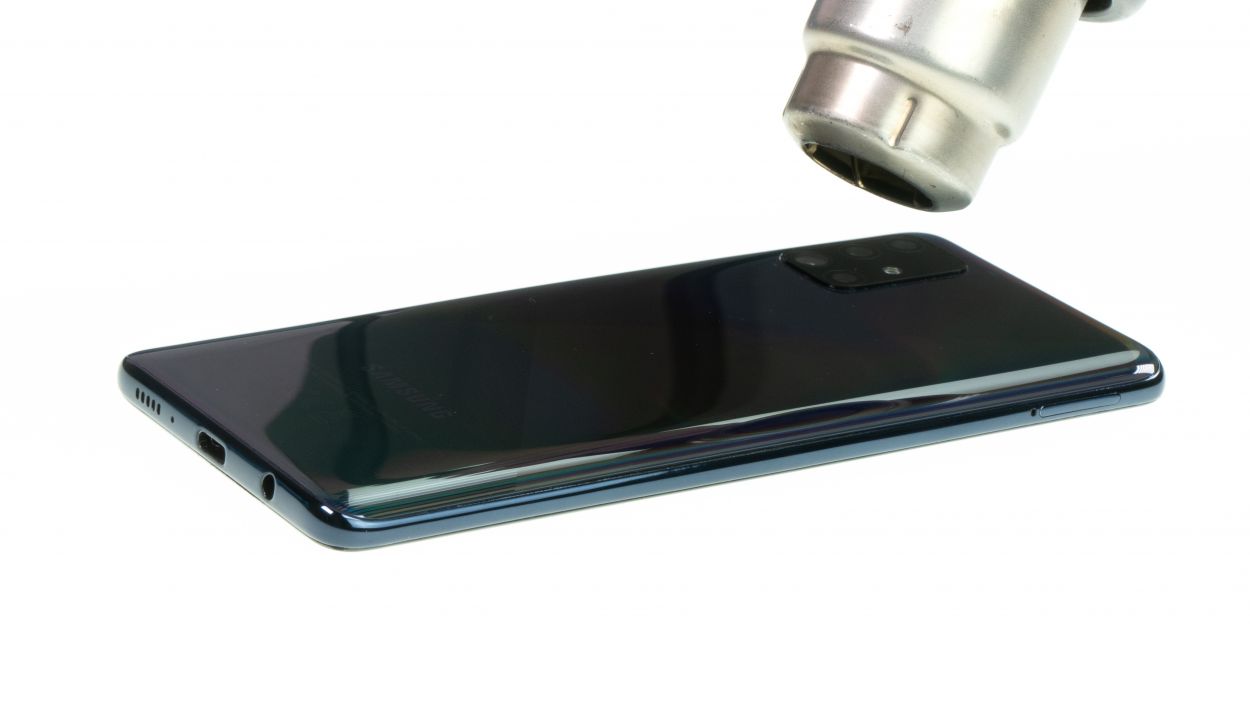
Here’s a handy tip: When heating up the edge of the back cover, make sure it’s warm enough to touch but not so hot that it feels like you just pulled it out of a volcano. Keep it comfy for your fingers!
– Alright, let’s get this started! First, flip your phone over so the screen is facing down on a nice, cozy surface.
– Now, take that hot air device and gently glide it along the edge of the back cover. Keep it moving for even heating!
Tools Used
- heat gun to heat parts that are glued on so they’re easier to remove.
In most cases, you can also use a hairdryer.” rel=”noopener”>Heat gun
Step 3

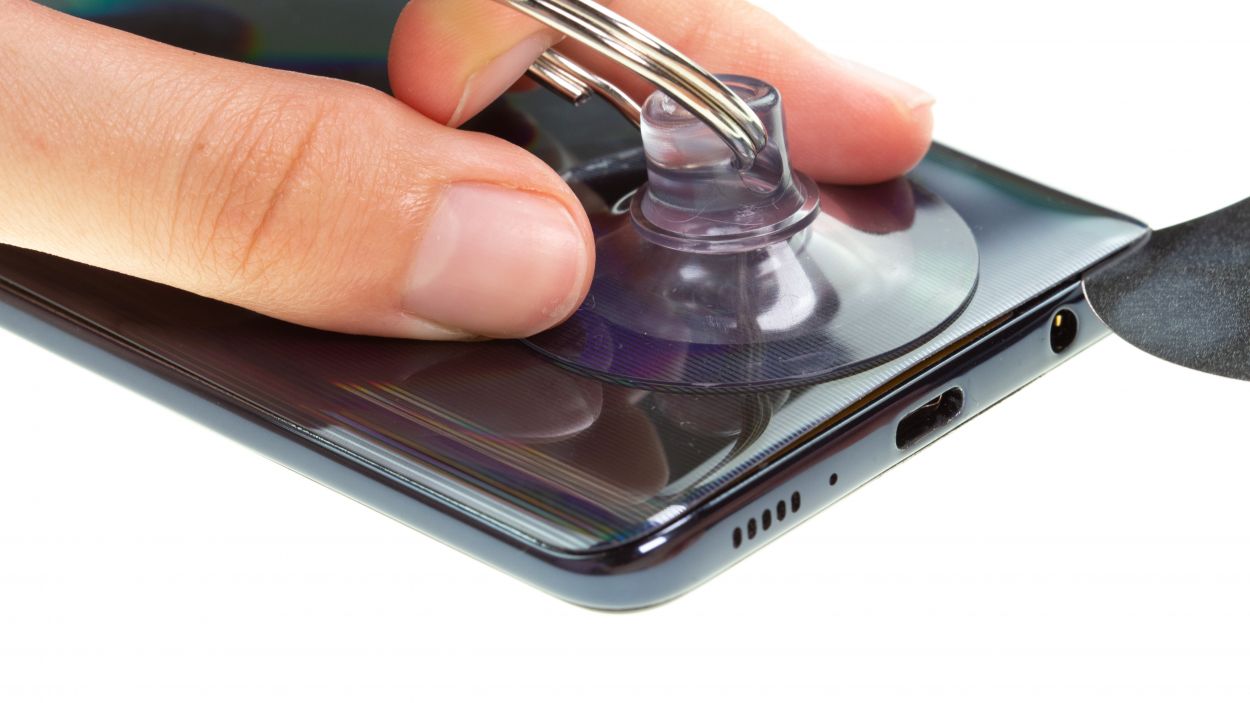
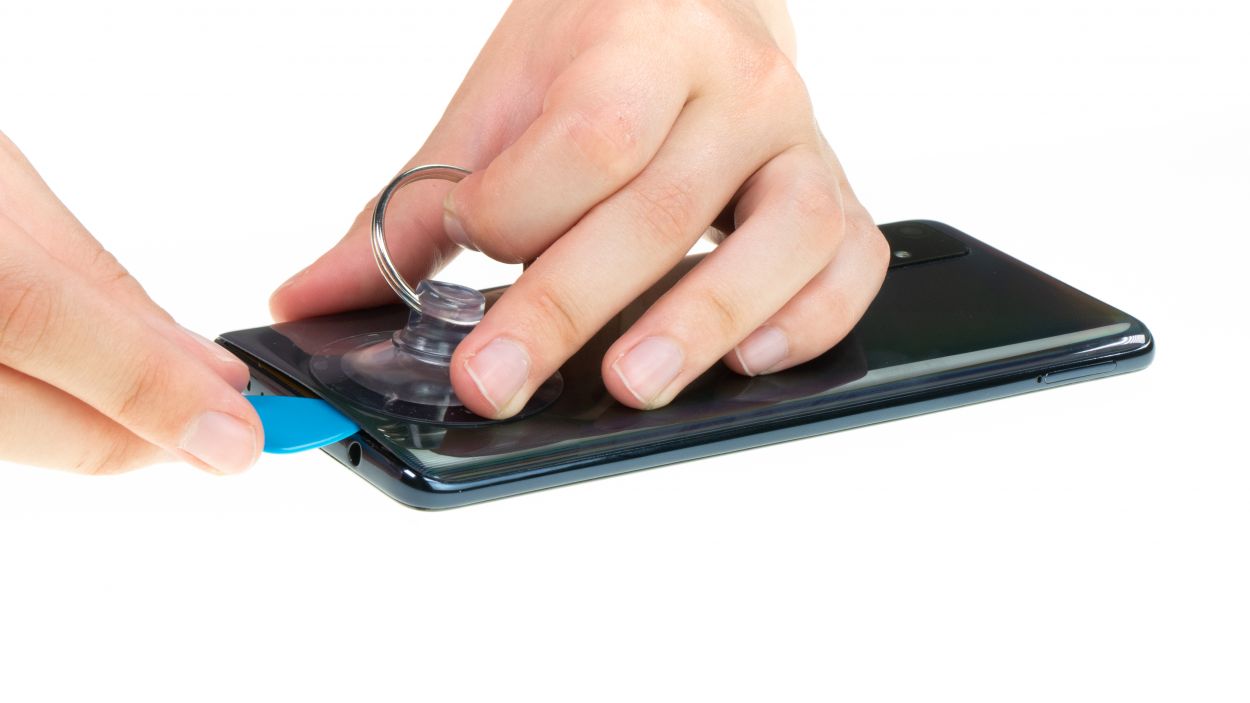
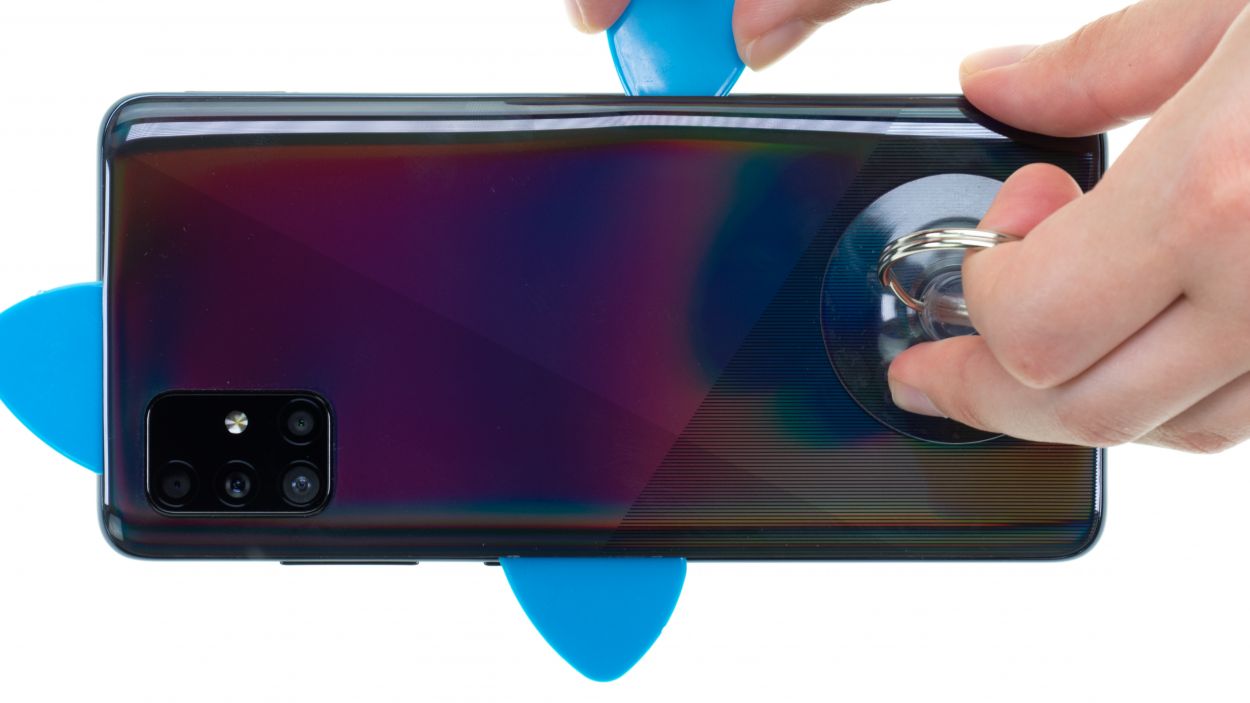
– Grab a suction cup and stick it on the lower part of the back cover. Give it a gentle pull upwards to create a tiny gap between the back cover and the middle frame—easy does it!
– While you’re at it, slide a flat, stable tool into that gap and gently wiggle it to make it a bit wider. Our favorites for this job are the iFlex and some trusty flat plastic picks. You’ve got this!
Just a heads-up: if you decide to open up your Galaxy A51, you might kiss that manufacturer’s warranty goodbye!
The iFlex is crafted from ultra-thin, sturdy metal and does have some sharp edges. To keep your device’s frame looking fresh and scratch-free, we suggest kicking things off with the iFlex at this stage, and as soon as you can, switch to a flat plastic pick. You’ve got this!
Tools Used
- Flat Picks
- screen and the frame. The practical iFlex is made of stainless steel and sits comfortably in the hand. This makes it the perfect assistant for every smartphone repair.” rel=”noopener”>iFlex Opening Tool
- VAKUPLASTIC Suction Cup
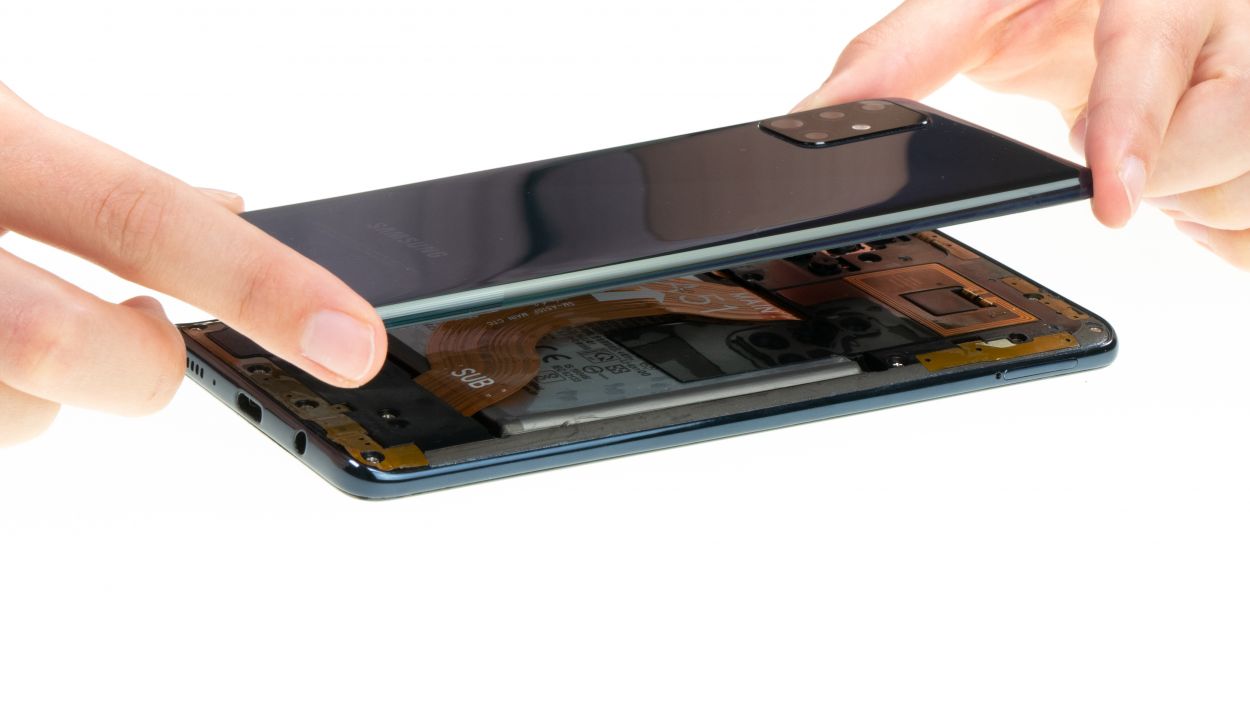
Step 4
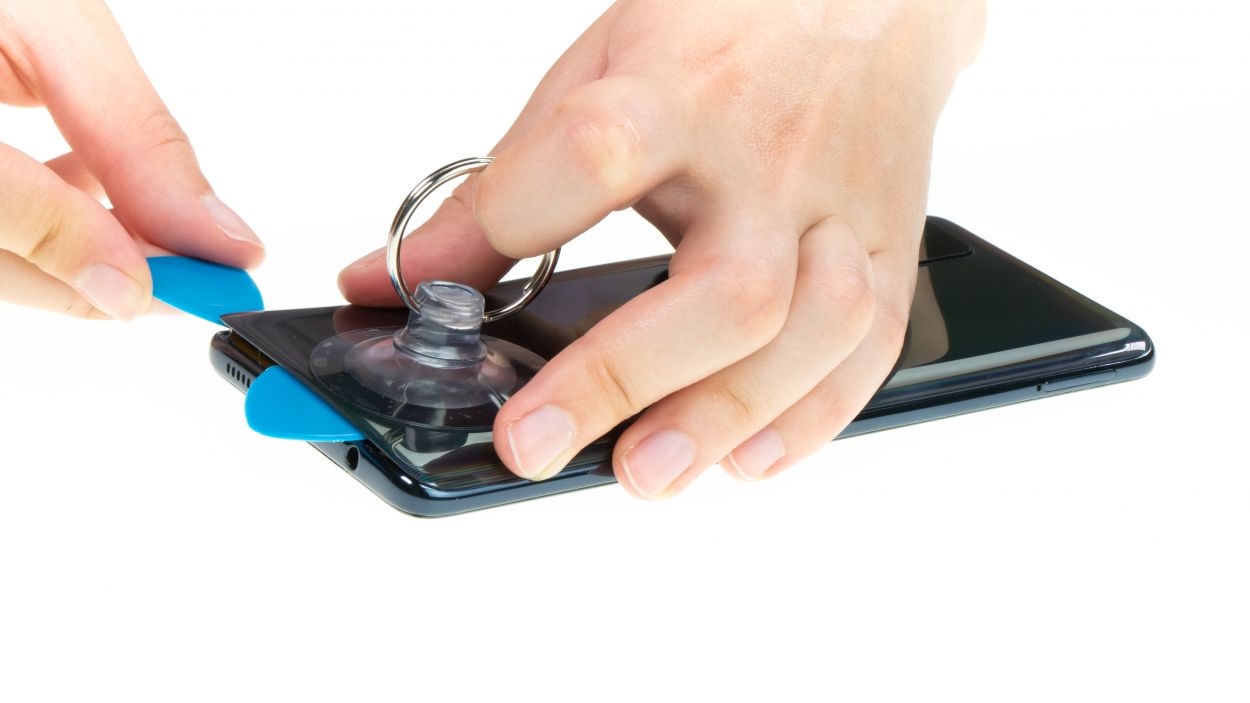

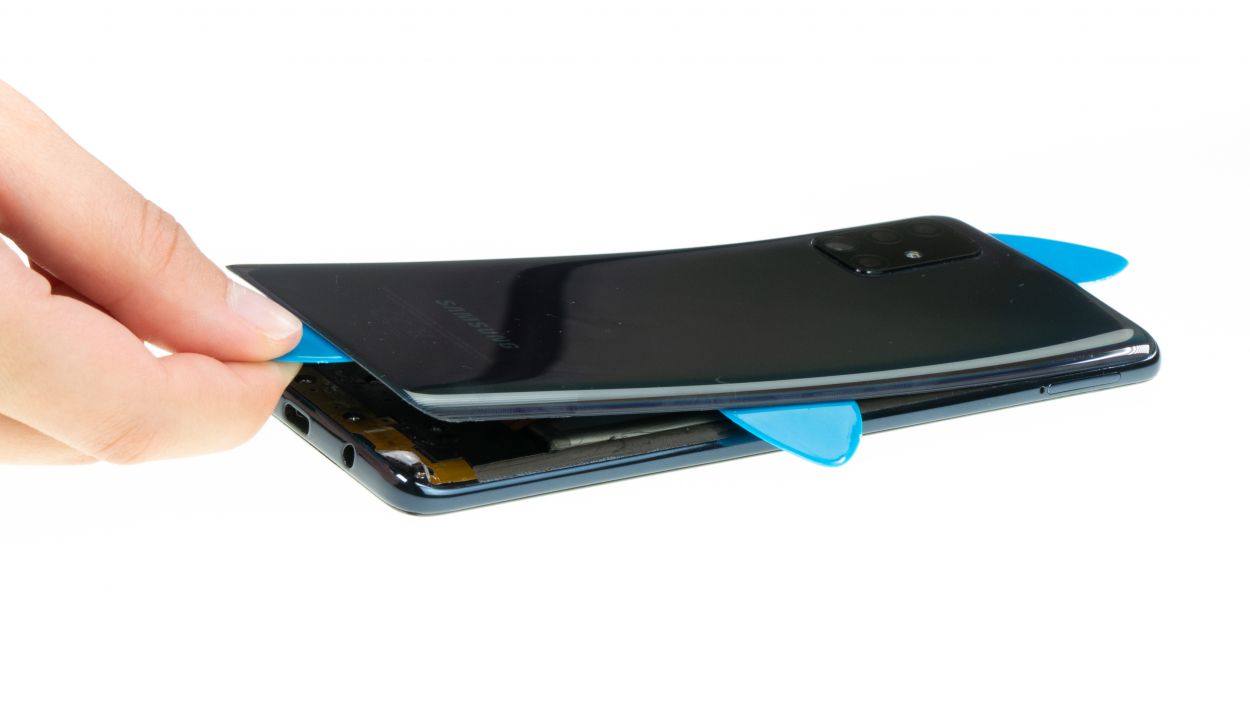
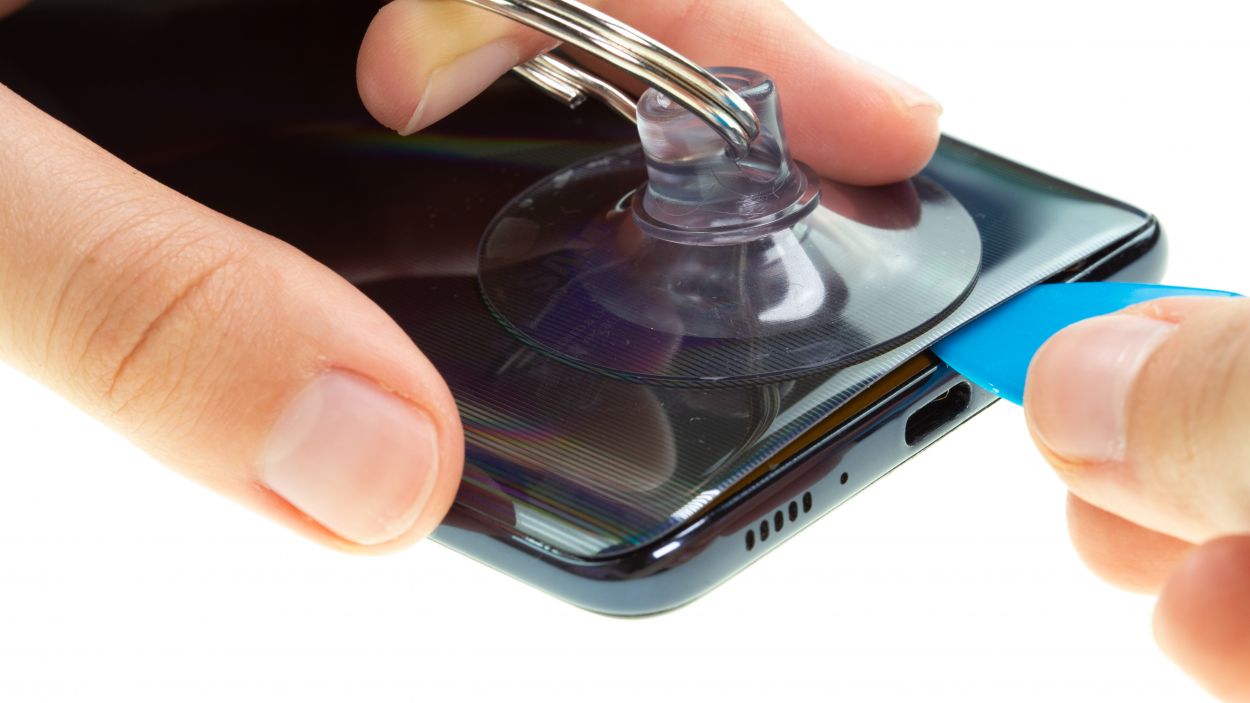
– Now that you’ve created a little gap, it’s time to gently peel off the back cover from the middle frame, section by section. Just glide that tool along the edge like you’re painting a masterpiece!
– While you’re at it, give it a little upward push to help it break free from the middle frame. You’ve got this!
Just a friendly reminder: when you’re diving into your Galaxy A51, make sure not to poke your tool too deep inside. We want to keep all those tiny components safe and sound!
Every now and then, pop in some flat picks at the loosened spots of the back cover frame to keep that pesky adhesive from sticking back together. Just flip those picks from the pointy side to the wide side for best results!
Tools Used
- heat gun to heat parts that are glued on so they’re easier to remove.
In most cases, you can also use a hairdryer.” rel=”noopener”>Heat gun - Flat Picks
Step 5

13 × 3.5 mm Phillips
To keep those little screws and tiny parts from playing hide and seek, grab yourself a screw storage box! Our magnetic pad is a perfect choice for this task. You can organize the removed components just like they were in your phone—it’s like a little puzzle waiting to be put back together!
– First, grab your trusty Phillips screwdriver and loosen all the screws that are holding the middle frame snugly against the display. Let’s get that frame ready for action!
Tools Used
- SIM card slot. This tool is designed especially for ejecting the SIM card from all iPhones and iPads, and fits perfectly into the appropriate opening.” rel=”noopener”>SIM Tool
- Wiha PicoFinish Phillips Screwdriver PH00
- Magnetic Pad
Step 6


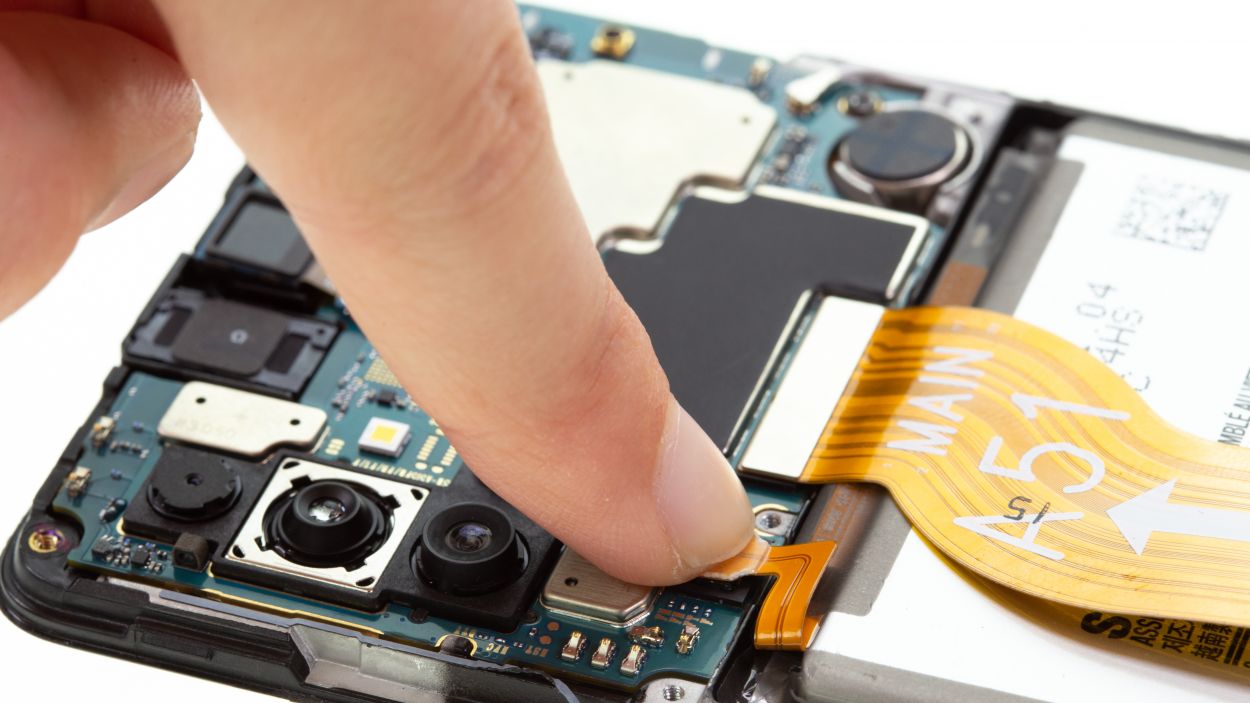
When you’re about to detach that battery connector, start from the side without any tiny components hanging around. Trust us, it’s the best way to keep everything safe and sound!
– Grab a solid plastic lever tool and slide it gently beneath that battery connector. With a little care, lift it off! We suggest using a handy plastic spudger for this job—it’s like the superhero of tools!
Tools Used
Step 7
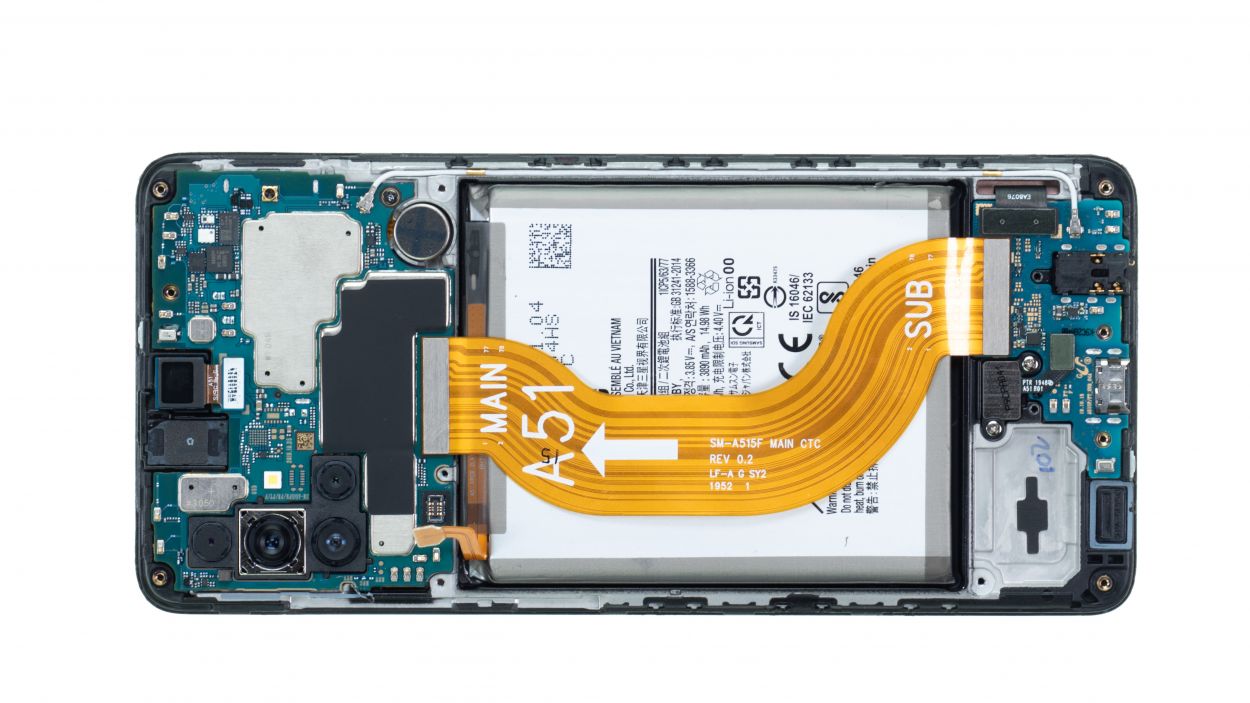
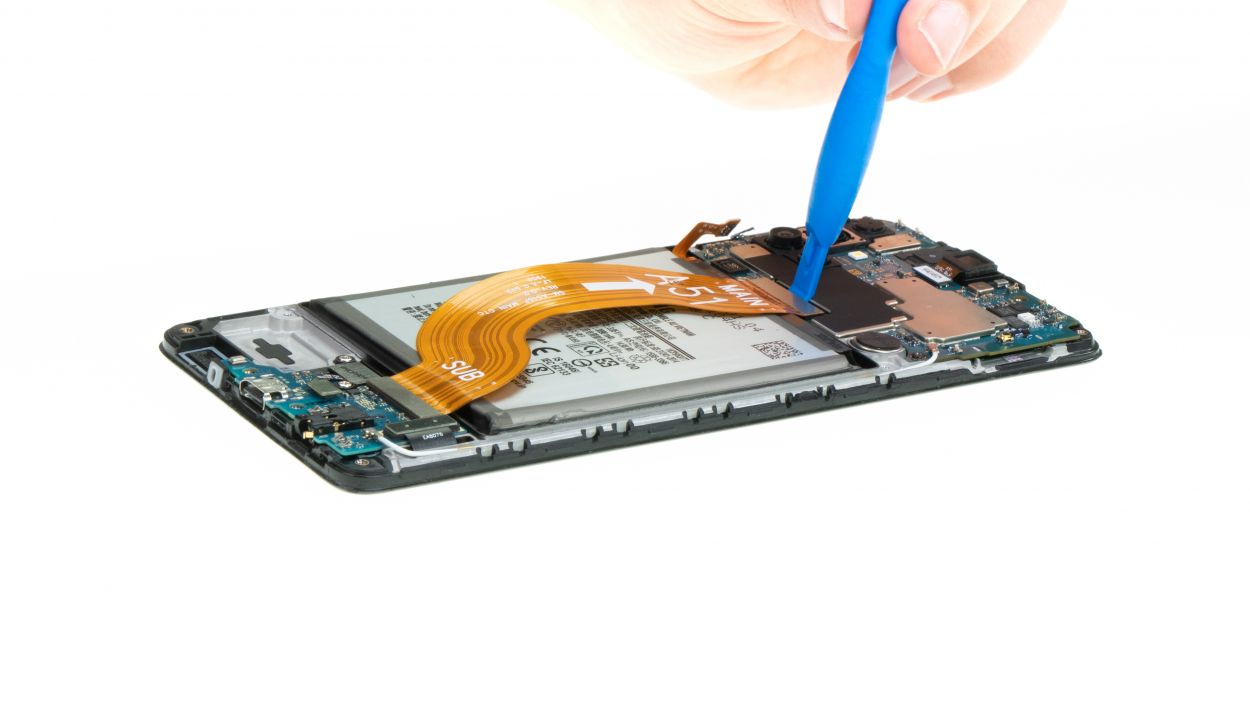
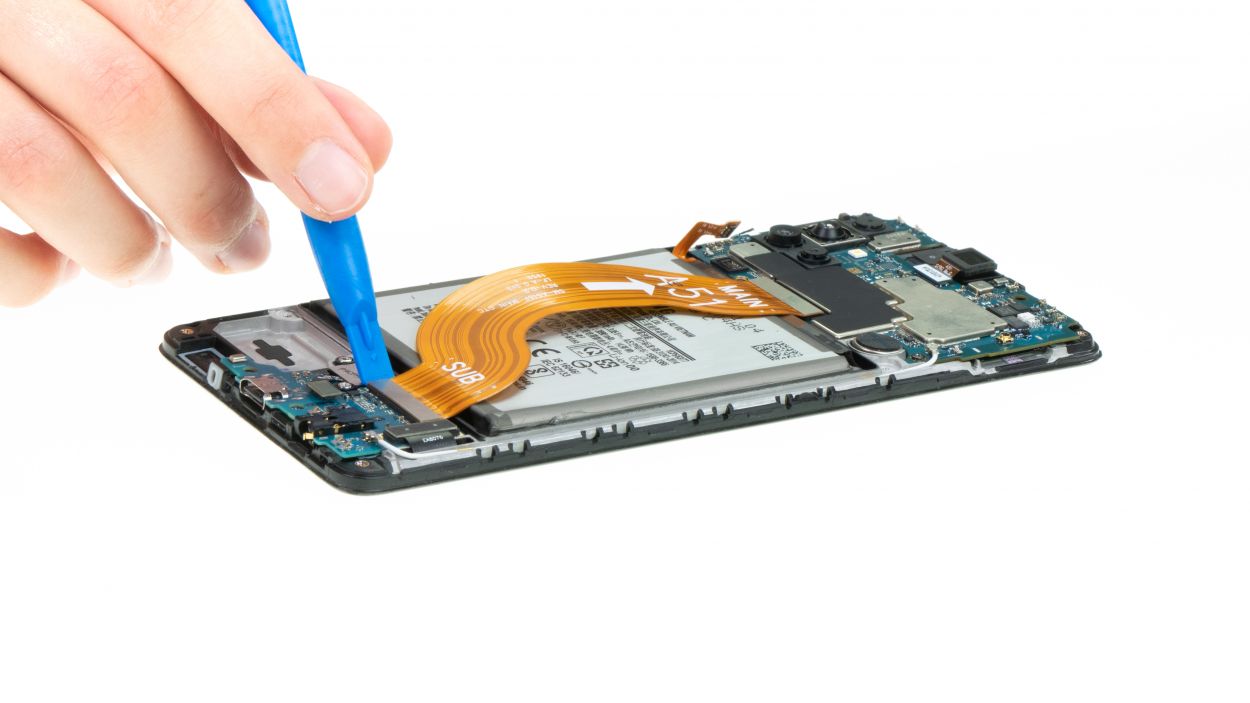
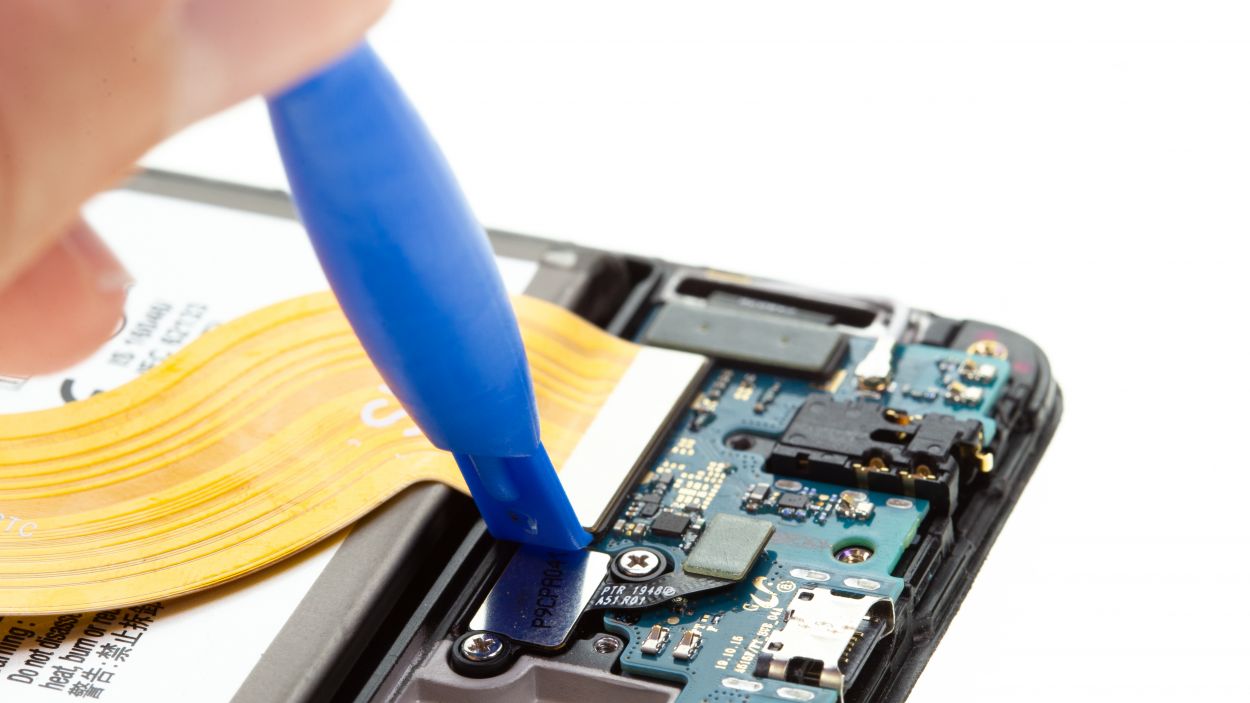
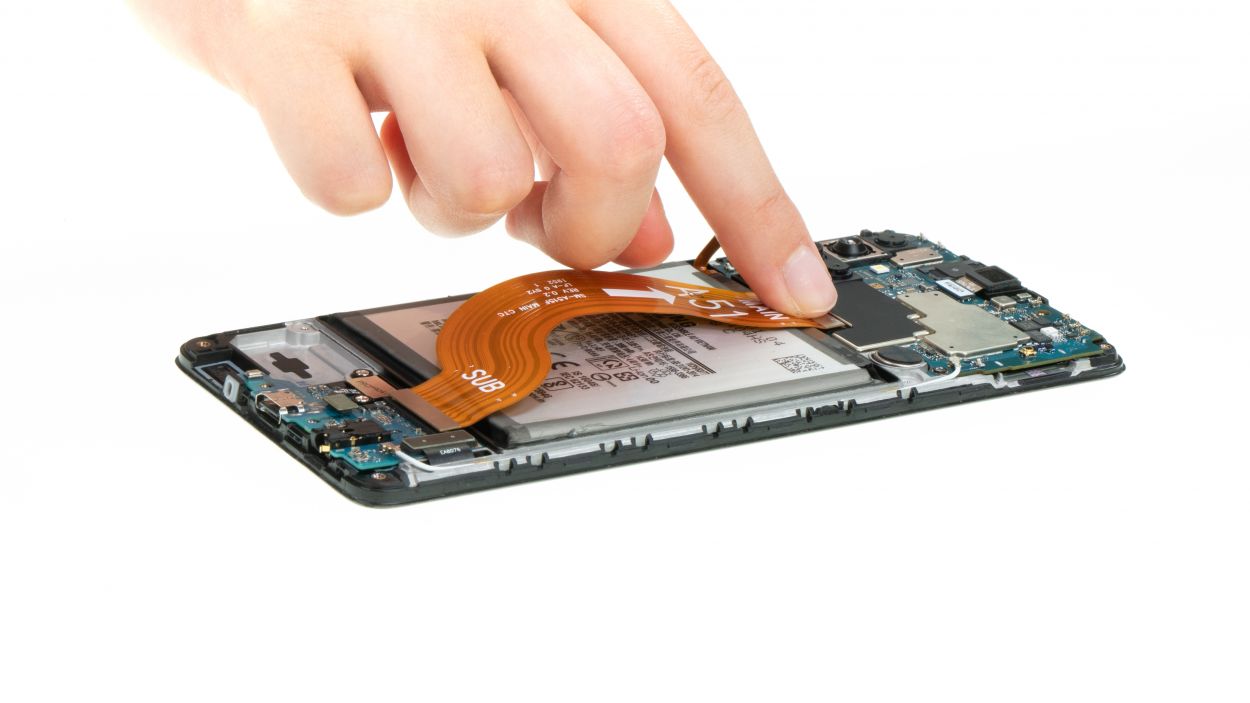
When you’re about to disconnect those flex cable connectors, remember to kick things off from the side that’s free of tiny components. It’s the best way to keep everything in one piece and avoid any mishaps!
– Grab your trusty plastic spudger and gently slide it under each flex cable connector, one at a time, giving them a little lift as you go. Careful now, we want to keep everything intact!
– Once you’ve got them all free, set that flex cable aside like a pro.
Tools Used
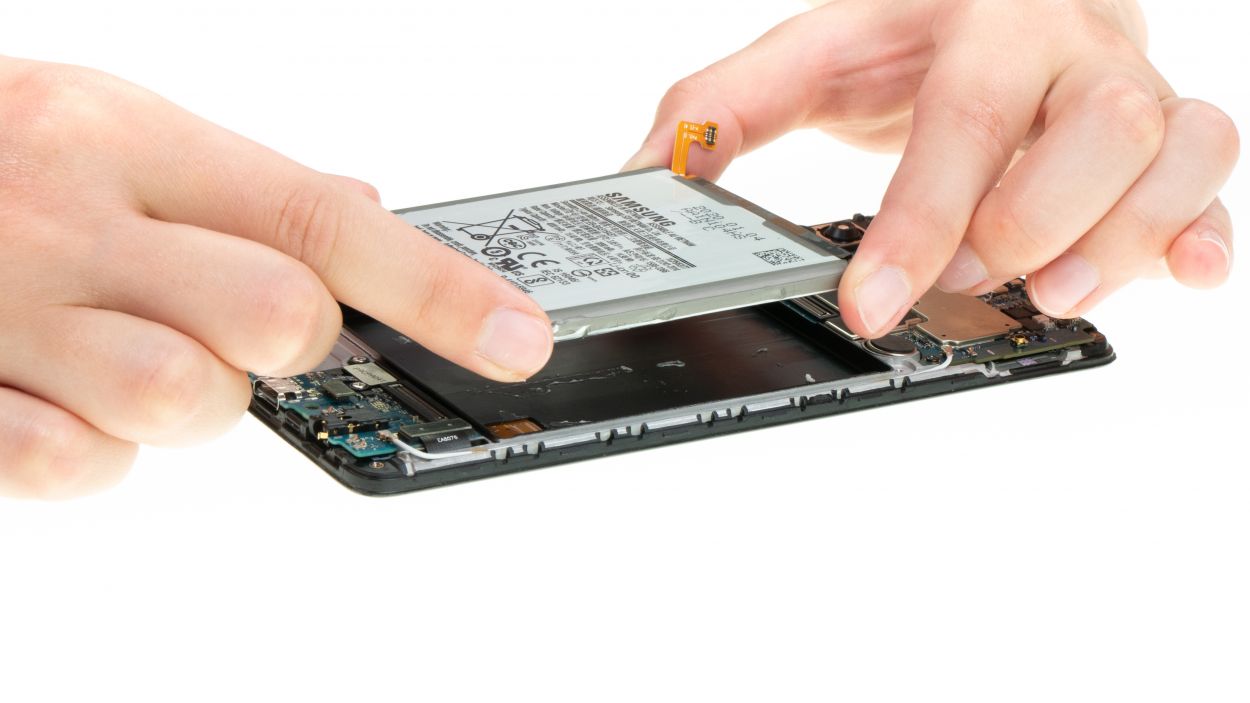
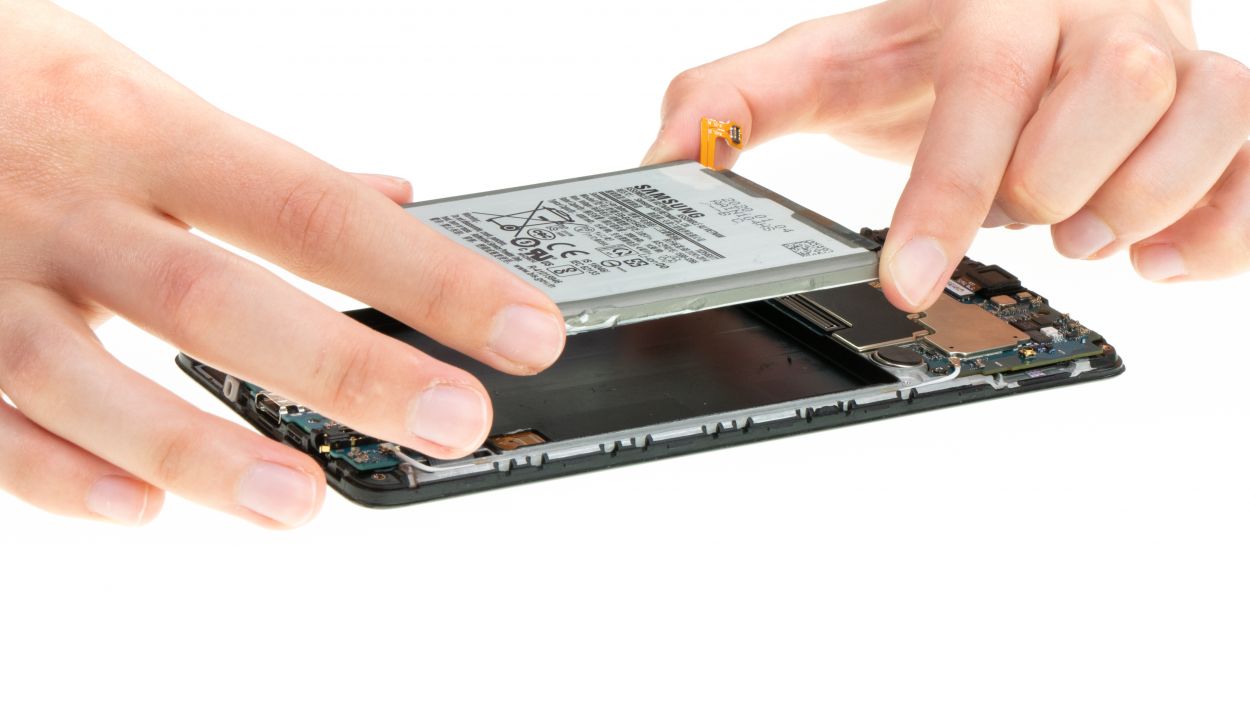
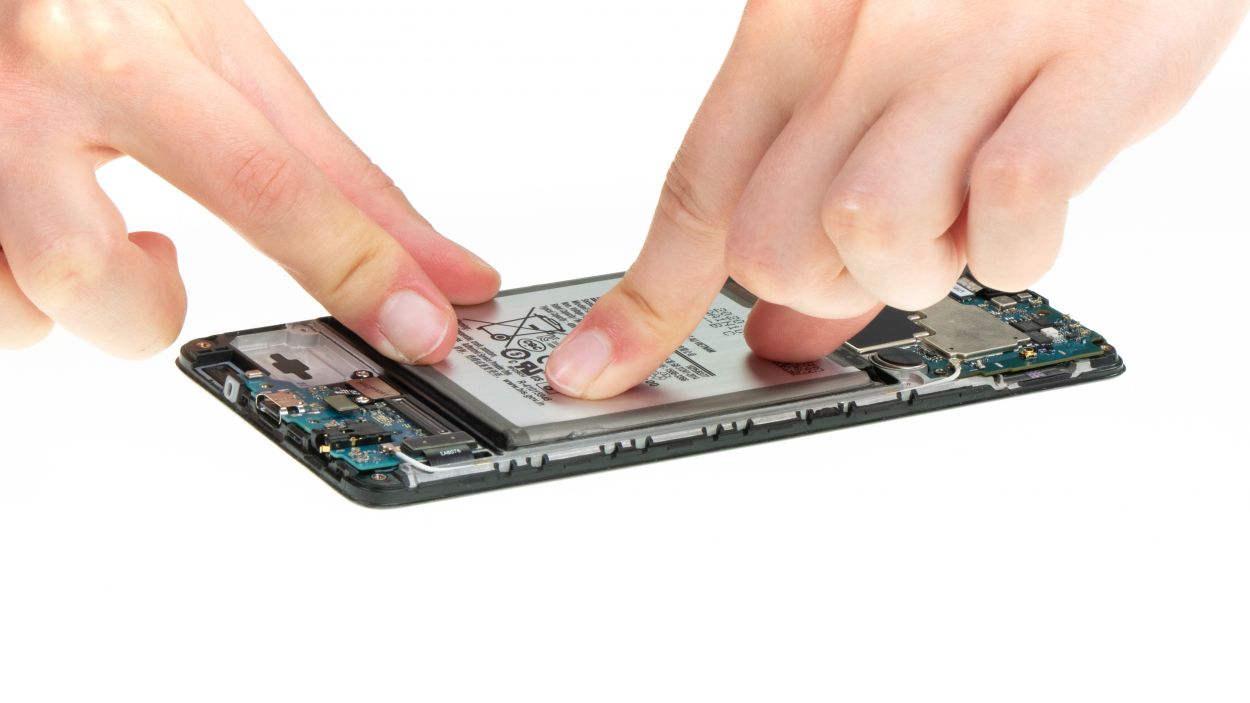
Step 8
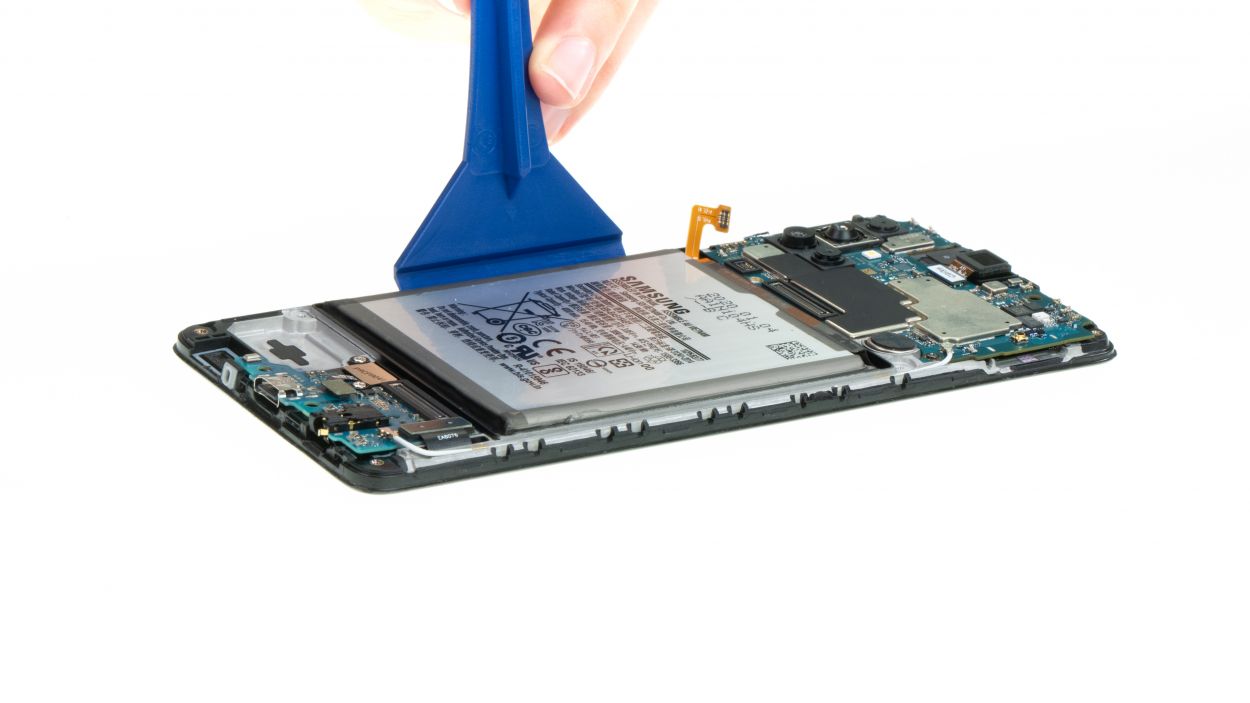
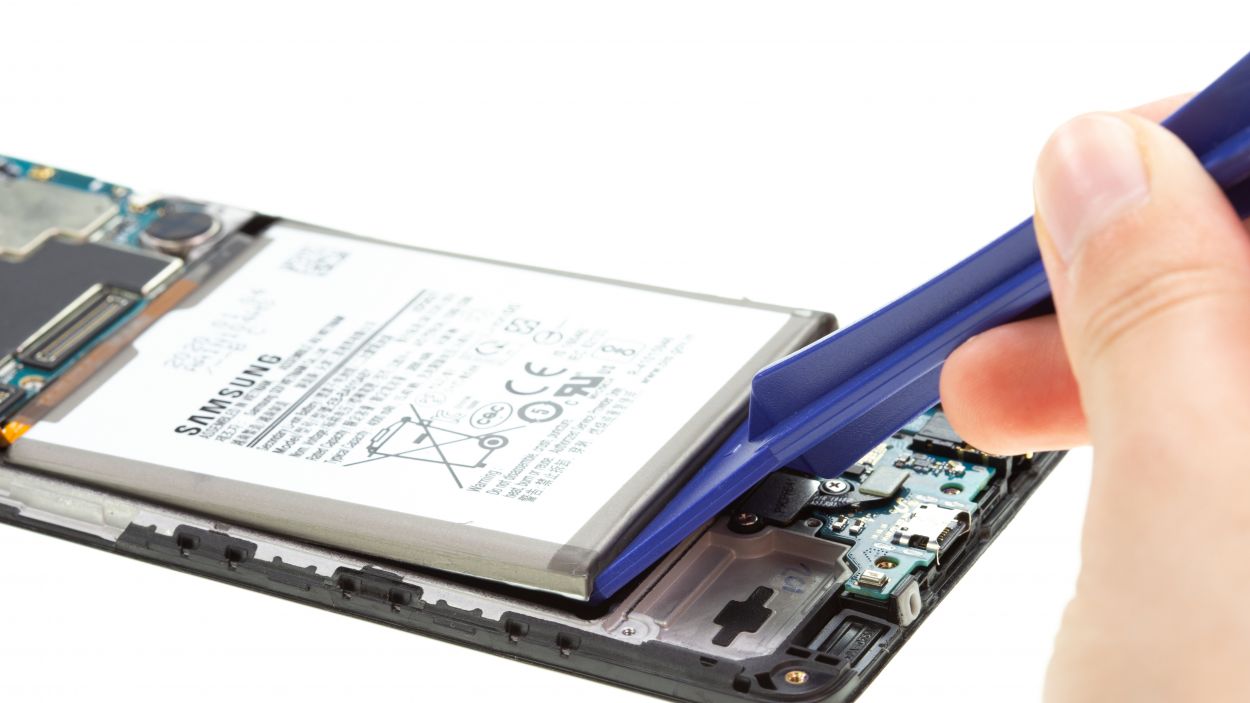
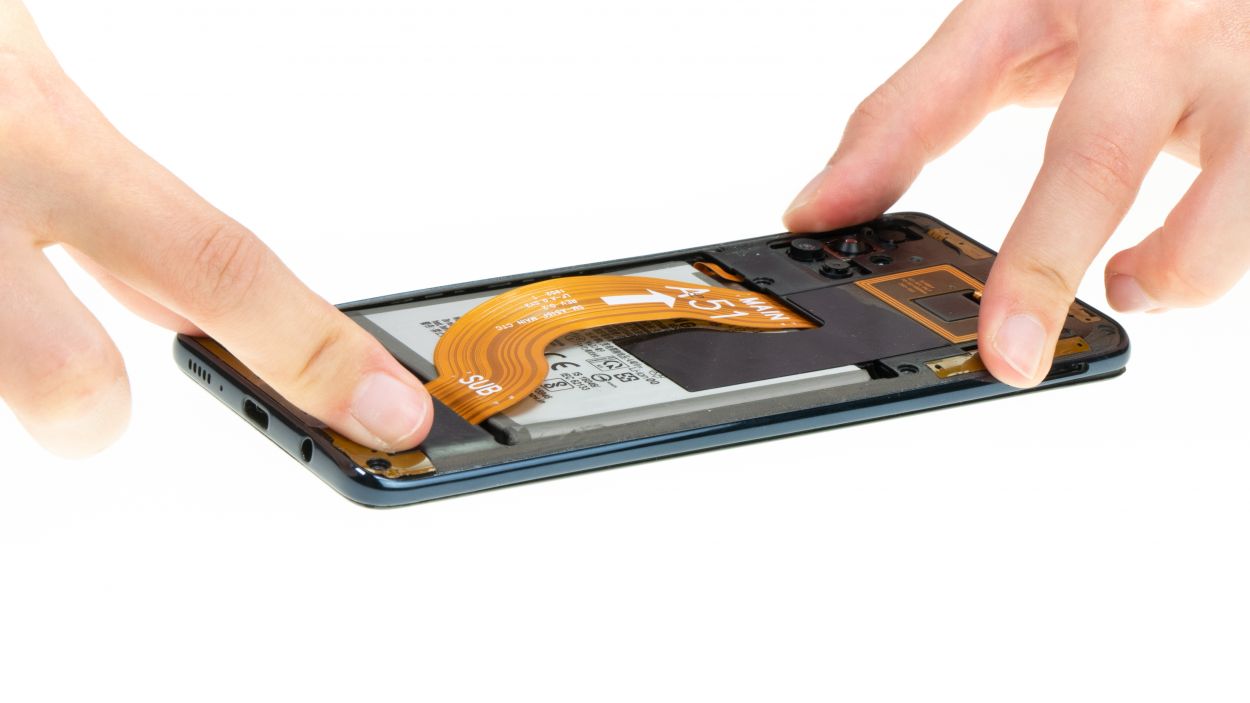
– First, flip your phone upside down so the screen is facing up, and let that hot air flow evenly over the battery area—like giving it a warm hug!
– Now, flip the display back over and grab a sturdy plastic tool. Slide it under one edge of the battery and gently lift it up. A battery spudger works wonders for this!
– If the battery is feeling a bit loose, take a flat, flexible tool like the iPlastix and slide it underneath to fully detach it from the display unit. You’re doing great!
Tools Used
- heat gun to heat parts that are glued on so they’re easier to remove.
In most cases, you can also use a hairdryer.” rel=”noopener”>Heat gun - battery? Then the iPlastix with its large blade will help you. The practical assistant is made of flexible, especially sturdy plastic and lies comfortably in the hand. Thanks to its design, you can even get into smaller gaps, for example to lift the screen or to prevent it from sticking together again.” rel=”noopener”>iPlastix Opening Tool
- Battery Spudger
Step 9
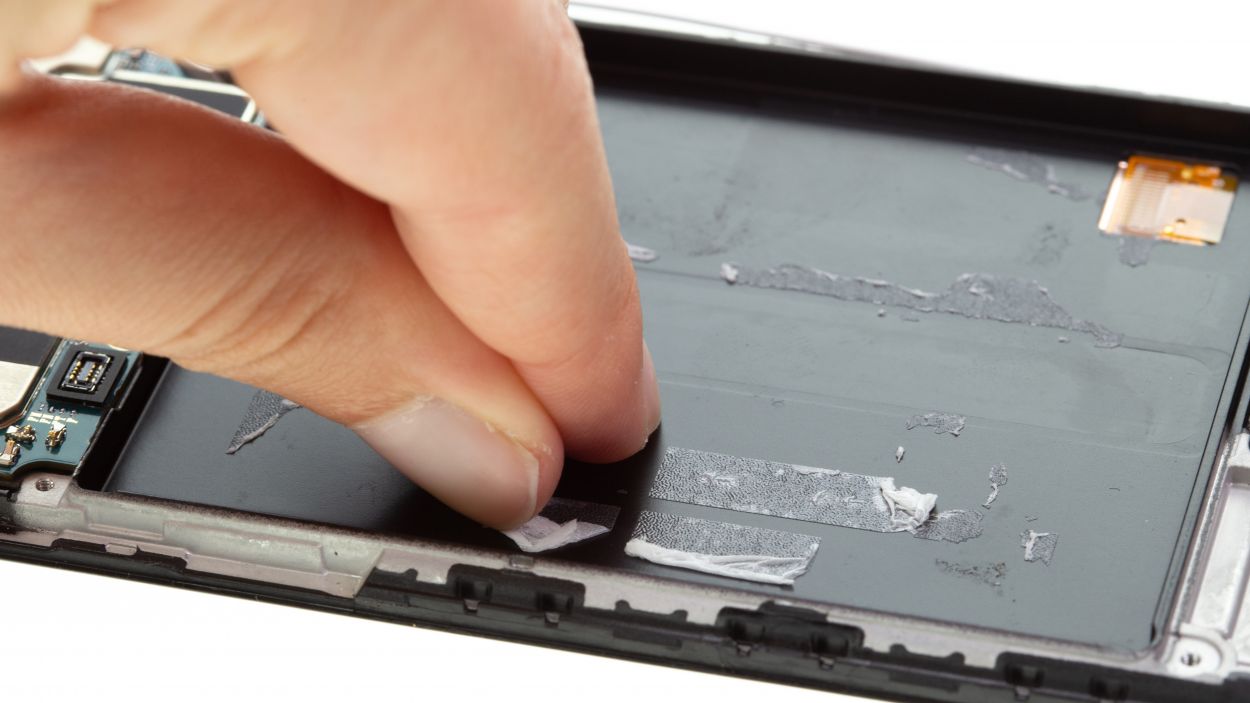
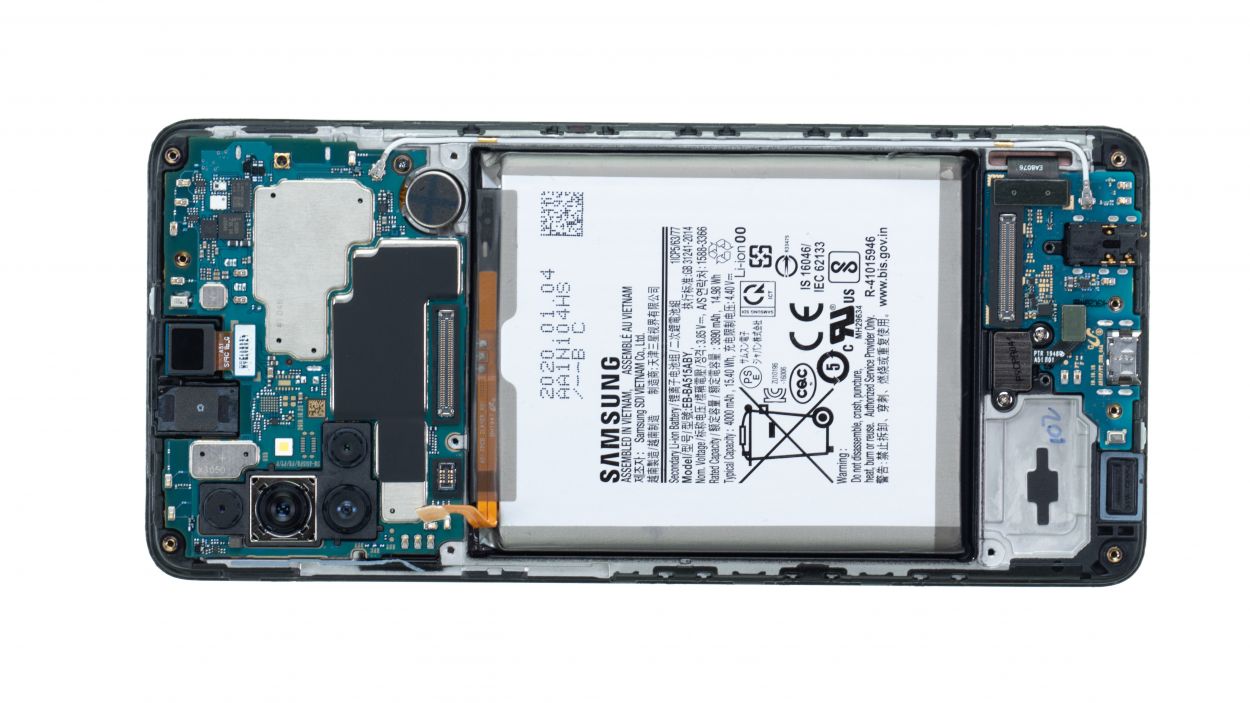
– To ensure that the new battery fits snugly in your device, start by cleaning off any leftover adhesive from the inside of the display—let’s make it nice and tidy!
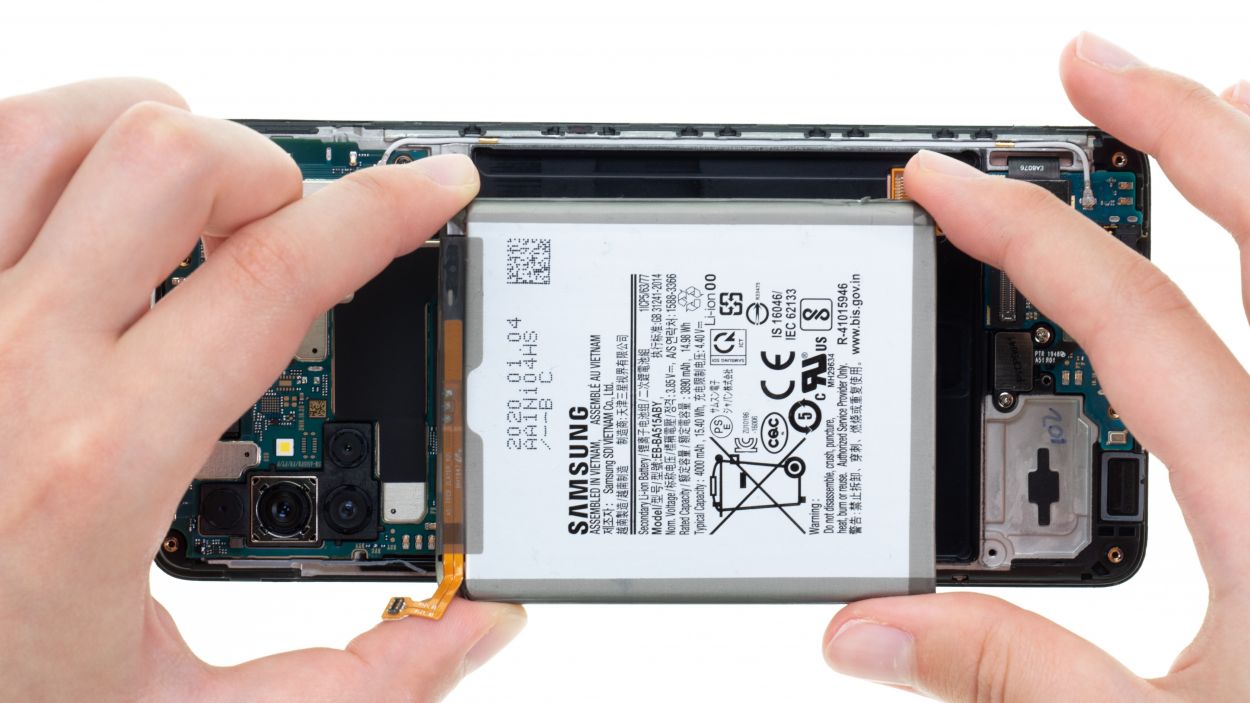
– Next up, peel off all those pesky protective films from the adhesive surfaces of your shiny new battery. We want it to stick like glue!
– Now, gently place the new battery into its designated spot in the display unit and press down firmly. This will help the adhesive make a solid bond all around. You’ve got this!
Step 10
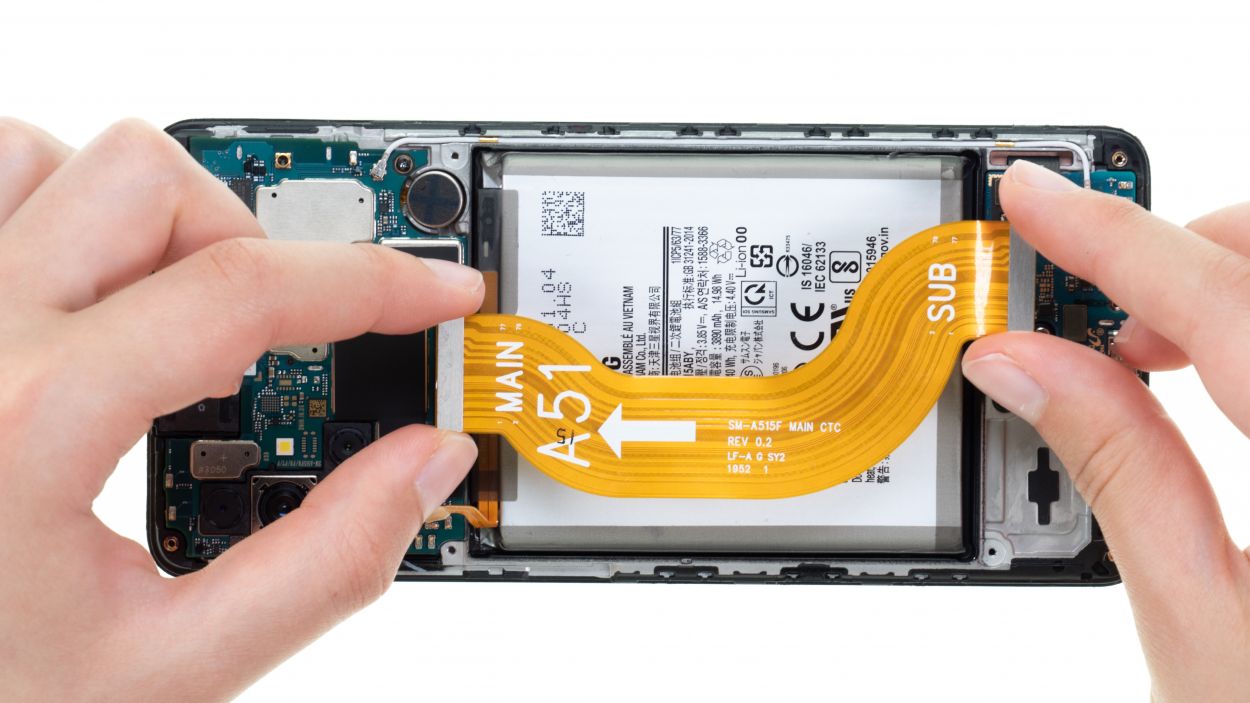
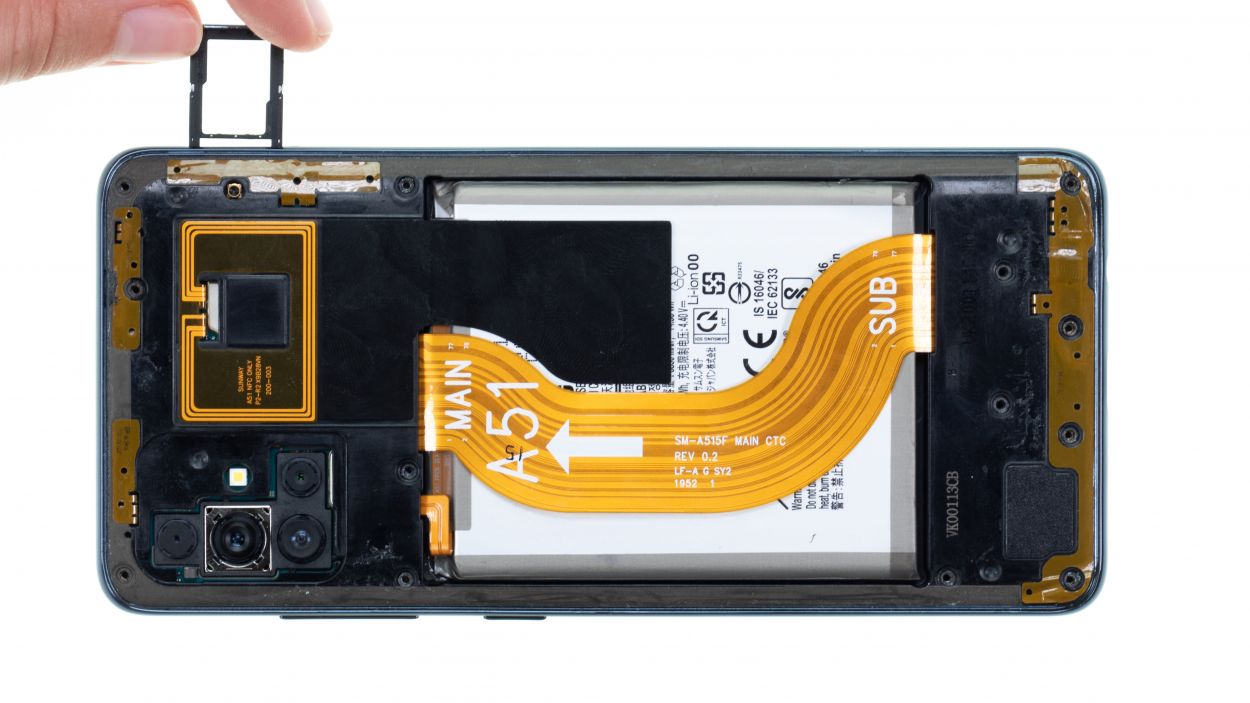
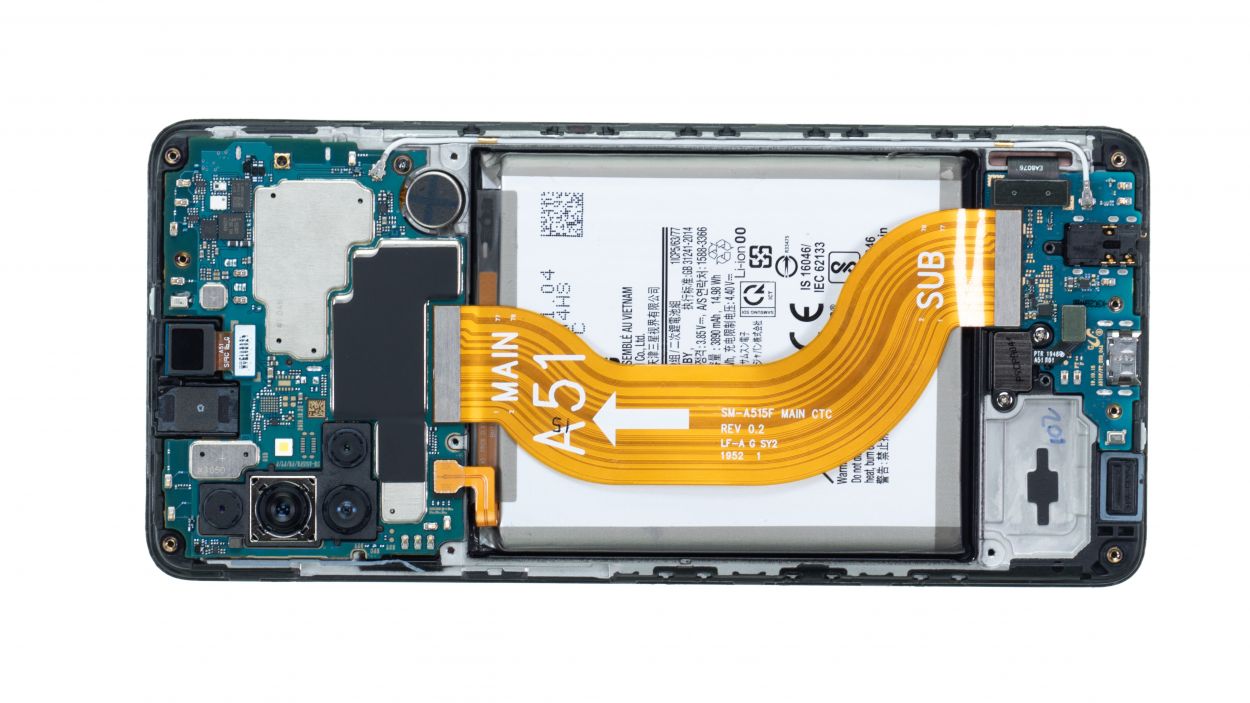
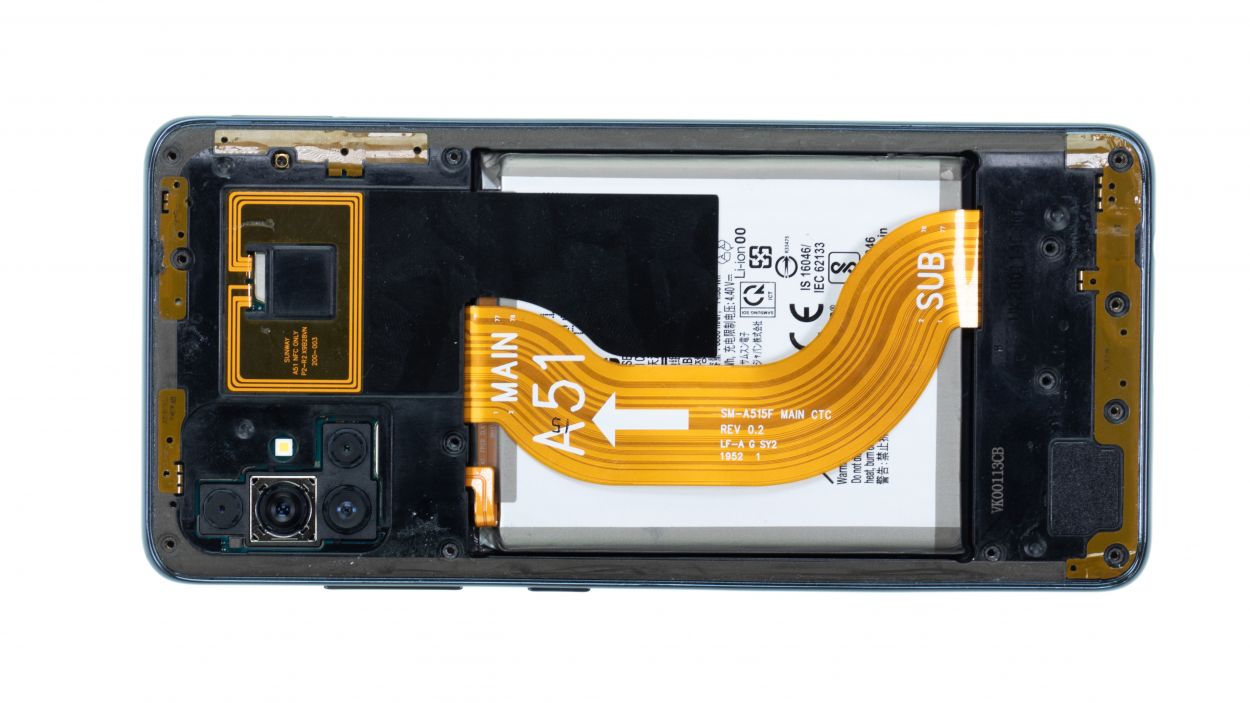
The labels Main and Sub on the cable are your best pals for getting everything lined up just right. Trust them to guide you!
– Get that flex cable all lined up just right!
Step 12

12 × 3.5 mm Phillips
Hey there! Just a little reminder: make sure to line up that middle frame just right. You can use the camera’s little nook as your trusty guide!
– Carefully set the middle frame onto the display unit and give it a solid press to ensure it clicks into place all around. You’re doing great!
– Now, slide that SIM tray into the middle frame of your Galaxy A51 like a pro.
Tools Used
Step 13
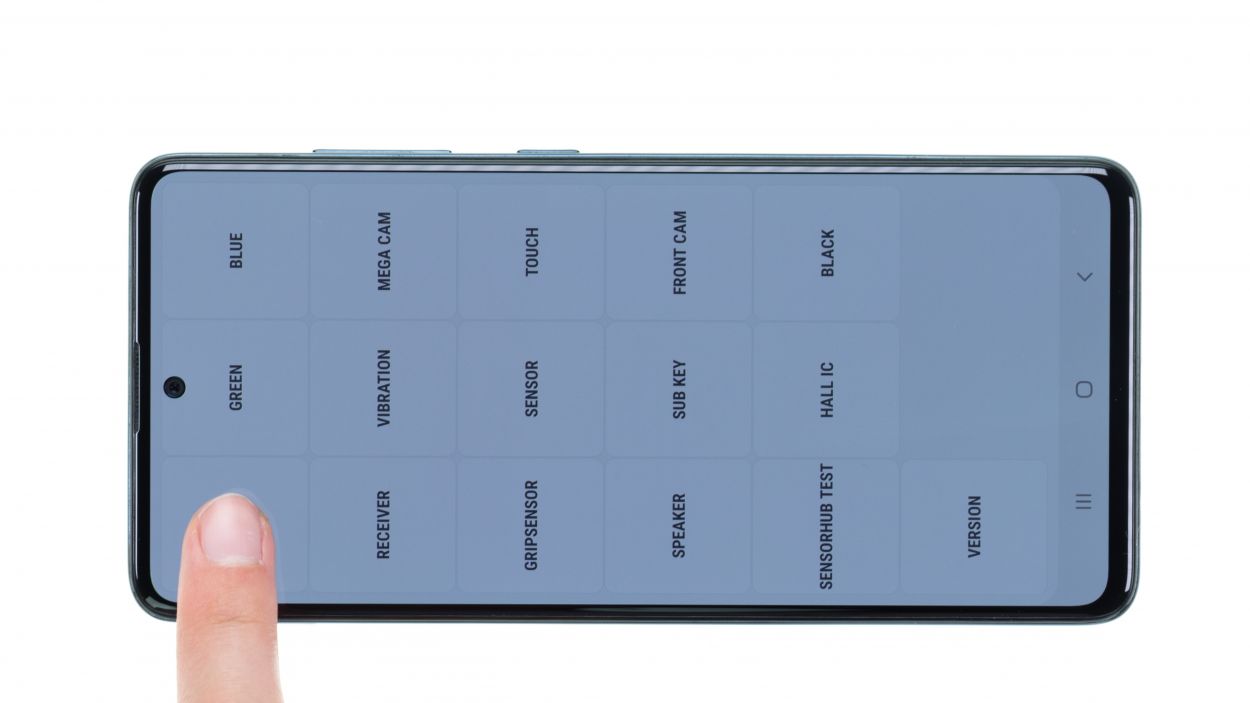
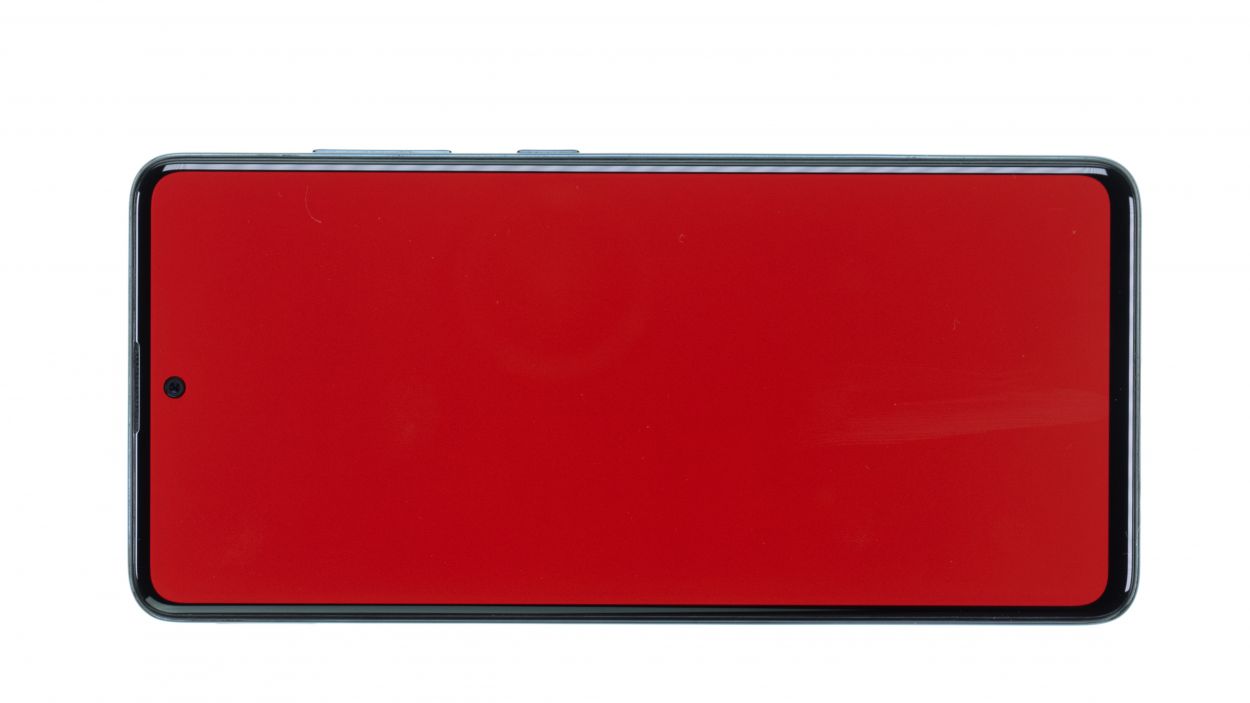
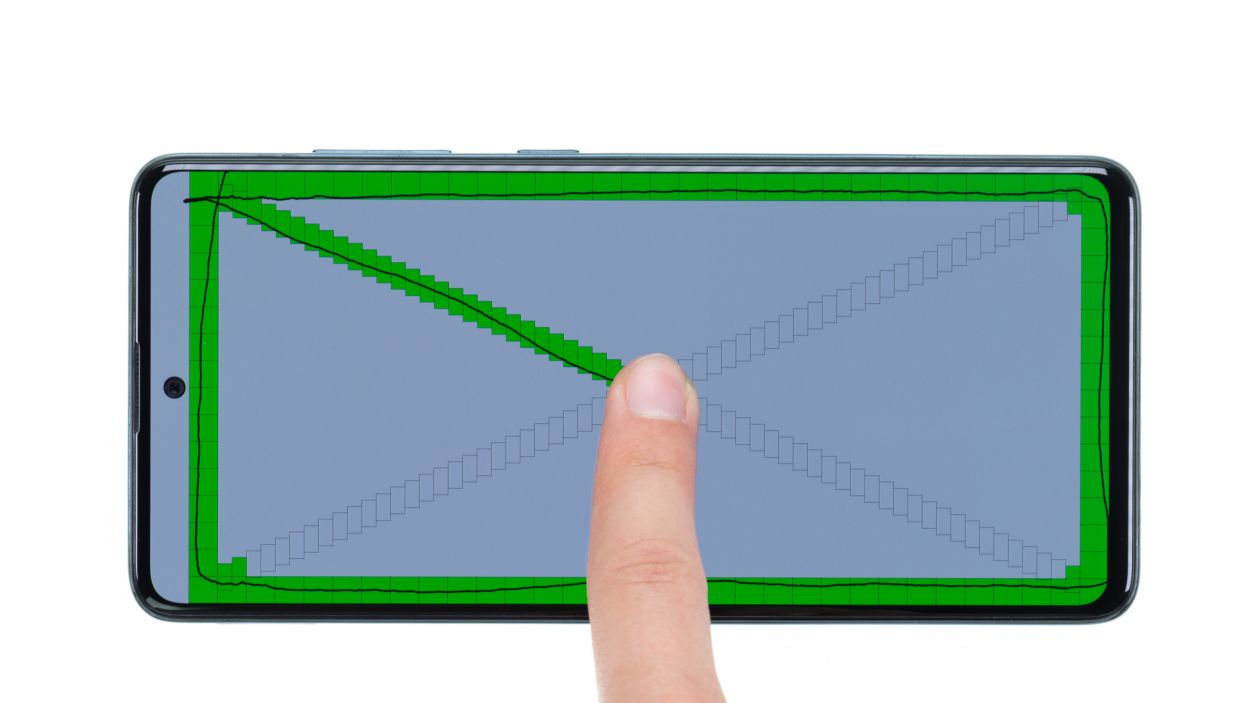
Don’t forget to give a little love to other parts too, like the vibration motor and speakers. Testing them out can be a fun part of your repair adventure!
Step 14
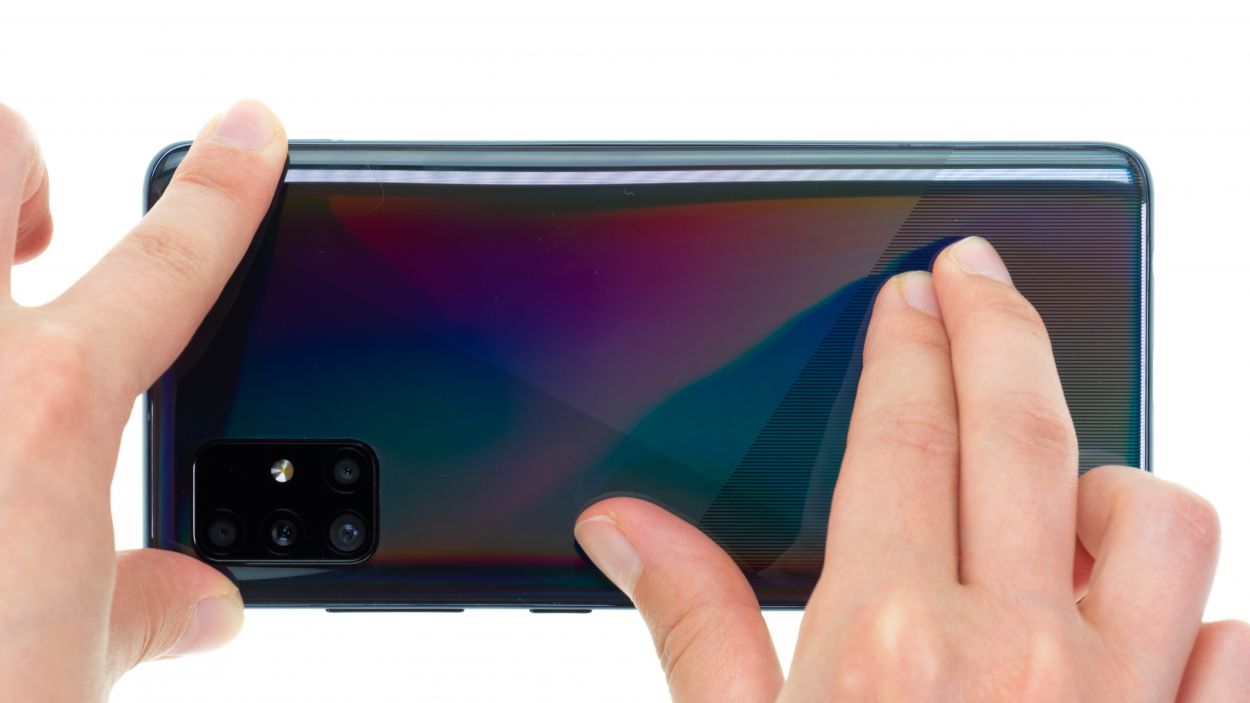

– Alright, time to get that back cover snug as a bug! Start by lining it up perfectly over the display unit and the middle frame.
– Now, give it a gentle press all around the edges with your fingers—think of it as giving your phone a little hug!
– To wrap things up, give that back cover another warm-up session and then place some books on top for about half an hour. This helps the glue settle in and bond like best friends!
Tools Used
- heat gun to heat parts that are glued on so they’re easier to remove.
In most cases, you can also use a hairdryer.” rel=”noopener”>Heat gun