Phone Screen Repair Stores: Top 5 Smart Choices
The Moment Your Screen Shatters: Understanding Your Repair Options
Phone screen repair stores offer varying levels of service, cost, and quality. Here’s what you need to know when comparing your options:
- Authorized providers (Apple, Samsung, Google) use original parts but cost more and may take longer.
- Independent local shops offer competitive pricing ($29-$149 typical range) and faster service (often under 1 hour).
- Chain repair stores like uBreakiFix (700+ locations) provide standardized service with 1-year warranties.
- Retail locations (Staples, Best Buy) offer convenience but may require mail-in service for some models.
- Key factors to compare: technician expertise, part quality (OEM vs. aftermarket), turnaround time, warranty coverage, and customer reviews.
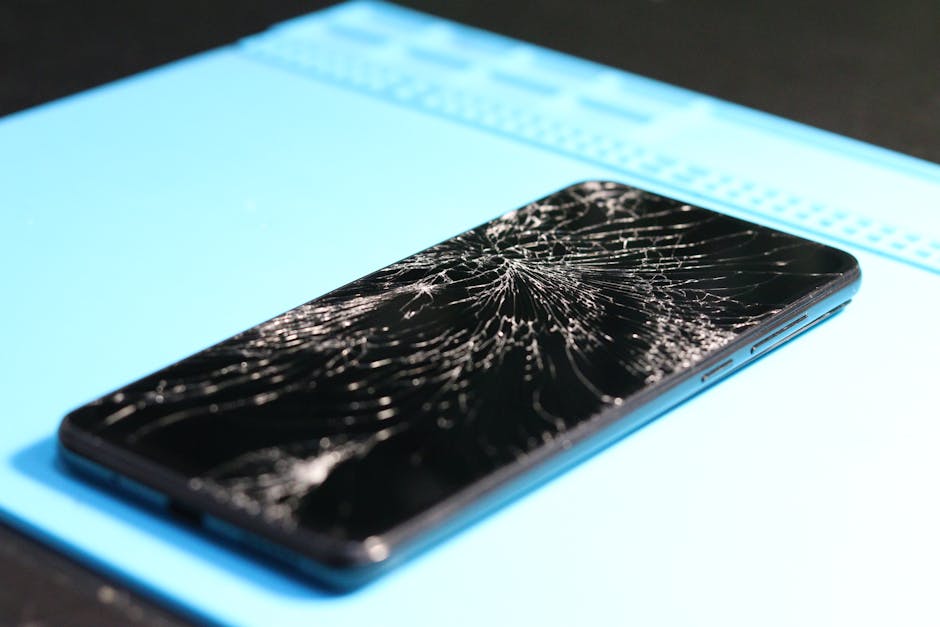
That crack across your phone screen is more than an annoyance—it’s a crisis. You rely on your phone for everything, and every moment without it feels like you’re disconnected. The good news? Most screen repairs take 45 minutes or less, and you have more options than you might think.
Common culprits behind broken screens are drops, pressure from being sat on, and falls from tables or cars. You’ll know you need a repair if you see visible cracks, dead pixels, unresponsive touch, or strange color lines on your display.
I’m Ralph Harris, and with 20 years of experience repairing electronics and managing phone screen repair stores, I’ve seen it all. My work at Salvation Repair has shown me that the right repair shop can mean the difference between a phone that lasts for years and one that fails within weeks.

Glossary for phone screen repair stores:
The Crossroads: Should You Repair, Replace, or Attempt a DIY Fix?
When your screen cracks, you face a choice: repair, replace, or try a DIY fix? Let’s break down the options.
The repair-versus-replace debate often comes down to cost. A new flagship phone can cost $800 to $1,200+, while professional screen repairs at reputable phone screen repair stores typically range from $29 to $149. For newer iPhones, repairs are around $79, and Google Pixels about $129. Repairing your phone keeps hundreds of dollars in your pocket.
Beyond cost, consider the environmental impact of buying new. Discarded phones become e-waste, filling landfills and consuming resources. Repairing extends your phone’s life, making it a more sustainable choice.
Now, what about that tempting DIY repair video? While saving money is appealing, DIY phone screen repairs rarely end well. Modern screens are complex layers of glass, digitizers, and displays that require specialized tools and expertise to separate.
The risks of going DIY are serious and can lead to more expensive problems. Without proper equipment, you can easily damage internal flex cables, crack the back glass, or fry the motherboard, turning a simple screen repair into a costly logic board replacement. Furthermore, DIY attempts void most warranties, and a single mistake can cause permanent data loss. The cheap parts in online kits often result in dim displays, poor touch response, and screens that crack again with minimal pressure.
Professional phone screen repair stores like Salvation Repair have the training, tools, and quality parts to do the job right. Most repairs take under an hour and come with a warranty. The smart choice is clear: a professional repair saves money, protects the environment, and avoids the headaches of a DIY disaster.
Decoding Your Options: A Look at Different Phone Screen Repair Stores
Once you’ve decided on a professional repair, the next step is understanding the landscape of phone screen repair stores. Not all shops are created equal, and knowing the differences helps you choose the best service in Mississippi, including Laurel, Jackson, and Oxford.

Here’s a breakdown of your main options:
- Authorized Service Centers: These are official repair shops for brands like Apple or Samsung. They use genuine OEM (Original Equipment Manufacturer) parts but are often the most expensive option with longer wait times.
- Independent Local Shops: Shops like Salvation Repair are your neighborhood experts. We offer competitive pricing (screen repairs often start at $29), fast turnarounds, and personalized service that larger operations can’t match.
- Chain Repair Stores: National chains like uBreakiFix offer standardized service across many locations, typically with same-day service and 1-year warranties.
- Retail Locations: Stores like Staples offer repair services, but some models may require mail-in service, leaving you without your phone for 7-10 business days.
Authorized vs. Independent Shops
The choice often comes down to brand-name parts versus practical flexibility. Authorized centers guarantee OEM parts but at a higher cost and with potential delays. Independent shops like Salvation Repair prioritize flexibility and competitive pricing without sacrificing quality. We use high-quality aftermarket parts that often meet or exceed original specifications, saving you money and getting your phone back faster.
What truly sets independent shops apart is personalized service. At Salvation Repair, we’re not a corporate checklist; we’re your neighbors in Laurel, Jackson, and Oxford. We take the time to explain the repair and answer your questions. Learn more about finding a trustworthy phone fixer near you.
What to Expect from Local Phone Screen Repair Stores
When you choose a local phone screen repair store in Mississippi, you should expect convenience and reliability. At Salvation Repair, we understand that being without your phone is disruptive.
That’s why we offer both in-store and on-site mobile services. We can come to your home or office in the Laurel, Jackson, or Oxford area. Explore our mobile on-site phone repair options to see how easy it can be.
Speed is critical. Like many shops, we offer most repairs in under an hour. But our warranty is where we truly stand out. While a 1-year warranty is standard elsewhere, Salvation Repair provides a lifetime warranty on our work. We’re so confident in our repairs that we stand behind them for as long as you own your device. For questions about our warranty, contact us for details.
Choosing a local shop that fixes “any device with a power button” means choosing convenience, quality, and service that puts you first.
The Ultimate Checklist: 5 Factors for Choosing the Right Repair Shop
Your phone holds your life, so trusting your repair shop is crucial. Five key factors separate the great phone screen repair stores from the rest.

- Technician Expertise: A skilled technician understands different models and can diagnose underlying issues, preventing future problems.
- Part Quality: Ask about the source of repair parts. High-quality aftermarket parts can perform as well as OEM parts, but cheap parts lead to poor touch sensitivity, bad color, and easy cracking.
- Turnaround Time: You can’t afford to be disconnected. Most reputable shops offer same-day service, often completing repairs in 45 minutes or less.
- Warranty Details: A strong warranty shows a shop’s confidence. Understand the length, what’s covered, and what’s excluded.
- Customer Reviews: Real customer reviews on Google and Yelp reveal the truth about service quality, pricing, and reliability.
How to Vet Local Phone Screen Repair Stores
Finding a trustworthy shop in Laurel, Jackson, or Oxford is simple if you follow these steps:
- Check Google and Yelp reviews: Look for consistent praise of speed, quality, and fair pricing. Note how the shop responds to negative feedback.
- Ask for free diagnostics: Reputable shops, like Salvation Repair, offer this to provide a transparent quote before you commit.
- Inquire about price-matching: Competitive shops stand by their pricing. Salvation Repair offers price matching to earn your business with quality and service.
- Verify technician experience: Ask about their training and how many repairs they perform. Confident answers indicate expertise. For more tips, see our guide on how to find a trustworthy phone fixer near you.
Why Speed Matters: Finding Same-Day Service
Being without your phone is a major disruption. That’s why same-day service is now the standard. At Salvation Repair, most repairs are done in under an hour. For ultimate convenience, our on-site mobile repair vans can come to your home or office in Laurel, Jackson, or Oxford. We also welcome walk-ins, ensuring you get help when you need it. Explore mobile on-site phone repair options.
Understanding Your Repair Warranty
A warranty is a promise that the shop stands behind its work. While a 1-year limited warranty is the industry standard offered by chains, some shops go further. At Salvation Repair, we offer a lifetime warranty on our repairs because we are confident in our parts and workmanship.
A good warranty covers both parts and labor but will have reasonable exclusions, such as new accidental damage or water damage. For local shops like ours, the warranty is valid at our locations. A strong warranty provides peace of mind, and we want you to feel confident in your choice. Have questions? Contact Salvation Repair for details about our lifetime warranty.
Beyond the Screen: How to Protect Your Phone From Future Damage
Once your screen is pristine again, it’s time to protect it from future damage and avoid another trip to the phone screen repair stores. Proactive measures are the best way to keep your device safe.

The most important investment is a high-quality screen protector. Forget thin plastic films; tempered glass is essential. These protectors are engineered to absorb impact, sacrificing themselves to save your actual screen. At Salvation Repair, we always recommend tempered glass for its superior protection against drops.
Next, get a durable protective case. Look for key features like raised edges (bezels) around the screen and camera to prevent direct contact during a fall. Cases with reinforced corners are especially effective at absorbing shock. A slightly bulkier case provides significantly more protection than a slim, fashionable one.
Your daily handling habits also make a huge difference. Avoid keeping your phone in your back pocket, as sitting on it creates immense pressure. Be mindful of where you set your phone down—avoid precarious edges of tables or car dashboards. And keep it away from liquids, as water resistance ratings aren’t foolproof and liquid damage typically voids all warranties.
Finally, while it won’t protect your screen, regular data backups protect your valuable information. Backing up to the cloud or a computer ensures that if the worst happens, your photos, contacts, and documents are safe.
By combining a tempered glass screen protector, a protective case, smart handling habits, and regular backups, you can dramatically reduce the risk of future damage. These simple steps extend the life of your device and save you the expense of another repair. If you’re looking for quality protection accessories, visit us at Salvation Repair where we can recommend the best options for your specific device.
Conclusion: Making the Smart Choice for Your Smartphone
We’ve covered a lot of ground together—from that initial heart-sinking moment when you see a crack spreading across your screen to understanding the landscape of phone screen repair stores and what separates a good repair from a great one. The path forward doesn’t have to be complicated.
Here’s what really matters when your screen breaks: finding a repair service that combines speed with quality parts and backs it all up with a strong warranty. These three factors determine whether you’ll be happy with your repair six months from now or frustrated with a screen that’s already showing problems. The good news? You now have the knowledge to spot the difference between shops that cut corners and those that do the job right.
Choosing professional repair over buying new isn’t just smart for your wallet—though saving hundreds of dollars certainly helps. It’s also the environmentally responsible choice, keeping perfectly good devices out of landfills. And when that repair takes less than an hour? You’re back to your life with minimal disruption.
For those of us here in the Laurel, Jackson, or Oxford, Mississippi area, we at Salvation Repair understand what you need from a repair service. We’ve built our business around the things that matter most: getting your device fixed fast (usually the same day), standing behind our work with a lifetime warranty, and meeting you where you are with on-site service. Whether it’s your iPhone, iPad, Samsung phone, or laptop—basically any device with a power button—we’ve got the expertise to get it working like new again.
The next time you’re staring at a cracked screen, remember: you have options, and you deserve quality service. Don’t settle for a repair that might fail in a few months or a shop that can’t give you straight answers about their warranty. Your phone is too important for that.
Ready to get your device back in action? Get your phone fixed today with our expert same-day service. We’re here to help you make the smart choice—one that gets you back to what matters most, with a phone that’s built to last.