Tablet Hinge Repair Laurel: Expert 2025 Fix
Why a Broken Tablet Hinge Demands Immediate Attention
Tablet hinge repair Laurel services are available from local professionals who can diagnose and fix your device quickly, often the same day. Here’s what you need to know:
Top Tablet Hinge Repair Options in Laurel, MS:
- Salvation Repair – Expert service with lifetime warranty on repairs
- The Fix in Walmart Laurel – Same-day service, 30-60 minute repairs for many issues
Average Repair Time: Same-day to 1-2 days depending on complexity
Typical Cost: Varies by model and damage severity; most shops offer free estimates
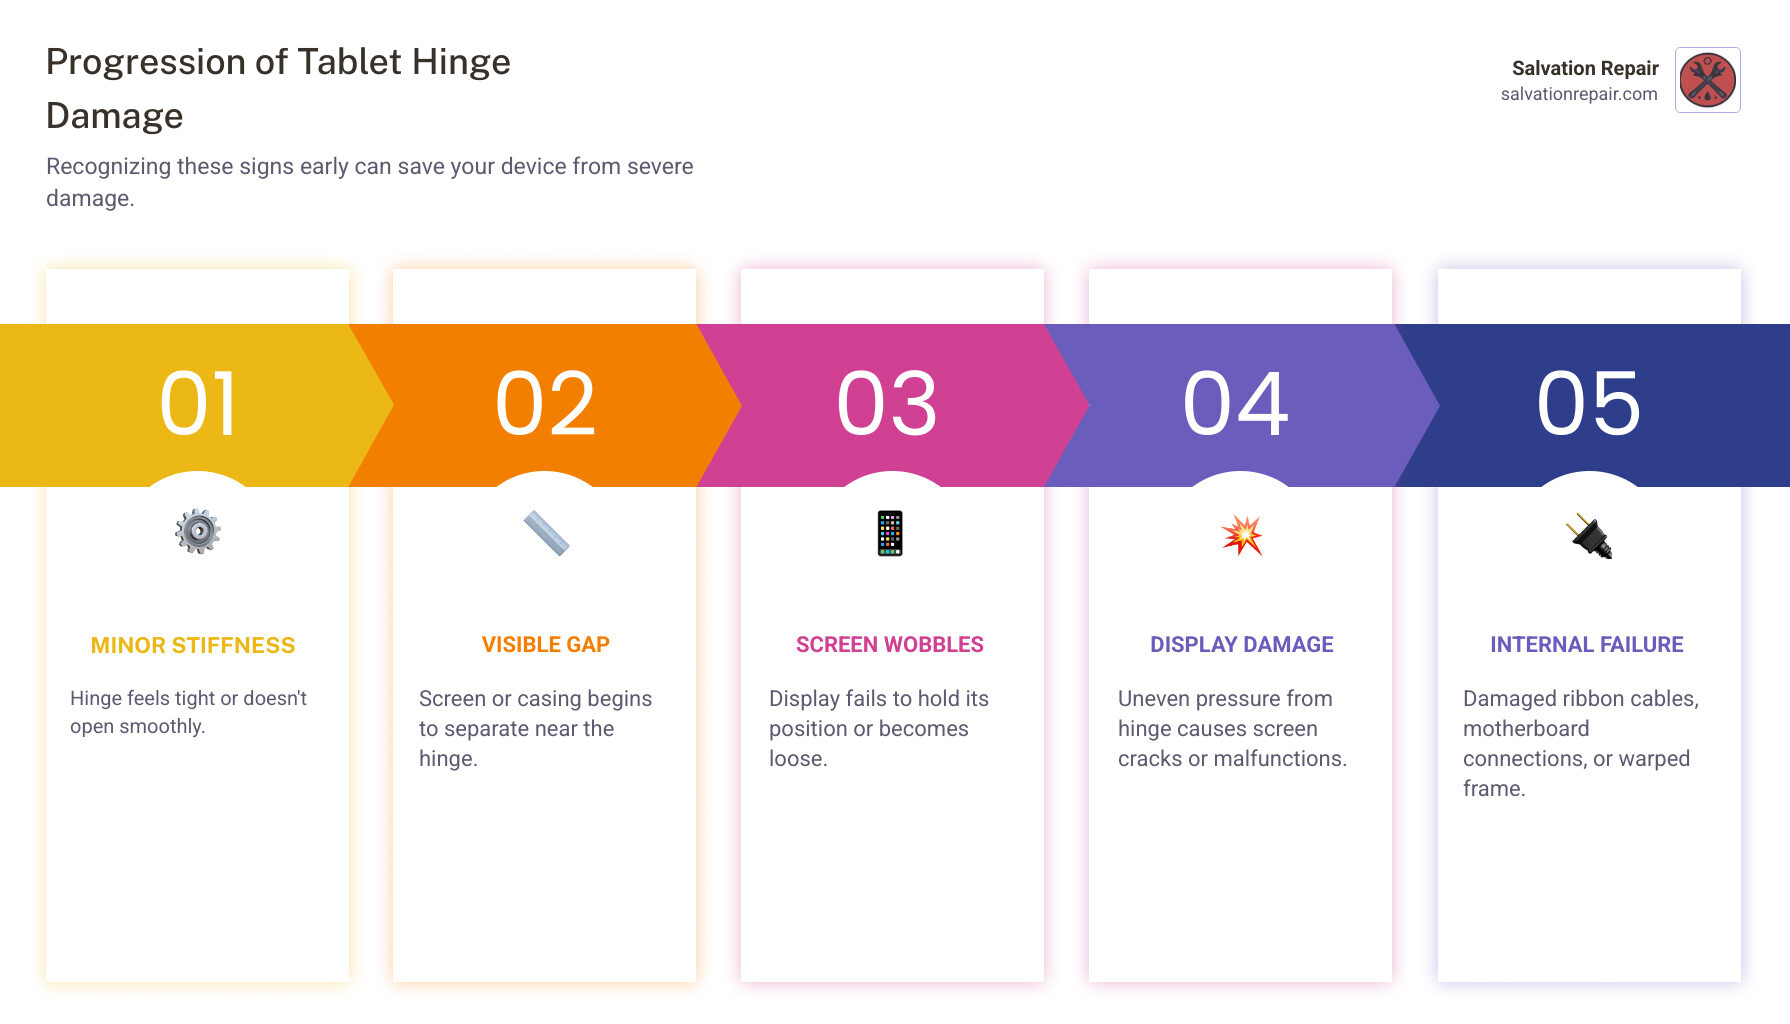
A broken tablet hinge isn’t just annoying—it’s a ticking time bomb for your device. When your tablet’s hinge becomes stiff, loose, or starts separating from the casing, continuing to use it puts enormous stress on the display panel and internal cables. What starts as a minor mechanical issue can quickly escalate into a cracked screen or damaged motherboard, turning a $50 repair into a $300+ problem.
The stakes are even higher with modern tablets like the Microsoft Surface Pro or iPad Pro, where the screen is held in place primarily by adhesive and delicate ribbon cables run directly through the hinge area. One wrong move, and you’re facing a device that’s more expensive to repair than replace.
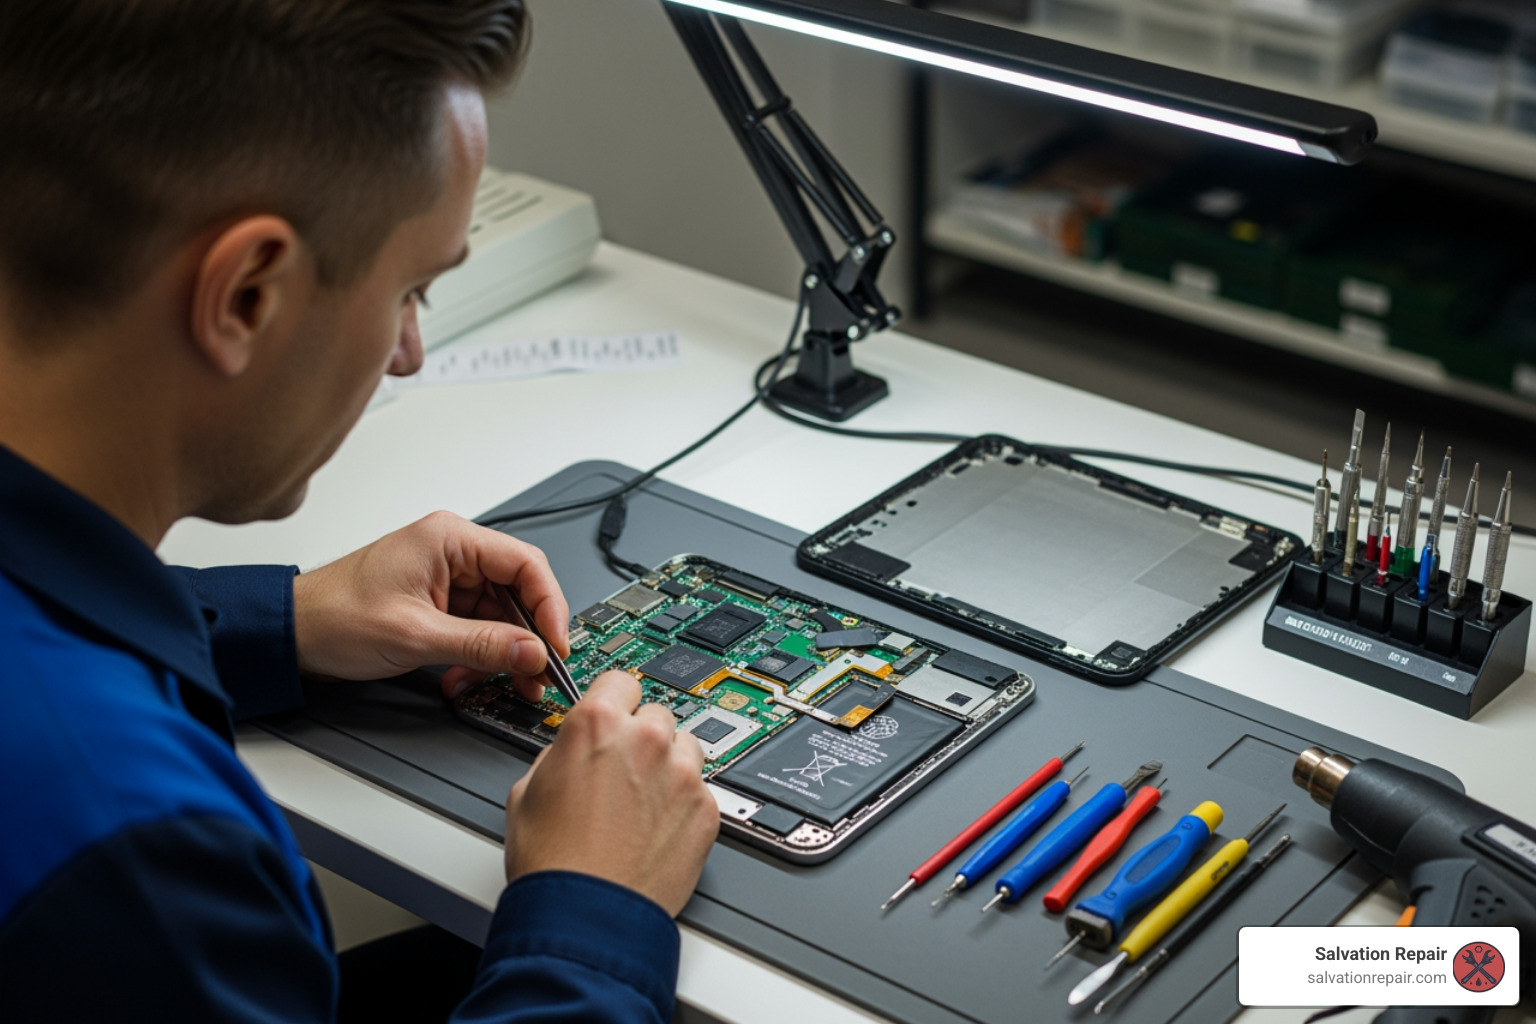
Why professional repair matters: Unlike a DIY attempt that requires heating the screen, cutting through adhesive, and navigating microscopic components with a high risk of permanent damage, professional technicians in Laurel have the specialized tools and experience to handle these repairs safely. Many shops offer same-day service with warranties that protect your investment.
I’m Ralph Harris, and over my 20+ years repairing electronics and authoring over 2,000 repair guides, I’ve seen countless tablets that could have been saved with timely tablet hinge repair Laurel services—and many more that were destroyed by well-meaning DIY attempts. In this guide, I’ll show you exactly how to identify hinge problems, why professional repair is your best option, and where to find trusted service in Laurel, MS.

Recognizing the Signs: Does Your Tablet Hinge Need Repair?
A tablet’s hinge, whether it’s part of a convertible device, a kickstand, or an integrated keyboard case, is a critical component that allows for versatile use. When it starts to fail, your user experience can quickly degrade from convenient to frustrating. Recognizing the early signs of hinge damage can save you from more extensive and costly repairs down the road.
Here are the common indicators that your tablet hinge needs attention:
- Stiffness when opening: If your tablet or its attached keyboard feels unusually rigid or resistant when you try to open or adjust it, the hinge mechanism might be seizing up. This can be due to accumulated dirt, debris, or internal damage.
- Looseness or wobbling: Conversely, if your tablet screen or kickstand no longer holds its position firmly, or if there’s excessive play and wobbling, the hinge has likely become loose. This often means screws have come undone or internal components have worn down.
- Clicking or grinding noises: Any unusual sounds, such as clicking, grinding, or popping, when you open or close your tablet’s hinge are definite red flags. These noises suggest that internal parts are rubbing incorrectly, possibly indicating broken plastic components or misaligned metal pieces.
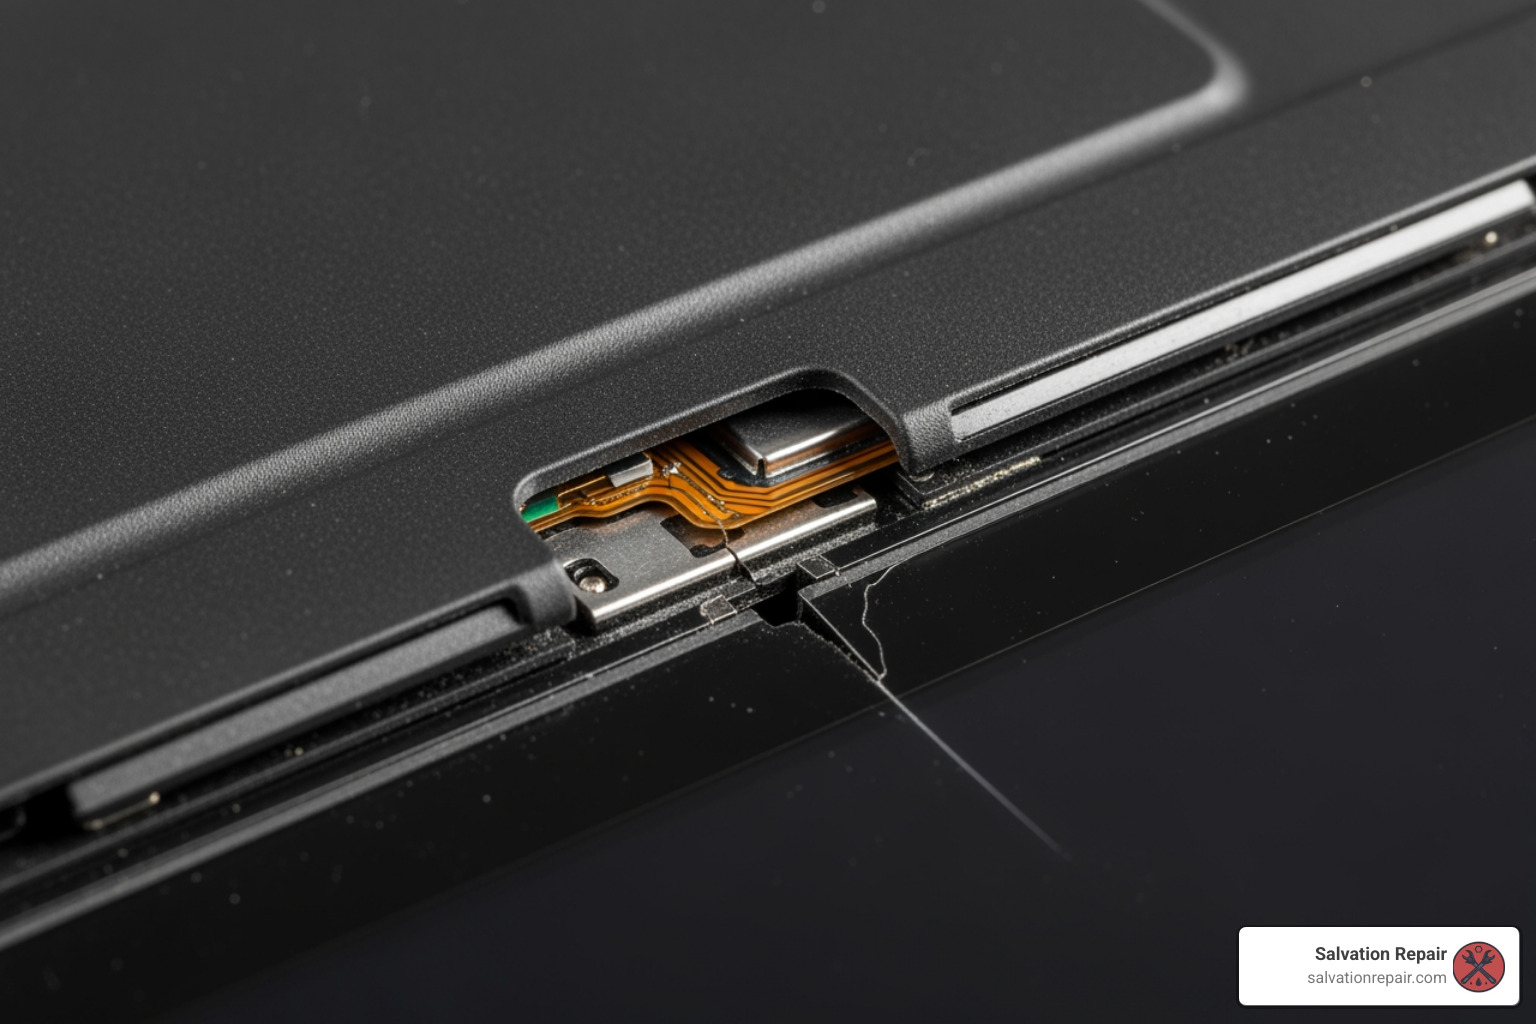
- Casing separating near the hinge: This is a particularly alarming sign. If you notice the plastic or metal casing of your tablet pulling apart or creating a gap near the hinge area, it means the hinge mounts are failing. This often happens when the hinge itself is stiff, and the force of opening the device tears the plastic around its anchor points. We’ve seen this frequently with accessories like the Zagg Keys Folio keyboard cases, where the plastic around the hinges tends to break.
- Screen not holding its position: The primary function of a hinge is to allow adjustment while maintaining stability. If your screen flops backward, refuses to stay at a desired angle, or simply can’t hold itself upright, the hinge has lost its necessary tension.

These issues don’t just appear out of nowhere. They stem from a combination of factors, including:
- Accidental drops: A sudden impact can bend or break the delicate internal mechanisms of a hinge.
- Normal wear and tear: Over time, the constant friction and movement of opening and closing will naturally degrade any mechanical part.
- Manufacturing defects: Sometimes, a hinge might have been designed with a weak point or constructed with substandard materials, leading to premature failure.
What Causes Hinge Damage?
Understanding the root causes of hinge damage can help us appreciate why these components are so prone to failure and why professional tablet hinge repair Laurel services are often necessary.
- Repetitive stress: Every time you open, close, or adjust your tablet, the hinges undergo stress. This continuous motion, especially if done frequently throughout the day, can lead to metal fatigue or wear in the pivot points.
- Impact from falls: Tablets are portable, which means they’re susceptible to accidental drops. Even a short fall can transmit significant force to the hinge area, bending metal, cracking plastic mounts, or dislodging internal pins.
- Debris in the hinge mechanism: Small particles of dust, crumbs, or other foreign matter can work their way into the hinge. Over time, this debris can increase friction, causing stiffness and grinding, and accelerating wear on the moving parts.
- Extreme opening angles: Forcing a tablet open beyond its intended range of motion or twisting it unnaturally can put undue strain on the hinges, leading to immediate breakage or gradual weakening.
- Material fatigue over time: Hinges are made from various materials, often a combination of metal and plastic. With repeated use and exposure to environmental factors, these materials can weaken and eventually fail.
The Dangers of Ignoring a Broken Hinge
A broken hinge is more than a cosmetic issue; it can lead to more severe and costly damage. We’ve seen it countless times: a user ignores a slightly wobbly hinge, thinking it’s just a minor inconvenience. However, forcing a stiff or broken hinge can put immense pressure on the display panel, potentially cracking the screen or damaging the delicate ribbon cables that connect the screen to the motherboard. This can turn a simple mechanical repair into a much more complex and expensive one.
Tablets, by their very design, are compact and often use adhesive to secure components like the screen. As iFixit guides often highlight, tablet repair is “often more involved than laptop repair” due to their “small size and frequent use of adhesive.” This means that internal components are packed tightly, and critical connections, like the display cables, frequently run near the hinge mechanism. If a hinge is compromised, these cables can be pinched, frayed, or severed, leading to display issues, touch screen malfunctions, or even complete loss of functionality. For example, in a Microsoft Surface Pro 7 kickstand hinge replacement, the process involves heating the screen, carefully cutting adhesive, and disconnecting delicate cables before even accessing the hinge. Ignoring a failing hinge can force these delicate components into precarious positions, escalating the damage significantly.
Why Professional Tablet Hinge Repair is the Best Choice in Laurel
When faced with a damaged tablet hinge, the temptation to try a DIY fix or simply replace the entire device can be strong. However, for residents of Laurel, MS, choosing professional tablet hinge repair Laurel services offers numerous advantages that make it the smartest and most cost-effective option in the long run.
| Professional Repair in Laurel, MS |
|---|
| Benefits: Experienced technicians; Proper tools and equipment; Warranty on parts and labor; Risk-free for the customer; Fast turnaround, often same-day. |
| Expertise: Professionals understand the unique construction of different models, from Apple iPad to Microsoft Surface. |
At Salvation Repair, we pride ourselves on our expertise and commitment to customer satisfaction. Our technicians are highly trained and equipped with specialized tools designed for delicate electronic repairs. We understand that your tablet is an essential part of your daily life, and we strive to provide a repair experience that is efficient, reliable, and stress-free. With our lifetime warranty on repairs, you can have peace of mind knowing your device is in good hands.
Professional technicians in Laurel, like ours at Salvation Repair, possess the in-depth knowledge required to diagnose the precise nature of your hinge problem. They understand the intricacies of various tablet models and their unique hinge designs. As iFixit points out, tablet repair is generally more complex than laptop repair due to the smaller components and extensive use of adhesive. Our experts steer these challenges daily, ensuring a precise and effective repair.
The Risks of Attempting Tablet Hinge Repair Yourself
We understand the allure of a DIY project, especially when trying to save a few bucks. But when it comes to intricate electronics like tablets, attempting hinge repair yourself carries significant risks that often outweigh any potential savings.
Consider the complexity involved: a guide for a Microsoft Surface Pro 7 kickstand hinge replacement illustrates just how delicate these repairs are. It involves carefully heating the screen, often requiring an iOpener or heat gun, to soften the strong adhesive that holds it in place. Then, you must carefully cut through this adhesive with opening picks, being extremely careful not to insert tools too deeply, which could damage the LCD or internal cables. Even taping the screen with packing tape is recommended to prevent further breakage during the process. After detaching the screen, you still need to disconnect fragile ribbon cables and the battery before you can even access the hinge mechanism itself.
Without the proper tools, a steady hand, and extensive experience, you could easily:
- Crack the display: Tablet screens are incredibly thin and fragile. Applying uneven pressure or insufficient heat during removal can lead to a shattered screen, instantly turning a hinge repair into a much costlier screen replacement.
- Tear vital cables: Internal ribbon cables, responsible for connecting the screen, touch digitizer, camera, and other components, are very delicate. A slip of a prying tool or improper handling can sever these connections, causing various malfunctions.
- Damage the chassis: The internal frame or chassis of your tablet often contains the mounting points for the hinges. Aggressive prying or incorrect disassembly can strip screw holes or crack the plastic, making it impossible for a new hinge to be securely installed.
- Cause electrical shorts: Disconnecting the battery is a critical first step in most tablet repairs to prevent accidental shorts. Forgetting this or mishandling internal components can lead to permanent damage to the motherboard.
What might seem like a simple hinge adjustment could quickly become a saga of broken parts and escalating costs. In our experience, many “DIY repair disasters” end up costing more to fix professionally than the original hinge repair would have. Save yourself the headache and the potential for a completely bricked device by trusting the professionals in Laurel, MS.
Finding the Best Tablet Hinge Repair Services in Laurel
When your tablet’s hinge gives out, finding a trustworthy and skilled repair service in Laurel, MS, is paramount. You want a team that can handle the job efficiently, effectively, and with transparent pricing. Here’s what we recommend looking for when choosing a repair shop for your tablet hinge repair Laurel needs:
- Choosing a repair shop: Look for reputable local businesses with a strong track record. Salvation Repair is a leading electronic device repair company in the Laurel, MS area, specializing in same-day, on-site repairs for various devices, including tablets. Another option is The Fix in Walmart Laurel, which offers same-day tablet screen replacement, with many repairs completed in 30-60 minutes.
- Free estimates: A reliable repair shop should always offer a free, no-obligation estimate. This allows you to understand the scope of the damage and the cost of repair upfront, without any surprises.
- Warranty on repairs: This is a crucial indicator of a shop’s confidence in its work. At Salvation Repair, we stand by our repairs with a lifetime warranty, offering you unparalleled peace of mind. The Fix in Walmart Laurel also provides warranties on their services.
- Positive customer reviews: Check online reviews and testimonials. What are other customers saying about their experience? This can give you valuable insight into the quality of service, turnaround time, and customer care.
- Experience with various tablet models: Tablets come in many forms, from iPads to Samsung Galaxy Tabs, Amazon Fires, and Microsoft Surface devices. Ensure the repair technicians are experienced with a wide range of models and hinge types. The Fix in Walmart Laurel, for instance, handles repairs for all major tablet brands.

What to Expect from a Tablet Hinge Repair in Laurel
When you bring your tablet to a professional for hinge repair in Laurel, MS, you can expect a streamlined process designed to get your device back to you as quickly as possible.
First, our technicians will conduct a thorough diagnosis of your tablet. This free assessment helps us understand the exact cause and extent of the hinge damage. Based on this, we’ll provide you with a clear, upfront quote for the repair. The cost and time for a repair can vary significantly based on your tablet model and the extent of the damage. A simple hinge adjustment might be relatively quick and inexpensive, while a complete hinge and chassis replacement on a high-end device will naturally take more time and cost more.
For many common issues, we strive for efficiency. Many local shops in Laurel, like Salvation Repair, offer same-day service for common issues. The Fix in Walmart Laurel also boasts many repairs completed within 30-60 minutes for screen replacements, indicating a focus on quick turnaround for various tablet issues.
The repair itself may involve several steps: replacing the hinge mechanism entirely, repairing the mounting points on the tablet’s chassis (the internal frame where the hinge attaches), or replacing parts of the casing that have been damaged by the hinge failure. We use high-quality replacement parts to ensure durability and restore your tablet to its optimal functionality.
Questions to Ask a Repair Shop
Before you commit to any tablet hinge repair Laurel service, we encourage you to ask these important questions. They will help you gauge the professionalism and reliability of the repair center:
- Do you offer a warranty on your hinge repairs? (At Salvation Repair, we proudly offer a lifetime warranty on our repairs.)
- Can you provide a free, no-obligation estimate?
- How long will the repair take? (Many repairs, especially at Salvation Repair, can be completed same-day.)
- Have you worked on my specific tablet model before?
- What is included in the repair price?
How to Prevent Future Tablet Hinge Damage
Even after a successful tablet hinge repair Laurel, prevention is key to ensuring your device’s longevity. A little care can go a long way in protecting your tablet’s delicate hinge mechanisms from future damage.
- Protective cases: Invest in a high-quality, rugged, shock-absorbent case. These cases are designed to absorb impacts and protect your tablet from drops, which are a common cause of hinge damage. If your tablet uses a keyboard case, ensure it’s robust and provides good support for the hinge area.
- Gentle handling: Avoid aggressive opening or closing of your tablet. Treat it with care, especially during transitions between modes (e.g., tablet to laptop mode for 2-in-1 devices).
- Opening from the center: When opening a tablet with a clamshell design or adjusting a kickstand, try to apply pressure evenly from the center rather than pulling from one corner. This distributes the stress across the hinge equally.
- Avoiding extreme angles: Don’t force your tablet past its natural stopping points. Opening it to extreme angles beyond what it’s designed for can strain the hinges and lead to breakage.
- Cleaning the hinge area: Periodically inspect and gently clean the hinge area to remove any accumulated dust, dirt, or debris. A soft brush or compressed air can help keep the mechanism free of particles that might cause friction or stiffness.
Frequently Asked Questions about Tablet Hinge Repair
Can a broken hinge damage other parts of my tablet?
Absolutely, yes. A broken tablet hinge is rarely an isolated problem. We often see a domino effect of damage. A faulty hinge can put uneven pressure on the screen, leading to cracks or display failure over time. This pressure can also warp the tablet’s frame or chassis, misaligning other components. Furthermore, many internal ribbon cables—which connect the screen, touch digitizer, camera, or Wi-Fi antennas—often run directly near the hinge mechanism. A compromised hinge can pinch, fray, or even sever these vital cables, leading to various malfunctions or complete component failure. What starts as a simple mechanical issue can quickly spread, turning your tablet into an expensive paperweight.
What types of tablets are most prone to hinge issues?
Any tablet computer with a moving part that relies on a hinge can experience problems. This includes devices with integrated kickstands, like the Microsoft Surface series, or 2-in-1 tablets that convert into laptops. Tablets used with external keyboard cases that have integrated hinges, such as those from Zagg Keys Folio, are also commonly prone to hinge issues, often due to the plastic around the hinges breaking. The constant opening and closing, combined with the stress of holding the screen’s weight, makes these components vulnerable over time. While all major tablet brands (including Apple iPads, Samsung Galaxy Tabs, and Amazon Fire tablets) can experience hinge issues, those with complex hinge designs or frequent articulation tend to be more susceptible.
How much does tablet hinge repair typically cost in Laurel?
The cost of tablet hinge repair Laurel services can vary widely depending on several factors: the specific tablet model, the severity of the damage (e.g., just a loose screw versus a completely broken hinge mount and cracked casing), and the cost of replacement parts. A simple adjustment might be inexpensive, while a full hinge and chassis replacement on a high-end device like a Microsoft Surface Pro will naturally cost more due to the complexity and parts involved.
The good news is that reputable repair shops in Laurel, MS, like Salvation Repair, offer free estimates. This means you can get a clear understanding of the repair cost upfront before committing to any service. We also offer price matching to ensure you get the best value for your repair.
Conclusion: Get Your Tablet Fixed Right in Laurel, MS
A broken tablet hinge is a serious problem, but it doesn’t have to be the end of your device. In Laurel, MS, professional technicians have the tools, experience, and expertise to fix it safely and effectively. By choosing a professional repair service, you protect your valuable device from further damage and gain the peace of mind that comes with a reliable warranty.
Don’t let a wobbly screen or a stiff kickstand turn into a cracked display or a dead motherboard. For expert, same-day service with a lifetime warranty on repairs, trust Salvation Repair for all your tablet repair needs in Laurel, MS. We’re here to help you get your tablet back in perfect working order, so you can get back to work, play, and everything in between.
Visit us or contact us today to learn more about our iPad repair services and how we can bring your tablet back to life!

