iPad repair in laurel MS: Fast, Best 2025
Why Fast iPad Repair Matters in Laurel, MS
iPad repair in laurel MS is easier than you might think, with several local options offering same-day service and warranty-backed repairs. Whether you’re dealing with a shattered screen, dead battery, or charging issues, professional repair shops in Laurel can typically fix your device within hours—not days.
Top iPad Repair Services in Laurel, MS:
| Service | Location | Key Features |
|---|---|---|
| Salvation Repair | 1503 Lakeview Rd | Same-day service, lifetime warranty, mobile repairs, price matching |
| iFixandRepair | 1621 Highway 15 N (inside Walmart) | Fast turnaround, multiple device types, convenient location |
A broken iPad isn’t just frustrating—it can completely disrupt your daily routine. Whether you use your iPad for work, school, entertainment, or staying connected with family, a cracked screen or dying battery means lost productivity and missed connections. The good news? Most iPad issues can be fixed quickly and affordably by skilled local technicians.
Many people hesitate to get professional repairs because they worry about cost or turnaround time. But attempting DIY repairs on an iPad often causes more damage than it fixes. Modern iPads have delicate internal components and sealed designs that require specialized tools and expertise to repair properly. One wrong move can turn a simple screen replacement into a $500 mistake.
I’m Ralph Harris, and with over 20 years in electronics repair and more than 500 Apple repair certifications, I’ve seen every type of iPad issue imaginable. Through my work with iPad repair in laurel MS and publishing over 2,000 repair guides, I’ve helped countless customers get their devices back to perfect working condition. Let me walk you through everything you need to know about getting your iPad fixed fast in Laurel.

Common iPad Problems You Can’t Ignore
When your trusty iPad starts acting up, it can feel like a small crisis. But don’t despair! Most issues, from a shattered display to a dying battery, are routine fixes for experienced technicians. We’ve seen it all, and we’re here to tell you that help for iPad repair in laurel MS is readily available.

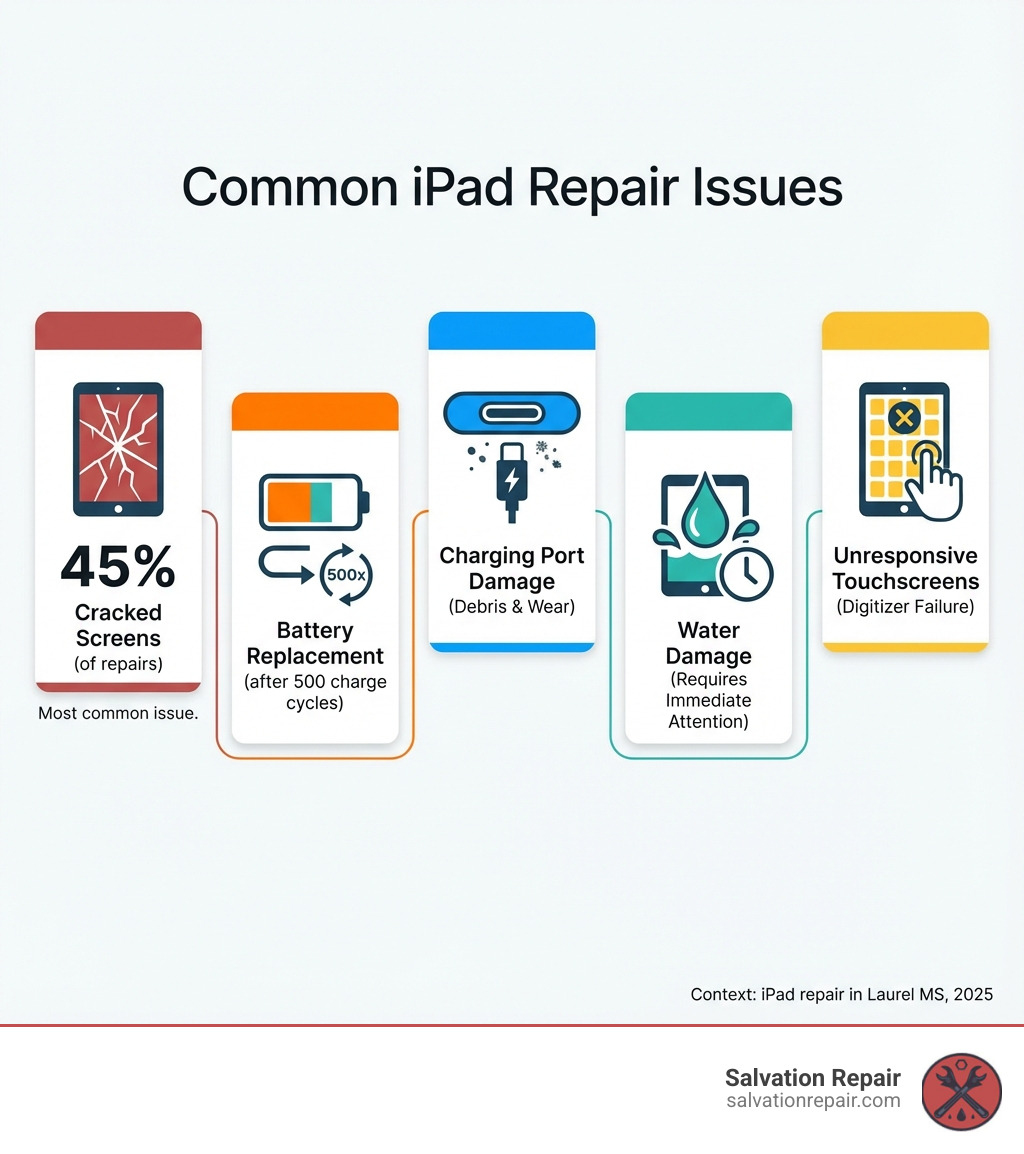
The most common iPad woes we encounter include:
- Cracked screens: The classic “oops!” moment.
- Failing batteries: When your iPad dies faster than a smartphone in a cold snap.
- Charging port damage: The frustrating dance of trying to find the “sweet spot” for charging.
- Water damage: The dreaded splash, spill, or accidental swim.
- Software glitches: When your iPad decides to have a mind of its own.
- Unresponsive touchscreens: Tapping and swiping with no reaction.
Salvation Repair specializes in expert iPad repair services, and our skilled technicians are well-versed in addressing a comprehensive range of these issues to keep your devices running smoothly.
Cracked Screen Repair: More Than Just a Cosmetic Fix
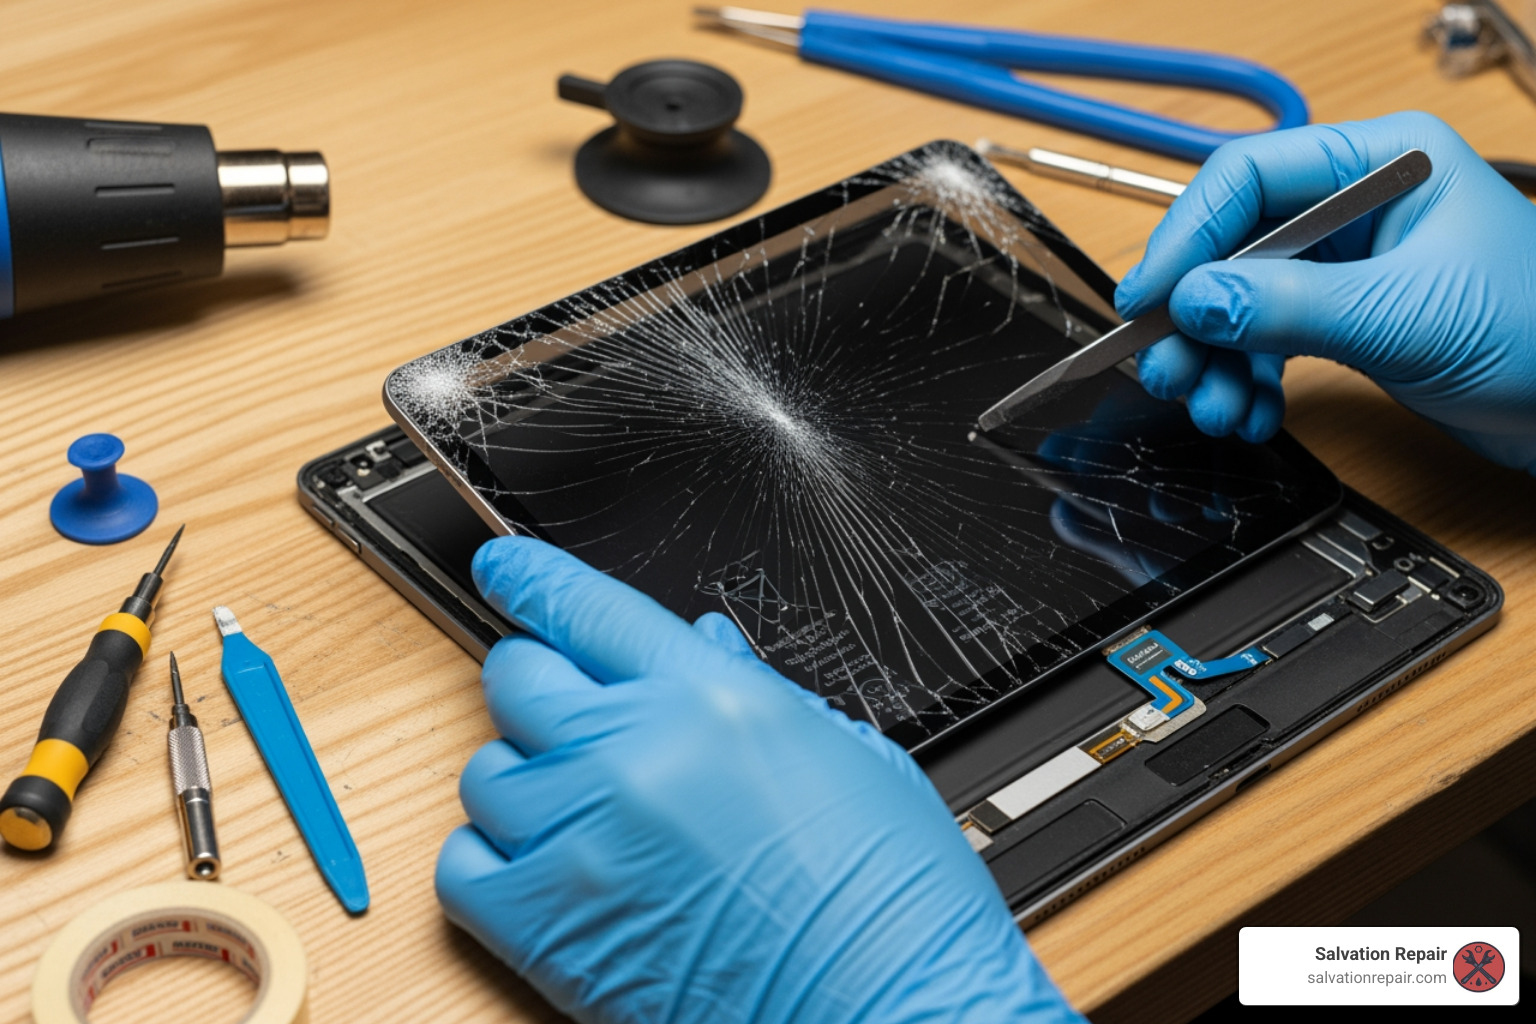
A cracked iPad screen isn’t just an eyesore; it’s a gateway to bigger problems. That hairline fracture or spiderweb pattern compromises your device’s sealed environment. What starts as a cosmetic issue can quickly lead to:
- Further internal damage: The delicate components beneath the screen are exposed.
- Dust and moisture entry: Even tiny particles can wreak havoc on your iPad’s sensitive electronics.
- Safety hazards: Sharp glass can cause cuts.
At Salvation Repair, we understand the urgency of a broken screen. Our technicians are skilled in repairing tablets, including iPads, and can fix broken iPad screens for various models, including iPad Air, iPad Pro, and iPad Mini. Restoring your screen means restoring your iPad’s integrity and protecting its internal components.
Battery Replacement for a Longer Lifespan
Is your iPad’s battery life becoming a joke? Do you find yourself constantly tethered to a charger, or does your device unexpectedly shut down at 30%? These are classic signs of a failing battery. Over time, all rechargeable batteries degrade, leading to:
- Unexpected shutdowns: Your iPad powers off without warning.
- Slow performance: A struggling battery can impact overall device speed.
- Short battery life: What used to last all day now barely makes it through a few hours.
A new battery can breathe new life into your iPad, restoring its original performance and extending its usability. Salvation Repair offers comprehensive iPad repair services, including battery replacement, to ensure your device stays powered up. We even offer options for extended capacity batteries for some devices, giving you even more juice to get through your day.
Solving Charging and Connectivity Issues
There’s nothing more frustrating than plugging in your iPad only to find it’s not charging. This common issue can stem from a few culprits:
- Damaged charging port: Often caused by wear and tear, debris, or incorrect cable insertion.
- Faulty charging cable or adapter: Sometimes, the problem isn’t the iPad at all!
- Internal charging component failure: A more complex issue requiring expert diagnosis.
Our team at Salvation Repair can diagnose and fix charging issues, distinguishing between a simple cable problem and a more involved port repair. Beyond charging, we also address other connectivity problems like Wi-Fi and Bluetooth issues, ensuring your iPad connects seamlessly to your network and accessories. We offer diagnostic services to pinpoint the exact cause of your iPad’s woes, ensuring we fix the right problem the first time.
What to Look for in an iPad Repair Service in Laurel, MS
Choosing the right service for your iPad repair in laurel MS can feel daunting, but knowing what to look for makes the decision much easier. We believe in transparency and quality, and these are the same standards we recommend you seek out.

When evaluating iPad repair shops, consider these crucial factors:
- Turnaround time: How quickly can they get your iPad back to you?
- Warranty policies: Do they stand behind their work?
- Quality of parts: Are they using reliable components?
- Technician expertise: Are the repair people actually skilled?
- Customer reviews: What do other locals say about their experience?
- Mobile repair options: Can they come to you for convenience?
Speed and Convenience: Same-Day and Mobile Repairs
In today’s world, being without your iPad for an extended period is simply not an option for many of us. That’s why speed and convenience are paramount when it comes to iPad repair in laurel MS.
We understand the importance of fast repairs to minimize your downtime. Salvation Repair prides itself on offering same-day service for most common iPad issues. This means you can often drop off your device in the morning and pick it up fully functional by the afternoon. As one satisfied customer, Eddie White, noted, we offer “Excellent service and quick turnaround time” “Excellent service and quick turnaround time”Eddie White.
But we take convenience a step further. Salvation Repair offers same-day mobile repairs, bringing our expert service directly to you. Imagine getting your iPad fixed while you’re at work, home, or even enjoying a coffee. This on-site and in-home repair service means less disruption to your busy schedule and more time for what matters most.
The Importance of a Warranty on Your iPad Repair in Laurel MS
When you invest in an iPad repair in laurel MS, you want to know that your investment is protected. This is where a robust warranty policy becomes incredibly important. A good warranty isn’t just a piece of paper; it’s a testament to the repair shop’s confidence in their work and the quality of their parts.
At Salvation Repair, we offer a lifetime warranty on our iPad repairs. This means we guarantee our parts and labor for the lifespan of your device, providing unparalleled peace of mind. A lifetime warranty is a significant differentiator and a strong indicator of a reputable service committed to customer satisfaction and quality craftsmanship. It tells you that we stand behind every fix, ensuring your iPad continues to function flawlessly long after you leave our shop.
Expertise and Advanced Repair Capabilities
You wouldn’t trust your car to an inexperienced mechanic, and the same principle applies to your iPad. For reliable iPad repair in laurel MS, you need technicians with proven expertise and advanced repair capabilities.
Our technicians at Salvation Repair are highly skilled in repairing tablets, including iPads, and possess the knowledge to tackle a wide array of issues, from simple screen replacements to complex internal repairs. We use high-quality replacement parts, ensuring your iPad performs as good as new. Our team is equipped to handle more than just the basics; we also offer advanced services like data recovery, giving you options even for the most challenging situations.
Customer testimonials consistently highlight our technicians’ skill and dedication. Jaret Duvall, a satisfied customer, shared, “Best cell phone repair experience ever! This guy went above and beyond to make a difficult repair on my iPhone 14 Pro. Back glass was destroyed so he replaced this and the phone’s chassis, just like new again. Very reasonable pricing on repairs and didn’t waste any time getting the job done 100% sati…” Jaret Duvall “Best cell phone repair experience ever! …”. While this review is for an iPhone, it speaks volumes about the caliber of expertise you can expect for your iPad repair. Trinity Williamson also praised our service for a laptop repair, stating, “I had a Dell laptop needing repair he had it done in a day good price as well. Very genuine about prices and is honest also he explains your issue to you in detail which I find very helpful” Trinity williamson “I had a Dell laptop needing repair he had it done in a day good price as well. Very genuine about prices and is honest also he explains your issue to you in detail which I find very helpful”. This commitment to quality and clear communication extends to all our repair services, including iPads.
Comparing Your Local iPad Repair Options
Finding the best iPad repair in laurel MS means doing a little homework. We’ve put together a handy comparison table to help you weigh your options and understand what makes a repair service stand out.
| Feature | Salvation Repair | iFixandRepair (Walmart) |
|---|---|---|
| Same-Day Service | Yes | Yes |
| Lifetime Warranty | Yes | (Not explicitly stated) |
| Mobile Repair | Yes | No |
| Free Estimate | Yes | Yes |
| Price Matching | Yes | (Not explicitly stated) |
When comparing services, consider not just the price, but the overall value. Getting multiple quotes can be helpful, but also dig into what each quote includes: parts quality, warranty, and turnaround time. Look for special offers or discounts that might give you better value. Amberjena93, a customer, mentioned getting a “super quick and very reasonable price. free screen cover. highly highly recommend” amberjena93 “phenomenal jobanyone who has broken their phone knows how frustrating it can be to go without. super quick and very reasonable price. free screen cover. highly highly recommend” for their phone repair, highlighting the added benefits some shops provide.
How to Get a Free Estimate for Your iPad Repair in Laurel MS
Before committing to any repair, you’ll naturally want to know the cost. Getting a free estimate for your iPad repair in laurel MS is a straightforward process, and we make it as easy as possible.
You have a few convenient ways to get a quote:
- Online Quote Requests: Many repair services, including Salvation Repair, offer online forms where you can describe your issue and receive an estimate.
- Calling for Pricing: A quick phone call can often give you an immediate estimate for common repairs. You can reach Salvation Repair at 601-699-8246.
- In-Person Diagnostics: For more complex issues or if you’re unsure of the problem, bringing your iPad in for a free diagnostic is the best approach. Our experts can assess the damage and provide an accurate quote.
To help us provide the most accurate estimate, be prepared to share some key information: your iPad model (e.g., iPad Air 2, iPad Pro 11-inch), a detailed description of the problem, and any events leading up to the damage (e.g., “I dropped it,” “It got wet”).
Salvation Repair offers free price estimates when fixing your favorite devices. You can easily schedule a call to get your free estimate here: Request a Quote Get a Free Estimate.
Understanding Repair Costs and Finding the Best Value
The cost of iPad repair in laurel MS can vary depending on several factors. It’s important to understand these to ensure you’re getting the best value for your money.
Key factors influencing repair prices include:
- iPad Model: Newer models or those with advanced displays (like OLED on some Pro models) often have more expensive parts.
- Type of Damage: A simple screen replacement is generally less costly than, say, a logic board repair or extensive water damage remediation.
- Part Quality: Reputable shops use high-quality, often OEM-grade, replacement parts, which might cost a bit more but offer better longevity and performance.
At Salvation Repair, we understand that price is a significant concern. That’s why we offer price matching any local competitor’s published price for the same repair. This ensures you’re always getting a fair deal without compromising on quality or our lifetime warranty. Always ask about special offers or discounts. Sometimes, you might even get a free screen protector with your repair, as one of our customers happily noted!
Frequently Asked Questions about iPad Repair
We hear a lot of questions about iPad repair in laurel MS, and we’re happy to clear up any confusion. Here are some of the most common inquiries we receive:
How long do most iPad repairs take?
The typical turnaround time for iPad repair in laurel MS largely depends on the type of repair needed. For most common issues, you’ll be surprised at how quickly we can get your iPad back to you.
- Screen replacement: For many iPad models, a screen replacement can be completed within a few hours.
- Battery replacement: Similarly, battery replacements are often quick, typically taking less than an hour.
At Salvation Repair, we pride ourselves on our efficiency. Many of our customers experience same-day turnaround, minimizing the disruption to their daily lives. As Eddie White attested, we offer “Excellent service and quick turnaround time” “Excellent service and quick turnaround time”Eddie White. While complex issues like extensive water damage or intricate microsoldering might require a bit more time (sometimes a day or two), we always aim for the fastest possible repair without sacrificing quality.
Is it worth repairing an older iPad?
This is a question we get frequently, and the answer often depends on a cost-benefit analysis. While it might be tempting to just buy a new iPad, repairing an older one can often be a very smart choice for iPad repair in laurel MS.
Consider these points:
- Repair Cost vs. Replacement Cost: A repair, even for a significant issue, is almost always less expensive than purchasing a brand-new iPad.
- Functionality Check: If your older iPad still meets your needs and runs the apps you use, a repair can extend its life by several years.
- Environmental Impact: Repairing is a more sustainable choice than discarding and replacing.
We offer free diagnostics at Salvation Repair. This means we can assess your older iPad’s condition, identify the problem, and provide you with an exact repair cost. Then, you can make an informed decision based on whether the repair cost makes sense for your budget and your device’s remaining potential. Don’t underestimate the power of a good repair to extend your device’s life!
Will my data be safe during the repair?
The safety of your personal data is a top priority for us, and it should be for any reputable iPad repair in laurel MS service. While our technicians are highly skilled and professional, we always recommend taking precautions with your sensitive information.
Here’s what we advise:
- Back Up Your Device: Before bringing your iPad in for repair, it’s always a good practice to back up your data. You can do this via iCloud or by connecting your iPad to a computer and using iTunes/Finder. This ensures that even in the rarest event of data loss, your precious photos, documents, and apps are safe.
- Data Privacy Policies: At Salvation Repair, we adhere to strict data privacy policies. Our technicians focus solely on the hardware or software issue at hand and respect your privacy.
- Data Recovery Services: In unfortunate cases where data might seem lost due to severe damage, Salvation Repair also offers data recovery services. This is a specialized service that can sometimes retrieve information from seemingly defunct devices.
Rest assured, we handle your device with the utmost care and professionalism, but a quick backup on your end gives you ultimate peace of mind.
Conclusion: Your Next Step for Fast iPad Repair in Laurel
When your iPad takes an unexpected tumble or starts acting sluggish, getting it fixed quickly and reliably is essential. For iPad repair in laurel MS, you have excellent local options that prioritize speed, quality, and customer satisfaction.
We’ve covered the key factors to consider:
- Speed: Look for same-day service to minimize your downtime.
- Quality: Ensure the repair shop uses high-quality parts and has experienced technicians.
- Warranty: A strong warranty, especially a lifetime one, offers invaluable peace of mind.
At Salvation Repair, we are dedicated to providing top-tier iPad repair in laurel MS. Our commitment to a lifetime warranty, same-day mobile service, and a price match guarantee ensures you receive the best value and service. Our expert technicians are ready to tackle any iPad challenge, getting your device back into your hands and running smoothly in no time.
Don’t let a broken iPad slow you down. For more information about our comprehensive iPad repair services and to get your free estimate, visit us today: More info about iPad repair services.
