Quick iPhone Screen Repair: Top 5 Fast Fixes
Why Quick iPhone Screen Repair Matters for Your Daily Life
Quick iPhone screen repair services can fix your cracked screen in as little as 30-60 minutes, with most repairs completed same-day. Here’s what you need to know:
Top Quick Repair Options:
- Independent Shops – 30-60 minutes, walk-ins welcome, $60-$450 depending on model
- Apple Authorized Providers – Same-day service at Best Buy, genuine parts
- Mail-in Service – 3-5 business days through Apple directly
Average Repair Times:
- iPhone 7/8: 30-45 minutes
- iPhone X/XS: 45 minutes
- iPhone 13/14: 45-60 minutes
Cost Range in the US (2025):
- Aftermarket screens: $60-$180+
- Original Apple displays: $140-$450+
A cracked iPhone screen doesn’t have to derail your entire day. Whether you dropped your device on concrete or finded spiderweb cracks after pulling it from your pocket, getting back to normal is faster than most people realize. The repair industry has evolved dramatically – what used to take days now happens while you grab a coffee.
I’m Ralph Harris, and over my 20 years repairing electronics and earning over 500 Apple repair certifications, I’ve seen Quick iPhone screen repair transform from a multi-day ordeal into a streamlined 45-minute service. This guide will walk you through every option available so you can make the smartest choice for your situation.
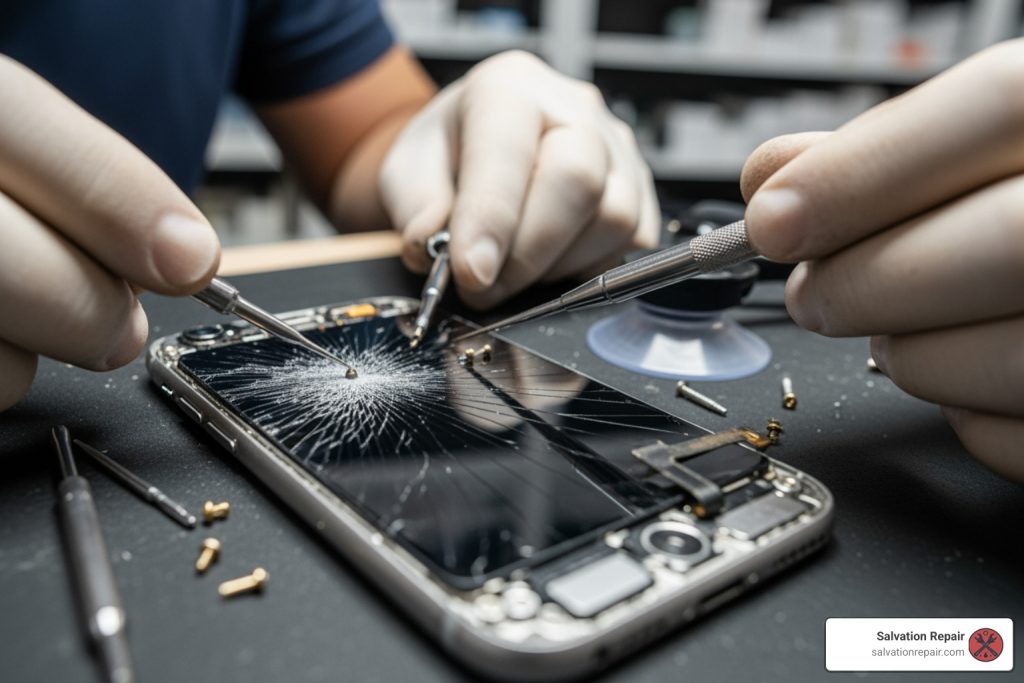
 Walk-in or appointment (5 min), 2) Diagnostic check (5-10 min), 3) Screen removal and replacement (20-30 min), 4) Quality testing including touch response and Face ID (5-10 min), 5) Device return with warranty (5 min). Total time: 30-60 minutes for most models. - Quick iPhone screen repair infographic pillar-5-steps")
Quick Quick iPhone screen repair terms:
Understanding the Cost of Quick iPhone Screen Repair
When you’re staring at a shattered display, the first question is always: “How much is this going to set me back?” In 2025, the iPhone Screen Repair Cost varies significantly based on which generation of phone you’re holding and the type of technology inside that glass.
Generally, we see a wide spectrum of pricing. For older models like the iPhone 7 or 8, you might pay as little as $60 for an aftermarket fix. However, for the latest flagships like the iPhone 16 Pro Max, costs can soar above $450 due to the complexity of the Super Retina XDR displays.
| iPhone Model Group | Aftermarket Screen Est. (USD) | Original Apple Display Est. (USD) |
|---|---|---|
| iPhone 7 / 8 / SE | $60 – $80 | $140+ |
| iPhone X / XS / 11 Pro | $100 – $150 | $250 – $300 |
| iPhone 12 / 13 / 14 | $130 – $180 | $300 – $400 |
| iPhone 15 / 16 Series | $180 – $250+ | $350 – $450+ |
Understanding How Much It Cost to Repair iPhone Screen requires looking at the screen technology itself. Older phones used LCD (Liquid Crystal Display), which is relatively cheap to manufacture. Modern iPhones use OLED (Organic Light-Emitting Diode) panels. These offer those beautiful deep blacks and vibrant colors we love, but they are much thinner, more fragile, and significantly more expensive to produce. If you are curious about specific older premium models, check out our iPhone X Screen Repair Cost Guide for a deeper dive.
Factors Influencing Your Quick iPhone Screen Repair Price
Several “hidden” factors can nudge your bill up or down. At Salvation Repair, we always try to be transparent about these variables:
- Model Age: As a rule of thumb, the newer the phone, the higher the price. Parts for the latest models haven’t reached “commodity” status yet. You can read more about the newest generation in our guide: From Cracked to Pristine: Navigating Your iPhone 16 Screen Repair Journey.
- Screen Quality: This is the big one. Do you want a “Genuine Apple” part or a high-quality aftermarket alternative? Original displays retain features like True Tone and perfect color accuracy, while aftermarket options are easier on the wallet.
- Labor Rates and Location: While we serve the Laurel and Jackson, MS areas with competitive pricing, labor rates can fluctuate. However, we offer price matching to ensure you get the best deal in Jones County.
- Additional Damage: Sometimes a drop doesn’t just crack the glass; it might bend the frame or damage the internal sensors. For a full breakdown of what a technician looks for, see our iPhone Screen Repair Complete Guide.
Why Speed Matters for a Quick iPhone Screen Repair
We live on our phones. They are our GPS, our wallets, and our connection to family. That’s why a Quick iPhone screen repair isn’t just a luxury—it’s a necessity. A 30-60 minute turnaround time means you don’t have to find a “loaner” phone or go off the grid for a week.
Most independent shops, including ours, focus on Phone Repair Same Day because we know your time is valuable. For example, a Repair Guides / iPhone 13 Display Screen Replacement typically takes us about 45 minutes. We keep parts in stock so that walk-in customers can get back to their lives immediately.
Comparing Repair Providers: Independent vs. Authorized

Choosing where to take your device is the next hurdle. You generally have three paths: the Apple Store (or an Authorized Service Provider), a big-box retailer like Best Buy, or a specialized independent shop like Salvation Repair.
Apple Authorized Service Providers (AASPs): Places like Best Buy are “Apple-certified.” This means they use genuine parts and follow Apple’s strict protocols. While this is great for staying within your Apple Repair Terms and Conditions, it can sometimes be more expensive and might require an appointment days in advance.
Independent Repair Shops: We often provide a more personal, faster experience. Because we aren’t tied to Apple’s corporate scheduling software, we can often jump on a repair the moment you walk through the door. We also offer choices between premium aftermarket and original parts, giving you more control over the final price. For those seeking a Professional iPhone Repair, independent doesn’t mean “amateur”—it means agile.
Original Apple Displays vs. Aftermarket Screens
The debate between “Original” and “Aftermarket” is central to any Quick iPhone screen repair.
- Genuine Apple Displays: These are the exact screens your phone was born with. They support True Tone (which adjusts the screen’s color temperature to your environment) and ensure Face ID and brightness sensors work perfectly.
- Aftermarket Screens: These are third-party replacements. While they are significantly cheaper, some lower-quality versions might lack the same peak brightness or color depth.
Before you decide, it’s always wise to Check your coverage status to see if you have AppleCare+. If you do, an original screen at an authorized provider is usually the cheapest route ($29 in many cases). If you’re out of warranty, a high-quality aftermarket screen is often the best value for a Broken Phone Screen.
Choosing a Reliable Shop for Quick iPhone Screen Repair
Don’t just go to the first place you see. Look for shops with a proven track record. Customer reviews are your best friend here. For instance, look at what Joel Policarpo said about his experience:
When choosing, ensure the shop offers a warranty. At Salvation Repair, we offer a lifetime warranty on our screen repairs because we believe in the parts we use and the skill of our technicians.
Beyond the Glass: Comprehensive Repair Services
Sometimes, a cracked screen is just the tip of the iceberg. If your iPhone Screen Not Working after a drop, it might be due to internal connectors being jarred loose.
A reputable shop won’t just slap on a new piece of glass. They will perform a full diagnostic. Common “while-you-re-here” repairs include:
- Battery Replacement: If your phone is already open, it’s the perfect time to swap out an aging battery.
- Charging Port Cleaning/Fixes: We often find that “broken” chargers are just ports full of pocket lint!
- Back Glass Repair: Modern iPhones are glass sandwiches. If the back is shattered, we can fix that too. See our guide on Cracked Screen issues for more.
For older models, like the iPhone 11, the process is very straightforward. You can see the steps involved in our Repair Guides / iPhone 11 Screen Repair.
Handling Water Damage and Logic Board Issues
Dropped your phone in the sink and cracked the screen? That’s a bad day, but it’s not the end. Water damage requires a specialized diagnostic process to remove corrosion before it eats away at the logic board.
We’ve seen cases where a phone wouldn’t even turn on, like this one:
Whether it’s a simple Repair Guides / iPhone 12 Screen Replacement Guide or a complex micro-soldering job on the motherboard, professional technicians prioritize data preservation so you don’t lose your photos and contacts.
Frequently Asked Questions about iPhone Screen Fixes
Can water-damaged iPhones still get their screens repaired?
Yes, but the screen is often the least of your worries. We first perform a thorough cleaning and diagnostic to ensure the internal components are stable. If the logic board is healthy, a new screen will restore full functionality. For smaller devices like the SE or Mini, check out our Repair Guides / Replace iPhone 12 Mini Screen Replacement.
Do third-party shops offer warranties on screen repairs?
The best ones do! While Apple offers a 90-day service guarantee, many independent shops offer much longer. We offer a lifetime warranty on parts and labor. As Mandy Tran noted after her repair:
Is it cheaper to repair at an independent shop versus Apple?
Generally, yes. Independent shops have lower overhead and offer aftermarket part options that Apple simply doesn’t provide. Plus, you save on the “convenience tax”—no need to wait for a Genius Bar appointment. Stacey Iseman found this out firsthand:
…He replaced my phone screen while I waited, and charges much less than Appl…
Conclusion
At Salvation Repair, we understand that your iPhone is your lifeline. Whether you are in Laurel, Jackson, Ellisville, or anywhere else in Jones County, Mississippi, we are dedicated to providing the fastest, most reliable service possible. We specialize in same-day, on-site repairs for almost any device with a power button.
With our lifetime warranty, price matching guarantee, and commitment to Quick iPhone screen repair, you don’t have to live with a broken device. Don’t let a crack slow you down—visit us today and get your Screen Repair done right the first time!