Your Guide to Quick & Reliable Phone Repair Services Nearby
When You Need to Fix Phone Near Me: Quick Answers First
If you need to fix phone near me fast, here are the most common ways to find reliable help:
- Search Google Maps for “phone repair near me” and filter by ratings (4+ stars)
- Check for authorized providers (Samsung, Google, or Apple certified shops)
- Look for same-day service – most common repairs like screens and batteries are done in under 2 hours
- Ask about warranties – reputable shops offer at least a 1-year limited warranty
- Walk in or book online – many shops accept walk-ins with no appointment needed
Your phone is one of the most important tools you own. When it breaks, everything stops – work emails pile up, you miss calls, and daily life gets harder fast.
The good news? Most phone problems are fixable. Cracked screens, dead batteries, busted charging ports, and even water damage can all be repaired by a skilled local technician – often the same day.
But not all repair shops are equal. Knowing where to go, what to look for, and what to expect can save you time, money, and a lot of frustration. This guide covers everything you need to make a smart decision.
I’m Ralph Harris, and with over 20 years in electronics repair, more than 500 Apple certifications, and hands-on experience across the full spectrum of device fixes, I’ve helped thousands of people find trustworthy solutions when searching for a place to fix phone near me. Let’s walk through exactly what you need to know.

Simple fix phone near me glossary:
Common Issues That Require You to Fix Phone Near Me
When your device starts acting up, it can feel like your entire digital life is on hold. At Salvation Repair, we’ve seen it all—from the “I dropped it on the sidewalk” shattered glass to the “it fell in the sink” panic. Understanding the most common issues can help you describe the problem to a technician and get a faster estimate.

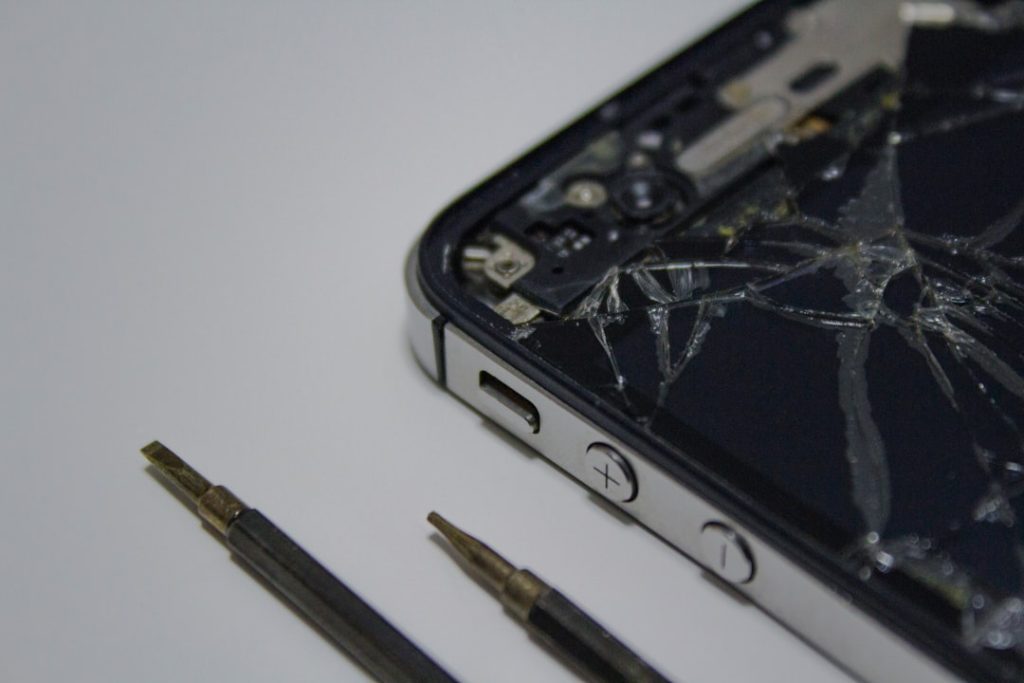
The most frequent reason people search for fix phone near me is a cracked screen. Whether it’s a tiny hairline fracture or a complete spiderweb of glass, a broken display is more than just an eyesore. It can lead to “ghost touching” (where the phone opens apps on its own) or even cut your fingers. If you’re dealing with a shattered display, you should check out local phone screen repair stores as soon as possible to prevent further damage to the internal OLED or LCD panel.
Other common headaches include:
- Battery Drainage: If your phone dies at 20% or needs to be plugged in three times a day, your battery has likely reached the end of its life cycle.
- Charging Port Failures: Sometimes your phone isn’t broken; it’s just dirty! Lint and dust can clog the port, but often the internal pins are bent or worn out, requiring a hardware replacement.
- Water Damage: This is a true emergency. If you’ve had a liquid spill, you need a cell phone water damage repair specialist immediately to stop corrosion.
- Audio Issues: Broken speakers or muffled microphones make it impossible to take calls or enjoy videos.
For those in the Pine Belt, finding quality smartphone repair laurel ms means looking for a shop that handles these issues daily with precision and speed.
Identifying Hardware vs. Software Failures
Not every glitch requires a screwdriver. Sometimes, your phone’s “brain” is just confused. If your apps are crashing constantly or the phone feels sluggish, it might be a software issue. However, if the touchscreen is completely unresponsive or there are lines running through the image, you’re likely looking at a hardware failure.
A good rule of thumb from our phone repair laurel ms tips is to try a hard restart first. If the problem persists even after a factory reset, it’s time to bring it to us for a professional diagnostic.
The Dangers of Liquid Exposure
We’ve all heard the myth: “Put it in a bag of rice!” As experts, we have to tell you—forget the rice. Rice doesn’t pull moisture out of the deep crevices of a logic board; it just gets sticky dust inside your charging port.
The real danger of water is corrosion. Once liquid hits the internal circuits, it begins to eat away at the metal. Professional shops use ultrasonic cleaners and micro-soldering to save boards that look hopeless. If you are looking for soso phone repair or help in the surrounding areas, getting the device to a pro within the first few hours is the difference between a fixed phone and a paperweight.
How to Choose a Reliable Local Repair Shop
With a repair shop on every corner, how do you know who to trust? You want someone who treats your $1,000 smartphone with the respect it deserves.
First, look for experience and certifications. A technician who has seen thousands of devices will be able to spot hidden issues that a hobbyist might miss. Second, ask about the parts. Are they using OEM (Original Equipment Manufacturer) parts or high-quality “A1-grade” alternatives? Cheap, low-quality screens often have poor color balance and break much easier than the originals.
When searching for laurel phone repair, always check customer reviews. Look for mentions of “speed,” “honesty,” and “warranty.” At Salvation Repair, we believe in transparency, which is why we offer price matching. If you find a lower published price for the same repair nearby, we won’t just match it—we’ll make sure you get the best value in Mississippi.
Benefits of Authorized Service Providers
Choosing an authorized provider or a shop that uses genuine parts ensures your device stays within its intended specifications. For example, the Samsung Care Network is vast—enough that 75% of Americans have access to a participating location. These shops use factory-direct parts and certified technicians.
If you have a newer device like a Google Pixel or a Galaxy S21 and up, using a samsung phone repair mobile service ensures that features like water resistance seals are replaced correctly.
Why Warranties Matter When You Fix Phone Near Me
A repair is only as good as the guarantee behind it. Imagine getting your screen fixed, only for it to stop working two weeks later. If the shop doesn’t offer a warranty, you’re stuck paying for the same repair twice.
That’s why we offer a lifetime warranty on our repairs. Whether you’re looking for a fix my phone near me or visiting a hattiesburg repair shop, always demand a written guarantee. It shows the business stands behind their work and the quality of the parts they use.
Professional vs. DIY: Why Expert Service Wins
We get it—the DIY kits online look cheap and easy. But modern smartphones are held together with strong adhesives, tiny specialized screws, and delicate ribbon cables thinner than a piece of hair.
One wrong move with a pry tool can puncture a battery (which is a fire hazard) or tear a FaceID sensor that can never be replaced. When you choose professional ellisville phone repair, you aren’t just paying for the part; you’re paying for the specialized tools and the diagnostic accuracy that prevents further damage.
If you’re busy and have no time for a shop explore mobile on site phone repair options. We can often come to you, performing the fix in our specialized vehicle while you continue your day. This is the ultimate way to get smartphone repair hattiesburg without the stress of fighting traffic or sitting in a waiting room.
Beyond Smartphones: Tablets and Consoles
Most people don’t realize that a great phone repair shop is actually a “tech hospital.” We don’t just stop at iPhones. If you need phone repair jackson ms, you should look for a place that can also handle:
- iPads and Tablets: Shattered glass or charging issues on your kid’s favorite device.
- Gaming Consoles: HDMI port repairs for PlayStation or Xbox, and Joy-Con drift fixes for Nintendo Switch.
- Laptops: Broken hinges, dead batteries, or cracked MacBook screens.
Our motto is simple: if it has a power button, we can probably fix it.
What to Expect: Costs, Timelines, and Preparation
How much is this going to cost, and how long will I be without my “third limb”? These are the two biggest questions we hear.
Generally, most common repairs like screens or batteries are completed in under two hours. In fact, at many professional locations, if you have an appointment by 3 PM, you can get your device back the very same day.
| Repair Type | Estimated Cost | Repair Time | Savings vs. New Phone |
|---|---|---|---|
| Screen Replacement | $80 – $250 | 45-60 Mins | 70-80% |
| Battery Replacement | $50 – $90 | 30 Mins | 90% |
| Charging Port Fix | $60 – $110 | 1 Hour | 85% |
| Water Damage Clean | $49+ (Diagnostic) | 24-48 Hours | Variable |
Choosing phone repair same day service is almost always more affordable than buying a new device. For a detailed breakdown of what to expect in the Jones County area, our cell phone repair laurel ms guide provides all the local specifics.
How to Prepare to Fix Phone Near Me
Before you hand over your device, there are a few steps you should take to ensure your data is safe and the process goes smoothly:
- Back Up Your Data: Use iCloud or Google Drive to ensure your photos and contacts are safe. While we take every precaution, it’s always better to be safe.
- Disable “Find My”: For iPhones, we often need “Find My iPhone” turned off to run certain diagnostics.
- Remove Accessories: Take off your case and remove your SIM card or microSD card if you’re worried about them.
- Note Your Passcode: Our technicians will need to test the camera, speakers, and touch sensitivity after the repair is done.
If you’re using mobile iphone repairs near me services, make sure you have a flat surface or a clear area for the technician to work. These convenient cell phone repair on demand services in laurel are designed to be as hands-off for you as possible!
Frequently Asked Questions about Phone Repair
How much does a typical screen repair cost?
Costs vary depending on the model. An older iPhone might cost around $80, while a high-end Samsung Galaxy with a curved OLED screen can be $200 or more. We always provide a free estimate before we start any work.
Can water damage always be fixed?
Not always, but the success rate is high if you act fast. The goal of water damage repair is to clean the logic board and replace any shorted components. If the “brain” of the phone is completely fried, it may be unrecoverable, but we offer a “no fix, no fee” diagnostic for these cases.
Is same-day service available for all models?
For 90% of the phones on the market (iPhone, Samsung, Google Pixel), we keep parts in stock for same-day service. For rarer models, we might need to order a part, which usually takes 24-48 hours.
Conclusion
When your technology fails, you don’t have to face the frustration alone. Whether you are in Laurel, Jackson, Ellisville, or Soso, Salvation Repair is here to provide the quick, reliable service you need to get back to your life.
With our lifetime warranty, price matching guarantee, and the expertise to fix any device with a power button, you can rest easy knowing your phone is in good hands. Don’t spend another day squinting through a cracked screen or carrying a portable charger everywhere you go.
Get your screen fixed today and experience the difference that professional, local expertise makes. Visit us at our Laurel, MS location or call us to schedule your on-site repair today!