How to Fix Your iPhone Screen Without Breaking the Bank
What It Really Costs to Fix an iPhone Screen — Quick Answer
How much does fixing an iphone screen cost depends on three things: your iPhone model, where you go for the repair, and the type of screen used. Here’s a fast breakdown:
| Repair Option | Price Range |
|---|---|
| Apple Store (out-of-warranty) | $149 – $379 |
| Apple Store (with AppleCare+) | $29 flat |
| Independent repair shop | $99 – $279 |
| Salvation Repair — LCD | from $129.95 |
| Salvation Repair — Aftermarket OLED | from $129.95 |
| Salvation Repair — OEM | from $149.95 |
The short version: Most people pay between $99 and $279 at an independent shop. Apple charges more — up to $379 without coverage. And with AppleCare+, it drops to a flat $29.
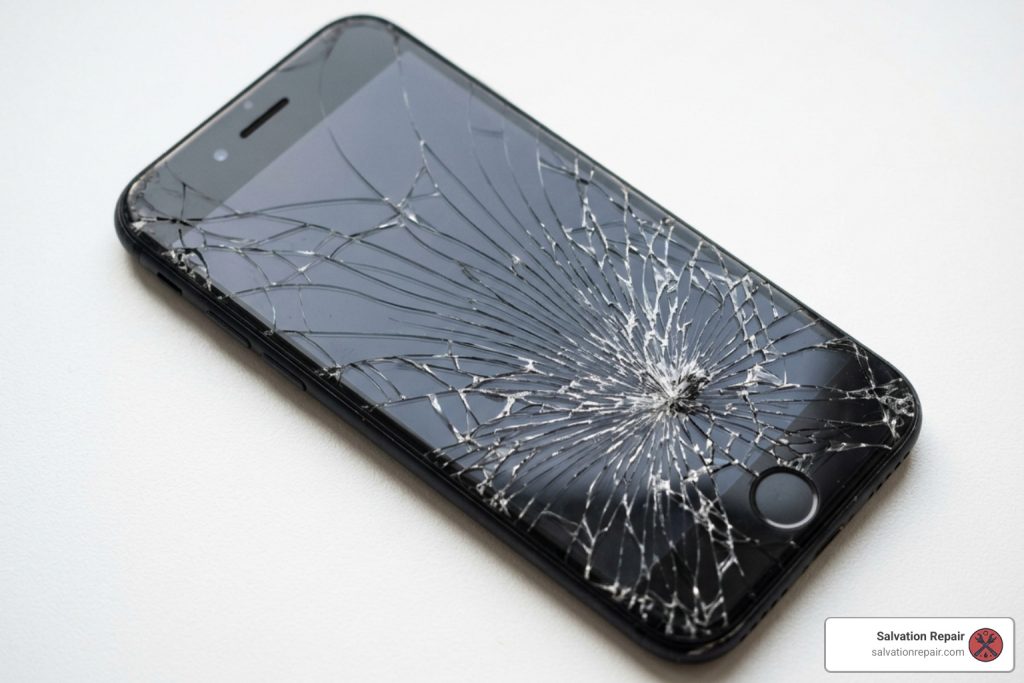
You cracked your screen. It happens — it’s actually the number one reason people bring their phones in for repair. The real question isn’t whether to fix it. It’s how to fix it without overpaying.
Whether you’re weighing Apple’s official service against a local shop, or trying to decide between a budget LCD and a premium OEM screen, this guide breaks down every cost so you can make a smart, confident decision.
I’m Ralph Harris, a certified Apple repair technician and phone repair specialist with over 20 years of hands-on experience running repair shops — and I’ve answered the question of how much does fixing an iphone screen cost thousands of times in person. This guide gives you the same straight answer I’d give a customer standing right in front of me.

How Much Does Fixing an iPhone Screen Cost?
When you hear that sickening crack as your phone hits the pavement, your mind immediately jumps to your wallet. The truth is, there is no single flat fee for repairing an iPhone display. The market in 2026 is highly segmented, giving you multiple pathways to get your phone back to mint condition.
To understand the broader landscape, it helps to look at average out-of-warranty costs. According to comprehensive industry data on How Much Do Apple Repairs Cost? (2026), an official out-of-warranty replacement from Apple typically ranges from $149 to $379.
If you choose to bypass the Apple Store and go with an independent repair provider, those costs drop significantly, generally landing between $99 and $279. This represents a substantial savings of 20% to 40% without necessarily sacrificing performance. For a deep dive into these pricing dynamics, check out our comprehensive resource on More info on iPhone screen repair costs.
Apple Store vs. Independent Repair Costs
Choosing between the Apple Store Genius Bar and an independent repair shop is the first major decision you will face.
Apple runs a highly standardized operation. If you walk into an Apple Store, you are guaranteed a brand-new, genuine Apple screen. However, you will pay a premium for that logo. Furthermore, Apple Authorized Service Providers are permitted to set their own labor fees, meaning you might pay even more than Apple’s estimated online pricing depending on where you live.
Independent repair shops, on the other hand, offer much more flexibility. At Salvation Repair, we believe in giving our customers options. We offer price matching to ensure you get the absolute best deal in Mississippi, combined with a lifetime warranty that shields you from future manufacturer defects.
While Apple offers a standard 90-day guarantee on their repairs, our lifetime warranty reflects our confidence in our technicians and the high-quality parts we source. For official manufacturer pricing, you can consult the Apple Service and Repair for iPhone Screens portal, but keep in mind that local independent service is almost always faster and more cost-effective.
iPhone Screen Repair Cost by Model
The age and tier of your iPhone are the primary drivers of the final bill. Newer, premium models feature advanced display technologies like 120Hz ProMotion OLEDs, which cost significantly more to manufacture and replace than older LCD displays.
Let’s look at the specific pricing for the latest generations:
- iPhone 16 Pro Max: This is the absolute peak of Apple’s display tech. If you need a replacement, we offer a range of tiers depending on your budget:
- AQ7 LCD: $129.95
- Aftermarket OLED: $219.95
- OEM Refurbished: $399.95
- New OEM: $469.95
- iPhone 16 Pro:
- LCD Option: $149.95
- OLED Option: $199.95
- For a complete breakdown of the latest generation, read our Guide to iPhone 16 screen repair in 2026.
- iPhone 15 Series: Out-of-warranty screen replacements at Apple hover around $279 to $329. Independent shops generally offer high-quality aftermarket OLEDs for this series starting around $150 to $180.
- iPhone 14 Series: Replacing an iPhone 14 screen at Apple costs $279, while the Pro Max jumps to $329. You can learn more about these specific model dynamics in our iPhone 14 screen repair guide.
- iPhone 13 Series: The standard iPhone 13 screen replacement at Apple is $279. At independent shops, you can easily find high-quality OLED replacements for under $150. For a closer look, read The Real Cost of Clarity: iPhone 13 Screen Repair Prices Revealed.
- iPhone 12 Series: The iPhone 12 was the first standard model to transition to OLED. Apple charges $279, but independent shops can repair these for $110 to $140. Check out The Price of Clumsiness: iPhone 12 Screen Repair Guide for more details.
- iPhone SE (3rd Gen): Because the SE uses older, budget-friendly LCD technology, it is the cheapest modern iPhone to repair. Apple charges $149, while independent shops can often complete the repair for under $90.
Understanding Screen Quality Tiers: LCD vs. OLED vs. OEM

When you get a quote from an independent repair shop, you will often be asked: “Do you want an LCD, an aftermarket OLED, or an OEM screen?”
Understanding these quality tiers is essential to making an informed decision. The screen tier you choose directly impacts color accuracy, brightness, battery consumption, and special features like True Tone and Face ID calibration.
LCD and AQ7 LCD Screens
Liquid Crystal Display (LCD) is a legacy technology. iPhones from the iPhone 8 and older, as well as the iPhone SE series, use LCDs natively. However, manufacturers also produce aftermarket LCDs (including premium variations like the AQ7 LCD) for newer iPhones that originally shipped with OLED screens.
- How they work: LCDs require a dedicated backlight behind the display panel to light up the pixels.
- Pros: They are incredibly budget-friendly. If you just need a functional phone to extract your data, or if you are on a very tight budget, an LCD will get the job done.
- Cons: Because they require a constant backlight, LCDs consume more battery power when installed on a phone designed for OLED. They are also slightly thicker, have larger bezels (borders), and cannot display true, deep blacks (black areas will look slightly gray).
Aftermarket OLED Screens
OLED (Organic Light-Emitting Diode) is the native technology used in all flagship iPhones from the iPhone 12 onward. Aftermarket OLEDs are built by third-party manufacturers to match Apple’s original specifications as closely as possible without the official OEM price tag.
- How they work: Unlike LCDs, every single pixel on an OLED screen produces its own light. When a pixel needs to display black, it turns off completely.
- Pros: Outstanding contrast ratios, vibrant colors, and native power efficiency. Aftermarket OLEDs preserve the original “feel” of your iPhone, keeping the display sharp and touch response highly fluid.
- Cons: While excellent, they may have slightly lower maximum peak brightness under direct Mississippi sunlight compared to official Apple parts.
OEM Refurbished and New OEM Screens
If you want absolute perfection, OEM (Original Equipment Manufacturer) is the way to go.
- New OEM: These are brand-new panels sourced directly from Apple’s supply chain. They offer 100% original color accuracy, flawless True Tone compatibility, maximum brightness, and maximum durability.
- OEM Refurbished: This is the “smart money” premium option. These are original Apple LCD or OLED panels that had cracked outer glass. Specialized recycling facilities separate the broken glass from the perfect underlying original Apple display panel, laminate a brand-new sheet of ultra-strong glass on top, and resell it. You get original Apple display quality and touch sensitivity at a lower price than a brand-new OEM part.
Key Factors That Influence the Cost of Your Repair

When calculating how much does fixing an iphone screen cost, the price on the board isn’t always the final price you pay. Several real-world variables can shift the final invoice.
How Additional Damage Affects Your Repair Cost
A drop rarely affects just one component. When a technician opens your iPhone, they must run a full diagnostic to ensure other vital components are still functioning.
- Frame Alignment: If your phone landed on its corner, the aluminum or stainless-steel frame might be bent. A new screen cannot sit flush in a warped frame. Straightening the frame requires extra labor.
- Back Glass Damage: On modern iPhones, the back glass is a separate structural component. If both the front and back are shattered, the repair complexity increases significantly.
- Liquid Damage: If water entered through the cracks in your screen before you brought it in, there may be hidden corrosion on the logic board.
- Face ID Sensors: The TrueDepth camera system is incredibly delicate. If the front sensor array was damaged during the drop, it may require advanced micro-soldering to restore Face ID functionality.
Repair vs. Replace: Applying the 50% Rule
Should you even bother fixing your phone, or is it time to upgrade? We always advise our customers in Laurel, MS and Meridian, MS to apply the 50% Rule.
If the total cost of the repair exceeds 50% of the phone’s current market value on the used/refurbished market, it is generally smarter to replace the device. For example, if you have an older iPhone 11 worth about $180, spending $150 on a premium screen repair doesn’t make financial sense. However, spending $199.95 to repair an iPhone 16 Pro worth $900 is an absolute no-brainer.
For a complete decision framework on this topic, check out Is It Cheaper to Repair or Replace a Phone? The 2026 Guide.
What to Expect During a Professional Screen Repair
At Salvation Repair, we believe your time is just as valuable as your money. You shouldn’t have to mail your phone away to a repair depot and wait a week to get your life back.
We specialize in high-speed, transparent, on-site service. When you bring your phone to us, we don’t hide in a back room.
- iPhone screen repairs take 10-15 minutes and are performed in front of the customer. You can watch our certified technicians work their magic, ensuring complete transparency and data privacy.
- Battery repairs take 30 minutes, allowing you to get a fresh charge cycle during your lunch break.
- Charging port repairs take 1 hour, resolving loose connections and slow charging issues on the spot.
For more information on what to expect during your visit, explore our Detailed Guide to iPhone Screen Repair Time.
How Much Does Fixing an iPhone Screen Cost in Terms of Time?
In our world, being without a phone is a massive disruption. If you mail your phone to Apple, you can expect to be offline for 5 to 7 business days. Even booking a Genius Bar appointment can take days, followed by a 2-to-3-hour wait in the store.
By choosing a local, same-day specialist, your “time cost” is virtually zero. You can walk in, have a cup of coffee, watch your screen get replaced in 15 minutes, and walk out with a fully functioning device. Learn more about your local rapid-repair choices in our guide on Same Day iPhone Screen Repair: Where to Go and What to Expect.
Frequently Asked Questions About iPhone Screen Repair
Does independent screen repair void my Apple warranty?
No. Under federal right-to-repair regulations, a manufacturer cannot void your entire device warranty simply because you had it repaired by a third party. However, if an independent shop damages your phone during the repair, Apple is not obligated to fix that specific damage under their warranty. That is why it is critical to choose a highly experienced, professional shop that stands behind their work.
How can I protect my iPhone screen after a repair?
The best way to avoid paying for another repair is prevention:
- Tempered Glass Screen Protector: This acts as a sacrificial lamb. If your phone drops, the protector shatters instead of your expensive display.
- Rugged Case with Raised Edges: Ensure your case has a “lip” that extends past the front glass. This prevents the screen from making direct contact with flat surfaces during a face-down drop.
- Avoid Back Pockets: Sitting on your phone puts immense torsional stress on the frame, which can hairline-crack the display over time.
What kind of warranty comes with a screen replacement?
Most independent repair shops offer a standard 30-day to 90-day warranty. Apple provides a 90-day service guarantee. At Salvation Repair, we do things differently. We provide a lifetime warranty on all our screen replacements, covering any issues with touch sensitivity, dead pixels, or digitizer glitches for as long as you own the device.
Conclusion
A cracked screen doesn’t have to mean a ruined week or an empty bank account. By understanding your options — from budget-friendly LCDs to premium OEM displays — you can find a solution that perfectly fits your budget and needs.
If you are in the Laurel, MS, Jackson, MS, Ellisville, MS, Soso, MS, or Meridian, MS areas, let us take the stress out of your repair. At Salvation Repair, we pride ourselves on our lifetime warranty, our robust price-matching policy, and our ability to fix “any device with a power button.”
Don’t spend another day squinting through shattered glass. Watch us fix your phone in just 10 to 15 minutes right in front of you. Book your professional screen repair today and get your iPhone back to looking and performing exactly the way it should!