HP laptop screen fix: Ultimate Fix 2025
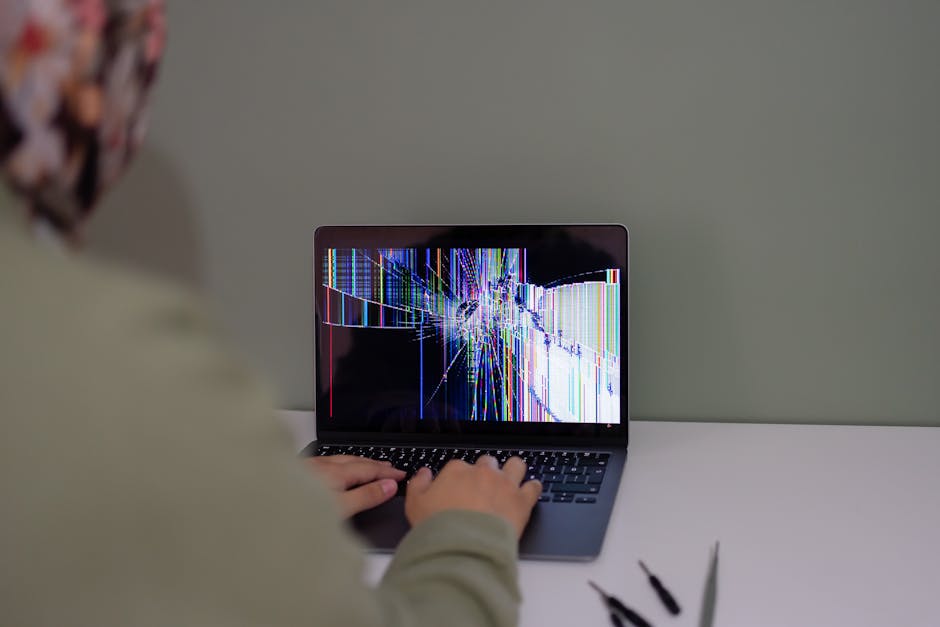
When Your HP Laptop Screen Breaks: What You Need to Know
An HP laptop screen fix is more achievable than you might think. A cracked or malfunctioning screen doesn’t mean your laptop is finished. You have two main paths forward:
Quick Answer:
- DIY Repair: Order a replacement screen ($50-$100), gather basic tools, and follow a guide. This usually takes 1-2 hours.
- Professional Repair: Contact a local repair shop. Costs typically range from $100-$300+, depending on the screen type.
- Key Decision Factors: Consider your warranty status, technical comfort level, and whether you have a complex touchscreen model.
A broken screen is one of the most common laptop issues. Whether you’re seeing cracks from a drop, strange lines on the display, or dead pixels, most problems are fixable. A DIY repair can save you significant money, with replacement screens available online for $50 to $100. For those who prefer expert handling, professional repair offers peace of mind and is the safer bet for complex issues or warranty preservation.
This guide will help you diagnose the damage, choose between a DIY or professional HP laptop screen fix, and walk you through the repair process if you decide to do it yourself.

First Steps: Diagnosing the Damage
Before starting any repair, you need to diagnose the problem. The clues your screen provides will determine the best course of action.
- Physical Damage: Obvious spiderweb cracks or missing glass from drops or impacts.
- Vertical or Horizontal Lines: Colored lines across the display often point to a faulty LCD panel or a loose internal video cable.
- Dead Pixels: Small dots that are stuck on one color or stay black. A large cluster can be very distracting.
- Black Spots: Ink-like splotches indicate pressure damage that has caused the liquid crystals in the LCD to leak.
- Flickering or Dim Screen: An intermittently black or extremely dim screen (where you can see a faint image with a flashlight) usually means a failing backlight or a loose cable.
- Unresponsive Touch: On touchscreen models, this points to a damaged digitizer layer.
Differentiating Screen vs. Graphics Card Issues
Sometimes, a display problem isn’t the screen at all but an issue with the graphics card. There’s a simple test to find out.

Connect your HP laptop to an external monitor or TV using an HDMI or other video cable. You may need to press a function key (like Fn + F4) to switch the display.
- If the external display works perfectly, the problem is your laptop’s screen. This is good news, as a screen replacement will solve the issue.
- If the external display shows the same distortion, the problem is likely your graphics card or another motherboard component, which is a more complex repair.
For software-related issues, HP’s guide to troubleshooting screen issues offers further diagnostics worth checking before committing to a hardware repair.
Customer Induced Damage (CID)
Be aware of Customer Induced Damage (CID). This term refers to damage from accidents like drops, spills, or impacts. Standard HP warranties do not cover CID. Unless you have a separate Accidental Damage Protection plan, you will have to pay for the repair out of pocket. This is a key factor when deciding between a DIY and professional HP laptop screen fix.
DIY vs. Professional Repair: Making the Right Choice
Now that you know what’s wrong, it’s time to decide: fix it yourself or hire a professional? There’s no single right answer—it depends on your budget, timeline, and technical comfort.
| Feature | DIY HP Laptop Screen Repair | Professional HP Laptop Screen Repair |
|---|---|---|
| Cost | Lower. Replacement screens typically cost $50-$100. Tools are a one-time purchase ($10-$30). Significant savings. | Higher. Usually around $100-$300+, depending on laptop model and screen type. Complex repairs can be $200-$500+. |
| Time | Moderate. Can often be completed in an hour or two, once you have the parts. | Variable. Depends on shop’s backlog and part availability. Could be same-day to several business days or weeks. |
| Risk | Higher. Potential for further damage (e.g., stripping screws, breaking cables, damaging other components). Voids warranty. | Lower. Performed by experienced technicians. Shop often provides a warranty on the repair. |
| Warranty | Likely voided. Opening the laptop and performing repairs yourself will almost certainly void any remaining manufacturer warranty. | Maintained (if HP authorized). If repaired by an HP authorized service center, your warranty may remain intact for other issues. |
| Skill Level | Requires patience, attention to detail, and basic technical aptitude. | No technical skill required from you. |
| Convenience | You work on your schedule. | Drop off and pick up. |
Key Considerations
-
Cost: The most significant advantage of DIY is the cost savings. You’re paying for the part ($50-$100) and maybe some tools, versus a professional repair that often costs between $100 and $300+.
-
Warranty: If your laptop is still under warranty, a DIY repair will void it. While accidental damage isn’t covered anyway, the warranty would still apply to other components like the motherboard. A repair at an HP authorized center preserves your warranty.
-
Skill and Complexity: Be honest about your abilities. A standard, non-touch screen replacement is manageable for many beginners. However, touchscreens are far more complex as the digitizer is often glued to the LCD. For these, professional help is strongly recommended to avoid costly mistakes.
-
Risks: A DIY HP laptop screen fix carries risks. You could strip a screw, break a delicate cable, crack the new screen, or order the wrong part. A professional repair minimizes these risks and often includes a warranty on the work itself.
When to Seek Professional Help
Consider professional help if your laptop is under warranty, has a touchscreen, or if you’re simply not comfortable with the process. If the external monitor test failed, a professional diagnosis is essential to avoid wasting money on the wrong parts. For peace of mind and expert service, a professional repair is the best choice.
For assistance with your HP laptop screen fix or other needs like Screen Repair and Gaming Laptop Repair, our team at Salvation Repair is ready to help. We offer same-day service in Laurel, MS, Jackson, MS, and Oxford, MS, with a lifetime warranty on our work.
The Ultimate DIY HP Laptop Screen Fix Guide
For those ready to tackle the HP laptop screen fix yourself, this guide will walk you through the process. With patience and care, you can save money and gain a valuable skill.

Step 1: Identify Your Model and Find the Correct Screen
Ordering the correct screen is the most critical step. An incorrect part won’t fit or function.
-
Find Your Model Number: Look for a sticker on the bottom of your laptop. The model name (e.g., “HP Pavilion 15-cs0xxx”) and product number (P/N) are key. If the battery is removable, the label might be underneath it. Alternatively, if the laptop powers on, press Windows key + R, type msinfo32, and find the “System Model” in the window that appears.
-
Source a Replacement Screen: Search online for your full model number plus “LCD screen replacement.” Use reputable online retailers that specialize in laptop parts and check seller ratings and return policies.
-
Verify Compatibility: The new screen must match the original’s size (e.g., 15.6-inch), resolution (e.g., 1920×1080), and connector type (e.g., 30-pin or 40-pin). Do not try to “upgrade” the resolution, as it won’t work. The best way to ensure a match is to remove the old screen first and search for the part number printed on its back.
Step 2: Gather Your Tools for the HP laptop screen fix
- Precision Screwdriver Set: With Phillips head and possibly Torx bits.
- Plastic Pry Tool (Spudger): Essential for safely separating the plastic bezel without causing damage.
- Anti-Static Wrist Strap: Prevents static discharge from damaging internal components.
- Small Container for Screws: A magnetic tray or small bowls to keep screws organized.
- Lint-Free Cloth: For cleaning the new screen.
Step 3: The Replacement Process: A Step-by-Step Walkthrough
Take your time and work carefully through these steps.

-
Safety First: Shut down the laptop completely, unplug the power adapter, and remove the battery if it’s external. Ground yourself with an anti-static wrist strap.
-
Remove the Screen Bezel: The bezel is the plastic frame around the screen. Look for screws hidden under small rubber or plastic covers in the corners. After removing the screws, use a plastic pry tool to gently work your way around the edges, unsnapping the clips that hold it in place.
-
Unscrew the Damaged LCD Panel: The LCD panel is secured by screws on metal brackets on its sides. Remove these screws and gently tilt the panel forward, laying it face-down on the keyboard. Be careful not to strain the attached video cable.
-
Disconnect the Video Cable: On the back of the panel, you’ll find a flat ribbon cable. It’s often secured with tape and a small retaining clip or lever. Peel back the tape, release the clip (it may flip up or slide), and then gently pull the cable straight out of the connector. Do not use force.
-
Install the New Screen: Connect the video cable to the new screen, ensuring it’s fully seated and the retaining clip is secured. Position the new screen in the frame and replace the mounting screws. Tighten them until snug, but don’t overtighten.
-
Test Before Reassembly: This is a crucial step. Before snapping the bezel back on, reconnect the battery (if removed) and power adapter. Turn on the laptop. Check for a clear image, and look for any lines, dead pixels, or flickering. If it looks good, power down and disconnect everything again.
-
Final Reassembly: Snap the bezel back into place, ensuring all clips engage. Replace the bezel screws and their covers. Reinstall the battery. Power on one last time to confirm your successful HP laptop screen fix.
If you encounter issues or prefer a professional touch, Salvation Repair offers same-day service in Laurel, MS, with a lifetime warranty.
Frequently Asked Questions about HP Laptop Screen Repair
Here are answers to the most common questions we get about screen repairs at Salvation Repair.
How much does it cost to fix an HP laptop screen?
The cost depends on your repair path. A DIY HP laptop screen fix is the most affordable option, with replacement screens typically costing $50 to $100. Professional repair services generally range from $100 to $300+. The final price is affected by several factors:
- Screen Type: Touchscreens are significantly more expensive than non-touch displays.
- Resolution: High-resolution (FHD, 4K) panels cost more than standard HD screens.
- Laptop Model: Screens for premium or gaming laptops are pricier than those for entry-level models.
Standard warranties do not cover accidental damage, so you’ll likely pay out-of-pocket unless you have an Accidental Damage Protection plan.
Can I fix a cracked HP laptop screen myself?
Yes, it’s possible if you are patient, detail-oriented, and comfortable working with small electronics. A DIY repair can save you a lot of money. However, it’s not recommended for everyone. You should consider professional help if:
- Your laptop has a touchscreen, which is much harder to replace.
- Your laptop is still under warranty and you want to preserve it.
- You suspect there is further damage beyond just the screen.
- You’re not confident in your technical skills.
Opening your laptop will void the manufacturer’s warranty, so weigh the savings against that risk.
What should I do if the new screen doesn’t work?
Don’t panic. This is often due to a simple issue. Power everything down and try these troubleshooting steps:
- Check the Video Cable Connection: This is the most common culprit. Re-seat the cable on both the screen and motherboard side, ensuring it’s fully inserted and the retaining clip is locked.
- Verify the Part: Double-check that the part number on the new screen matches your original. Even a small difference in model or connector type can cause incompatibility.
- Test with an External Monitor: Connect to an external display again. If it works, the issue is with the new screen or its connection. If the external display also fails, a different component may have been damaged during the repair.
If you’ve tried these steps and the screen still doesn’t work, you may have a defective part. Contact the seller for a replacement. If you’re stuck, the team at Salvation Repair can diagnose the problem and complete the repair for you.
Conclusion: Your Laptop’s Screen is Saved
A damaged HP laptop screen can be frustrating, but it’s a fixable problem. Your laptop is far from a lost cause. The key is to start with a proper diagnosis to confirm the issue is screen-related, often with a simple external monitor test.
From there, you face the choice between DIY and professional repair. A DIY HP laptop screen fix is a budget-friendly option for those with the right skills and patience, with parts costing around $50-$100. Professional repair offers expertise, speed, and peace of mind, and is the recommended path for complex touchscreen models or for preserving a warranty.
If you chose the DIY route, you’ve learned how to identify your model, source the right part, and carefully perform the replacement. The most important lessons are to work slowly, stay organized, and always test the new screen before final reassembly.
Whether you fixed it yourself or sought professional help, your laptop is back in working order. A broken screen doesn’t have to be the end of your device’s life.
If you’re in the Laurel, MS, Jackson, MS, or Oxford, MS area and prefer an expert to handle your HP laptop screen fix, we’re here for you at Salvation Repair. We offer same-day service and a lifetime warranty on our work. We’re committed to getting your device back to you quickly because we know how important it is.
Ready to get your laptop looking good as new? Get a fast, professional screen repair today. Your screen will thank you.