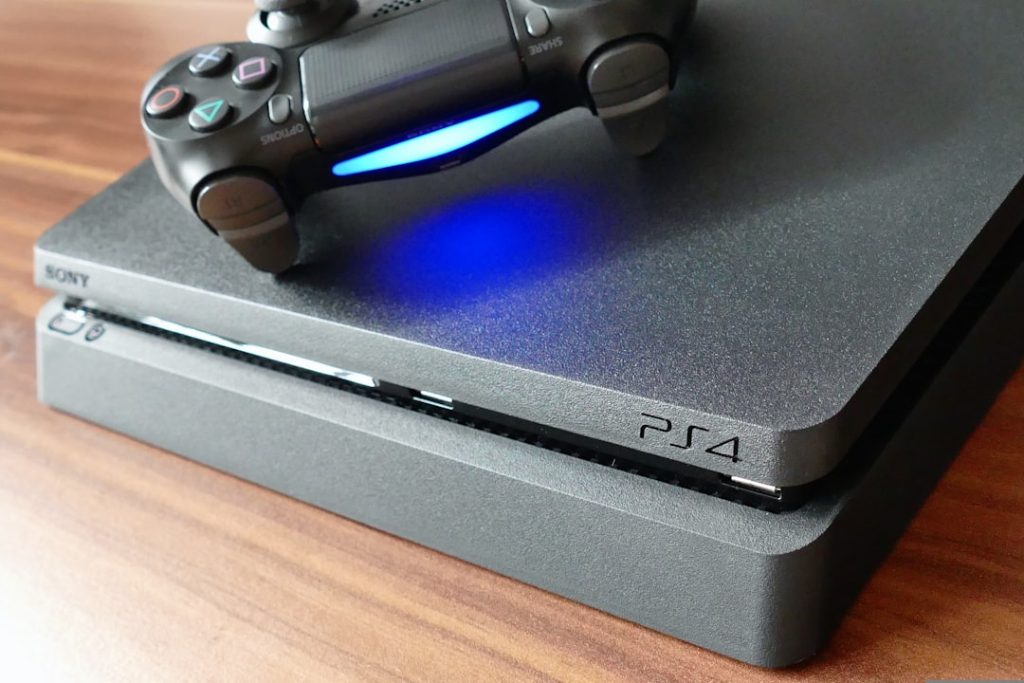
PS4 loud fan repair: Ultimate Fix 2025!
Why Your PS4 Fan Sounds Like a Jet Engine
PS4 loud fan repair typically involves improving ventilation, cleaning dust from the internal fan and heatsink, or replacing degraded thermal paste. Most issues stem from dust restricting airflow, forcing the fan to spin faster and louder to keep components cool.
Quick Fix Guide:
- Simple Fix (5 minutes): Move your PS4 to an open, well-ventilated area and clean external vents with compressed air.
- Deep Clean (30-45 minutes): Open the console and remove dust from the fan blades and heatsink using compressed air and soft brushes.
- Advanced Repair (1-2 hours): Replace thermal paste on the processor if cleaning doesn’t resolve the issue.
- Fan Replacement (1-2 hours): Replace the fan motor if it’s physically damaged or fails to spin properly.
If your PlayStation 4 sounds like a jet engine during gameplay, you’re not alone. This is a common complaint, especially with older models, but you can often fix it yourself. The root cause is almost always dust accumulation. Over time, dust clogs the fan and heatsink, restricting airflow. To compensate and maintain safe temperatures, the fan spins much faster, creating the loud noise.
A loud fan is a warning sign. Poor cooling can lead to reduced performance (thermal throttling), sudden shutdowns, or even permanent component failure like the Blue Light of Death. This guide will walk you through diagnosing and fixing your loud PS4 fan, from simple external cleaning to internal maintenance like thermal paste replacement. We’ll cover the original PS4, PS4 Slim, and PS4 Pro, as each has different disassembly requirements.
I’m Ralph Harris, and with over 20 years of electronics repair experience and more than 500 Apple repair certifications, I’ve fixed countless PS4 loud fan repair cases. This guide will help you restore quiet, efficient performance.

Why Your PS4 Sounds Like a Jet Engine: Diagnosing the Problem
When your PS4 roars louder than the game, its cooling system is struggling. Understanding the cause is the first step to a successful PS4 loud fan repair.
Common Causes
The primary reason is dust accumulation. Dust insulates components, clogs the heatsink and vents, and restricts airflow. This forces the fan to spin at maximum speed to compensate, creating the jet engine sound. We see this constantly in our Laurel, MS repair shop.
Other factors include:
- Blocked Vents: Obstructed air vents compromise airflow, making the fan work harder and louder.
- Poor Ventilation: Placing your console in an enclosed space prevents proper air circulation, leading to overheating.
- Degraded Thermal Paste: Over several years, the thermal paste between the processor (APU) and heatsink dries out, becoming less effective at transferring heat. The processor runs hotter, and the fan works harder to compensate.
- Failing Fan Motor: Though less common, a fan motor can fail. Worn bearings may cause a grinding noise, or the motor may spin without moving much air.
Signs Your PS4 Fan Needs Attention
Recognizing warning signs early can prevent severe damage. Look out for:
- Jet engine noise during gameplay: The most obvious sign, especially during graphically intensive games.
- Console is hot to the touch: Excessive heat, particularly around the vents, indicates overheating.
- Error messages about temperature: Your PS4 may display on-screen warnings about high temperatures.
- Games lagging or crashing: Overheating causes the system to “throttle” performance, leading to slowdowns, frame drops, or crashes.
- No air blowing from vents: If the fan is loud but little air is expelled, airflow is severely restricted.
Consequences of Ignoring the Issue
Ignoring a loud fan can lead to serious consequences:
- Overheating and Component Damage: High temperatures shorten the lifespan of the processor, graphics chip, and memory.
- Blue Light of Death (BLOD): Extreme, prolonged overheating can cause critical hardware failure, signaled by the BLOD.
- Reduced Performance: Overheating causes thermal throttling, where the PS4 slows down to manage heat. This results in lower frame rates and lag.
Other components can also make noise. A failing hard drive might click or grind. While the fan is the most common cause of increasing noise, if you’re unsure, our technicians in Jackson, MS, can diagnose the exact issue.
Your Step-by-Step Guide to PS4 Loud Fan Repair
Now, let’s fix your loud PS4. This guide covers simple external cleaning and more involved internal repairs to bring your console back to a whisper.

Before You Start: Essential Tools and Precautions
Before starting internal work, gather the right tools and understand the risks. Preparation is key for a successful PS4 loud fan repair.
Here’s what you’ll need:
- TR8/T9 Torx Security Screwdriver: For special security screws on most PS4 models.
- Phillips Screwdriver (PH00, PH1): For various internal screws.
- Canned Air (or a Dust Blower): For blasting away dust. Hold it upright to avoid expelling liquid.
- Isopropyl Alcohol (90%+): For cleaning old thermal paste.
- Cotton Swabs and Microfiber Cloths: For applying alcohol and wiping surfaces.
- New Thermal Paste (e.g., Arctic MX-4, Noctua NT-H1): Crucial for thermal paste replacement.
- Spudger or Prying Tool: For gently separating plastic casings.
- Tweezers: For handling small connectors and stubborn dust.
- Soft Brushes (e.g., anti-static brush): For dislodging dust from tight areas.
Precautions:
- Warranty Void Warning: Disassembling the PS4 will void the manufacturer’s warranty. If your console is still under warranty, contact Sony or a professional service like Salvation Repair in Oxford, MS, before attempting a DIY fix.
- Static Electricity Risk: Work on a clean, dry surface. Avoid using vacuum cleaners on internal components, as they generate static electricity that can damage parts.
- Unplug Everything: Always unplug your PS4 from power and disconnect all cables before starting.
- Organize Screws: Keep track of screws using a magnetic mat or small containers. Taking photos during disassembly helps with reassembly.
Simple Fixes for PS4 Loud Fan Repair Without Opening the Console
First, try these simple fixes that don’t require opening the console. They are quick, easy, and often effective for a first attempt at PS4 loud fan repair.
-
Improve Ventilation:
- Move to an Open Space: Ensure your PS4 isn’t in a tight cabinet. Give it breathing room, especially around the back and side vents.
- Use a Vertical Stand: Orienting your PS4 vertically can improve airflow, but ensure the stand doesn’t block vents.
- Lift the Console: Placing small risers under the console allows more air to circulate underneath.
-
Clean External Vents:
- Use Compressed Air: With the console unplugged, use short bursts of compressed air to clear dust from all external vents and ports. Hold the can upright. Never blow air directly into the PS4 Disc Drive.
- Check for Obstructions: Visually inspect vents for large dust bunnies or pet hair and gently remove them with tweezers.
- Wipe Down Exterior: Use a microfiber cloth to wipe down the console’s exterior.
If these steps don’t work, it’s time for a deeper clean.
Advanced PS4 Loud Fan Repair: Deep Cleaning and Component Replacement
If simple fixes fail, a deep clean is necessary. This involves disassembling the PS4 to access the fan, heatsink, and possibly replace the thermal paste.
-
Disassembly Process:
- Removing the Casing: Steps vary by model, but you’ll generally remove the hard drive cover, then the plastic casings. This requires removing warranty stickers to access security screws.
- Accessing Internal Components: Once the shell is off, you’ll remove the hard drive, power supply, and other parts to reach the motherboard, fan, and heatsink. Take photos at each step to aid reassembly.
-
Cleaning the Fan Blades:
- Once accessible, use tweezers to remove large clumps of dust from the fan.
- Use a soft brush or cotton swab with isopropyl alcohol to wipe each fan blade.
- Use compressed air to blow away remaining dust. See a visual guide here: PS4 Original Cleaning and Maintenance Video.
-
Cleaning the Heatsink:
- The heatsink’s thin metal fins often get clogged with dust.
- Use a soft brush to dislodge dust from between the fins.
- Use compressed air to blast the loosened dust out of the console. A clogged heatsink is a primary cause of overheating.
-
Replacing Thermal Paste:
- When to Replace: Replace the thermal paste if your PS4 is several years old, if cleaning doesn’t fix the noise, or if you’ve already disassembled it to the motherboard. The paste degrades over time, losing effectiveness.
- Application Process:
- Carefully remove old paste from the APU (processor) and heatsink using a cotton swab and isopropyl alcohol until both surfaces are spotless.
- Apply a small, pea-sized dot of new thermal paste to the center of the APU.
- When you reattach the heatsink, the pressure will spread the paste evenly. Tighten the clamp screws gradually to avoid issues.
-
Fan Replacement Process:
- If cleaning and new paste don’t help, and the fan makes grinding noises or doesn’t spin well, you may need a new one.
- Replacement involves installing a new, model-specific fan, which typically costs $22 – $33.
- While DIY is possible, it’s an intricate process. If you’re not comfortable, our technicians at Salvation Repair can handle it. Professional repair often starts at $100, including parts, labor, and a warranty.
PS4 vs. PS4 Slim vs. PS4 Pro: Model-Specific Repair Tips
The principles of PS4 loud fan repair are the same for all models, but disassembly differs. Knowing your model is crucial to avoid damage.

Key Differences in Disassembly, Fan Access, and Tool Requirements
In our Laurel, MS shop, we’ve seen that each model’s internal layout is distinct.
Here’s a quick comparison:
| Feature | PS4 Original (CUH-1xxx “Fat”) | PS4 Slim (CUH-2xxx) | PS4 Pro (CUH-7xxx) |
|---|---|---|---|
| Top Cover Removal | Requires tools (T8/T9 Torx) | Tool-less (gently pry/slide) | Tool-less (gently pry/slide) |
| Tools Needed for Fan Access | T8/T9 Torx security screwdriver, Phillips | T8 security Torx, Phillips #1, PH00 | T8 security Torx, Phillips #1, PH00, spudger |
| Warranty Seal Location | Over screws on the back | Sticker over a screw | Sticker over a screw |
Repairing the Original PS4 (2013 “Fat” Model)
The original PS4 is prone to loud fan noise from dust. Its design requires more effort to access internal components.
- Tools Needed: A T8 or T9 Torx security bit is required to remove screws hidden under warranty stickers.
- Disassembly: The process involves removing the hard drive cover, flipping the console, and prying off the bottom plastic section after removing the Torx screws to expose the fan and heatsink.
- Guide: For a detailed walkthrough, consult the PS4 Original Fan Replacement Guide.
Repairing the PS4 Slim
The PS4 Slim is generally quieter but still collects dust. Its design allows easier initial access for basic cleaning.
- Top Cover Removal: The top cover can often be removed without tools by gently pulling and sliding it off, giving you quick access to the fan.
- Deeper Access: For a full deep clean or fan replacement, you’ll still need a T8 security Torx and Phillips screwdrivers to remove internal components.
- Guide: For comprehensive instructions, see the PS4 Slim Fan Replacement Guide. Thermal paste replacement is often a necessary but unstated step.
Repairing the PS4 Pro
The PS4 Pro has a robust cooling system but is not immune to dust. Its internal layout is more complex.
- Top Cover Removal: Like the Slim, the Pro’s top cover can be removed without tools for superficial cleaning.
- Internal Complexity: A full disassembly is more involved than the Slim, requiring careful handling of ribbon cables and screws.
- Guide: Refer to the PS4 Pro Fan Replacement Guide for detailed instructions.
No matter your model, proceed with caution. If you feel out of your depth, our team at Salvation Repair in Mississippi is here to help.
Frequently Asked Questions about PS4 Fan Noise
Here are answers to common questions we get from customers in Jackson, MS, about noisy PS4s.
How often should I clean my PS4?
How often you should clean your PS4’s internals depends on your environment and usage. We advise:
- Every 6 to 12 months: For most users in a typical home environment to prevent major dust buildup.
- Every 3-6 months: If you have pets, smoke indoors, live in a dusty environment, or use your PS4 heavily.
- As needed: If you notice any warning signs, clean it immediately. Don’t wait for the noise to get worse.
Regular maintenance helps avoid the need for intensive PS4 loud fan repair.
Can I use a vacuum cleaner to clean my PS4?
No, do not use a vacuum cleaner on internal components. It poses several risks:
- Static Electricity Risk: Vacuums generate static electricity that can permanently damage sensitive electronics.
- Potential for Component Damage: The strong suction can dislodge or damage delicate parts like small connectors.
- Why Compressed Air is Safer: Compressed air or a dust blower is much safer, dislodging dust without physical contact or static risk.
- Proper Technique: When using canned air, hold the can upright and use short bursts. A vacuum can be used carefully on external vents, but keep it away from the openings.
Will cleaning my PS4 make it run faster?
Yes, cleaning your PS4 will improve its performance indirectly. It won’t upgrade the hardware, but it will restore its intended speed.
- Preventing Thermal Throttling: A clean, cool PS4 prevents the system from “thermal throttling”—deliberately slowing down to avoid overheating. This allows your console to run at full speed for a smoother experience.
- Maintaining Stable Frame Rates: A cool console sustains higher, more stable frame rates, reducing lag.
- Reducing Crashes and Freezes: Overheating causes crashes and freezes. A clean PS4 is a more stable PS4.
Cleaning ensures your PS4 performs at its best, preventing slowdowns caused by heat and extending its lifespan.
Conclusion: Keeping Your Console Quiet for Good
Fixing a loud PS4 fan restores quiet, safeguards your console, and ensures optimal performance. We’ve covered everything from simple cleaning to thermal paste replacement for an effective PS4 loud fan repair. The benefits include a quieter console, better performance, and a lower risk of overheating damage.
Prevention is always better than cure. To keep your console quiet:
- Use Dust Covers: When not in use, a dust cover reduces dust settlement.
- Maintain a Clean Gaming Area: Regularly dust the area around your PS4.
- Ensure Proper Ventilation: Place your PS4 in an open area, avoiding enclosed cabinets or carpet.
While many PS4 loud fan repair tasks are DIY-friendly, sometimes you need professional help. If you’re uncomfortable with disassembly, if the problem persists after cleaning, or if you suspect a complex hardware issue, it’s best to consult experts.
At Salvation Repair, we specialize in game console repair. Our experienced technicians in Laurel, MS, Jackson, MS, and Oxford, MS, can diagnose and fix loud fan issues efficiently, offering same-day service and a lifetime warranty.
Don’t let a noisy fan ruin your gaming experience. Take action today, and if you need a hand, we’re here to help you get back to gaming in peace!
Explore our game console repair guides
One thought on “Quiet Your Console: A Guide to Fixing Loud PS4 and PS5 Fans”