Xbox Series X fan: 2026’s Cool or Con?
Understanding the Xbox Series X Fan: What You Need to Know

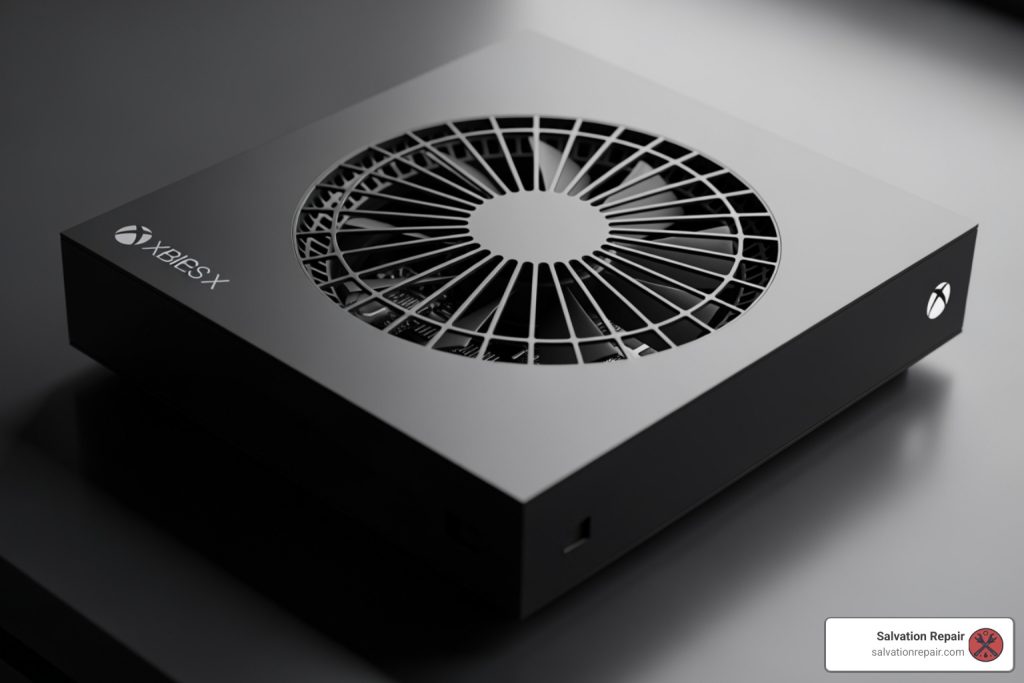
The Xbox Series X fan is a sophisticated 130mm cooling system designed to keep Microsoft’s most powerful console running quietly and efficiently. If you’re evaluating whether to add an external fan accessory to your setup, here’s what matters most:
Quick Answer: Do You Need an External Fan for Xbox Series X?
- Built-in cooling is highly effective – The console features a 130mm fan, vapor chamber heatsink, and parallel cooling architecture
- Normal operation – The console should feel warm (not hot) with exhaust reaching up to 62°C, operating at just 37.3 dB(A) under load
- External fans are usually unnecessary – Microsoft’s design already handles thermals efficiently for most environments
- When external fans help – Hot climates, enclosed spaces, or specific reported overheating issues
- Potential downsides – Risk of pushing dust inside, disrupting airflow, and added noise
The Xbox Series X was engineered from the ground up with cooling as a primary design goal. Its tower shape isn’t just aesthetic—it’s functional, using natural convection assisted by a large top-mounted fan to draw cool air from the bottom and exhaust heat efficiently from the top. This system keeps the console quieter than the previous Xbox One X, even under heavy gaming loads.
Many gamers wonder if adding an external fan accessory provides meaningful benefits or if it’s an unnecessary expense that might even cause harm. Some users report lower surface temperatures and resolved freezing issues after adding external cooling, while others warn about dust infiltration and disrupted airflow patterns. The truth lies somewhere in between, depending on your specific setup and environment.
I’m Ralph Harris, and over my 20+ years repairing gaming consoles and electronics, I’ve seen countless Xbox Series X fan questions and cooling concerns that could have been avoided with proper understanding of how these systems work. Through hands-on diagnostic work at Salvation Repair, I’ve learned what actually matters for console longevity versus what’s marketing hype.

Simple Xbox Series X fan glossary:
Understanding the Xbox Series X’s Built-In Cooling System
At Salvation Repair, we often encounter questions about the Xbox Series X fan and its cooling capabilities. It’s a marvel of engineering, truly. Microsoft designed the console with a clear focus on thermal management, understanding that raw power means nothing if it can’t be sustained without overheating or excessive noise.
The primary function of the Xbox Series X fan is to facilitate heat removal from the console’s internal components, especially the powerful System on a Chip (SoC). It’s part of a sophisticated “parallel cooling architecture” that draws cool air from the bottom of the console, guides it through a large passive heatsink with vertical fins, and then expels the hot air out the top. This design leverages natural convection, where hot air naturally rises, making the vertical orientation slightly more efficient for cooling.
Compared to previous Xbox models and many PCs, the Series X’s cooling system is remarkably integrated and efficient. While PCs often rely on multiple fans (120mm or 140mm are common), the Series X uses a single, large 130mm fan. This choice balances performance, noise, and size effectively. The cooling system also incorporates a vapor chamber heatsink, which helps to spread heat evenly across the entire surface of the heatsink, further enhancing thermal dissipation.
This meticulous design allows the Xbox Series X to handle intense gaming loads with impressive quietness and thermal stability.
Xbox Series X thermal and power analysis
Why Your Console Feels Warm
It’s perfectly normal for your Xbox Series X to feel warm, especially on the top where the fan expels hot air. This warmth is a sign that the cooling system is doing its job effectively, moving heat away from the internal components.

Our thermal analyses have shown that the console’s skin temperature can reach 48-49°C in the center under load, while the exhaust air from the top can hit a maximum of 62°C. While this might sound high, it’s well within safe operating parameters for electronics. For comparison, the Xbox One X, a console three years older, idled at 38.5 dB(A) and ramped up to 45 dB(A) under load. The Series X, on the other hand, is significantly quieter.
The key is to differentiate between “warm” and “hot.” If your console feels excessively hot to the touch, or if it’s shutting down unexpectedly, then we might have a problem. But a warm console simply means the heat exchange is working as intended.
How the Fan Design Achieves Quiet Performance
One of the most impressive feats of the Xbox Series X fan design is its quiet operation. Microsoft’s goal was to match the noise levels of the Xbox One X, a console already praised for its quietness, and they succeeded. The Series X operates at approximately 37.3 dB(A) under load, which is even quieter than the Xbox One X at idle (38.5 dB(A)). At idle, the Series X is practically silent.
This quietness is achieved through several design choices:
- Large 130mm Fan: As fan experts at Noctua have noted, generally, the bigger the fan, the more airflow it can generate at the same noise level. The 130mm size is a sensible choice, offering a great balance of performance, noise, and size.
- Parallel Cooling Architecture and Vertical Fins: This design helps direct airflow efficiently, reducing turbulence and resistance, which can contribute to noise.
- Split Motherboard: The internal components are separated onto a split motherboard, which allows for more efficient heat distribution and prevents heat from concentrating in one area, reducing the need for the fan to spin at higher, noisier speeds.
- Natural Convection Assist: The tower design and top exhaust assist natural convection, meaning the fan doesn’t have to work as hard to push air out, especially when the console is placed vertically.
These features combined mean that your Xbox Series X fan can keep its powerful internals cool without sounding like a jet engine, allowing you to immerse yourself in your games without distraction.
The Great Debate: Pros and Cons of an External Xbox Series X Fan
The question of whether to add an external fan to your Xbox Series X is a common one we hear at Salvation Repair. While the console’s internal cooling system is robust, some users seek extra reassurance or believe they can improve performance. Let’s break down the arguments.
| Feature | Pros of External Fan | Cons of External Fan |
|---|---|---|
| Temperature | Can lower external casing temperatures | Internal temps may not significantly decrease |
| Airflow | May augment exhaust in specific scenarios | Can disrupt designed internal airflow, creating hot spots |
| Dust | Can potentially draw more air through console | Risks blowing more dust into the console |
| Noise | Some offer quieter operation than internal (rare) | Adds another source of noise to your setup |
| Power | Often USB-powered, simple setup | Draws power from console’s USB ports |
| Aesthetics | Some models offer RGB lighting | Can be bulky, detract from console’s sleek design |
| Necessity | Peace of mind for concerned users | Usually unnecessary given the console’s robust cooling |
| Damage Risk | Low, unless it causes power issues or dust buildup | Could potentially introduce dust-related problems |
The “Cool” Side: Potential Benefits of an External Xbox Series X Fan
For some, an external fan offers tangible benefits, or at least peace of mind. We’ve seen anecdotal evidence from users who swear by them:
- Lower External Temperatures: An external fan, especially one placed over the exhaust vent, can certainly make the console’s exterior feel cooler. This is primarily by dissipating heat more rapidly from the surface.
- Added USB Ports: Many external fan accessories come with integrated USB hubs, which can be a convenient bonus for connecting other peripherals or charging controllers, especially if your console’s ports are already occupied.
- RGB Lighting Aesthetics: Let’s be honest, for many gamers, RGB lighting is a must-have. Some external fan units offer customizable lighting, adding a touch of flair to your gaming setup.
- Peace of Mind: For those concerned about their console running warm, an external fan can provide a psychological benefit, making them feel like they’re actively protecting their investment.
- Anecdotal Freezing Fixes: We’ve heard stories from gamers who experienced freezing and shutdowns with their original Series X, only to find relief after adding an external USB PC fan to the exhaust. While this might indicate an underlying issue with the console itself (which we can diagnose at Salvation Repair), for some, it offered a quick solution.
The “Con” Side: Potential Risks and Downsides
While the benefits might sound appealing, there are legitimate concerns about external fans:
- Disrupting Intended Airflow: The Xbox Series X’s cooling system is a carefully engineered closed loop. Introducing an external fan can disrupt this delicate balance, potentially creating unexpected turbulence or even drawing air back into the console through exhaust ports, which is counterproductive. This could lead to less efficient cooling internally, even if the exterior feels cooler.
- Pushing Dust Inside: This is one of our biggest concerns at Salvation Repair. External fans, especially those not designed specifically for the Series X’s intake, can push more dust and debris into the console. Over time, this dust can accumulate on internal components, clog heatsinks, and even hinder the performance of the internal Xbox Series X fan, leading to worse cooling efficiency.
- Increased Noise Levels: While some external fans are quiet, adding another fan to your setup inevitably means more noise. If your goal is a serene gaming experience, this might be a step backward.
- Drawing USB Power: External fans typically draw power from the console’s USB ports. While this usually isn’t a significant drain, it’s still drawing power that could otherwise be used for other peripherals or charging.
- Often Unnecessary: For the vast majority of users in a well-ventilated space, the internal Xbox Series X fan and cooling system are perfectly adequate. The console is designed to run warm, and its thermal management is highly efficient.
Is Your Internal Fan Failing? Troubleshooting Guide
A malfunctioning Xbox Series X fan can be a real headache, potentially leading to overheating and even permanent damage to your console. But how do you know if your fan is truly failing, or if it’s just doing its job? Here at Salvation Repair, we can help you figure it out.
What are the potential issues if the Xbox Series X fan malfunctions?
If the Xbox Series X fan malfunctions, the console’s ability to dissipate heat is severely compromised. This can lead to:
- Overheating: The console’s internal temperature will rise significantly.
- Performance Throttling: The system might automatically reduce its performance (e.g., lower frame rates, graphical fidelity) to try and manage heat.
- Unexpected Shutdowns: As a last resort to prevent damage, the console will power off abruptly. This is a clear sign of severe overheating.
- Loud Noises: A failing fan might produce unusual grinding, buzzing, or whining noises as its bearings wear out or if it’s struggling against an obstruction.
- Reduced Lifespan: Prolonged exposure to high temperatures can degrade internal components, shortening the overall lifespan of your console.
Simple Fixes for Your Internal Xbox Series X Fan
Before you panic, there are several troubleshooting steps you can take if you suspect your Xbox Series X fan is acting up:
- Ensure Proper Ventilation: This is crucial! Make sure your console isn’t crammed into a tight space. It needs at least 4-6 inches of clear space on all sides, especially the top and bottom vents, for optimal airflow. Don’t block any vents.
- Clear Space Around the Console: Remove any objects that might be obstructing airflow near the console.
- Clean External Vents: Over time, dust and pet hair can accumulate on the console’s external vents. Use a can of compressed air to gently blow out any dust from the intake (bottom) and exhaust (top) vents. Do this in short bursts and hold the can upright.
- Check for Software Updates: Believe it or not, software glitches can sometimes affect fan behavior. Ensure your console’s operating system is up to date. Go to Profile & system > Settings > System > Updates.
- Power Cycle the Console: A simple reboot can often resolve minor glitches. Hold the Xbox button on the console for 10 seconds until it completely shuts down, then unplug it for a minute before plugging it back in and restarting.
- Factory Reset (as a last resort): If all else fails and you suspect a software issue, you can try a factory reset. WARNING: This will erase all data, so back up your games and saves first. Steer to Profile & system > Settings > System > Console info > Reset console.
If you’re experiencing a loud noise coming from your Xbox, it likely means the fan isn’t working properly. These steps can often resolve the issue, but if they don’t, it might be time for a professional to take a look. We’re here to help with Gaming Console Repair in Laurel, Jackson, and Oxford, MS.
When to Consider a Professional Repair
If you’ve tried the troubleshooting steps above and your Xbox Series X fan is still malfunctioning—perhaps with persistent overheating, unusual loud noises, or frequent shutdowns—it’s time to consider a professional repair. Attempting to open the console yourself without proper tools and knowledge can lead to further damage.
The good news is that the Xbox Series X is designed with a relatively modular approach. Teardowns reveal that components like the fan, power supply unit (PSU), and wireless board are designed to be easily replaceable. This makes fan replacement a straightforward process for experienced technicians. Our certified technicians at Salvation Repair are experts in safely opening your console, diagnosing the precise issue, and replacing the faulty Xbox Series X fan with a new one.
It’s also worth noting that while there are “tamper-evident stickers” on the console, Microsoft cannot legally void your warranty for removing them, as long as you don’t cause any damage during the process. However, for most users, professional repair is the safest and most reliable option. When we replace the fan, we even make sure to orient it correctly—just like iFixit suggests, ensuring “Master Chief” is facing you!
If your console needs a fan replacement or any other repair, don’t hesitate to Contact Salvation Repair for Xbox Series X Fan Issues. We pride ourselves on expert, same-day repairs and a lifetime warranty on parts and labor.
Frequently Asked Questions about Xbox Series X Cooling
We get a lot of questions about the Xbox Series X fan and its cooling. Here are some of the most common ones we hear:
Is it normal for my Xbox Series X to get hot?
Your Xbox Series X will naturally feel warm, especially at the top where the console exhausts heat. This is completely normal and indicates that the internal cooling system, including the Xbox Series X fan, is working effectively. Under heavy load, the exhaust air can reach up to 62°C, and the console’s casing will feel warm to the touch (around 48-49°C). What’s not normal is if it’s excessively hot to the point of being uncomfortable to touch, or if it’s causing the console to slow down or shut down unexpectedly. If you’re experiencing shutdowns, that’s a clear sign of a problem that needs attention.
Do external fans actually work for the Xbox Series X?
External fans can lower the surface temperature of your Xbox Series X, making it feel cooler to the touch. However, whether they significantly improve the internal cooling efficiency is debatable. The console’s internal cooling system is highly efficient and optimized for its specific design. In most cases, an external fan acts more like a placebo, providing peace of mind rather than a substantial thermal benefit. In some instances, it might even disrupt the carefully designed internal airflow, potentially creating new issues or pushing more dust into the console. For optimal cooling, ensuring good ventilation around the console is far more effective than adding an external fan.
Will adding an external fan void my Xbox warranty?
Generally, simply using an external accessory like a fan will not void your Xbox warranty. However, if the external fan or any other accessory directly causes damage to your console, that specific damage would likely not be covered under warranty. For example, if an external fan causes dust buildup that leads to an internal component failure, Microsoft might argue that the damage was caused by a third-party accessory. As for opening the console, while there are tamper-evident stickers, technically, Microsoft cannot legally void your warranty if you open it and don’t cause any damage. But we always recommend professional repair for internal issues to avoid accidental damage and ensure proper installation.
The Verdict: Is an External Fan a Smart Buy?
After all our research, experience, and troubleshooting at Salvation Repair, our verdict on external fans for the Xbox Series X is clear: for most users, they are simply not necessary. Microsoft’s engineers designed an incredibly efficient and quiet cooling system that is more than capable of handling the console’s thermal demands in a typical home environment.
The console’s large 130mm Xbox Series X fan, parallel cooling architecture, and clever vertical airflow design make it a thermal powerhouse. It’s designed to run warm, and that warmth is a sign that its advanced cooling is actively doing its job. Adding an external fan often provides more psychological comfort than actual thermal improvement, and it can introduce potential downsides like increased dust intake or disrupted airflow.
So, when might you consider one?
- Extreme Environments: If you live in an exceptionally hot climate or your gaming space is consistently warm, an external fan might offer a slight benefit in reducing ambient heat around the console.
- Enclosed Spaces: If, despite our advice, you must keep your console in a somewhat enclosed space (though we strongly recommend against it!), an external fan could help mitigate some of the trapped heat.
- Specific Overheating Issues: If your console is genuinely overheating and shutting down, and you’ve ruled out software issues and poor ventilation, it’s possible an external fan could temporarily alleviate symptoms. However, we’d strongly recommend getting a diagnostic from us at Salvation Repair first. An overheating console usually indicates a deeper problem with the internal Xbox Series X fan or heatsink that an external fan cannot truly fix.
Your best bet for keeping your Xbox Series X cool and running smoothly is to ensure it has ample ventilation, keep its vents clean, and trust its excellent built-in cooling system. If you ever suspect a problem with your Xbox Series X fan or any other console component, don’t hesitate to bring it to us at Salvation Repair in Laurel, Jackson, or Oxford, MS. We’re here to provide expert diagnostics and reliable repairs, keeping your gaming experience uninterrupted.
Explore our game console repair guides
One thought on “Cool or Con? Unpacking the Xbox Series X External Fan Debate”
Comments are closed.