Don’t Panic! Finding Reliable Computer Repair in Laurel, MS
Computer Repair in Laurel, MS: What You Need to Know First
If you need computer repair Laurel MS residents can count on, here are the fastest ways to get help right now:
| Option | Location | Phone | Walk-ins? |
|---|---|---|---|
| Salvation Repair | 1503 Lakeview Rd, Laurel, MS | (601) 699-8246 | Yes |
| iFixandRepair | 1621 Highway 15 N (Walmart), Laurel, MS | (601) 699-6017 | Yes |
| Burton Computer Resources | 400 N 16th Ave, Laurel, MS | (601) 428-0205 | Mon-Fri, 8AM-5PM |
Most common repairs (screens, batteries, virus removal) are finished the same day — often in under 90 minutes.
Your laptop just died. Your kid’s desktop won’t boot. Your work files might be gone. That sinking feeling is real — and it hits at the worst possible time.
The good news? Laurel, MS has solid local repair options that won’t leave you waiting days or spending a fortune. Whether it’s a cracked screen, a slow machine loaded with malware, or a computer that simply won’t turn on, local technicians can diagnose and fix most problems fast.
This guide walks you through exactly where to go, what to expect, and how to avoid overpaying.
I’m Ralph Harris — with a Computer Science degree from USM, 500+ Apple repair certifications, and over 20 years in electronics repair, I’ve seen nearly every computer problem imaginable, and I’ve built this guide specifically for anyone searching for trusted computer repair Laurel MS services. Let’s get your device back in action.
, typical turnaround times under 90 minutes for common repairs, and a repair-vs-replace guide based on the 50% rule - computer repair laurel ms infographic 4_facts_emoji_light-gradient")
Computer repair laurel ms word list:
Top-Rated Shops for Computer Repair in Laurel, MS

When your technology fails, you don’t want to ship your device across the country and wait three weeks for a “maybe” fix. You need local expertise. In Laurel, we are fortunate to have several reputable shops that handle everything from basic software glitches to complex hardware soldering.
At Salvation Repair, we’ve positioned our shop at 1503 Lakeview Rd to be a central hub for the community. We understand that in a town like Laurel, word-of-mouth is everything. That’s why we’ve focused on a “repair while you wait” model for many common issues. We aren’t just fixing a machine; we’re helping a neighbor get back to work or a student finish their term paper.
Other local options include iFixandRepair, conveniently located inside the Laurel Walmart. This is a great choice for those who want to drop off a device and get their grocery shopping done simultaneously. For local businesses that need more robust IT infrastructure support, Burton Computer Resources on N 16th Ave has been a long-standing “one-stop shop” for business technology in South and Central Mississippi.
Choosing the right shop depends on your specific needs. If you’re looking for more info about computer fixing services, it’s important to look for shops that offer transparent pricing and a solid warranty. There are approximately 11 computer repair businesses listed near Laurel on the BBB, showing that our local market is competitive, which ultimately benefits you, the consumer.
Specialized Laptop and Desktop Solutions
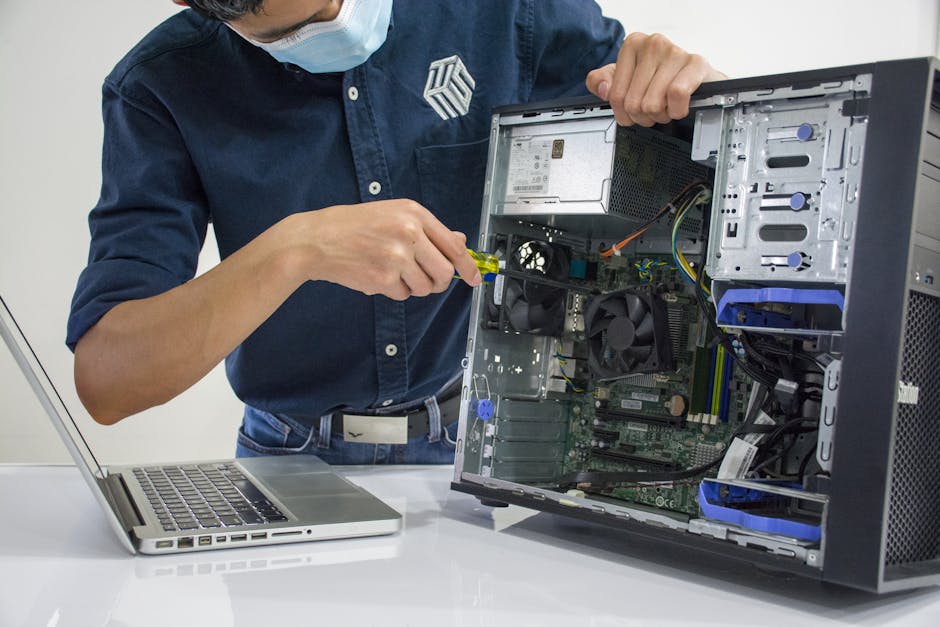
Laptops and desktops are different beasts. A desktop often suffers from power supply failures or cooling issues, while laptops are prone to “physical trauma”—cracked screens, broken hinges, and liquid spills.
We specialize in Dell computer laptop repair, which is one of the most common brands we see in Jones County. Whether it’s an Inspiron that won’t charge or an XPS with a flickering display, we have the parts on hand. Similarly, if you’re searching for HP laptop repair near me, you’ll find that local technicians are well-versed in the common motherboard and hinge failures these models face.
For the gamers in Laurel, we also offer Gaming laptop repair. Gaming machines like Alienware, ASUS ROG, or Razer require a higher level of expertise because of their complex cooling systems and dedicated graphics cards. We don’t just “fix” them; we perform thermal paste reapplications and internal cleaning to ensure your frame rates stay high and your temperatures stay low.
Mobile and Tablet Crossover Services
The line between a computer and a mobile device is blurry. Many Laurel residents use iPads or high-end Samsung tablets as their primary computers. If your “computer” happens to be a tablet, we offer comprehensive Phone repair Laurel MS services that extend to these larger devices.
Common crossover issues include:
- iPad Screen Fixing: Replacing the digitizer or LCD after a drop.
- Charging Port Cleaning: Often, a device that “won’t charge” just has lint in the port!
- Battery Swaps: Giving your tablet a second life when it can no longer hold a charge.
If you are dealing with a broken mobile device, check out our guide on Smartphone repair Laurel MS to see how these repairs often mirror the technical precision needed for laptop work.
Common Services and Computer Repair Laurel MS Costs
How much is this going to set you back? That’s usually the first question people ask. While every job is unique, we can look at industry averages in the Laurel area to give you a ballpark figure.
| Service Type | Average Cost in Laurel | Typical Turnaround |
|---|---|---|
| Virus & Malware Removal | $100 | Same Day |
| Laptop Screen Replacement | $150 – $320 | 1 – 2 Hours |
| Battery Replacement | $60 – $120 | 30 – 60 Minutes |
| Power Supply Repair | $80 – $150 | Same Day |
| Data Recovery | $150+ (Variable) | 2 – 5 Days |
If you are dealing with a shattered display, our broken laptop screen complete guide explains the difference between replacing just the glass versus the entire LCD assembly. For those whose machines simply won’t turn on, you might be looking at computer power supply repair, which is often much cheaper than replacing the entire unit.
We also handle specialized screen fixes, such as the HP laptop screen fix, ensuring that the replacement part matches the original resolution and color accuracy of your device.
Understanding Computer Repair Laurel MS Pricing
Pricing for computer repair laurel ms is generally based on two things: parts and labor. In Laurel, the average hourly rate for a skilled technician is approximately $60 per hour, with a typical range between $45 and $90 depending on the complexity of the work.
At Salvation Repair, we believe in part transparency. We’ll tell you exactly what the part costs and what the labor charge is. We even offer price matching to ensure you’re getting the best deal in Jones County. If you need a Dell laptop repair near me, we’ll provide a quote that covers everything upfront—no hidden “diagnostic fees” that surprise you at the end.
Hardware vs. Software Solutions
Is it a “physical” problem or a “brain” problem?
- Hardware: This accounts for about 40-50% of our jobs in Laurel, with screen replacements leading the pack.
- Software: This includes malware cleanup, which averages around $100. Often, a slow computer doesn’t need a new hard drive; it needs a fresh OS reinstallation or a deep cleaning of background processes.
For a deeper dive into these differences, our laptop repair complete guide breaks down how to identify which category your problem falls into before you even step into the shop.
What to Expect: Turnaround Times and Warranties
Time is money. We know that being without your computer for a week is unacceptable. In Laurel, the standard for common repairs has shifted toward a 90-minute turnaround time.
At Salvation Repair, we pride ourselves on our 99% customer satisfaction rate and our ability to handle most repairs on-site and the same day. But speed shouldn’t come at the cost of quality. That is why we offer a lifetime warranty on our work. While some shops might offer a standard 90-day parts guarantee, we stand by our repairs for the long haul.
Don’t just take our word for it—you can read customer reviews for Laurel repairs to see how your neighbors have fared. For a full breakdown of what to expect during the repair process, check out our computer repair Laurel complete guide.
How to Choose the Best Computer Repair Laurel MS Technician
Not all technicians are created equal. When you are handing over a device that contains your bank info, family photos, and personal emails, you need to know the person on the other side of the counter is trustworthy.
Here is a checklist for choosing a technician in Laurel:
- Check BBB Ratings: Look for A+ accreditation.
- Ask About Data Privacy: Do they have a protocol for protecting your files?
- Backup Protocols: Will they back up your data before starting work?
- Certifications: Do they have brand-specific training (Apple, CompTIA, etc.)?
- Local Reputation: How long have they been in Laurel?
We always recommend backing up your data before bringing a machine in, though we are happy to assist with that if the computer won’t boot. For more tips on vetting a pro, see our more info about computer repair page.
Frequently Asked Questions about Computer Repair
How long does a typical computer repair take in Laurel?
Most common repairs, like screen swaps or battery replacements, take under 90 minutes. If a specific part needs to be ordered, it typically takes 2-3 business days to arrive. You can check turnaround testimonials to see how quickly local shops respond to urgent needs.
Why Local Reviews Matter for Computer Repair Laurel MS
In a tight-knit community like Laurel, reviews are the heartbeat of a business. We are proud of our 99% satisfaction rate, but we always encourage customers to look at specific feedback. For example, a Cynthia Perez review might highlight communication, while a Jaret Duvall review might focus on the technical difficulty of a back-glass repair. Community trust is earned one repair at a time.
Is it cheaper to repair or replace my laptop?
We suggest the 50% rule: if the repair cost exceeds 50% of the price of a new, comparable laptop, it might be time to upgrade. However, most issues like a failing hard drive or a cracked screen are significantly cheaper to fix. Replacing a hard drive is almost always a better financial move than buying a whole new machine. See our detailed laptop repair guide for a cost-benefit analysis.
Conclusion
At the end of the day, a broken computer is a major disruption, but it doesn’t have to be a disaster. Whether you’re in Laurel, Ellisville, or Soso, there are expert hands ready to help.
At Salvation Repair, we live by the mantra that we can fix “any device with a power button.” From iPhones and iPads to high-end gaming rigs and office desktops, we provide same-day, on-site repairs backed by a lifetime warranty and price matching. We are committed to keeping Laurel connected, one device at a time.
Ready to get your machine back to 100%? Schedule your professional computer repair in Laurel, MS today and let us take the stress out of your tech troubles.