iPhone 16 Screen Repair: 3 Ultimate Solutions
When Your iPhone 16 Screen Shatters: Understanding Your Repair Choices
iPhone 16 screen repair can be completed through three main paths, each with distinct trade-offs:
| Repair Option | Typical Cost | Time Required | Key Benefit |
|---|---|---|---|
| Apple Authorized | $29 (with AppleCare+) or $279-$379 | Same day to 3-5 days | Apple Genuine parts, warranty protection |
| Salvation Repair | Starting at $99 | same-day, under 1 hour | Lower cost, quick turnaround |
| DIY Repair | $184+ for parts/tools | 30 minutes to 2+ hours | Maximum savings, full control |
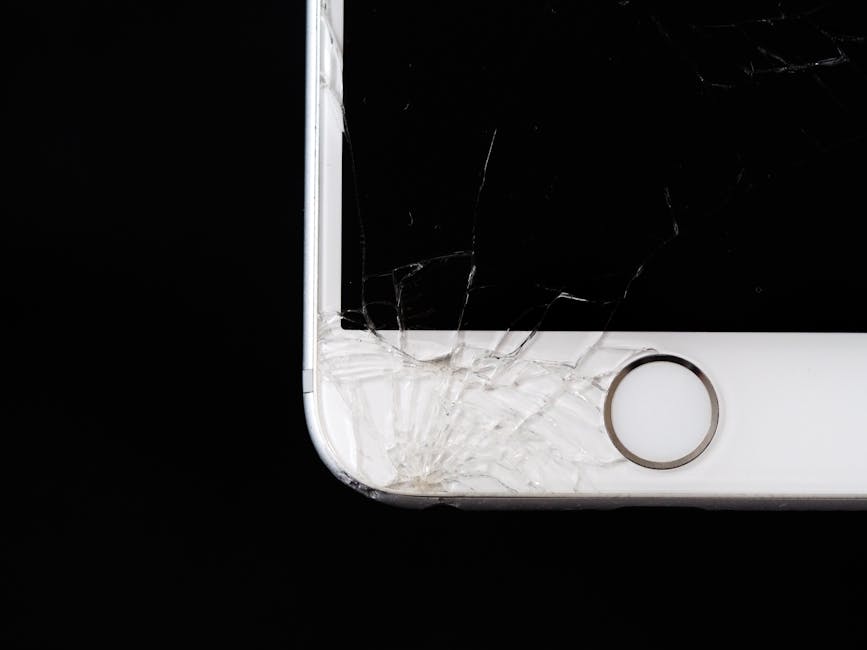
A spider-web crack on your iPhone 16 is more than frustrating—it’s a decision point. You’re now facing the question: How do I fix this, and what’s it going to cost me?
The good news is you have options. The bad news is each path has considerations like cost, time, warranty, and skill requirements.
I’m Ralph Harris, and with over 20 years of experience in electronics repair, I’ve helped thousands with their iPhone 16 screen repair decisions. This guide will help you understand each path so you can make the right choice.

Related content about iPhone 16 screen repair:
Your Main Repair Options: A Complete Breakdown
A cracked screen isn’t the end of the world for your iPhone 16. You have several paths to get it working again. Let’s break down the main options for an iPhone 16 screen repair, focusing on cost, time, and quality.
The Professional Route: Costs and Benefits for an iPhone 16 Screen Repair
Professional repair offers peace of mind, quality parts, and expertise. There are two main types: Apple Authorized Service Providers (AASPs) and Independent Repair Providers (IRPs).
Apple Authorized Service Providers (AASPs)
This includes Apple Stores and sanctioned shops like Best Buy’s Geek Squad. This route guarantees genuine Apple displays, ensuring your new screen performs exactly like the original.
- Cost:
- With AppleCare+: A screen repair is a low service fee, typically around $29. AppleCare+ covers unlimited incidents of accidental damage, making it very affordable.
- Without AppleCare+ (Out-of-Warranty): Out-of-warranty costs are substantially higher, estimated at $279 to $379 or more, based on previous models. This fee applies to accidental damage not covered by Apple’s Limited Warranty. You can always get an official Apple estimate.
- Time: Apple/AASP repairs can be same-day with an appointment, but mail-in service takes several business days.
- Warranty Implications: An Apple-authorized repair keeps your warranty intact. The repair is guaranteed for 90 days or your remaining warranty term. It also ensures water resistance is properly restored with new adhesive seals.
- Parts: Only genuine Apple parts are used, which may be new or refurbished parts that meet Apple’s functional requirements.
Independent Repair Providers (IRPs)
This includes local shops like Salvation Repair (Laurel, Jackson, and Oxford, MS) and chains like uBreakiFix. IRPs are a compelling alternative to Apple’s service.

- Cost: IRPs are often more competitive, with prices starting around $79. At Salvation Repair, we offer transparent pricing and price match local competitors for your iPhone 16 screen repair.
- Time: Speed is a key advantage. We offer Phone Repair Same Day service, with most screen replacements done in under an hour at our Laurel, Jackson, or Oxford, MS locations.
- Warranty Implications: IRPs like Salvation Repair offer their own warranties; we provide a lifetime warranty. Some IRPs can access genuine Apple parts, while others use high-quality aftermarket parts as a budget option. Always ask what parts are being used.
- Parts: Depending on the provider, you might get genuine Apple parts or high-quality aftermarket parts. We use the highest quality parts available to ensure durability and performance.
| Repair Type | AppleCare+ Cost (Estimated) | Out-of-Warranty Cost (Estimated) | Independent Repair Shop Cost (Estimated) |
|---|---|---|---|
| iPhone 16 Screen Repair | $29 | $279 – $379+ | Starting at $79 |
The DIY Route: Is an iPhone 16 Screen Repair Project for You?
For the adventurous, a DIY iPhone 16 screen repair is a tempting option, offering savings and a sense of accomplishment.
- DIY Advantages:
- Cost Savings: Cost is the primary driver. DIY kits from iFixit for newer models average around $184, a considerable saving over Apple’s out-of-warranty prices.
- Control: You choose your parts and work at your own pace.
- Learning Experience: It’s a great way to understand your device’s inner workings.
- Availability: Parts and guides are available through iFixit and Apple’s Self Service Repair Store.
- DIY Disadvantages:
- Technical Skill Required: It’s not for the faint of heart. The iPhone 16 is complex, with tiny screws, delicate connectors, and strong adhesive. There’s a steep learning curve for beginners.
- Time Commitment: A DIY repair can take 30 minutes to a few hours. Rushing leads to mistakes.
- Risks Involved: The risks are serious.
- Further Damage: A slipped tool or misplaced screw can damage other components, leading to a more expensive repair or a bricked phone.
- Compromised Water Resistance: Re-sealing to maintain water resistance is critical and challenging for a DIYer.
- Loss of Functionality: Apple’s “parts pairing” can disable features like True Tone if non-genuine parts are used without calibration.
- Battery Safety: Puncturing the battery is dangerous. Drain it below 25% before starting.
- Warranty Implications: A DIY repair will likely void your Apple warranty. If something goes wrong later, you’re on your own.
For those curious about diving deeper, we offer More info about our Repair Guides that can help you understand the complexity before you start.
A Step-by-Step Guide to DIY iPhone 16 Screen Repair
If you’ve decided on a DIY iPhone 16 screen repair, you’ll need precision and patience. Here’s an overview of the tools, parts, and steps.
Gathering Your Tools and Parts
Gather all your tools and parts before you begin.

- Essential Tools:
- P2 Pentalobe Screwdriver: For the two screws at the bottom of your iPhone.
- Tri-point Y000 Driver: For internal connector cover screws.
- Heat Gun or iOpener: To soften the screen adhesive.
- Suction Handle: To create a gap between the screen and frame.
- Opening Picks: To slice through adhesive.
- Spudger: A non-conductive tool for disconnecting cables.
- Tweezers: For handling tiny screws and components.
- Replacement Adhesive: Crucial for restoring water resistance.
- Packing Tape: To cover cracked glass for safety.
- Isopropyl Alcohol (90%+) & Lint-Free Cloth: For cleaning old adhesive.
- Sourcing Parts:
- iFixit: A great resource for guides and high-quality parts, including complete kits for the iPhone 16 Screen.
- Apple Self Service Repair Store: Apple’s Self Repair Store offers genuine parts and tools. It’s a great option for accessing Apple’s calibration tools, though it may be pricier.
- Considerations for Pro/Pro Max Models: Pro and Pro Max models may have different layouts. Ensure your guide matches your specific iPhone 16 model.
Key Steps in the Replacement Process
This is a simplified overview. Always refer to a detailed, model-specific guide.
- Safety First:
- Drain Battery: Drain the battery below 25% to reduce fire risk if it’s accidentally punctured.
- Power Off: Unplug and power off your iPhone.
- Tape the Screen: If cracked, apply packing tape over the glass to contain shards.
- Initial Disassembly:
- Remove Pentalobe Screws: Remove the two screws on either side of the USB-C port.
- Apply Heat: Gently heat the screen edges with a heat gun or iOpener to soften the adhesive. The screen should be warm, not hot.
- Separating the Screen:
- Create a Gap: Use a suction handle near the bottom edge to create a small gap.
- Insert Opening Pick: Insert a pick into the gap, no deeper than 3mm, to avoid damaging internal components.
- Slice Adhesive: Slide the pick around the edges to cut the adhesive. Leave picks inserted to prevent resealing.
- Swing Open: Gently swing the screen open to the left, like a book. It is still attached by delicate cables.
- Disconnecting and Transferring:
- Remove Connector Covers: Use a tri-point Y000 driver to remove the screws and metal brackets covering the screen connectors.
- Disconnect Cables: Use a spudger to carefully disconnect the screen and sensor connectors from the logic board.
- Remove Old Screen: The old screen can now be removed.
- Transfer Sensors: You must carefully transfer components like the ambient light sensor from the old screen to the new one. This requires delicate work.
- Cleaning and Preparing for New Screen:
- Clean Old Adhesive: Clean all old adhesive from the frame with isopropyl alcohol. A clean surface is essential for the new adhesive.
- Apply New Adhesive: Carefully apply the new adhesive strip around the frame.
- Reconnecting and Sealing:
- Connect New Screen: Reconnect the new screen’s cables to the logic board.
- Install Covers: Reinstall the connector covers and screws.
- Remove Liners: Remove the protective liners from the new adhesive.
- Align and Close: Align the top edge of the screen, then gently lower it into place.
- Press and Seal: Apply firm, even pressure around the screen’s perimeter to activate the new adhesive. Use clamps or stack books on the phone for at least 30-60 minutes to help it bond.
- Install Pentalobe Screws: Reinstall the two bottom screws.
- Post-Repair Calibration:
- Apple’s Repair Assistant: After the repair, calibrate the screen using Apple’s Repair Assistant to restore features like True Tone. Go to Settings → General → About → Parts & Service History and follow the prompts to finish the repair.
For a truly deep dive, we recommend checking out a comprehensive guide like View a detailed guide from iFixit for your specific iPhone 16 model.
The Tech Behind the Screen: Parts, Pairing, and Performance
Understanding the tech behind your iPhone 16 display is crucial for making an informed iPhone 16 screen repair decision. Not all screens are equal, and Apple’s tech affects repairs.
Understanding Screen Types: OLED vs. Aftermarket
The iPhone 16 uses an OLED (Organic Light-Emitting Diode) display, marketed as Super Retina XDR, known for vibrant colors and deep blacks. When you need a replacement, you’ll encounter a few options.
Replacement screen options include:
- Original/Genuine OLED: This is what you get from Apple. It’s the same quality as your original screen, with perfect color, brightness, and resolution (1179 x 2556 for the standard iPhone 16).
- Aftermarket Soft OLED: These third-party screens closely replicate the original’s quality. “Soft” OLEDs are generally more flexible and robust, offering excellent visuals with slight variations in color calibration.
- Aftermarket Hard OLED: These are more rigid and can be more fragile than soft OLEDs. They offer better quality than LCDs but may not match the original’s durability.
- LCD Alternatives: Aftermarket LCDs may be offered as a budget option. They are functional but have noticeably lower quality (darker, lower resolution, less distinct colors) than the iPhone 16’s native OLED.
Which is better for the iPhone 16? For the best experience, an original or high-quality aftermarket Soft OLED is ideal. The choice depends on your budget versus your desire for perfect display quality.
Apple’s ‘Parts Pairing’ and What It Means for Your Repair
Apple’s “parts pairing” is a major consideration for any non-official iPhone 16 screen repair. It’s a software lock that pairs components (like the screen) to the device’s logic board. If a replacement part isn’t calibrated by Apple’s software, the iPhone may display a “Non-Genuine Part” warning and lose some functionality.
- Consequences for Screen Replacement: The most noticeable consequences are:
- Loss of True Tone: This feature, which adjusts the display’s white balance to ambient light, will be disabled.
- Auto-Brightness Issues: The screen may not adjust its brightness correctly.
- Face ID Issues: Improper handling of the front sensor assembly can affect or disable Face ID.
- “Important Display Message”: Your iPhone may display a persistent message in Settings about the non-genuine display.
- Apple’s Repair Assistant and Calibration: Apple’s “Repair Assistant” calibrates genuine replacement screens to restore full functionality. After a repair with a genuine screen, go to Settings → General → About → Parts & Service History and follow the prompts to finish the repair. This process pairs the new screen to your device. Without it, even a genuine screen might lose features.
- Warranty Consequences: A “Non-Genuine Part” message signals unauthorized modifications to Apple, which can complicate future repairs. This is why many opt for professional repairs, like ours, where we clarify parts and warranty implications. For more information on what constitutes a Broken Phone Screen and repair considerations, check out our guide.
Frequently Asked Questions about iPhone 16 Screen Repair
We hear a lot of questions about cracked screens. Let’s tackle some of the most common ones regarding iPhone 16 screen repair.
How much does it typically cost to fix an iPhone 16 screen?
The cost for an iPhone 16 screen repair varies by repair path:
- AppleCare+: The service fee is typically low, around $29 per incident.
- Apple Out-of-Warranty: Without AppleCare+, Apple’s out-of-warranty repair is much higher, estimated between $279 and $379, possibly more for Pro models.
- Independent Repair Shops: Independent shops like Salvation Repair in Mississippi offer budget-friendly prices, starting around $79. We also price match to ensure the best value.
- DIY Kits: A screen replacement kit from a supplier like iFixit for newer models costs around $184 and up, plus tools.
For a detailed breakdown of costs, see our guide on How Much It Cost To Repair iPhone Screen.
How long does a screen replacement take?
The time for an iPhone 16 screen repair depends on the repairer:
- Professional Repair (Independent Shops): This is often the fastest. At Salvation Repair, many screen replacements are completed in under an hour at our Laurel, MS, Jackson, MS, or Oxford, MS locations.
- Professional Repair (Apple/AASP): Apple/AASPs may offer same-day repairs with an appointment, but mail-in service takes 3-5 business days.
- DIY Repair: This can range from 30 minutes to a couple of hours, depending on your technical skill and preparation.
Will my iPhone still be water-resistant after the repair?
It depends on the quality of the repair. Your iPhone’s water resistance comes from seals and a strong adhesive gasket sealing the display to the frame.
- Professional Repair Quality: Professional repairs from AASPs or reputable shops like Salvation Repair include new adhesive seals. We use specialized tools to restore water resistance as close to factory condition as possible. While no repair can guarantee perfect water resistance, a quality repair is crucial.
- DIY Risks: In a DIY repair, restoring the seal is challenging. Improper cleaning or application will compromise water resistance, making your phone vulnerable to liquid damage. It’s a significant risk.
Always assume your phone’s water resistance is reduced after any screen repair, and exercise caution around liquids.
Conclusion: Your Path to a Perfect Screen
Understanding your iPhone 16 screen repair options equips you to make an informed decision.
- For maximum peace of mind and guaranteed genuine parts, especially with AppleCare+, Apple’s official service is your best bet.
- If you prioritize speed, affordability, and local convenience, a reputable independent repair shop like Salvation Repair is an excellent choice. We offer quick turnaround, competitive pricing, and a lifetime warranty on our repairs in Laurel, MS, Jackson, MS, and Oxford, MS.
- For the brave and budget-conscious DIYer, replacing the screen yourself offers savings but comes with risks to your device, warranty, and functionality.
Your choice depends on your budget, technical comfort, and how quickly you need your phone fixed.
For a guaranteed, same-day professional fix in the Laurel, MS area, Salvation Repair offers a lifetime warranty and price matching. We’re here to turn that cracked screen into a distant memory. Get your Screen Repair done right.