Shattered Dreams: Your Step-by-Step Galaxy Tab A8 Screen Repair Guide
When Your Galaxy Tab A8 Screen Breaks: What You Need to Know First
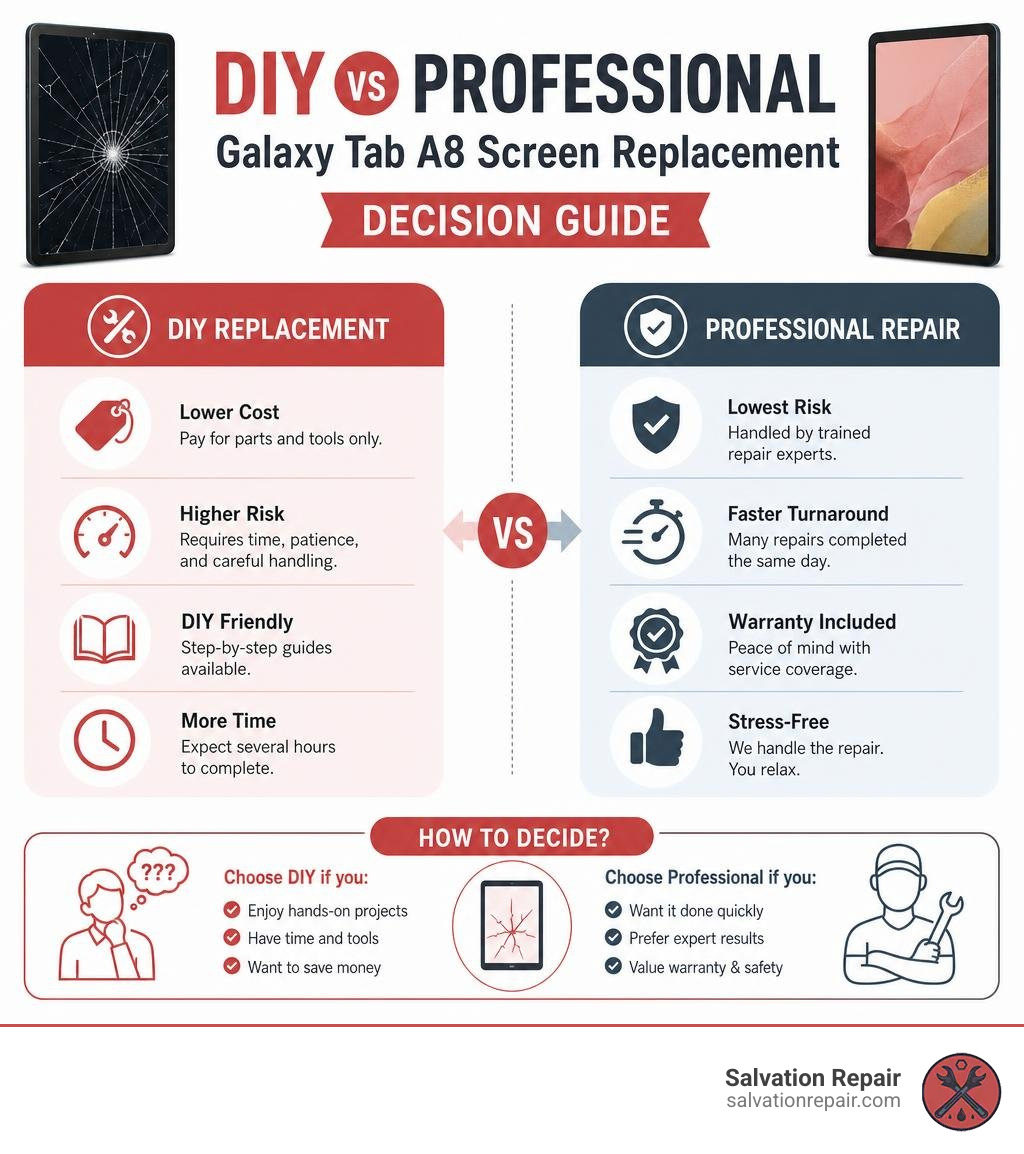
A galaxy tab a8 screen replacement is something many owners face — and the good news is it’s fixable, either as a DIY project or through a professional repair shop.
Here’s a quick overview of your options:
- DIY replacement — Buy a kit (like the ZTOOYO), follow a step-by-step guide, and do it yourself. Lower cost, higher risk.
- Aftermarket screen from Amazon — Kits are available for around $20–$40 and include tools and adhesive.
- OEM Samsung screen — Genuine part (GH81-21915A), higher quality, higher price.
- Professional repair — Fastest and safest option, with warranty coverage.
The Galaxy Tab A8 has a 10.5-inch 1920×1200 TFT display. It’s a mid-range tablet, so repair is almost always worth it over buying a new device.
Cracks, dead zones, pixelated patches, or a completely black screen are all signs your display needs attention. But before you pull out a heat gun, it’s worth knowing that not every screen issue is actually a screen problem — battery or processing faults can mimic display damage.
I’m Ralph Harris, a Wise Level 2 certified repair technician and certified Apple repair specialist with over 20 years of hands-on experience in electronics repair, including dozens of galaxy tab a8 screen replacement jobs across my repair shops. In the guide below, I’ll walk you through everything — from picking the right part to safely completing the repair — so you can make the smartest decision for your situation.
Understanding Your Galaxy Tab A8 Screen Replacement Options
When dealing with a cracked screen, you must understand that not all screens are created equal. The market is flooded with different quality levels, ranging from dirt-cheap aftermarket clones to premium original equipment manufacturer (OEM) parts.
For the Galaxy Tab A8 10.5″ (2021 model), the display technology is technically a TFT LCD. However, if you are looking at screen replacements for other family devices or comparing options, you will encounter terms like LCD, AQ7 LCD, OLED, and OEM.
Here is a quick comparison table to help you understand what these terms mean for your repair budget and device performance:
| Screen Option Type | Quality Level | Color & Brightness | Price Point / Quote | Best For |
|---|---|---|---|---|
| Standard Aftermarket LCD | Basic / Budget | Decent (70-80% of original) | $129.95 | Budget-conscious DIYers |
| AQ7 LCD | High-Quality Aftermarket | Good (85-90% of original) | Low-Medium | Reliable everyday use |
| Aftermarket OLED | Premium Aftermarket (Phones) | High Contrast / Vibrant | $129.95 | High-end smartphone repairs |
| OEM Refurbished | Original (Recycled Glass) | Excellent (100% original panel) | $149.95 | Quality-focused users |
| New OEM | Factory Original | Perfect (100% factory spec) | $149.95 | Restoring to brand-new condition |
Understanding these grades helps you decide whether to cheap out on a third-party kit or invest in a premium panel that will last for years.
LCD vs. Aftermarket OLED vs. OEM Screens
The Galaxy Tab A8 natively uses an LCD panel. If you see listings online claiming to offer an “OLED upgrade” for a Tab A8, be highly skeptical—the tablet’s motherboard and firmware are designed specifically for LCD voltage and signaling pathways.
For other devices, like iPhones or premium Samsung Galaxy S-series phones, the distinction between a standard LCD, an aftermarket OLED, and an OEM panel is massive. Standard aftermarket LCDs are thicker, consume more battery, and have cooler, bluer color temperatures. An aftermarket OLED restores the deep blacks and battery efficiency of your original phone, while OEM refurbished and new OEM screens provide the absolute best brightness levels and touch sensitivity.
When it comes to professional pricing, standard LCD repairs are quoted at $129.95, aftermarket OLED at $129.95, and OEM at $149.95. If you are looking to repair a newer smartphone, we also offer competitive rates: for the iPhone 16 Pro, we quote LCD repairs at $149.95 and OLED at $199.95. For the iPhone 16 Pro Max, we quote AQ7 LCD at $129.95, aftermarket OLED at $219.95, OEM refurbished at $399.95, and new OEM at $469.95.
If you are dealing with a broken phone screen alongside your tablet, choosing the right panel technology is crucial to avoid issues like “ghost touching” or rapid battery drain. For your Galaxy Tab A8, sticking to a high-quality LCD assembly that matches the original factory specifications is your best bet.
Sourcing Your Parts: The ZTOOYO Kit and Alternatives
If you decide to take the DIY route, you have two primary avenues for sourcing parts. You can either buy a premium, standalone OEM screen like the GH81-21915A – Samsung Galaxy Tab A8 10.5 Inch LCD Screen or purchase an all-in-one aftermarket kit from marketplaces like Amazon.
One of the most popular budget options on Amazon is the ZTOOYO screen replacement kit. Let’s break down what this kit offers and whether it’s worth your hard-earned cash.
ZTOOYO Kit Compatibility and Contents
The ZTOOYO replacement screen is designed to be compatible with the standard 10.5-inch Samsung Galaxy Tab A8 (2021/2022 release). This includes the following model numbers:
- SM-X200 (Wi-Fi only model)
- SM-X205 (LTE/4G international model)
- SM-X207 (Carrier-specific LTE model)
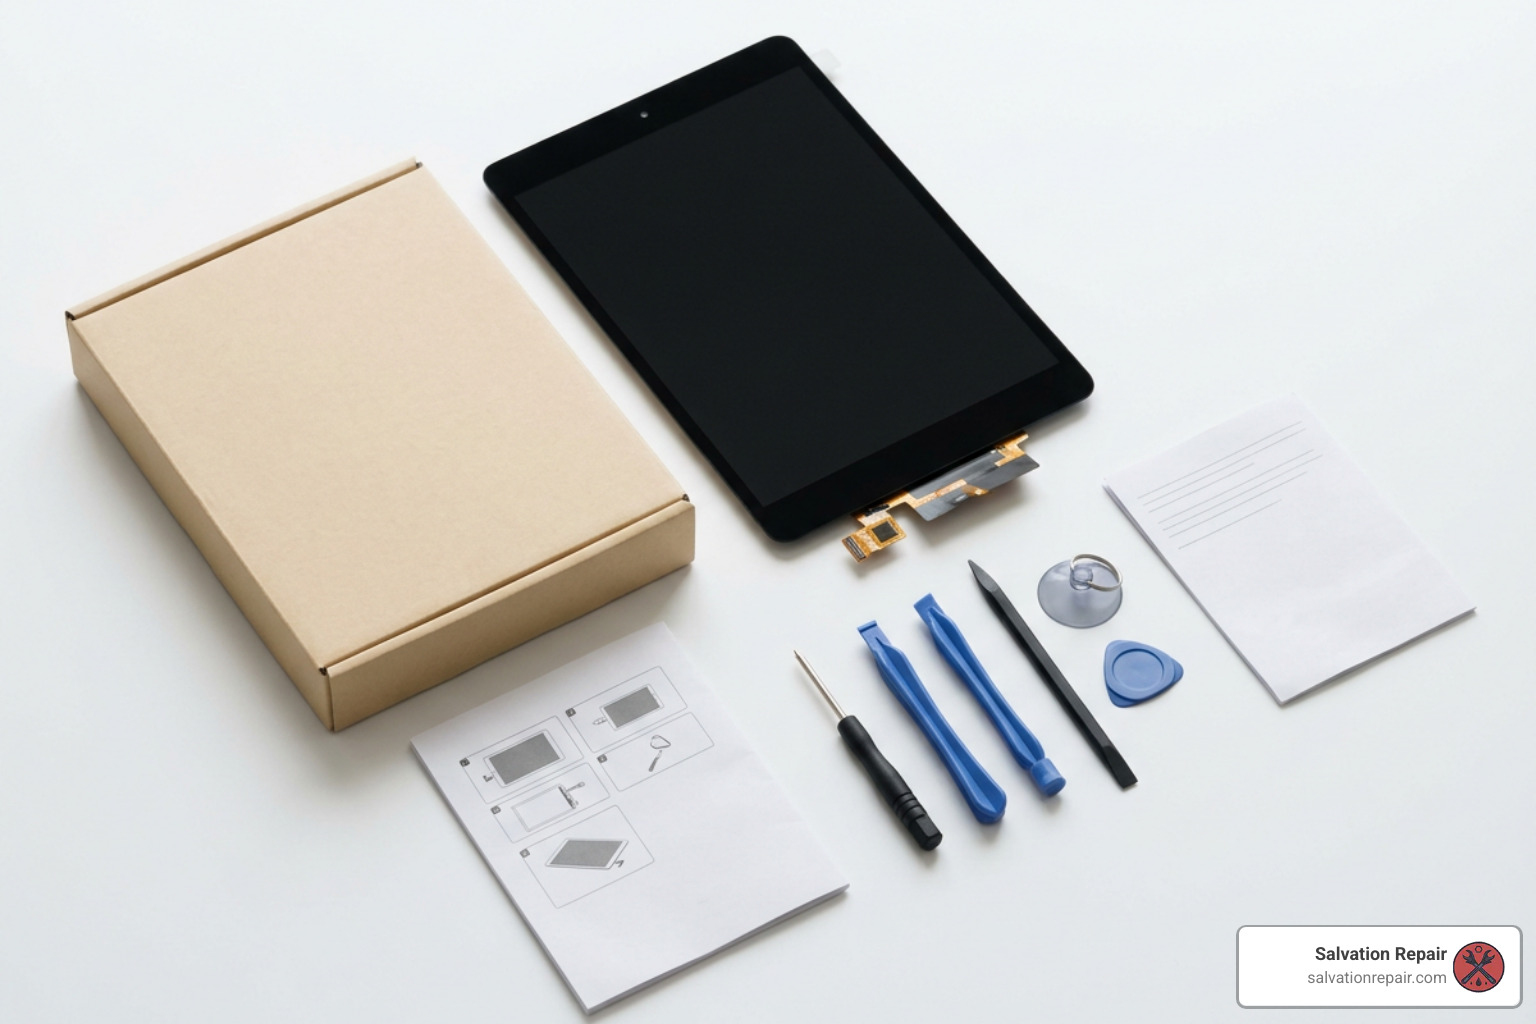
What is included in the ZTOOYO kit? Beyond the LCD and digitizer touch screen assembly, the kit typically includes a basic DIY toolset:
- A set of plastic opening picks and pry tools
- A suction cup for lifting the screen
- A basic Phillips #000 screwdriver
- Pre-cut adhesive tape or a small tube of liquid adhesive (like B-7000)
While these tools are a great starting point, they are budget-grade. If you want a seamless repair, we highly recommend supplementing them with a professional heat gun or a specialized heating pad to soften the stubborn factory adhesive.
Price Comparison and Amazon Market Rankings
The ZTOOYO screen replacement kit is a highly popular budget choice on Amazon. It currently sits at #59 in Tablet Replacement Screens on the platform.
Here is what the real-time data tells us about its market performance:
- Recent demand: 50+ units bought in the past month.
- Customer reception: It holds a respectable 4.3 out of 5 stars from 51 global ratings.
- Availability: Stock fluctuates wildly, often showing alerts like “Only 2 left in stock – order soon.”
Price-wise, aftermarket kits like the ZTOOYO usually hover around the $30 to $45 range. In comparison, a genuine OEM Samsung replacement screen can cost upwards of $60 to $80. While the OEM route is more expensive, it guarantees factory-level brightness and color reproduction. For more professional insights on sourcing parts, check out our guide on tablet repair shop secrets for fixing your larger screens.
DIY Step-by-Step Repair Guide
Before you begin, clear your workspace, turn off any fans that might blow dust around, and ensure you have all the necessary tools on hand.
Essential Tools Checklist:
- A heat gun, hair dryer, or specialized heating pad
- Plastic opening picks (guitar picks work great)
- Heavy-duty suction cup or an anti-clamp tool
- Phillips #000 precision screwdriver
- Nylon spudger or plastic pry tools (avoid metal tools near the motherboard!)
- Replacement adhesive tape or B-7000 glue
- Safety glasses (to protect your eyes from tiny glass shards)
For a highly visual, community-vetted breakdown of the teardown, you can refer to the official Samsung Galaxy Tab A8 Screen Replacement – iFixit Repair Guide.
Step-by-Step Galaxy Tab A8 Screen Replacement Guide
Follow these steps carefully. Take your time—patience is the most important tool in any technician’s kit!
Step 1: Power Off and Heat the Edges
Ensure your tablet is completely powered down. Using your heat gun or hair dryer, apply even heat around the outer perimeter of the screen for about 2 to 3 minutes. The goal is to soften the strong adhesive holding the screen to the frame. The glass should feel hot to the touch, but not so hot that it burns you or damages the underlying LCD.
Step 2: Apply the Suction Cup and Create a Gap
Place your suction cup near the top or bottom edge of the screen (avoiding areas where the glass is heavily shattered). Pull upward gently but firmly on the suction cup while using a plastic opening pick to slice into the tiny gap between the glass and the plastic frame.
Step 3: Slice the Adhesive
Once your first pick is inserted, slide it slowly around the perimeter of the tablet. Insert additional plastic picks every few inches to prevent the adhesive from cooling down and re-adhering.
- Ralph’s Pro Tip: If the adhesive hardens or becomes difficult to slice, stop immediately and re-apply heat. Forcing a cold screen will crack the glass further and potentially damage the inner frame.
Step 4: Lift the Screen Carefully
Slowly swing the screen open from the right side (like a book). Do not pull the screen completely away from the frame yet! There is a delicate screen ribbon cable still connected to the motherboard.
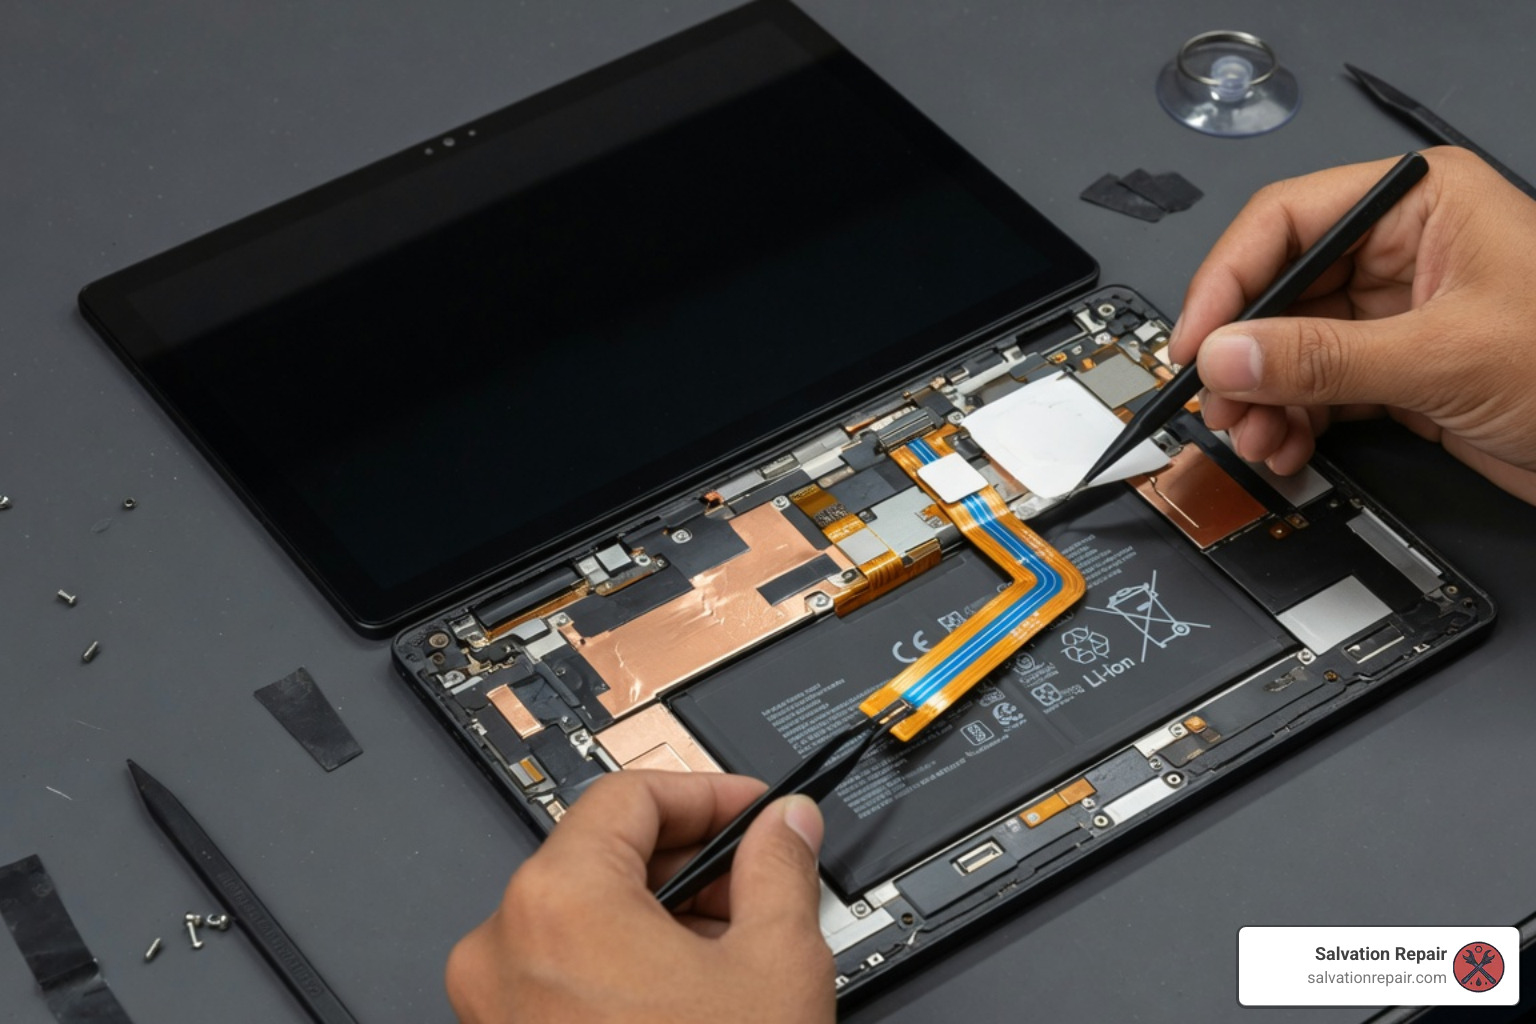
Step 5: Disconnect the Battery and Screen Cables
Locate the metal shield covering the motherboard connectors.
- Use your Phillips #000 screwdriver to remove the 1.8mm screw holding the screen ribbon clamp in place.
- Remove the clamp.
- Crucial Safety Step: Use a plastic spudger to disconnect the battery connector ribbon first. This cuts off all power to the board and prevents accidental short circuits.
- Disconnect the screen ribbon cable connector.
- You can now fully remove the old, broken screen.
For a complete video walkthrough of this exact process, watch the Samsung Galaxy Tab A8 Screen Replacement – Full DIY Guide! on YouTube.
Crucial Pre-Installation Testing and Precautions
Before you apply any new adhesive and seal your tablet back up, you must perform a “dry test.”
How to perform a dry test:
- Connect the new screen’s ribbon cable to the motherboard.
- Reconnect the battery ribbon cable.
- Carefully flip the screen over (do not glue it down yet) and power on the tablet.
- Check the display for any dead pixels, horizontal lines, or discoloration.
- Test the touch sensitivity across the entire surface. Open a drawing app or drag an icon to every corner of the screen to ensure there are no “dead zones.”
If everything works perfectly, turn the tablet off, disconnect the battery again, clean off any old adhesive residue from the frame, apply your new pre-cut adhesive tape, and press the screen firmly into place.
According to the official Samsung Galaxy Tab A8 tablet Service Manual, the manufacturer recommends applying a light, even pressing force of 1N for 1 minute across the surface of the newly installed LCD to ensure the adhesive cures and bonds permanently.
Troubleshooting and Post-Installation Issues
Even experienced technicians occasionally run into hiccups after completing a galaxy tab a8 screen replacement. If your tablet isn’t behaving properly after reassembly, don’t panic. Most issues can be traced back to a loose connection or static electricity.
If you hit a wall and decide the DIY route is more trouble than it’s worth, you can always find professional assistance. Check out our local guide on where to get a samsung tablet screen fixed in laurel ms to get your device back in perfect working order without the headache.
Common Pitfalls During Galaxy Tab A8 Screen Replacement
- The screen is completely blank or won’t turn on: This is usually caused by a loose screen flex cable. Re-open the tablet, disconnect the battery, unplug the screen cable, inspect the gold pins for dust, plug it back in firmly (you should feel a satisfying “click”), reconnect the battery, and test again.
- Touch screen is unresponsive or ghost-touching: Ensure the flex cable is not bent at an extreme, unnatural angle. Also, make sure you cleaned all the old glass shards and adhesive residue off the frame. Even a tiny piece of leftover glass can press against the back of the new LCD, causing phantom touch inputs.
- The tablet is stuck on a charging symbol or loop: This happens if the battery ribbon cable was not seated properly or was damaged during the disconnect phase. Always use plastic tools when touching the battery connector to prevent shorting out the board.
Frequently Asked Questions About Tablet Repairs
Is the ZTOOYO screen compatible with all Tab A8 models?
Yes, the ZTOOYO screen is fully compatible with the standard 10.5-inch Galaxy Tab A8 models released in 2021/2022, including the SM-X200, SM-X205, and SM-X207. However, it is not compatible with older 8.0-inch models (like the Tab A 8.0 from 2019) or other Tab A series variants. Always double-check your model number under Settings > About Tablet before buying parts.
What is the warranty on DIY replacement screens?
If you buy an aftermarket screen kit from Amazon (like ZTOOYO), you are generally covered by Amazon’s standard 30-day return policy. Some specialized parts suppliers offer a 14-day or 30-day “testing warranty,” meaning they will replace the screen only if it hasn’t been glued down yet. Once you apply adhesive and install the screen permanently, most sellers void the warranty. This is why dry testing before final assembly is so critical!
How long do professional repairs take compared to DIY?
A DIY tablet repair can easily take an amateur 1 to 2 hours, especially when factoring in the time needed to safely heat and scrape away old adhesive.
At Salvation Repair, we have the process down to a science. To give you an idea of our professional repair turnaround times:
- iPhone Screen Repairs: iPhone screen repairs take 10-15 minutes in front of the customer.
- Battery Repairs: Battery repairs take 30 minutes.
- Charging Port Repairs: Charging port repairs take 1 hour.
- Tablet Screen Replacements: Usually completed on the same day, ensuring you aren’t left without your device for days on end.
Conclusion
Taking on a galaxy tab a8 screen replacement by yourself can be a rewarding weekend project, but it requires patience, steady hands, and the right tools. One wrong slip of a pry tool can turn a simple cracked glass repair into a permanently dead motherboard.
If you’d rather bypass the stress, broken glass, and potential troubleshooting nightmares, let us handle it for you. At Salvation Repair, we specialize in professional, same-day electronic repairs across the Laurel, MS area—including Jackson, MS, Ellisville, Soso, Meridian, and throughout Jones County.
We repair “any device with a power button,” offer a lifetime warranty on our parts and labor, and will happily price match any local competitor.
Ready to bring your tablet back to life? Head over to our Samsung Phone Repair Complete Guide to learn more about our repair standards, or contact us today to schedule your same-day repair!
