How to Replace an iPhone 15 Plus Screen on a Budget
iPhone 15 Plus Screen Types and Repair Options
To complete an iPhone 15 Plus screen replacement on a budget, purchase a complete aftermarket Soft OLED or Incell LCD assembly rather than an expensive OEM part or risky glass-only kit. Power down the device, remove the two bottom P2 pentalobe screws, and apply controlled heat to soften the perimeter adhesive. Carefully slice the seal with a pick, open the display book-style, and disconnect the battery terminal followed by the screen flex cables. Transfer the original top ambient light sensor module to the new panel, reconnect the ribbon cables, test touch response, and press the display firmly into place.
The iPhone 15 Plus features an expansive 6.7-inch Super Retina XDR display running at a crisp 2796 × 1290 resolution. Because it ships with an emissive organic light-emitting diode (OLED) panel, choosing the correct replacement part directly dictates visual fidelity, battery consumption, and durability.
When looking into replacement screens, aftermarket suppliers and repair facilities generally provide three main tiers of screen assemblies: Incell LCD (such as the AQ7 LCD), Hard OLED, and Soft OLED, alongside OEM solutions (both OEM refurbished and brand-new OEM). You can explore evaluating screen quality options to see how these panel types perform in daily use.
| Screen Type | Technology | Typical Cost | Color & Contrast | Durability & Drop Resistance | Fit & Bezel Size |
|---|---|---|---|---|---|
| Incell LCD (AQ7 LCD) | Liquid Crystal with Backlight | $30 – $70 | Lower contrast, muted blacks, thicker display | Moderate; thicker glass profile | Noticeably thicker bezels; slightly raised frame |
| Hard OLED | Rigid Glass Substrate OLED | $60 – $100 | High contrast, true blacks, decent colors | Lower; brittle glass substrate prone to cracking upon drops | Standard bezel profile, but fragile under pressure |
| Soft OLED | Flexible Polymer Substrate OLED | $80 – $220 | Near-OEM vibrance, deep blacks, high peak brightness | High; flexes under impact like the factory display | Exact 1:1 OEM fitment, slim bezels |
| OEM / Refurbished OEM | Original Apple Specification Panel | $150 – $330 | Factory calibration, peak HDR brightness, perfect viewing angles | Maximum factory durability | Perfect factory fitment |
Understanding the distinction between these technologies is vital:
- Incell LCD (AQ7 LCD): LCDs rely on a continuous backlight layer behind the panel. This makes the assembly slightly thicker, lowers overall outdoor visibility (typically around 500 cd/m² luminance), consumes more battery, and cannot produce true infinite blacks. However, it serves as an ultra-budget alternative if your primary goal is simply getting a working display.
- Hard OLED: Built on a rigid glass base, hard OLED panels deliver vibrant colors and true black levels at an accessible price. The major downside is physical fragility: because the underlying substrate is rigid glass, a minor impact on the phone’s frame can cause internal display bleeding or vertical green lines even without cracking the exterior glass.
- Soft OLED: Manufactured on a flexible polyimide substrate—identical to the factory design—soft OLED assemblies provide superior impact resistance, true-to-life color rendition, 1:1 bezel thickness, and support for higher peak brightness. This remains the absolute best balance of cost and performance for an aftermarket repair.
- OEM Refurbished and New OEM: These screens preserve or restore original Apple display panels, ensuring factory-standard touch sampling rates, maximum HDR luminance, and native sensor integration.
Cost Comparison for iPhone 15 Plus Screen Replacement Options
Pricing for an iPhone 15 Plus display repair varies significantly depending on whether you visit an authorized repair provider, purchase parts for a DIY weekend project, or visit an independent repair facility.
Apple charges an out-of-warranty flat fee of $329 for an official iPhone 15 Plus screen repair. If you carry AppleCare+, accidental damage screen repair drops to a $29 service fee.
For do-it-yourselfers, parts suppliers offer standalone hardware at different price points:
- Basic Incell LCD replacement assemblies retail between $29.99 and $69.99.
- Premium Soft OLED kits (like those from aftermarket manufacturers or modular DIY suppliers) range from $79.59 to $219.99.
- Third-party professional repair services typically start around $79 for baseline display fixes, scaling upward depending on the chosen panel grade.
Reviewing a detailed iphone screen repair cost guide 2026 helps contextualize part expenses against labor and warranty value. Finding practical methods for fixing your iphone 15 screen without breaking the bank allows you to weigh your budget against long-term device usability.
Glass-Only vs Full OLED Assembly Replacements
Online marketplaces frequently list “glass-only” replacement kits for the iPhone 15 Plus for as little as $26.66. While tempting, attempting a glass-only repair without specialized industrial equipment is almost guaranteed to destroy your phone’s display.
The iPhone 15 Plus front assembly consists of three tightly integrated layers:
- The exterior Ceramic Shield protective glass.
- The touch digitizer grid.
- The flexible OLED panel, optically laminated together using optically clear adhesive (OCA).

Separating cracked glass from an intact OLED panel requires heating the assembly on a vacuum hot plate, slicing through the OCA glue with a micro-thin molybdenum wire (0.028 mm), cleaning residual glue with specialized chemical solvents, and re-laminating new glass inside a pressurized autoclave chamber to eliminate micro-bubbles.
For DIYers and standard repair shops, swapping the full assembly (fused glass, digitizer, frame, and OLED) is the only realistic, reliable method to restore functionality without damaging internal components.
Required Tools and Preparation for DIY Screen Repair
Attempting a self-repair on modern Apple hardware requires specialized tools. Using improper screwdrivers or makeshift pry tools will strip precision fasteners or tear internal flex ribbons.
Before turning a single screw, gather the following toolkit:
- P2 Pentalobe Driver (0.8 mm): To remove the two bottom chassis security screws flanking the USB-C port.
- Tri-Point Y000 Driver (0.6 mm): Essential for the internal connector bracket screws.
- Precision Phillips (#000) & Standoff Drivers: For secondary sensor brackets.
- Suction Handle or Screen Pliers: To apply uniform lifting force to the front panel.
- Plastic Opening Picks & Anti-Static Spudger: To break the perimeter adhesive barrier safely without shorting circuit board pins.
- Heat Gun or Constant-Temperature Heat Mat: To soften the structural frame adhesive safely.
- 90%+ Isopropyl Alcohol (IPA): To dissolve leftover adhesive sealants.
- Pre-cut Perimeter Waterproof Adhesive Gasket: To reseal the chassis after service.
- ESD-Safe Tweezers: For precise handling of miniature bracket screws and sensor modules.
For detailed hardware schematics and step-by-step structural diagrams, consult the official iPhone 15 Plus Repair Manual – Apple Support before beginning disassembly.
Essential Safety Protocols and Workstation Setup
Safety is paramount when working with high-density lithium-ion batteries and shattered glass. Follow these setup steps before proceeding:
- Discharge the Battery: Ensure your iPhone 15 Plus battery is drained below 25%. A charged lithium-ion battery poses a severe thermal runaway risk if accidentally nicked, bent, or punctured by metal tools.
- Apply Surface Tape: If your exterior glass is severely shattered, completely cover the front face with overlapping strips of clear packing tape. This creates a solid surface for the suction cup and prevents rogue glass shards from entering the battery cavity or injuring your fingers.
- Manage Thermal Levels: Never heat the perimeter of your iPhone past 80°C (176°F). Excessive localized heat can cause battery swelling or scorch the internal logic board.
- Work on an ESD Mat: Static electricity can silently destroy the logic board’s surface-mount capacitors. Ground yourself using an anti-static wrist strap.
Step-by-Step iPhone 15 Plus Screen Replacement Guide
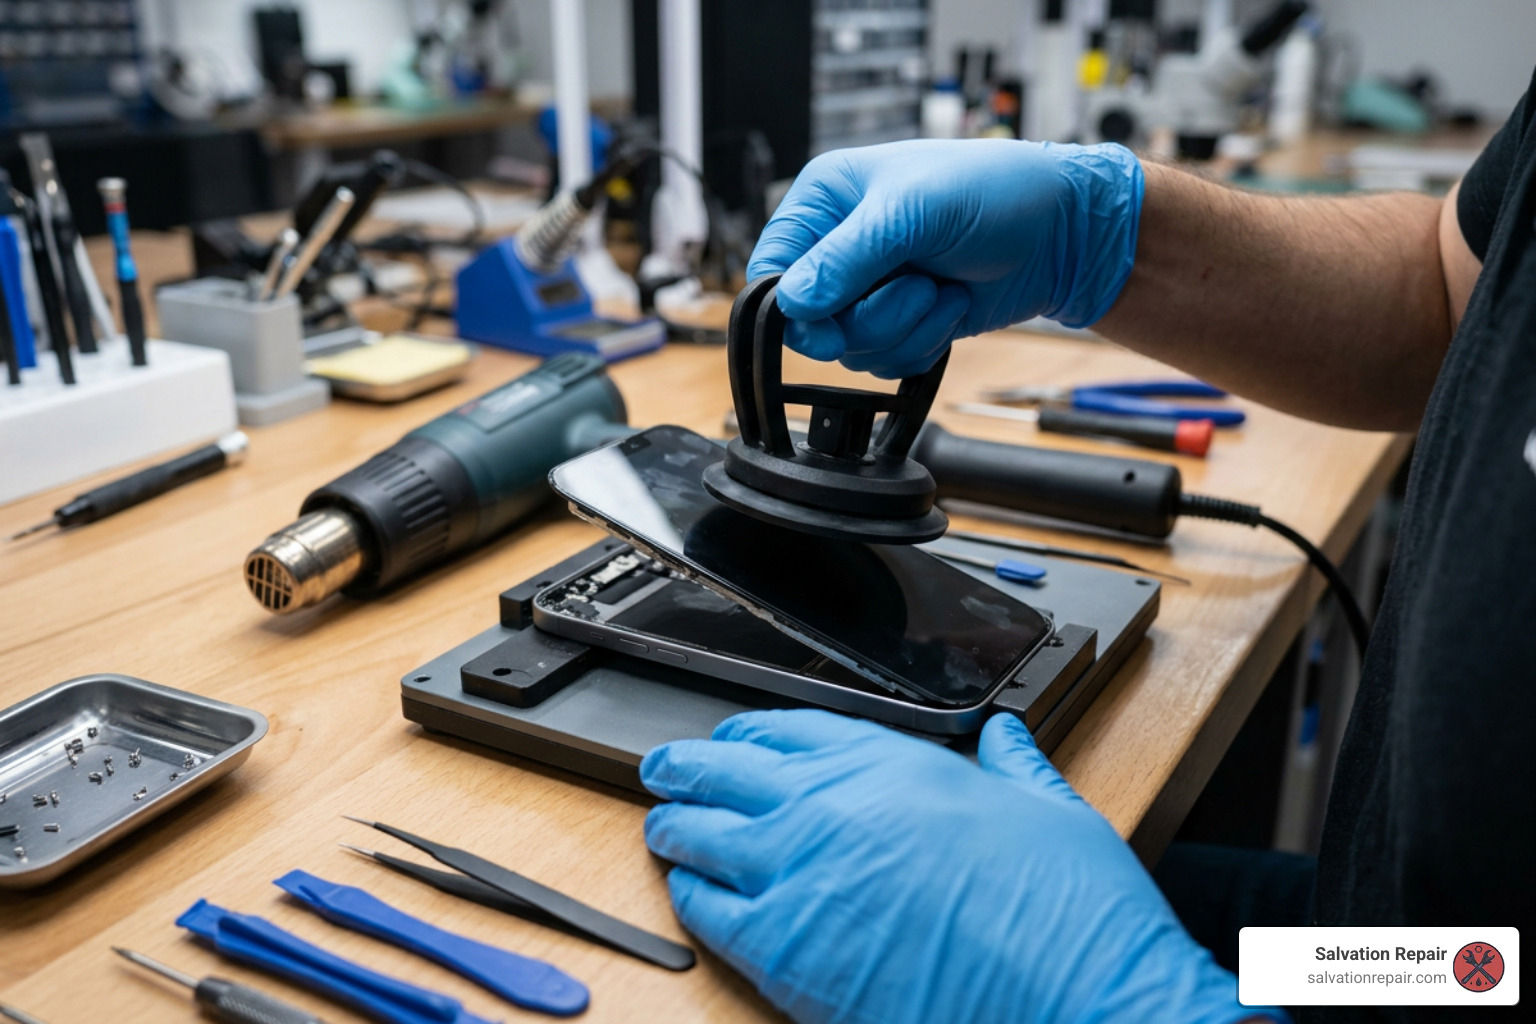
Replacing the display requires a methodical, step-by-step sequence. For detailed visual references during your repair, cross-reference the iPhone 15 Plus Screen Replacement – iFixit Repair Guide.
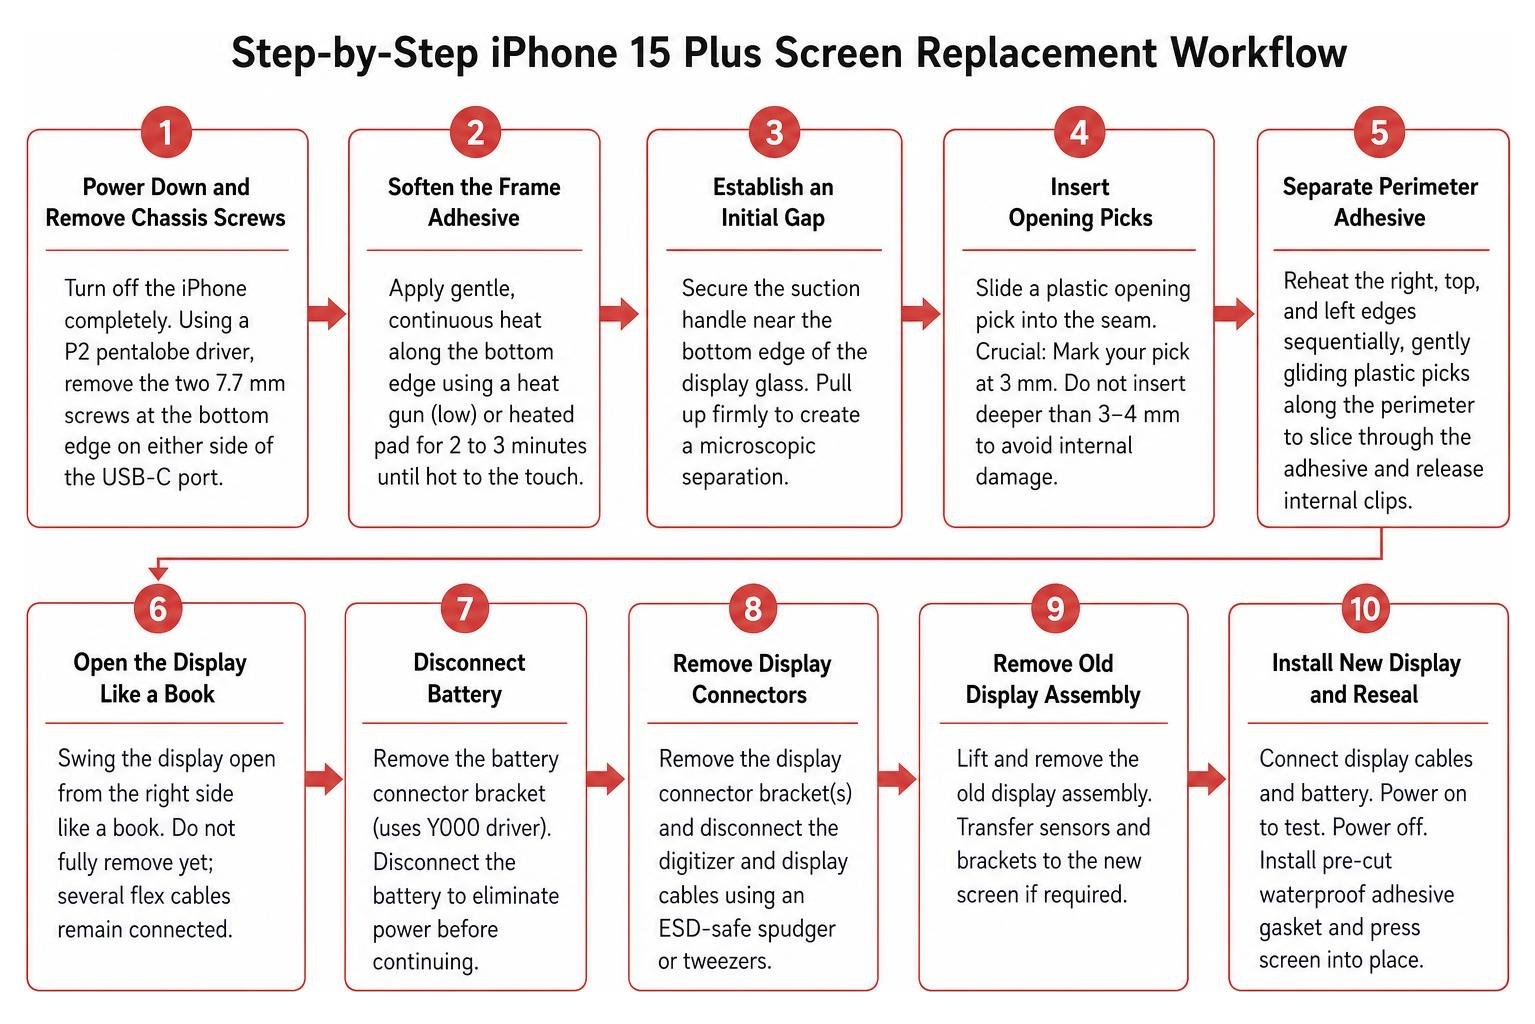
- Power Down and Remove Chassis Screws: Turn off the iPhone completely. Using a P2 pentalobe screwdriver, remove the two 7.7 mm screws located at the bottom edge on either side of the USB-C charging port.
- Soften the Frame Adhesive: Apply gentle, continuous heat along the bottom edge of the phone using a heat gun set to low (or a heated pad) for 2 to 3 minutes until the surface is hot to the touch.
- Establish an Initial Gap: Secure your suction handle near the bottom edge of the display glass. Pull up firmly to create a microscopic separation between the front panel frame and the aluminum enclosure.
- Insert Opening Picks: Slide a plastic opening pick into the seam. Crucial: Mark your pick at 3 mm. Inserting a pick deeper than 3 to 4 mm can slice through internal ribbon cables or damage delicate grounding spring clips along the frame.
- Separate Perimeter Adhesive: Reheat the right, top, and left edges sequentially, gently gliding plastic picks along the perimeter to slice through the adhesive seal and disengage the internal mechanical clips.
- Open the Display Panel: Gently swing the screen open from the right edge toward the left edge, like the front cover of a book. Do not pull the screen away fully, as short flex cables tether the display to the logic board.
- Disconnect the Battery Terminal: Unscrew the tri-point Y000 screws securing the logic board shield plate. Remove the plate with tweezers, then use a plastic spudger to gently pop the battery connector off its socket. Disconnecting power prevents accidental short circuits during subsequent steps.
- Disconnect the Display and Sensor Assemblies: Remove the remaining bracket covers, then unseat the display press connector and the upper ambient light sensor connector from the logic board. Lift the damaged screen assembly completely away from the phone body.
- Clean the Housing Perimeter: Dip an anti-static swab or lint-free wipe into 90%+ isopropyl alcohol and thoroughly clean all residual foam, glass dust, and adhesive residue from the perimeter ledge of the aluminum frame.
Sensor Transfer, True Tone, and Parts Pairing
Once the broken display is off the phone, you must address the top sensor assembly:
- Transferring the Ambient Light Sensor: The top assembly houses the ambient light sensor and proximity sensor. Using a heat gun on low, warm the top interior edge of the broken screen. With ESD-safe tweezers, carefully lift the plastic alignment bracket, pry up the ambient light sensor module, and peel up the delicate flex ribbon. Seat this module into the corresponding bracket on your new screen assembly and secure it.
- Understanding True Tone and Ambient Brightness: In iOS environments, True Tone dynamically adjusts screen white balance based on ambient room light. Historically, transferring aftermarket screens disabled this feature unless serial data was transferred via an external EEPROM programmer. With modern iOS versions, Apple has introduced the on-device Repair Assistant (accessible under Settings > General > About > Parts & Service History). This utility allows users to calibrate genuine and select certified aftermarket replacement displays directly over the air.
- Parts Pairing and System Warnings: If you install an aftermarket screen without transferring the original Touch IC chip via micro-soldering, your device may show an “Unknown Part” or “Important Display Message” notification in Settings. This message informs the user that Apple cannot verify the screen as a factory original component; however, high-grade soft OLED screens retain normal touch responsiveness, 60 Hz fluid rendering, and standard system operations.
Avoiding Common Risks During iPhone 15 Plus Screen Replacement
A budget DIY repair can quickly become expensive if avoidable mistakes occur:
- Puncturing the Battery: Never use metal spudgers, razor blades, or sharp dental picks inside the battery housing. A direct puncture can spark a chemical fire.
- Screw Stripping and “Long Screw Damage”: The screws inside the iPhone 15 Plus vary in both length and thread pitch. Installing a 1.3 mm screw into a hole engineered for a 1.0 mm screw will drive the screw directly into the multi-layer printed circuit board beneath the standoff, severing internal traces and permanently killing the phone. Use a magnetic screw mat to map every fastener to its exact origin.
- Tearing the Ambient Sensor Flex Cable: The sensor flex ribbon at the top of the display is brittle. Pulling it without sufficient heat will tear the copper leads, disabling auto-brightness and face-detection sleep features during phone calls.
- Loss of Factory Ingress Protection: Once the original factory seal is broken, the device loses its native IP68 water resistance. Always install a new, accurately aligned perimeter gasket and apply uniform clamping pressure across the display perimeter during final assembly to minimize moisture and dust intrusion.
Professional vs DIY: Time, Warranty, and Turnaround
Deciding between DIY execution and professional repair comes down to balancing cost, technical risk, personal time, and warranty protections.
A DIY screen swap typically takes between 1 and 2 hours for a novice, requiring patience, steady hands, and specialized tools. If a DIY part arrives defective or fails during installation, you are limited to the return policies of online suppliers, which may exclude user-induced flex cable damage.
By contrast, choosing professional iphone repair gives you verified technician craftsmanship, precision pressure-press lamination, and strong warranty backing. Understanding what to expect with same day iphone screen repair where to go and what to expect helps you make an informed decision when evaluating your schedule and budget.
At Salvation Repair, our technicians complete iPhone screen repairs in just 10 to 15 minutes, performed directly in front of you so you never lose sight of your personal device and data. Other hardware repairs are handled with the same rapid turnaround: battery replacements take 30 minutes, while charging port repairs take one hour. Every screen replacement we provide is backed by our comprehensive lifetime warranty and strict price-matching policy.
Frequently Asked Questions About iPhone Screen Repair
Does replacing my iPhone 15 Plus screen disable Face ID or True Tone?
Replacing the screen assembly does not inherently disable Face ID, provided the front-facing TrueDepth camera array located in the phone chassis remains undamaged. You must, however, carefully transfer the top ambient light sensor from your old screen to the new frame without tearing its delicate ribbon cable. True Tone can be restored on newer iOS updates using the built-in Apple Repair Assistant or through specialized aftermarket screen programmer tools.
What is the difference between Incell LCD and Soft OLED for the iPhone 15 Plus?
An Incell LCD (such as an AQ7 LCD) uses an LED backlight behind liquid crystals. It is thicker, produces dark gray rather than true black tones, consumes more battery power, and provides lower outdoor peak brightness. A Soft OLED utilizes flexible organic light-emitting diodes that produce their own light on a pixel-by-pixel basis, offering infinite contrast ratios, vibrant colors, true black levels, slim factory bezels, and superior drop resilience matching Apple’s original display design.
How long does an iPhone 15 Plus screen repair take?
A beginner working at home with a step-by-step DIY guide should set aside 1 to 2 hours to carefully heat adhesives, map screws, and transfer the sensor harness. In contrast, experienced professional repair technicians at Salvation Repair complete full display replacements in 10 to 15 minutes right before your eyes.
Conclusion
Restoring an iPhone 15 Plus with a cracked display does not have to break your budget. While ordering an aftermarket kit allows you to tackle the repair at home, it requires specialized screwdrivers, steady hand-eye coordination, and careful handling to protect the internal battery and delicate logic board traces.
For residents across Laurel, MS and surrounding communities like Ellisville, Bay Springs, and Soso, Salvation Repair offers a stress-free, cost-effective alternative. Our certified technicians complete on-site screen repairs in just 10 to 15 minutes right in front of you, using top-tier display assemblies backed by our lifetime warranty and price match guarantee. Whether you want to purchase parts for a home build or schedule an immediate in-person service, explore our professional options for an iPhone 15 screen replacement to get your smartphone back in pristine condition today.
