A Quick Start Guide to iPhone 11 Screen Replacement Options
Comparing Your Repair Pathways: Apple Service vs DIY vs Third-Party
When your display shatters or loses touch responsiveness, deciding how to fix it depends on balancing cost, repair turnaround time, and risk tolerance. You essentially have three routes: going through official Apple channels, attempting a do-it-yourself (DIY) kit repair, or visiting an independent third-party repair specialist.
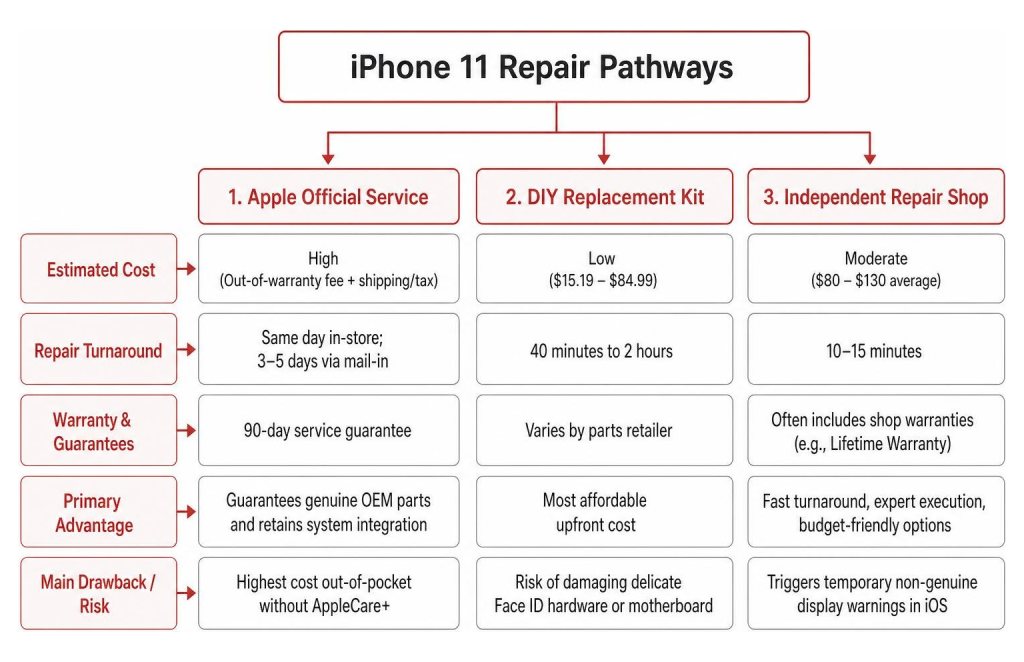
| Repair Pathway | Estimated Cost | Repair Turnaround | Warranty & Guarantees | Primary Advantage | Main Drawback / Risk |
|---|---|---|---|---|---|
| Apple Official Service | High (Out-of-warranty fee + shipping/tax) | Same day in-store; 3–5 days via mail-in | 90-day service guarantee | Guarantees genuine OEM parts and retains system integration | Highest cost out-of-pocket without AppleCare+ |
| DIY Replacement Kit | Low ($15.19 – $84.99) | 40 minutes to 2 hours | Varies by parts retailer | Most affordable upfront cost | Risk of damaging delicate Face ID hardware or motherboard |
| Independent Repair Shop | Moderate ($129.95 – $149.95 average) | 10–15 minutes | Often includes shop warranties (e.g., Lifetime Warranty) | Fast turnaround, expert execution, budget-friendly options | Triggers temporary non-genuine display warnings in iOS |
To get a complete view of how display costs compare across different phone generations, you can review our comprehensive iPhone Screen Repair Cost Guide 2026.
Evaluating Options for the Best iPhone 11 Screen Replacement
First-party Apple repair service offers guaranteed component authenticity. If you have active AppleCare+ coverage, screen damage is covered for a minimal service fee. Apple even offers an Express Replacement service under AppleCare+, shipping you a replacement device upfront before you return your damaged handset. Out of warranty, however, Apple’s direct repair costs rise significantly, requiring an official inspection and estimate where shipping fees and local taxes apply.
On the other hand, choosing a local independent repair shop provides a fast, localized service model without long mail-in wait times. Most reputable independent repair shops complete display swaps on the spot while maintaining high quality standards and providing extensive service warranties.
Financial Breakdown: DIY Kits vs Professional Repair
Evaluating the true financial commitment requires looking beyond the price tag of a bare display panel.
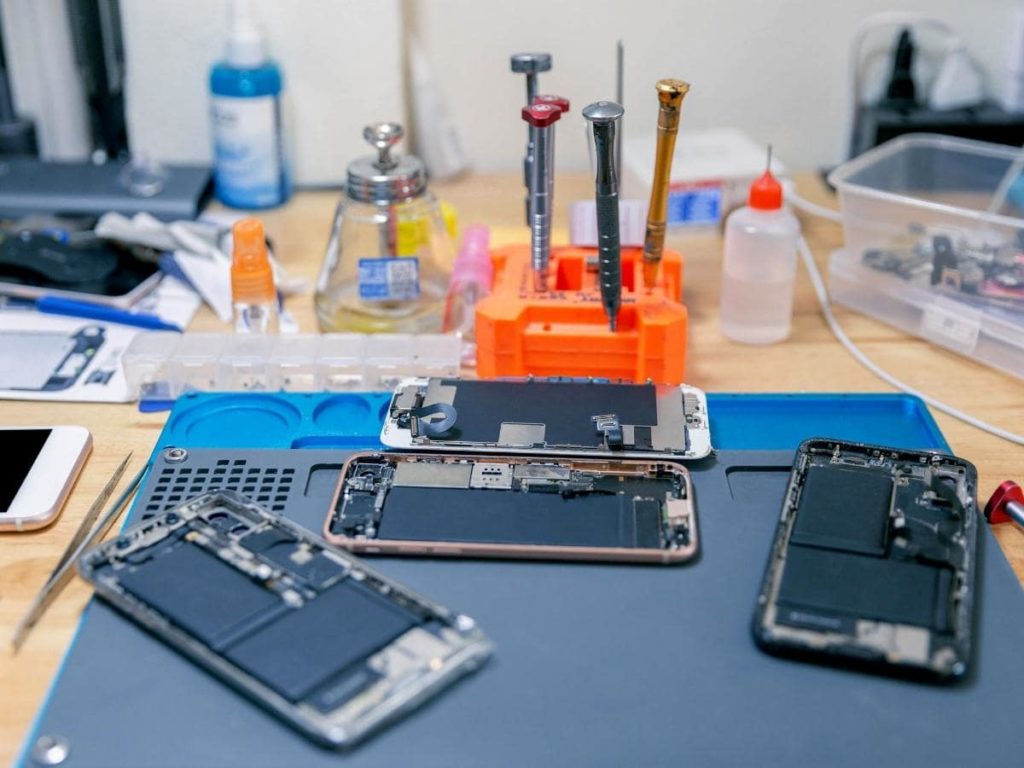
When ordering a DIY kit, panel prices depend on component quality:
- Grade A Incell LCD Panels: Typically run between $15.19 and $20.00.
- Premium Incell LCD Kits (with backplates and full repair tools): Range from $29.90 for budget kits to $84.99 for full-spec iPhone 11 Screen LCD + Digitizer Replacement Part repair kits.
- Pro Model OLED Alternatives: For iPhone 11 Pro and Pro Max models, aftermarket In-Cell LCD conversion kits start around $69.99, while Soft OLED panels cost approximately $46.39 for the part alone.
While DIY kits appear cheap upfront, hidden costs include purchasing specialized precision toolkits, heating pads (or heat guns), waterproof frame adhesive, and static-safe tweezers. Additionally, if an untrained touch accidentally tears a micro-flex cable during installation, replacing damaged internal sensors will quickly surpass the cost of a professional repair. You can explore a broader market price analysis in our guide on how to Compare Screen Repair Prices: Average Costs & Tips.
How to Choose the Best iPhone 11 Screen Replacement Kit
Selecting the best iphone 11 screen replacement requires understanding display hardware. The standard base iPhone 11 features a 6.1-inch Liquid Retina IPS LCD screen with an 828 x 1792 resolution at 326 ppi and 625 nits peak brightness. It does not feature an OLED panel. In contrast, the iPhone 11 Pro (5.8-inch) and iPhone 11 Pro Max (6.5-inch) were built with Super Retina XDR OLED displays.
To choose the right replacement match for your needs, you should clearly distinguish between the panel technologies and screen repair options available on the market:
- LCD (Including AQ7 LCD): The standard factory technology for base iPhone models like the iPhone 11, delivering accurate color reproduction and standard power efficiency. Standard LCD repairs are quoted at $129.95. For the iPhone 16 Pro, an LCD repair is quoted at $149.95, while for the iPhone 16 Pro Max, an AQ7 LCD repair is quoted at $129.95.
- Aftermarket OLED (Soft vs. Hard OLED): Flexible or rigid aftermarket OLED options offering rich contrast and deep blacks. Standard aftermarket OLED repairs are quoted at $129.95. For the iPhone 16 Pro, OLED repairs are quoted at $199.95, and for the iPhone 16 Pro Max, aftermarket OLED is quoted at $219.95.
- OEM Screen Repair Options (OEM Refurbished & New OEM): OEM options deliver original factory performance specs. Standard OEM repairs are quoted at $149.95. OEM Refurbished screens feature original Apple panels with fresh top glass, while New OEM assemblies are brand-new factory displays. For the iPhone 16 Pro Max, OEM refurbished is quoted at $399.95 and new OEM is quoted at $469.95.
For additional insight into selecting the right DIY products, check out our guide on iPhone 11 Screen Replacement: A Product Roundup for DIYers.
Key Criteria for the Best iPhone 11 Screen Replacement Kit
When shopping for replacement kits, evaluate these mandatory technical criteria:
- Assembly Completeness: Look for pre-assembled display units that include the digitizer glass, LCD, image controller, backlight, and flex cables. Kits that include pre-installed metal shield backplates save significant time during installation.
- Display Quality Metrics: Check that the screen provides at least >500 nits luminance brightness, a 6400K–7600K color temperature range, and a full 60 Hz refresh rate.
- Included Repair Essentials: A solid repair kit should include P2 Pentalobe and Y000 Tri-point precision screwdrivers, opening picks, a suction handle, plastic spudgers, and pre-cut replacement waterproof frame adhesive seals.
Top Features to Look for in the Best iPhone 11 Screen Replacement Assembly
The highest quality aftermarket panels are “ORIE” or original-quality assemblies. These utilize original screen driver ICs and flex layouts combined with precision touch assemblies. Choosing a full iPhone 11 display assembly ensures that the display ribbon cables mate perfectly with logic board connectors without straining copper contacts.
Step-by-Step DIY iPhone 11 Display Swap and Sensor Transfer
If you choose to handle your own screen swap, following a strict technical sequence is critical to protect your hardware.

Essential DIY Repair Tools and Safety Precautions
Before turning a single screw, prepare your workspace and observe these safety standards:
- Discharge the Battery: Always drain your iPhone 11 battery below 25% prior to repair. A fully charged lithium-ion battery can catch fire or explode if accidentally punctured by a screwdriver or pick.
- Wear Safety Gear: Put on eye protection. If your screen glass is badly shattered, cover the entire front face with overlapping strips of clear packing tape to prevent loose glass shards from causing injury or puncturing internal cables.
- Manage Static and Heat: Discharge static electricity before touching internal boards. When heating the frame edges to soften waterproof display adhesive, keep your heat gun or hairdryer moving continuously at a minimum distance of 5 cm—never hold heat over one spot.
- Limit Pick Depth: Mark your opening picks at a 3 mm insertion depth limit. Inserting tools further than 3 mm along the perimeter can slice delicate flex cables running along the right side of the logic board.
For detailed hardware teardowns, refer to official documentation on about genuine iPhone displays.
Transferring the Earpiece Speaker and Flood Illuminator Sensor
The most critical phase of the entire repair is transferring the top assembly from the old screen to the new display panel.
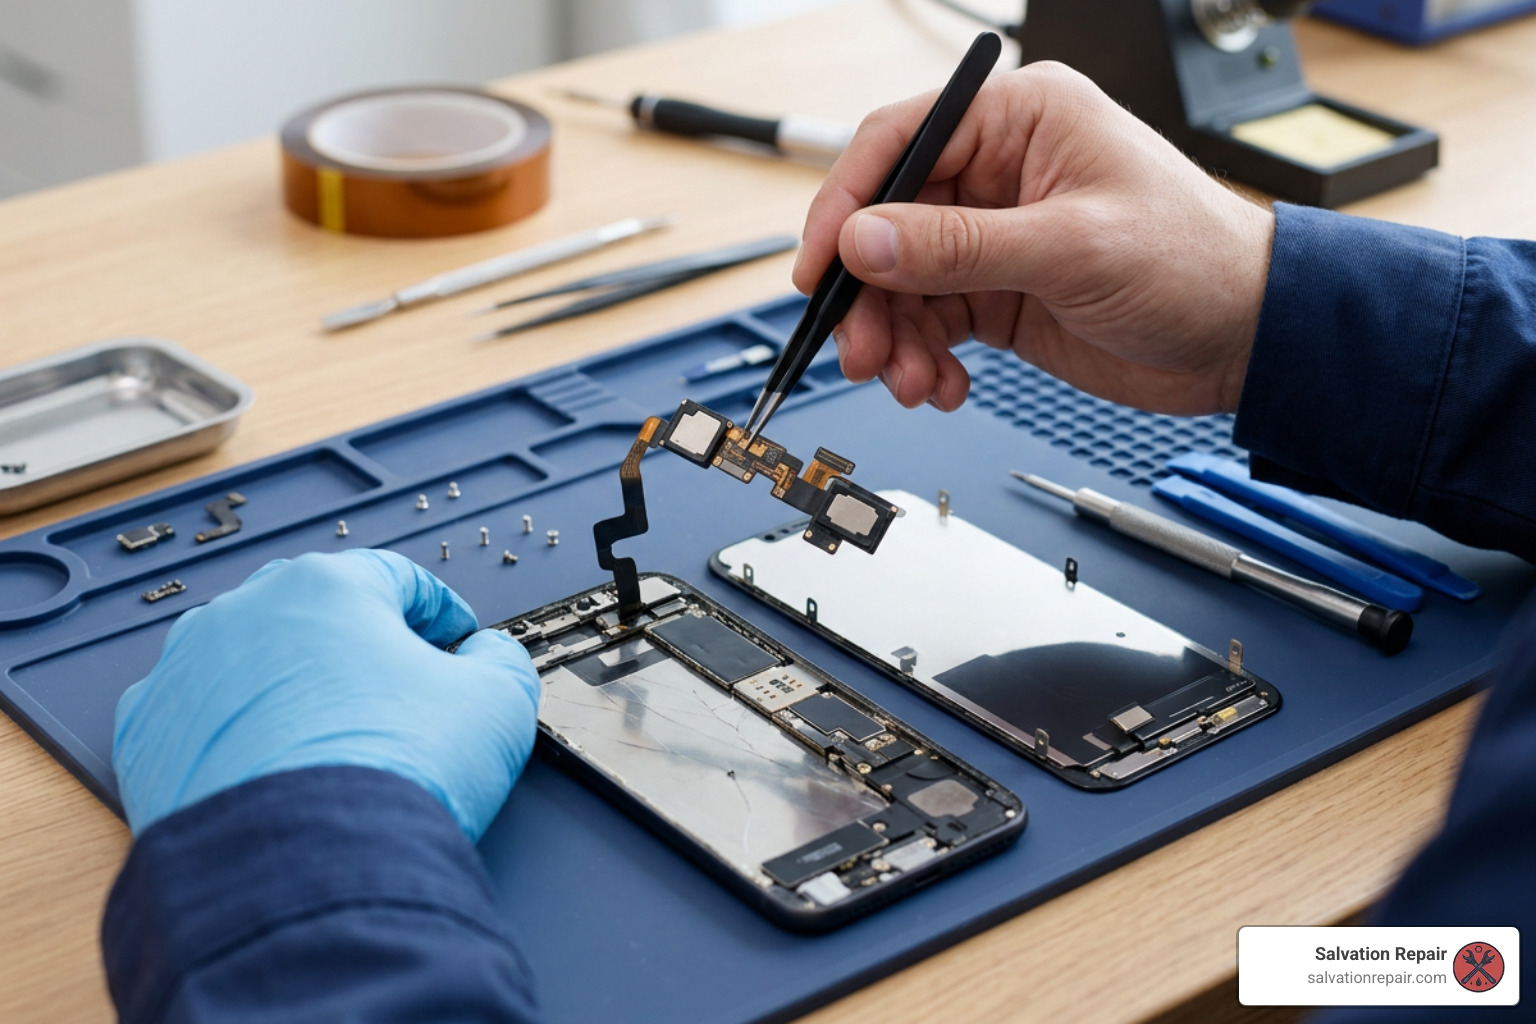
The upper assembly includes four distinct hardware elements:
- The top earpiece speaker
- The upper microphone
- The ambient light sensor
- The flood illuminator
The flood illuminator module is cryptographically paired to your phone’s specific logic board at the factory. If you damage or replace this sensor module, Face ID will be permanently disabled.
To safely transfer the assembly:
- Remove the three 1.6 mm Phillips screws and the single 1.3 mm Y000 tri-point screw holding the top speaker bracket in place.
- Carefully flip the speaker driver down to reveal the underlying sensors set into the top screen bezel.
- Apply gentle heat (for 1 to 2 minutes) to the top outer glass edge to soften the adhesive holding the delicate sensors.
- Use a thin plastic spudger or opening pick to gently pry underneath the ambient light sensor and microphone. Never pull directly on the ribbon cables.
- Lift out the combined sensor array and transfer it intact to the alignment brackets on your new display assembly.
Managing Post-Repair Warnings, True Tone, and IP68 Water Seals
Once the new display is attached, three factors remain:
- Non-Genuine Display Notifications: Modern iOS versions run hardware security checks upon boot. When a non-factory display swap is detected, an “Important Display Message” appears stating that iOS cannot verify the screen.
- True Tone Functionality: The True Tone display calibration feature (which adjusts screen color temperature to ambient lighting) automatically disables after a display swap. This occurs even if you install an original Apple panel, because True Tone code data is linked to the display’s original EEPROM chip. Restoring True Tone requires copying data from the old screen chip using a specialized handheld EEPROM programmer.
- Restoring Water Resistance: Opening an iPhone destroys its factory IP68 watertight seal. Clean away all residual adhesive glue from the aluminum chassis before applying a fresh perimeter adhesive gasket during reassembly.
Frequently Asked Questions
Will replacing my iPhone 11 screen break Face ID or True Tone?
Replacing the screen will not break Face ID as long as you carefully transfer your original earpiece speaker and flood illuminator sensor assembly to the new display frame intact. If that factory-paired sensor module is ripped or replaced with a new part, Face ID stops working permanently.
True Tone functionality, however, will be disabled after a screen swap unless you use a dedicated hardware EEPROM programmer to copy display calibration data from the old screen board over to the replacement panel.
How long does an iPhone 11 screen replacement take and how hard is it?
For an experienced professional repair technician with specialized tools, replacing an iPhone 11 display assembly takes under 15 minutes. For a home DIYer following step-by-step instructions for the first time, the repair carries a moderate difficulty rating and typically takes between 40 minutes and 2 hours.
Most of that time is spent carefully unseating the waterproof chassis adhesive, cataloging the non-uniform screws (mixing up different screw lengths can drive a long screw directly through the new display panel), and carefully removing the top sensor module.
What does the ‘Important Display Message’ warning mean after repair?
The “Important Display Message” is an automated system notification triggered by iOS when a screen replacement is performed outside of Apple’s proprietary server-side pairing system.
It does not mean your replacement screen is defective or unable to perform properly. The warning system operates on a set notification schedule:
- It appears as a prominent banner notice on your lock screen for the first 7 days.
- It then moves into the main Settings menu page for 15 days.
- After 25 days, the notification sinks permanently into Settings > General > About, where it remains as a recorded repair history note without affecting day-to-day phone operations.
Conclusion
Whether you prefer ordering an all-inclusive DIY repair kit or having an expert handle the process, restoring your display returns your iPhone 11 to peak usability. If you want to handle the swap yourself, purchase a complete assembly kit with pre-tested In-Cell LCD or AQ7 display panels, work methodically, and treat the delicate Face ID flood illuminator sensor with extreme care.
If you prefer to avoid the risks of DIY repair—such as stripped Y000 screws, lost Face ID function, or torn ribbon cables—let our certified repair specialists handle the job for you.
At Salvation Repair, we specialize in fast, hassle-free electronic device services. For our local customers in Laurel, MS, as well as surrounding communities in Jones County, Mississippi (including Ellisville, MS, Soso, MS, Jackson, MS, and Meridian, MS), we deliver top-tier repair solutions backed by our lifetime warranty, price matching, and expert care.
We perform standard iPhone screen repairs in just 10 to 15 minutes directly in front of the customer, so you never have to leave your phone behind or worry about data privacy. If your phone needs additional care, our battery repairs take 30 minutes, and charging port repairs are completed in one hour. Plus, true to our promise, we proudly repair any device with a power button!
To explore complete service choices across all Apple devices, browse our detailed iPhone Screen Repair Complete Guide. Ready to restore your phone? Drop by our Laurel shop or visit our website today to get your display working like new!
