
Silence the Screaming: A DIY Guide to PS5 Slim Coil Whine
What You Can Actually Do About PS5 Slim Coil Whine
PS5 Slim capacitor whine repair is possible, but the right fix depends on how bad your noise is. Here are your main options at a glance:
| Fix | Difficulty | Effectiveness |
|---|---|---|
| Cap framerate in games | Easy | Moderate |
| Use headphones | Easy | Moderate |
| Apply dampening material to capacitors | Hard | Low to moderate |
| Replace PSU capacitors | Very hard | Low to moderate |
| Exchange unit for a different revision | Easy (if in warranty) | Best outcome |
You just bought a PS5 Slim, fired it up, and now there’s a high-pitched whine cutting through your living room. Your spouse can hear it from the next room. You’re not imagining it, and you’re not alone.
That buzzing, whining, or electric-shaver sound is coil whine — a real hardware issue that affects a notable share of PS5 Slim units. According to a NeoGAF poll of 94 owners, around 18% kept their unit despite the noise, while another 5% returned it because the sound was unbearable. Some users describe it as loud enough to hear over in-game audio from normal seating distance.
The frustrating part? There’s no single guaranteed fix. But there are things you can try — and things you should absolutely not try without the right knowledge.
I’m Ralph Harris, a Wise Level 2 certified technician and Apple-certified repair specialist with over 20 years of hands-on electronics repair experience, including gaming consoles like the PS5 Slim — and PS5 Slim capacitor whine repair is one of those problems I’ve seen come through the shop more times than I’d like to count. In this guide, I’ll walk you through exactly what’s causing that noise, what actually works, and when it’s time to stop DIYing and call a pro.
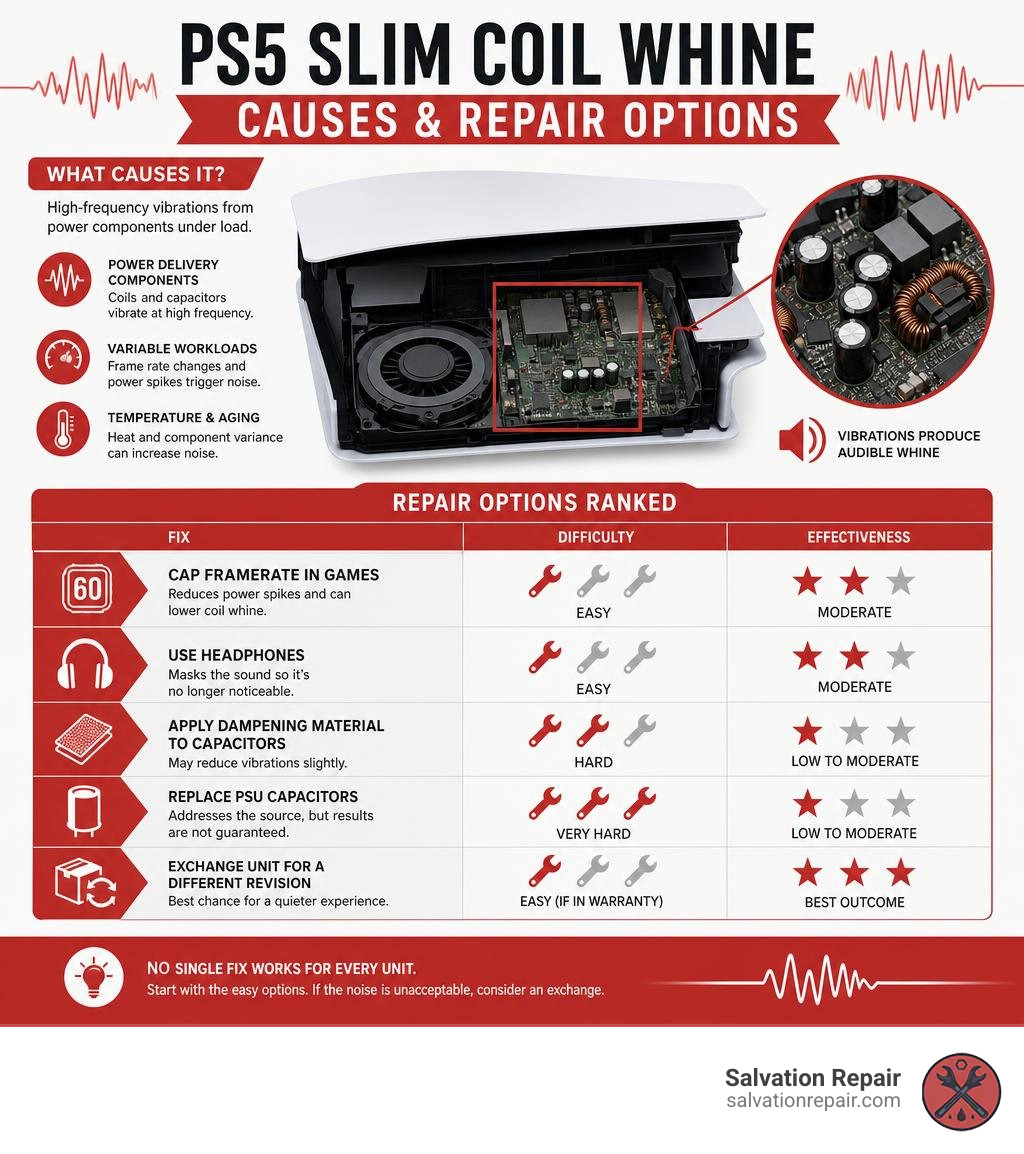
What is PS5 Slim Coil Whine and Why Does It Happen?
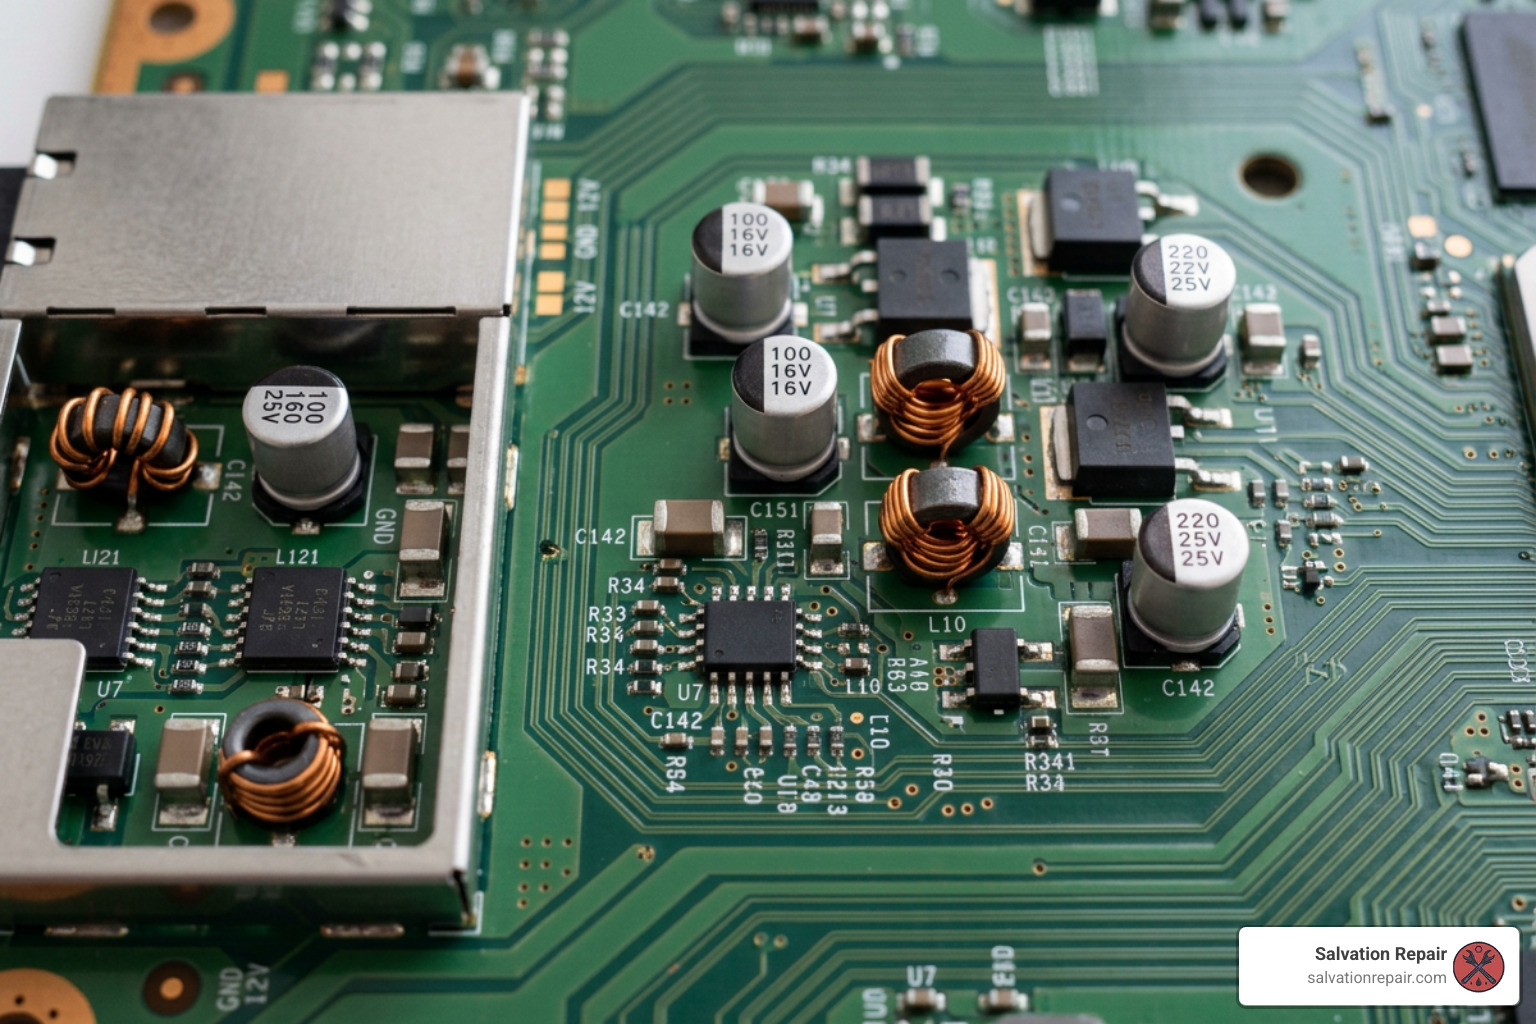
To tackle this annoying high-pitched scream, we first need to understand the physics of what is actually happening inside your console.
At its core, “coil whine” (or more accurately in this case, “capacitor whine”) is caused by micro-vibrations. When high amounts of electrical current pass through electromagnetic components like inductors (coils) and capacitors, they create magnetic fields. These fields cause the physical copper coils or the internal metallic layers of the capacitors to vibrate at an incredibly high frequency.
If those vibrations happen to hit a frequency that is audible to human ears (typically between 20 Hz and 20 kHz), you hear it as a sharp, buzzing, or whining sound. The more power the console draws, the more violent these micro-vibrations become. This is why the noise often gets much louder when you boot up a graphically intensive game like Astro Bot or Demon’s Souls, and quietens down when you return to the basic PlayStation home menu.
In the PS5 Slim, this vibration primarily originates from two areas:
- The Power Supply Unit (PSU): Manufactured largely by Delta, the PSU converts high-voltage AC power from your wall outlet into stable DC power for the console. The metalized film capacitors and inductors in this unit handle massive electrical throughput.
- The APU (Accelerated Processing Unit) Voltage Regulator Modules (VRMs): Located on the main motherboard, these components feed clean power directly to the main processor. Under intense gaming loads, these motherboard capacitors can vibrate just as loudly as the PSU.
To see how the PS5 Slim stacks up against the competition in terms of acoustics under load, let’s look at how it compares to other modern hardware:
| Hardware Unit | Average Noise Under Heavy Load | Primary Source of Whine | User Satisfaction Rate |
|---|---|---|---|
| PS5 Slim (CFI-2000 series) | ~38 to 43 dB | Power Supply Capacitors & APU VRMs | Moderate (high variance in units) |
| Original PS5 (CFI-1000/1100) | ~39 to 44 dB | 12V Fan Profile & PSU Inductors | Moderate |
| Xbox Series X | ~30 to 35 dB | Main Exhaust Fan (rare coil whine) | High (highly dampened design) |
| High-End PC GPUs (RTX 4090) | ~45 to 52 dB | High-Power VRM Inductors | Low (very common under unlocked FPS) |
As you can see, high-power electronics across the board suffer from this physical phenomenon. However, Microsoft utilized heavier vibration-dampening materials in the Xbox Series consoles, leaving Sony’s sleeker, more compact PS5 Slim more vulnerable to transmitting these vibrations directly through its plastic chassis.
Identifying the High-Pitch Buzz: Coil Whine vs. Fan Noise
Before you start tearing down your console for a PS5 Slim capacitor whine repair, you need to make sure you are targeting the correct culprit. A noisy console can be caused by a few different components, and fixing a noisy fan requires a completely different approach than fixing vibrating capacitors.
Here is how you can tell the difference:
- The Fan Test: If the noise is a consistent, low-frequency hum or a rhythmic ticking sound that increases in speed gradually as the console warms up, you are likely dealing with fan noise. Some PS5 Slim models ship with different fan brands (such as Foxconn or Nidec), and some are naturally louder than others. You can read more about dealing with console cooling assemblies in our guide on PS4 Loud Fan Repair.
- The Framerate Test: This is the ultimate test for coil/capacitor whine. Boot up a game and navigate to a menu screen with an unlocked framerate (such as the main menu of Oddworld: Soulstorm). Listen closely. If the pitch of the whine instantly changes, goes up, or fluctuates wildly as you move between different game menus, you are 100% dealing with capacitor whine. The noise changes pitch because the power draw fluctuations match your game’s framerate changes.
If you hear a physical clicking or buzzing that doesn’t change pitch with the game’s graphics, check out Sony’s official hardware noise guidelines at PS5: console is making noise to rule out basic housing vibrations or optical disc drive issues.
Is the PS5 Slim More Prone to Whine Than the Original PS5?
The short answer is: Yes, but it is a “hardware roulette.”
When Sony redesigned the PlayStation 5 into the Slim model (CFI-2016 and subsequent revisions), they had to shrink the footprint of the console significantly. This meant redesigning the motherboard (moving through revisions like the EDM-040, EDM-041, and EDM-140) and cramming the power supply into a much tighter space.
Because the internal components are packed closer together, there is less physical airflow and less mass to absorb mechanical vibrations. Furthermore, to keep manufacturing costs down, Sony opted not to apply heavy silicone putty or epoxy over the power supply capacitors — a common industry practice used by high-end electronics manufacturers to physically lock vibrating components in place.
As a result, the PS5 Slim acts almost like an acoustic amplifier. The micro-vibrations from the capacitors on the EDM-040 or EDM-041 boards transfer directly into the metal shielding and plastic plates, turning your sleek new console into a high-pitched speaker.
Step-by-Step PS5 Slim Capacitor Whine Repair and DIY Fixes
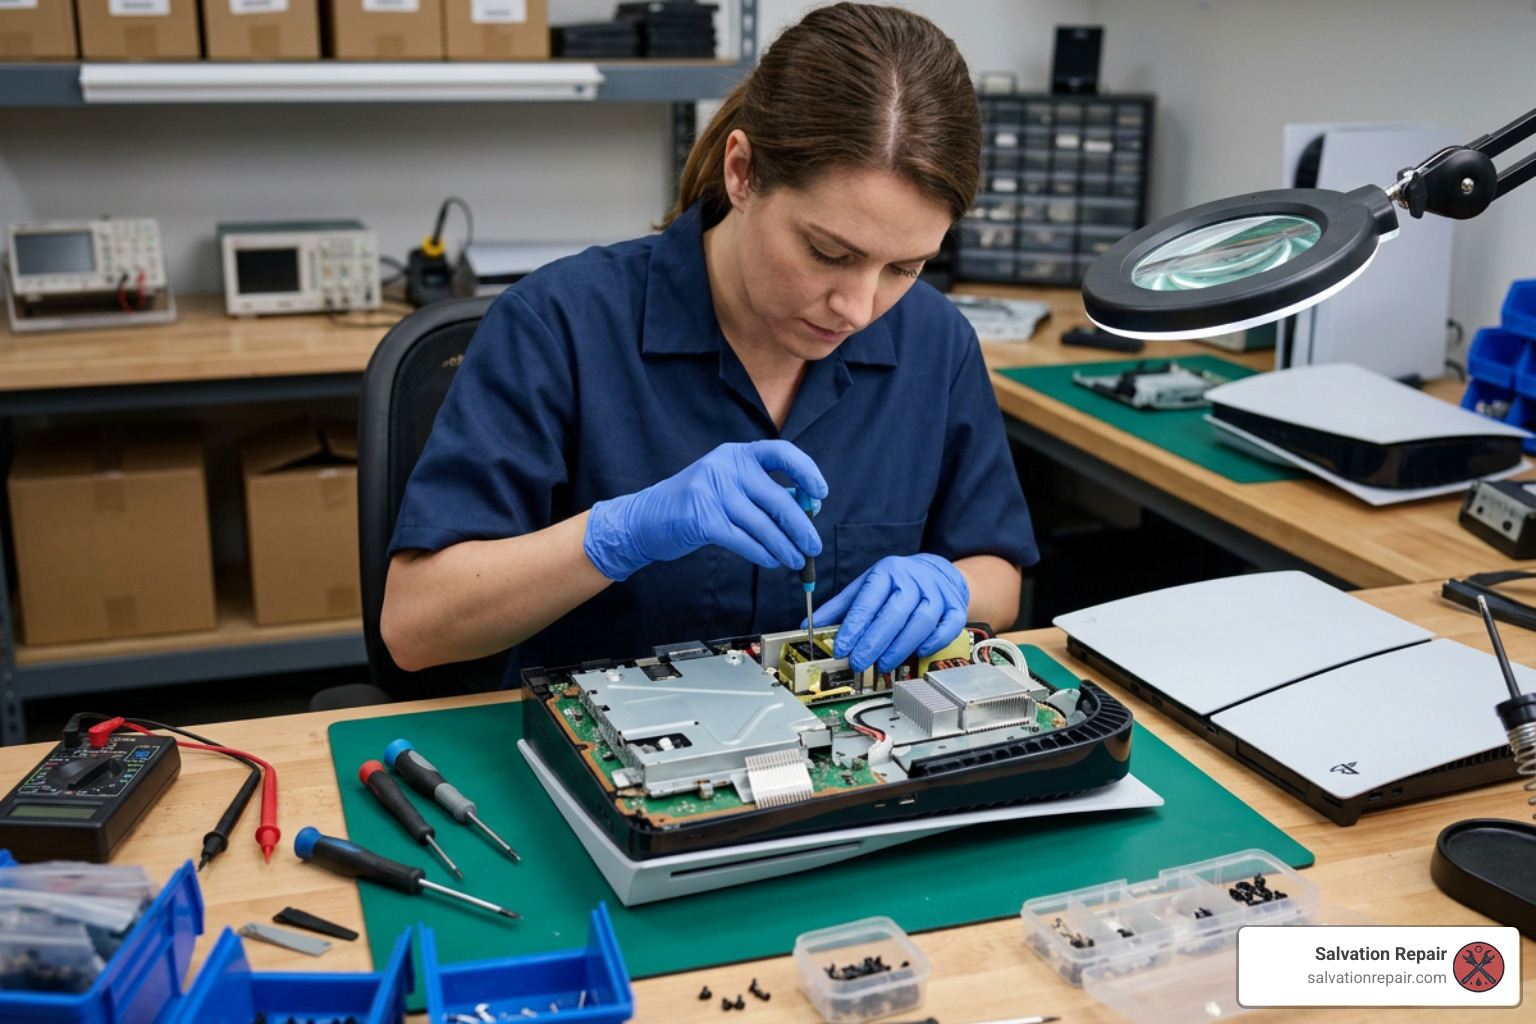
If you have confirmed that your console is screaming due to capacitor whine and you want to try a physical repair, you have a couple of paths forward.
Warning: Opening your PS5 Slim’s internal metal shielding or tampering with the power supply will void your manufacturer warranty. If you are not comfortable working with delicate electronics, we highly recommend visiting our team at Salvation Repair for professional Gaming Console Repair.
If you are a seasoned DIY enthusiast, here are the tools you will need to gather before starting:
- T8 Security Torx screwdriver
- Precision Phillips head screwdriver
- Plastic spudgers or non-conductive pry tools
- High-quality thermal pads (1.0mm and 1.5mm thickness)
- Non-conductive electronics grade silicone adhesive (such as MG Chemicals Silicone) OR high-temperature epoxy
- A fine-tip soldering iron and leaded solder (if performing a full capacitor replacement)
Sourcing Replacement Parts for PS5 Slim Capacitor Whine Repair
For those looking to perform a complete component-level swap, identifying the correct parts is half the battle. On the newer PS5 Slim motherboards (like the EDM-044), technicians often struggle to identify the exact specifications of the surface-mount capacitors.
For example, on the motherboard’s power delivery rails, you will find small, silver solid-state polymer aluminum capacitors. A common point of confusion is the marking FP 53CH 391 6.3.
Through diagnostic discussions on hardware forums like PS5 Slim: Trying to identify FP 53CH 391 6.3, technicians have successfully reverse-engineered these markings:
- FP: Indicates the FPCAP series manufactured by Nichicon.
- 391: Represents the capacitance value of 390 microfarads (39 with one trailing zero).
- 6.3: Indicates a 6.3-volt rating.
- Dimensions: These are ultra-compact capacitors measuring roughly 6mm in diameter by 6mm in height.
If you are replacing these to fix a short circuit or to try and install higher-quality, lower-ESR (Equivalent Series Resistance) alternatives, make sure you source genuine Nichicon parts from reputable distributors like DigiKey or Mouser. Replacing these surface-mount components requires expert micro-soldering skills, as modern lead-free solder has a very high melting point and can easily damage the delicate PCB traces if too much heat is applied.
Applying Dampening Material to Noisy Capacitors
If you don’t want to risk desoldering tiny components from your motherboard, a more common DIY approach is to physically dampen the vibrations using non-conductive glue, epoxy, or thermal pads.
The logic is simple: if you coat the vibrating component in a heavy, solid material, it cannot vibrate, and the sound will stop. However, as documented in extensive community testing on I tried to fix the PS5 power supply capacitor buzz, this fix is often a waste of time.
Users who completely coated their power supply capacitors in high-temperature epoxy or hot glue reported almost no measurable change in decibel levels. Why? Because a significant portion of the high-pitched buzz actually originates from the APU’s silicon and the main motherboard’s power phases, not just the power supply brick itself.
If you still want to try this method, follow these steps:
- Completely discharge the console: Unplug the PS5 Slim from the wall and hold the power button down for 10 seconds to drain any residual charge. Let it sit unplugged for at least 12 hours before opening the power supply.
- Expose the PSU board: Use your T8 Torx to remove the outer casing and carefully unscrew the internal shielding.
- Locate the large metalized film capacitors: These are the large, blocky components inside the power supply.
- Apply dampening material: Carefully wedge high-density, non-conductive thermal pads tightly between the capacitors and the metal shielding of the power supply. This transfers the mechanical energy into the shielding and can help muffle the sound without creating a permanent, sticky mess of epoxy.
Preventive Measures and Workarounds Before Repairing
If you don’t want to void your warranty or risk damaging your console with a soldering iron, there are several highly effective workarounds you can use to keep your sanity intact.
- Limit Your Framerates: Since capacitor whine is directly tied to power draw, running games at uncapped frame rates (like 120Hz modes or unlocked menus) makes the scream much worse. Whenever possible, enable V-Sync or cap your games to a stable 60 FPS in the in-game settings.
- Go Horizontal: Many users report that laying the PS5 Slim horizontally rather than standing it vertically changes the physical pressure on the internal mounting screws, noticeably reducing the transmission of the high-frequency vibrations through your TV stand.
- Use Acoustic Isolation Pads: Place small rubber or foam isolation pads under your console’s feet. This prevents the console from turning your wooden entertainment center into a giant sounding board.
- Relocate the Console: If you are using a long, high-quality HDMI 2.1 cable, you can place the console slightly further away from your main seating position, or even inside a well-ventilated cabinet to block the high-frequency sound waves. If your console is experiencing other issues like display drops during setup, check out our guide on How to Fix PS5 Slim No Display in 5 Steps.
Frequently Asked Questions about PS5 Slim Capacitor Whine Repair
Does Sony cover PS5 Slim capacitor whine repair under warranty?
Generally, no. Sony considers coil whine and capacitor vibration to be a normal characteristic of high-power electrical operation, not a hardware defect. Unless your console is failing to power on entirely, customer support will likely deny a warranty claim for noise alone.
However, if you are still within your retailer’s return window (usually 14 to 30 days from purchase), we highly recommend taking advantage of it. Return the console and exchange it for another unit. Because of the “hardware roulette,” your replacement unit has a good chance of being much quieter.
Which PS5 Slim motherboard revisions are most affected by coil whine?
The early PS5 Slim revisions utilizing the EDM-040 and EDM-041 motherboards have the highest volume of user complaints regarding capacitor buzz. The newer EDM-140 boards feature slightly revised power delivery layouts, but they are still susceptible to the issue depending on the batch of capacitors used during assembly.
If your console is suffering from more severe motherboard failures, such as a Blue Light of Death (BLOD) or a damaged port, you can learn about professional solutions in our PS5 HDMI Port Replacement guide.
Is DIY PS5 Slim capacitor whine repair dangerous?
Yes, it can be extremely dangerous if you open the power supply unit.
The large capacitors inside the PS5 Slim’s PSU are designed to hold high-voltage electrical charges even after the console has been unplugged from the wall. Touching the exposed pins of a charged capacitor can deliver a painful, potentially lethal electrical shock.
Always allow the console to sit unplugged for at least 12 hours, and use a multimeter to verify that the voltage across the main capacitors has dropped to safe levels (below 15V) before attempting any physical contact. If this sounds intimidating, it’s always safer to trust an expert.
Conclusion
At the end of the day, capacitor whine is an annoying side effect of modern, high-performance gaming hardware packed into tiny spaces. While DIY fixes like thermal padding can help muffle the scream, component-level repairs are highly technical and carry real safety risks.
If you live in Laurel, MS, Jackson, MS, Ellisville, MS, Soso, MS, Meridian, MS, or anywhere in Jones County, Mississippi, you don’t have to risk your hardware or your safety. At Salvation Repair, we specialize in professional, high-quality electronics repairs. Our motto is simple: we can fix any device with a power button.
Whether you need expert console diagnostics, a controller overhaul from our Xbox Controller Fixers, or general Gaming Console Repair, we’ve got you covered.
Plus, we are famous for our ultra-fast, same-day mobile phone repairs! If you have a cracked phone screen, we can handle it right in front of you:
- iPhone Screen Repairs: Our iPhone screen repairs take 10-15 minutes in front of the customer! We offer standard LCD repairs at $129.95, aftermarket OLED at $129.95, and OEM at $149.95.
- For iPhone 16 Pro, we quote LCD at $149.95 and OLED at $199.95.
- For iPhone 16 Pro Max, we quote AQ7 LCD at $129.95, aftermarket OLED at $219.95, OEM refurbished at $399.95, and new OEM at $469.95.
- iPhone Battery Repairs: Our battery repairs take 30 minutes.
- iPhone Charging Port Repairs: Our charging port repairs take 1 hour.
All of our repairs are backed by our industry-leading lifetime warranty and our local price match guarantee.
Don’t let a screaming console ruin your gaming sessions. Bring your PS5 Slim to Salvation Repair today, and let us bring the quiet back to your living room!

One thought on “Silence the Screaming: A DIY Guide to PS5 Slim Coil Whine”