How to Fix PlayStation 5 Slim Power Issues in Less Than an Hour a Day
Fix PlayStation 5 Slim Power Issues Before They Get Worse
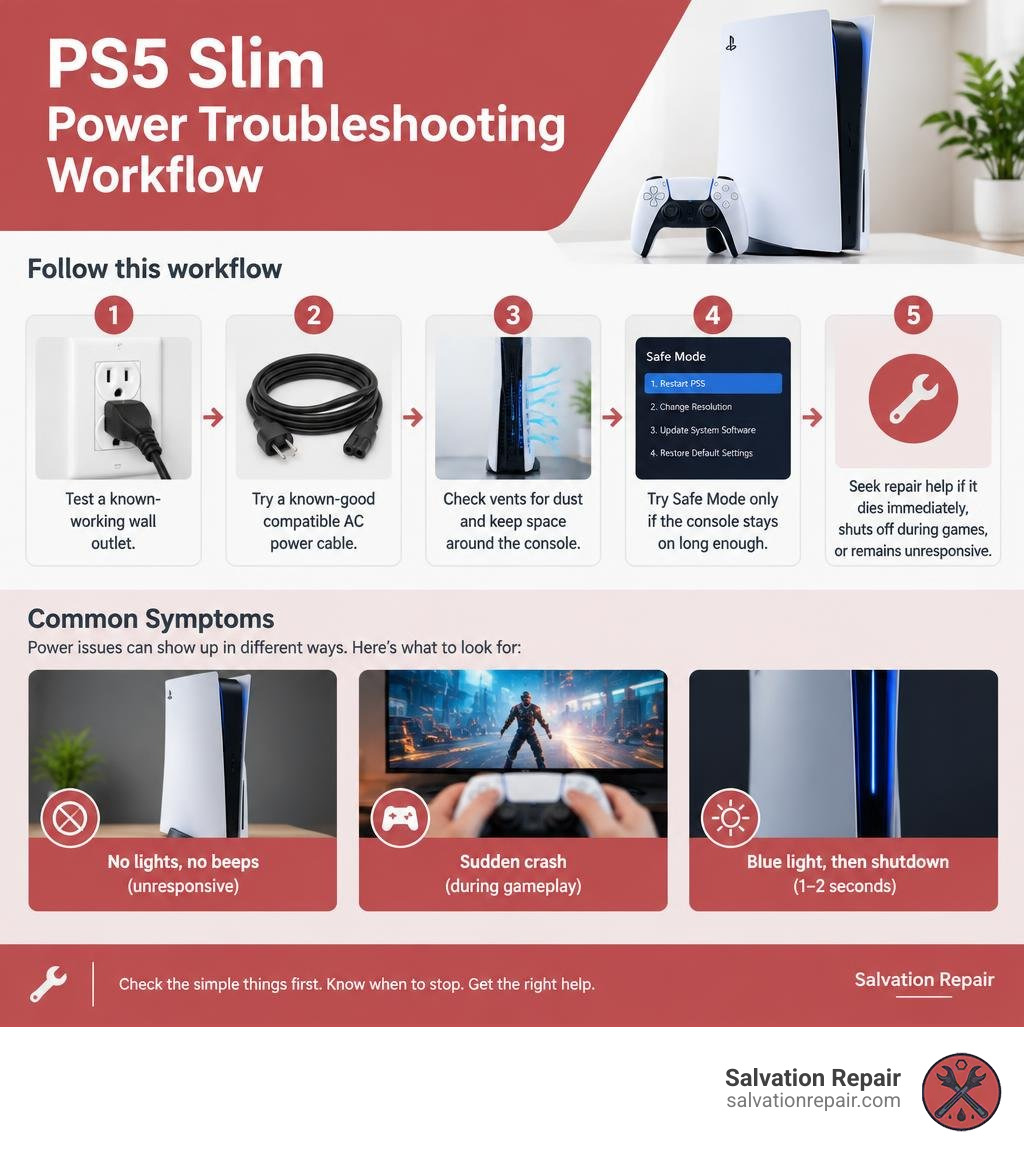
Most Playstation 5 Slim Power Issues start with a simple check: test the wall outlet, reseat the power cable, unplug the console for 5 to 10 minutes, then hold the power button for 10 to 15 seconds before reconnecting it. If it still shows no light, no beep, or a blue light for one to two seconds before shutting off, stop repeating power-on attempts and narrow down whether the cause is heat, a loose internal power connection, the power supply, or a motherboard fault.
Start with these safe checks:
- Plug the PS5 Slim directly into a known-working wall outlet.
- Try a known-good compatible AC power cable.
- Check the vents for dust and make sure the console has open space around it.
- Try Safe Mode only if the console stays powered on long enough.
- Seek repair help if it dies immediately, shuts off during games, or remains fully unresponsive.
A brief blue light and shutdown can point to a deeper board-level problem, while a console revived by a tap may have a loose PSU-to-motherboard contact. Do not smack the console as a fix; it can worsen cracked solder joints or damaged connectors.
I’m ralph harris, an electronics repair technician and technical writer with more than 20 years of hands-on experience diagnosing device failures, including Playstation 5 Slim Power Issues. I focus on clear, practical steps that help Laurel, MS gamers know what they can safely try at home and when a professional diagnosis is the smarter move.
Common Symptoms and Quick Checks for PlayStation 5 Slim Power Issues

When troubleshooting modern hardware like the PlayStation 5 Console Model CFI-2015, power failures generally manifest in three distinct ways: complete unresponsiveness with no lights and no beeps, a sudden crash during intense gameplay (such as during an Overwatch 2 match), or the classic “blue light of death” where the power indicator illuminates for 1 to 2 seconds before the system abruptly dies.
Before assuming your motherboard is dead, eliminate external environmental variables. Power strips, surge protectors, and smart plugs often fail under the 350W demand of a PS5 under load. Always plug the system directly into a verified wall outlet.
Follow this standard AC power-cycling sequence:
- Disconnect the AC power cord from both the wall and the rear of the console.
- Let the console rest disconnected for 5 to 10 minutes to allow the high-voltage internal capacitors inside the Power Supply Unit (PSU) to discharge fully.
- While unplugged, hold down the front power button for 10 to 15 seconds to drain any residual standby energy from the motherboard’s power management rails.
- Inspect the AC inlet prongs for scorch marks, bending, or debris.
- Firmly reconnect the cable directly into the wall and press the power button once.
If you hear a single chime but the system refuses to boot, review our guide to troubleshooting the single beep power fault. For standard system integrity checks, compare your symptoms with the PlayStation official power troubleshooting guidelines.
Safe Mode and Software Power Recovery
If your console stays powered on for at least a few seconds or boots with an amber/white light before freezing, a corrupt operating system or damaged NVMe database could be interrupting the boot sequence.
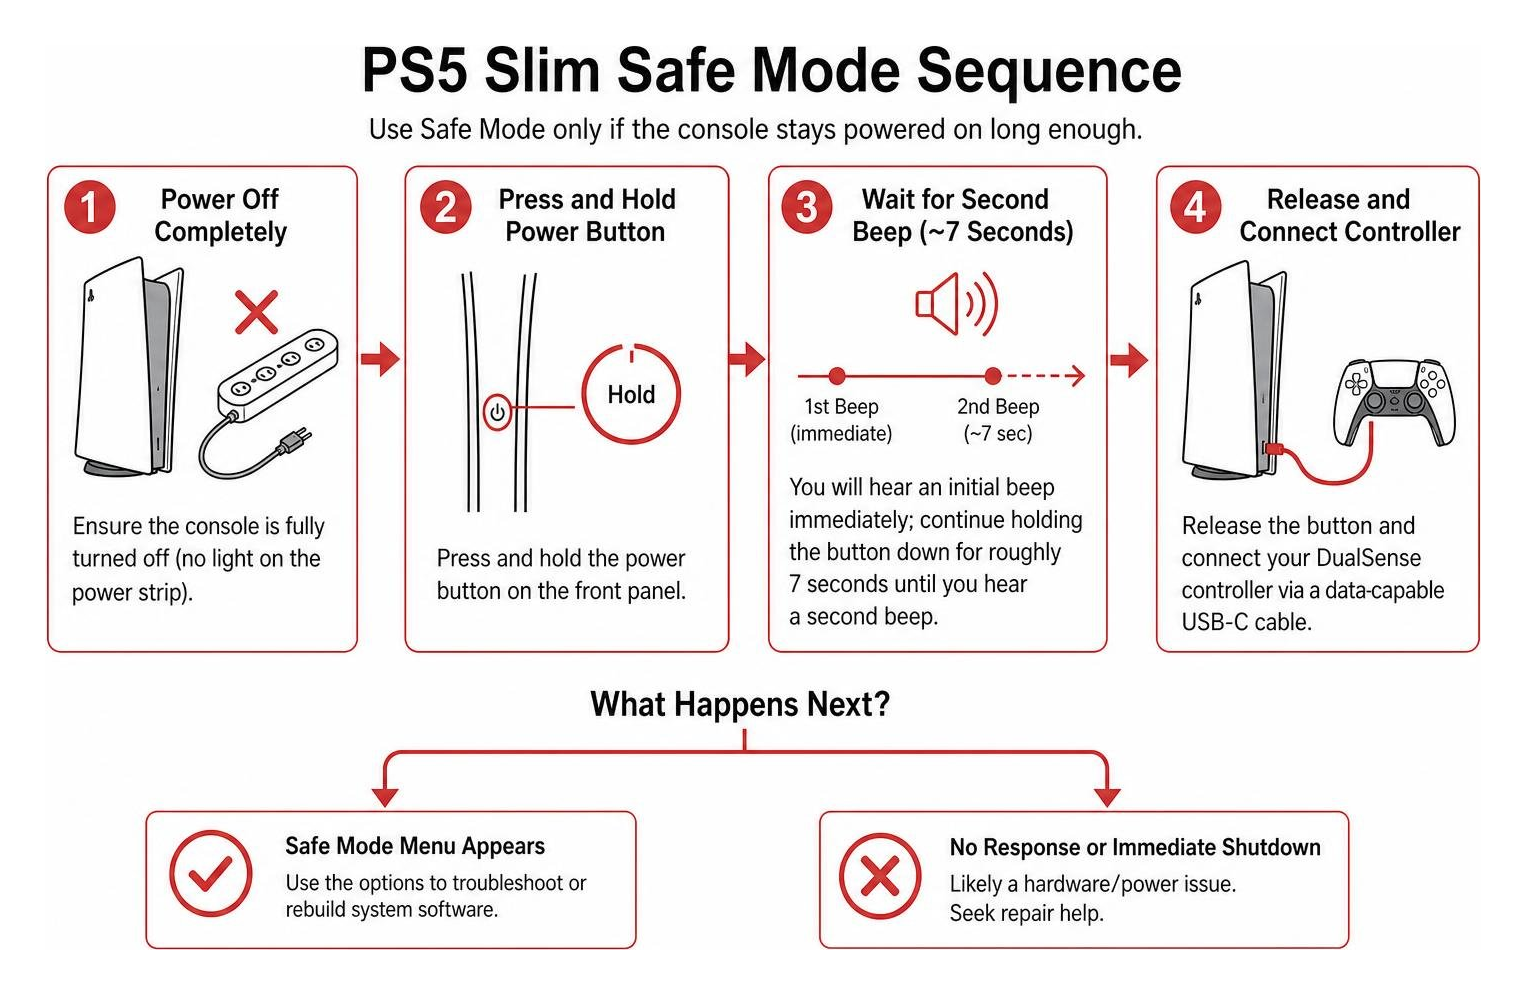
To enter Safe Mode:
- Ensure the console is fully turned off (no light on the power strip).
- Press and hold the power button on the front panel.
- You will hear an initial beep immediately; continue holding the button down for roughly 7 seconds until you hear a second beep.
- Release the button and connect your DualSense controller via a data-capable USB-C cable.
From the Safe Mode menu, select Option 5: Clear Cache and Rebuild Database, followed by Clear System Software Cache. This wipes temporary hibernation files that can cause soft-lock power-down loops. If that fails to stabilize boot behavior, our walkthrough on resolving one-beep startup failures provides further isolation steps.
Mechanical Contacts and the Console Tapping Phenomenon
An odd yet widely reported phenomenon in gaming forums involves users reviving a completely dead PS5 Slim by firmly tapping or smacking the side of the chassis. While it might feel satisfying when “percussive maintenance” works, this reaction reveals a mechanical flaw inside the console.
In the PS5 Slim redesign, the internal PSU connects to the main motherboard using structural metal prongs rather than a flexible wiring harness. Over thermal cycles, these prongs can suffer from:
- Terminal tension relaxation (the prongs expand and loosen their grip).
- Surface oxidation on high-current contact points.
- Micro-arcing that creates non-conductive carbon deposits.
Tapping the chassis momentarily shifts the contacts, bridging the connection and completing the standby circuit. However, continuing to smack the console risks fracturing fragile BGA (Ball Grid Array) solder balls beneath the APU or RAM chips. To fix the issue permanently, follow our guide on internal power switch and connector maintenance to clean and tension the internal terminals properly.
Isolating Hardware Faults: Power Supply, Fuses, and Motherboard Rails
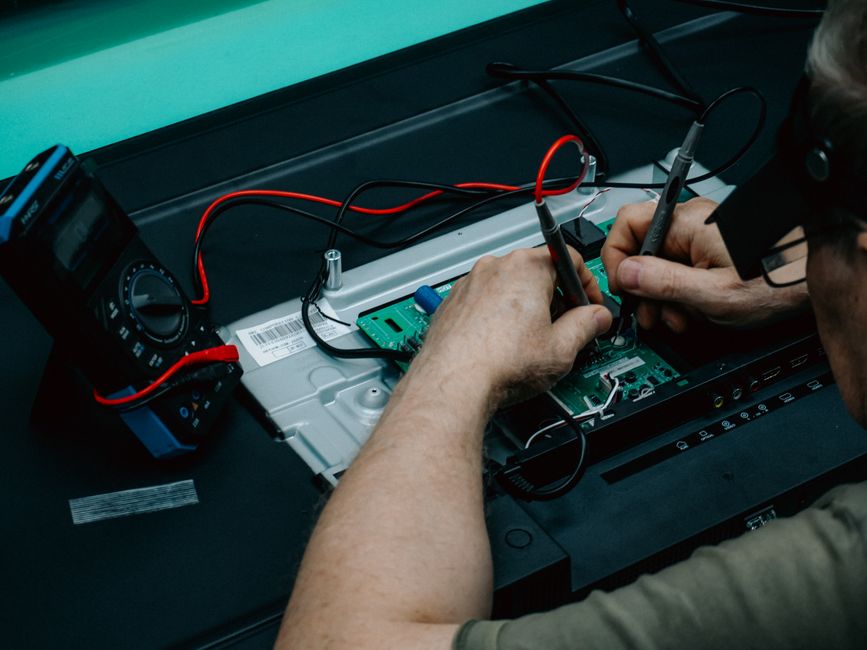
When basic external steps fail, you must open the console and use a digital multimeter to measure hardware rails. The PS5 Slim logic board relies on a strict power-up sequence managed by the Syscon (System Controller) chip. If any voltage rail fails to appear within its assigned millisecond timing window, the Syscon triggers an immediate shutdown to protect sensitive silicon.
Essential PS5 Slim voltage rails and baseline values include:
- Standby Rail: 5.17V (Must be present continuously whenever the AC cord is attached).
- Main 12V Rail: 12.15V (Activated when the power button is pressed).
- APU Core Voltage (VDD_Core): ~0.91V under initial initialization.
- RAM Rail (VDD/VDDQ): ~1.37V to 1.38V (Supplies the high-speed GDDR6 memory chips).
Before testing active power rails, disconnect power and measure continuity across the primary surface-mount device (SMD) fuses:
- F7002, F7003, F7005: High-current safety fuses safeguarding peripheral and auxiliary power lines.
- F3501: Drive and accessory interface fuse.
If all fuses show 0.00 ohms (continuity) and the 12.15V rail appears for a split second before dropping to zero, the PSU itself is likely healthy—the motherboard is actively shutting it down due to an downstream short circuit.
| Power Symptom | Measured Voltage Behavior | Likely Faulty Component |
|---|---|---|
| Completely Dead (No beep, no light) | 0V on Standby Rail (5.17V missing) | Blown Main PSU or shorted standby diode |
| Blue light for 1–2 sec, fan twitches | 12.15V present briefly, RAM ~1.38V drops | RAM calibration fault, Net72 rail, or XDPE |
| Powers on, freezes at dashboard, shuts down | Core rails sag under thermal load | Thermal shutdown / Dry Liquid Metal |
| Shuts off after 20 minutes of gameplay | 12.15V stable, sudden drop to 0V | PSU internal thermal cutoff or dirty heatsink |
Diagnosing PlayStation 5 Slim Power Issues: PSU, Capacitors, and Rail Shorts
To isolate board-level short circuits, set your multimeter to resistance mode (ohms) or diode mode with the black probe grounded to the motherboard’s metal shield plate:
- Check 12V Rail Resistance: Measure from the main 12V incoming prongs to GND. A healthy reading should steadily climb into kilo-ohms as internal filtering capacitors charge. A reading below 50 ohms indicates a shorted high-side MOSFET or shorted Multi-Layer Ceramic Capacitor (MLCC).
- Inspect 5V Standby Rail: If the 5.17V line reads near 0 ohms to ground, inspect the small buck converter IC and adjacent bypass capacitors.
- Inspect RAM Resistance to Ground: Measure across the main VDD rail for the GDDR6 chips. Normal resistance sits between 23 and 30 ohms. A measurement below 5 ohms points to a catastrophic internal short inside one of the memory dies.
If the power failure is accompanied by an unexpected display cutoff, you can verify your video output stages with our guide on how to fix PS5 Slim no display in 5 steps. If shutdowns occur strictly during demanding 3D games, address dust buildup and thermal management by managing console overheating and dust blockages.
Deep Hardware Diagnostics on EDM-040 and EDM-041 Motherboards
The PlayStation 5 Slim introduced two main motherboard revisions: EDM-040 and EDM-041 (found across CFI-2000 and CFI-2016 series). While these revisions reduced the overall footprint of the console, they packed high-heat components closer together, creating specific board-level failure modes.
When testing EDM-040 and EDM-041 boards on a workbench, never power on the console without heatsinks clamped to the APU and voltage regulators. Without thermal mass, the bare silicon reaches critical cutoff temperatures in under three seconds, skewing your diagnostics and potentially degrading the APU’s liquid metal barrier. Detailed community investigations on the EDM-041 board-level power sequence diagnostic research demonstrate that early shutdowns often look like PSU failures even when every fuse is intact.
Advanced Board Fixes for PlayStation 5 Slim Power Issues
For intermittent freezes and 1-second shutdowns, reading the Syscon error logs via a UART-to-USB serial adapter connected to the motherboard’s Tx/Rx test pads is the most reliable diagnostic method. The Syscon stores 4-byte hexadecimal error codes that identify the exact circuit causing a shutdown.
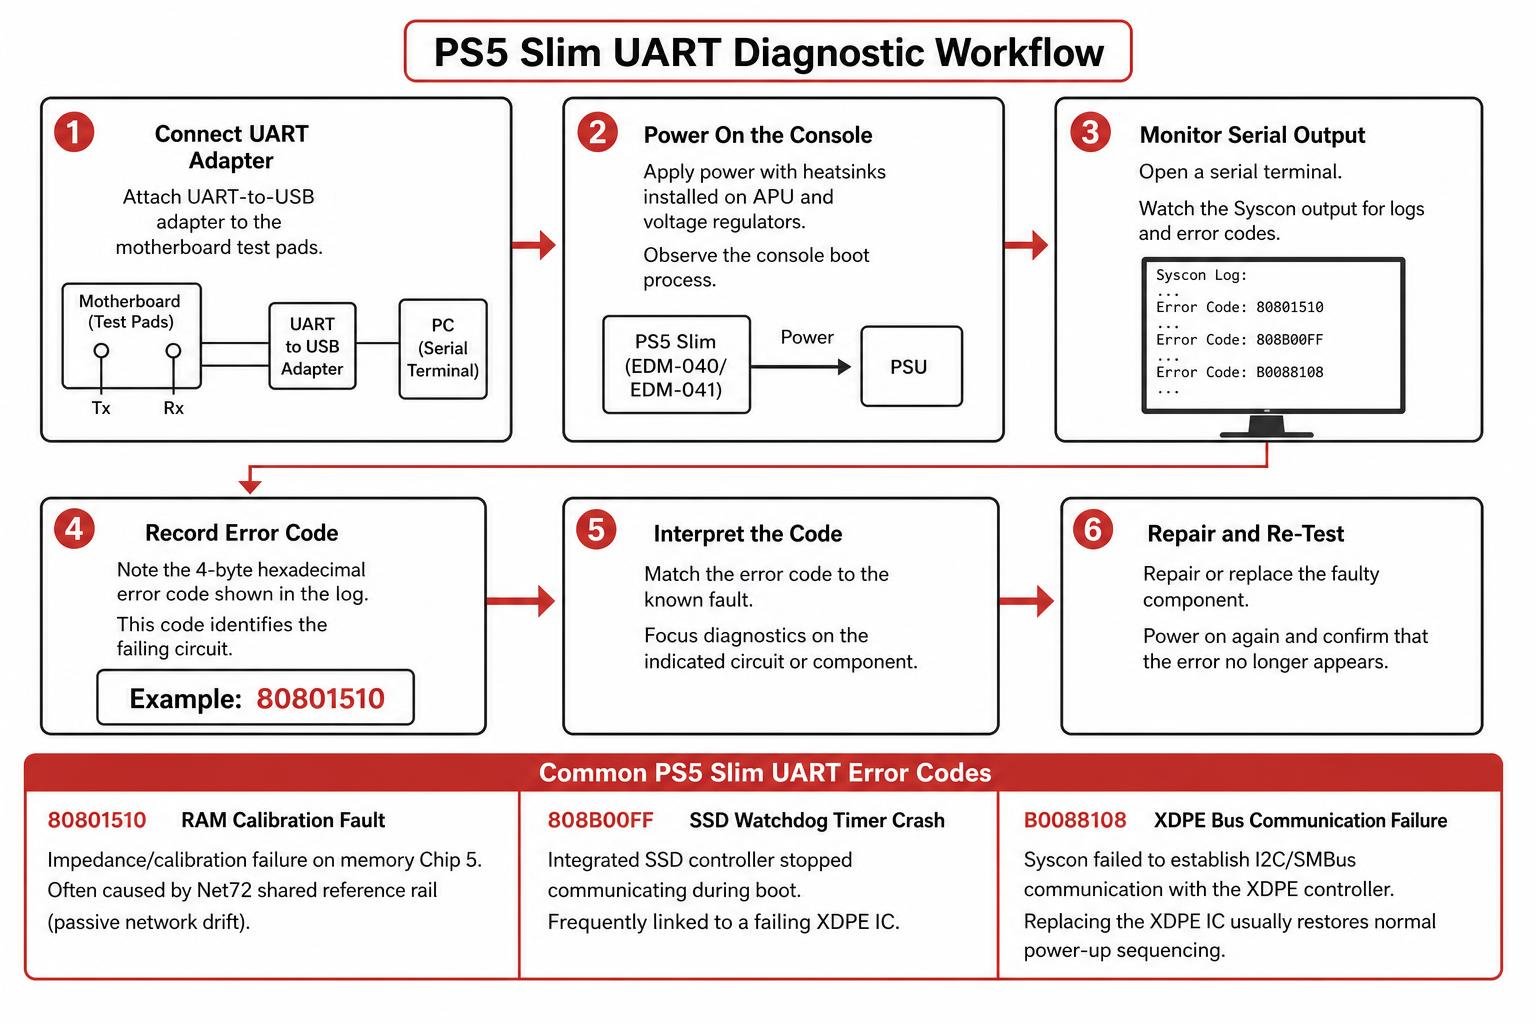
The most frequent UART error codes found on PS5 Slim motherboards include:
- Error Code 80801510 (RAM Calibration Fault): This error indicates an impedance or calibration failure on memory Chip 5. Technicians often assume replacing the physical GDDR6 IC will solve the problem. However, on the EDM-041 revision, this issue is frequently caused by a fault on the Net72 shared reference rail—a network of passive pull-up resistors and micro-capacitors that drift in value, causing the memory controller to abort initialization.
- Error Code 808B00FF (SSD Watchdog Timer Crash): Indicates that the integrated SSD controller stopped communicating during boot. This is frequently linked to a failing XDPE power management IC.
- Error Code B0088108 (XDPE Bus Communication Failure): The Syscon failed to establish I2C/SMBus communication with the XDPE controller chip. Replacing the XDPE IC restores normal power-up sequencing in the vast majority of cases.
Real-world bench testing highlights these specific faults, as shown in this EDM-040 freeze and shutdown diagnostic case study. If you run into coil whine alongside these voltage instabilities, consult our instructions to silence the screaming: a DIY guide to PS5 Slim coil whine.
When to Attempt DIY vs Professional Repair and Warranty Options
Before attempting board-level micro-soldering, evaluate your comfort level, tools, and warranty status:
Safe for Home DIY:
- Cleaning intake vents, fan fins, and exhaust ports using compressed air and soft brushes.
- Replacing damaged external AC power cords.
- Testing wall outlets and eliminating faulty surge protectors.
- Rebuilding system software databases and running USB firmware recoveries.
Requires Professional Lab Equipment:
- Re-spreading or replenishing oxidized APU liquid metal (spilling conductive liquid metal onto surrounding SMD passives will permanently short out the APU).
- Diagnosing and replacing shorted 0402/0201 MLCC surface capacitors.
- Desoldering and replacing BGA memory chips or the XDPE controller IC.
- Soldering delicate motherboard pins or traces.
If you are comfortable with basic mechanical repairs, review our step-by-step PlayStation hardware fix guide for safe teardown methods. If physical drops or cable strain damaged your display connection alongside power faults, explore our guides on PS5 HDMI port replacement, how to handle a broken PS5 HDMI port, and assessing a PS5 damaged HDMI port: your guide to quick fixes and repairs. For minor bent external pins, see how to fix PS5 HDMI port without replacement.
If your console is under Sony’s 1-year factory warranty, submit a ticket through Sony’s official support portal. For out-of-warranty systems, third-party repair specialists provide faster turnaround times and component-level repairs that avoid costly full-motherboard replacements.
Frequently Asked Questions About PS5 Slim Power Failures
Why does my PS5 Slim turn on for two seconds with a blue light and immediately turn off?
This symptom indicates a Syscon safety power abort. When you press the power button, the console begins bringing up its power rails (12V, 5V, RAM, and APU core). If any single rail fails to reach its expected voltage within milliseconds—or if the Syscon detects an error code such as 80801510 (RAM calibration fault) or B0088108 (XDPE communication loss)—it cuts the 12V rail immediately to prevent thermal runaway or electrical damage.
Can tapping or smacking the PS5 Slim permanently fix power loss?
No. While tapping the console may temporarily shift the internal PSU-to-motherboard prongs back into contact, it does not fix the underlying contact oxidation, terminal slack, or cold solder joints. Continuing to hit the console can break fragile solder balls under the main processors. The prongs must be mechanically adjusted, cleaned with isopropyl alcohol, or properly soldered.
How much does it cost to repair a PlayStation 5 Slim that will not power on?
Official Sony out-of-warranty service typically costs between $230 and $250, which often results in a refurbished replacement console. Independent repair facilities generally charge $80 to $140 for power supply replacements or standard contact repairs. Advanced motherboard diagnostics involving micro-soldering, shorted capacitor clearing, or XDPE chip replacement usually range from $120 to $180 depending on the parts required. For pricing context on associated repairs, review our in-depth guide to PlayStation 5 HDMI port repair costs in Laurel MS.
Conclusion
Resolving PS5 Slim power problems follows a clear process: start with basic cable and outlet checks, move on to Safe Mode software recoveries, and proceed to board-level voltage rail measurements when necessary. Because the EDM-040 and EDM-041 motherboard revisions pack high-performance silicon into a tight footprint, issues like cracked mechanical contacts, RAM reference rail drift, and failing power controller chips require precision tools and careful troubleshooting.
If you have isolated the issue to a shorted motherboard rail or failing internal components, our repair team is ready to help. At Salvation Repair, we specialize in component-level micro-soldering and console diagnostics for gamers in Laurel, MS, and surrounding areas including Ellisville, Bay Springs, and Soso. We service “any device with a power button” and back our work with a lifetime warranty and price matching.
Alongside our expert gaming console repair services—where PlayStation 5 HDMI port replacement starts at $99.95 (with HDMI port repair and board repair priced as separate, dedicated services)—we provide fast mobile device care. We perform iPhone screen repairs in just 10 to 15 minutes right in front of the customer, battery repairs in 30 minutes, and charging port repairs in one hour, with a free screen protector included with every screen repair. If you need phone service, we clearly distinguish between standard LCD (including AQ7 LCD), aftermarket OLED, and OEM screens (both OEM refurbished and new OEM). For Samsung Galaxy S22 Ultra screen repairs, we offer clear, labor-included options: aftermarket OLED for $219.95, refurbished OEM for $309.95, and new OEM for $339.95—plus the option to upgrade from LCD or OLED to an OLED or OEM display anytime within 60 days of your repair.
Stop by our shop at 1503 Lakeview Rd, Laurel, MS 39440, and let us get your PlayStation 5 Slim running quietly, safely, and reliably.
